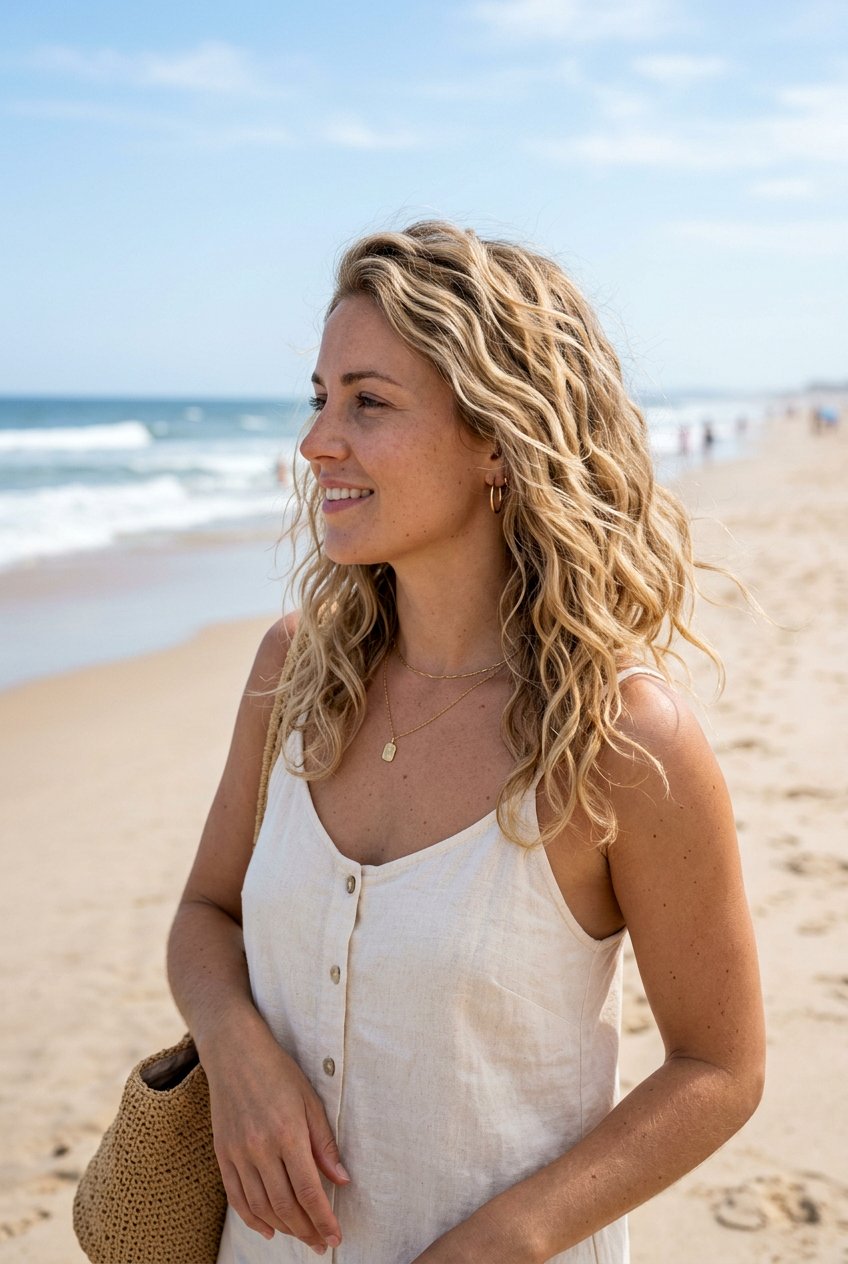
Waking up with a salon-quality blowout or bouncy, defined ringlets doesn’t have to involve a 6:00 AM date with a curling iron. If you have shoulder length hair, you are in the “Goldilocks zone” for heatless styling—long enough to wrap and secure, but short enough that your hair dries quickly and holds a shape all day. Utilizing overnight bun curls is a game-changer for maintaining hair health while looking polished. Whether you want the loose, “lived-in” waves currently dominating the 2026 runways or tight, structured coils that mimic a professional perm, the secret lies in how you twist and tuck your damp strands before hitting the pillow. This guide explores the most effective, comfortable, and trend-setting methods specifically tailored for your medium-length tresses.
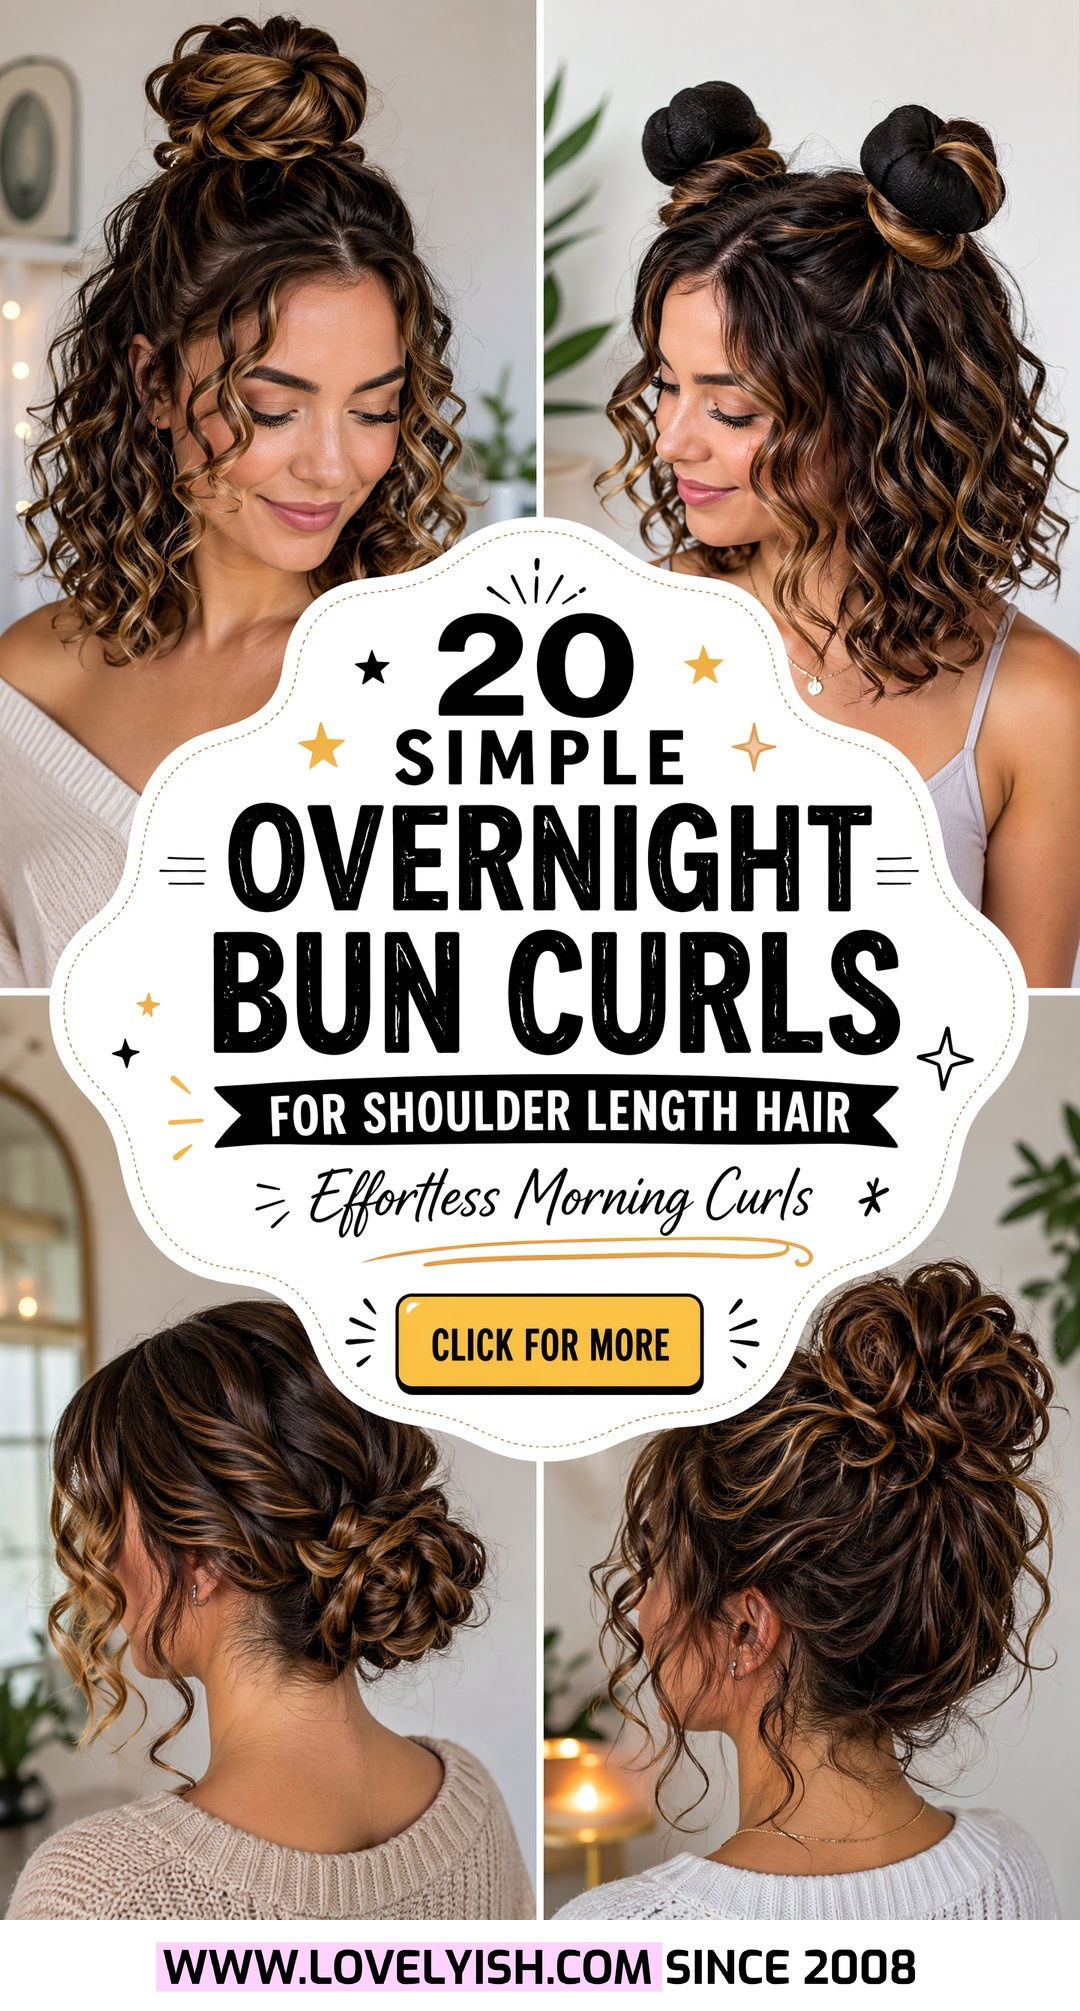
1. Sock Bun Curls
Have you ever looked at a stray sock and seen a high-end styling tool? To master this classic, cut the toe off a clean tube sock and roll it into a donut shape. Pull your shoulder length hair into a high ponytail, then pull the ends through the center of the sock. Begin rolling the sock down toward your scalp, tucking the hair under the fabric as you go. Because your hair is shorter, a high placement is vital to ensure the “bun” stays secure while you move in your sleep. By morning, you will reveal massive volume at the roots and soft, rounded ends that look like a professional round-brush blowout.
2. Space Bun Waves
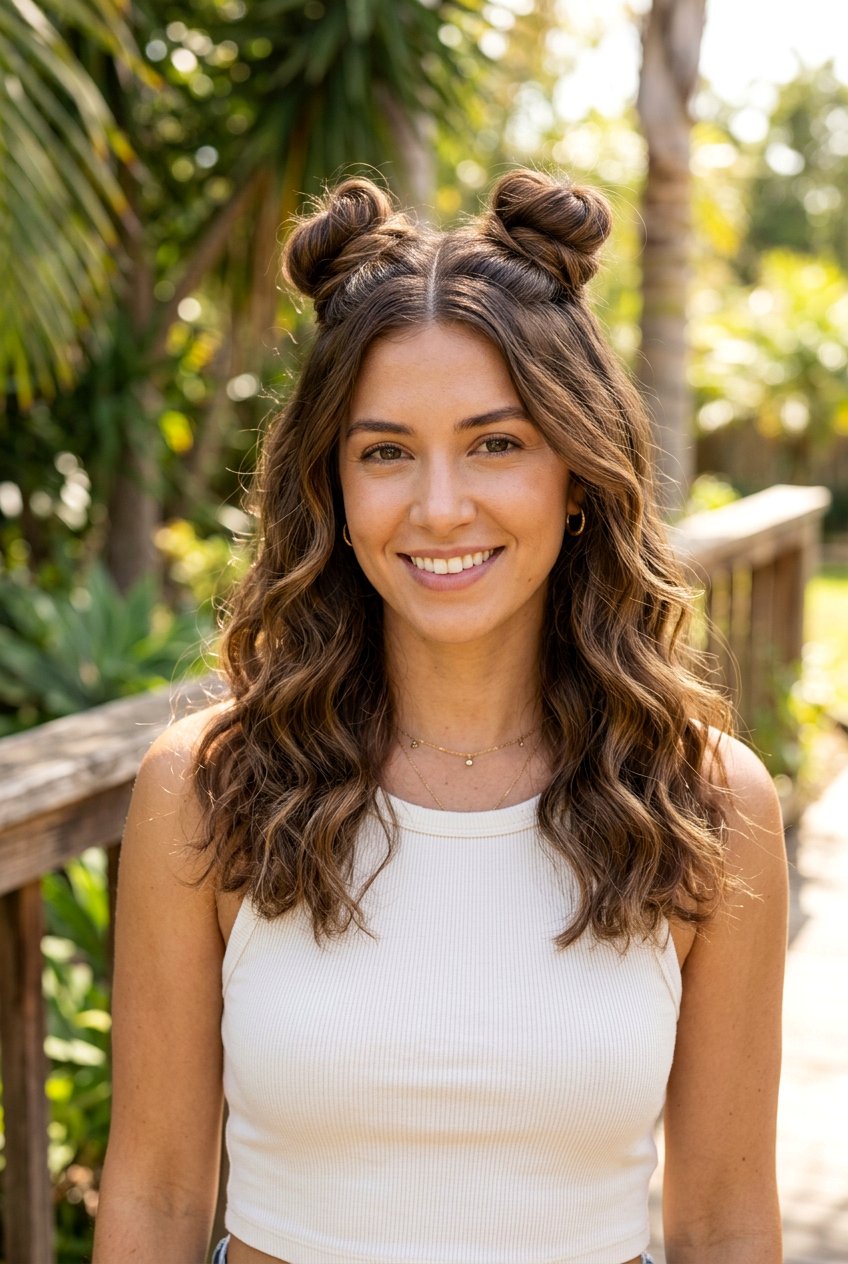
Are you looking for a way to get symmetrical, beachy texture without the effort? Dividing your hair into two high ponytails creates the foundation for space bun waves. Twist each ponytail tightly away from your face until it begins to coil onto itself, then secure the resulting buns with silk scrunchies. For shoulder length hair, this method is superior to a single bun because it ensures every layer, even those shorter pieces near the neck, gets wrapped properly. When you shake them out, you’ll find consistent, S-shaped waves that add width and personality to your bob or lob, making it look much thicker than it actually is.
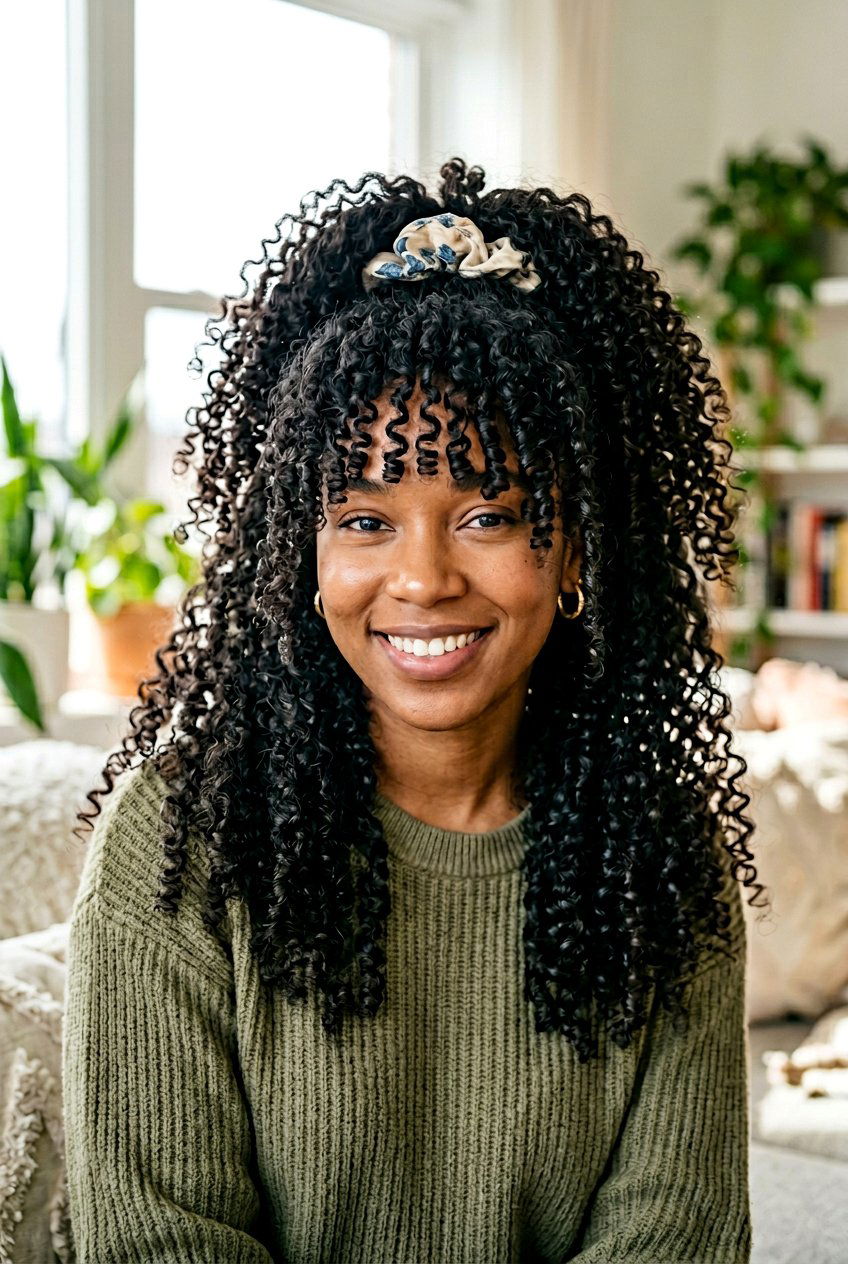
3. Bantu Knot Curls
Do you want tight, springy ringlets that last for days? Bantu knots involve sectioning your hair into several small squares and twisting each section until it creates a small, sturdy knot against your head. For medium hair lengths, creating about four to six knots is the “sweet spot” for achieving defined curls without them looking too frizzy. Ensure your hair is about 80% dry before twisting; if it is too wet, the centers of the knots won’t dry by morning. This technique provides incredible definition and a bold, textured look that works beautifully for both casual days and formal events where you want your hair to stand out.
4. Silk Scrunchie Bun
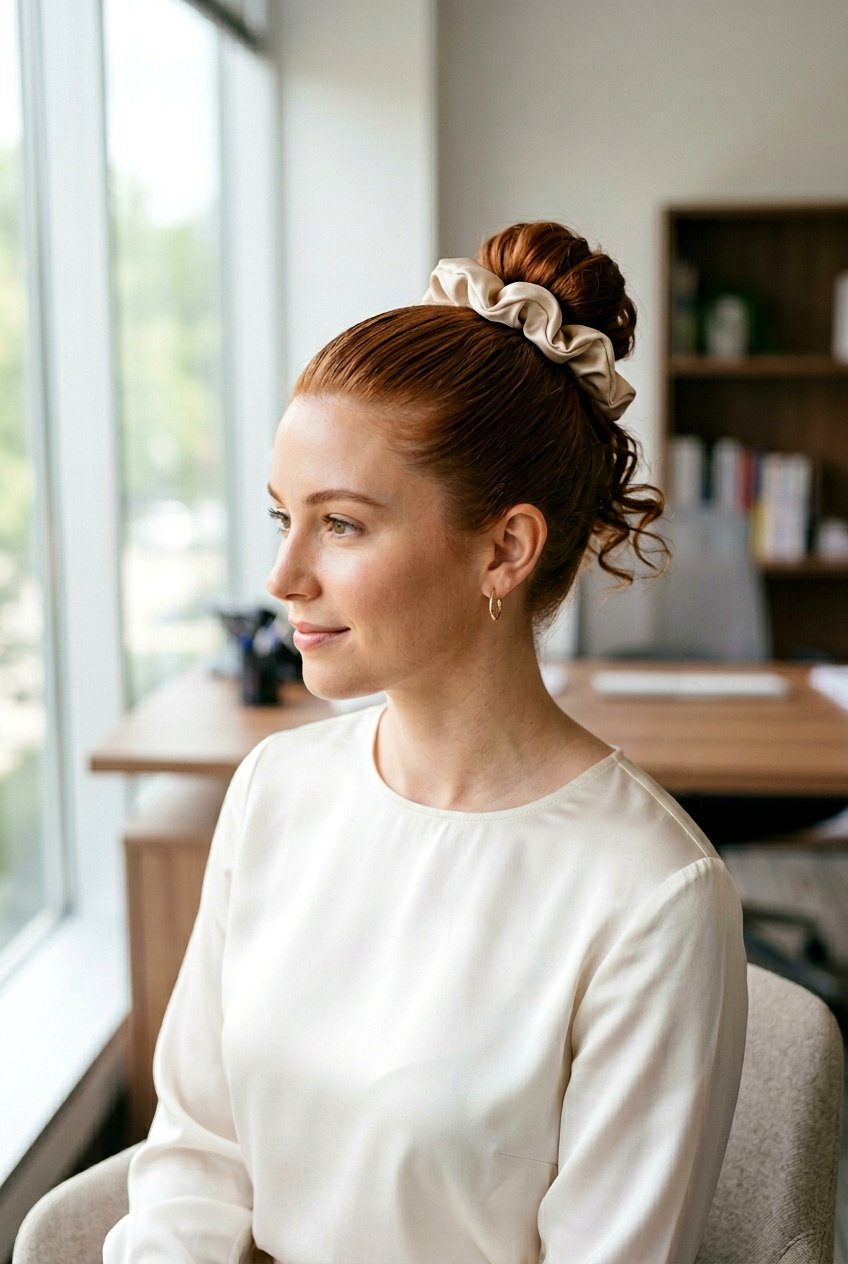
Is comfort your primary concern when sleeping in hair tools? The silk scrunchie bun is the “lazy girl” method that actually delivers results. Simply gather your hair at the crown and create a “loop” bun using a large, high-quality silk scrunchie. The silk prevents friction and breakage, which is essential for protecting the delicate ends of shoulder length hair. Because the hair is loosely gathered, the result is a soft, voluminous “C” curl at the ends rather than a tight spiral. This is the perfect choice for a polished, everyday office look that requires zero touch-ups with a wand once you leave the house.
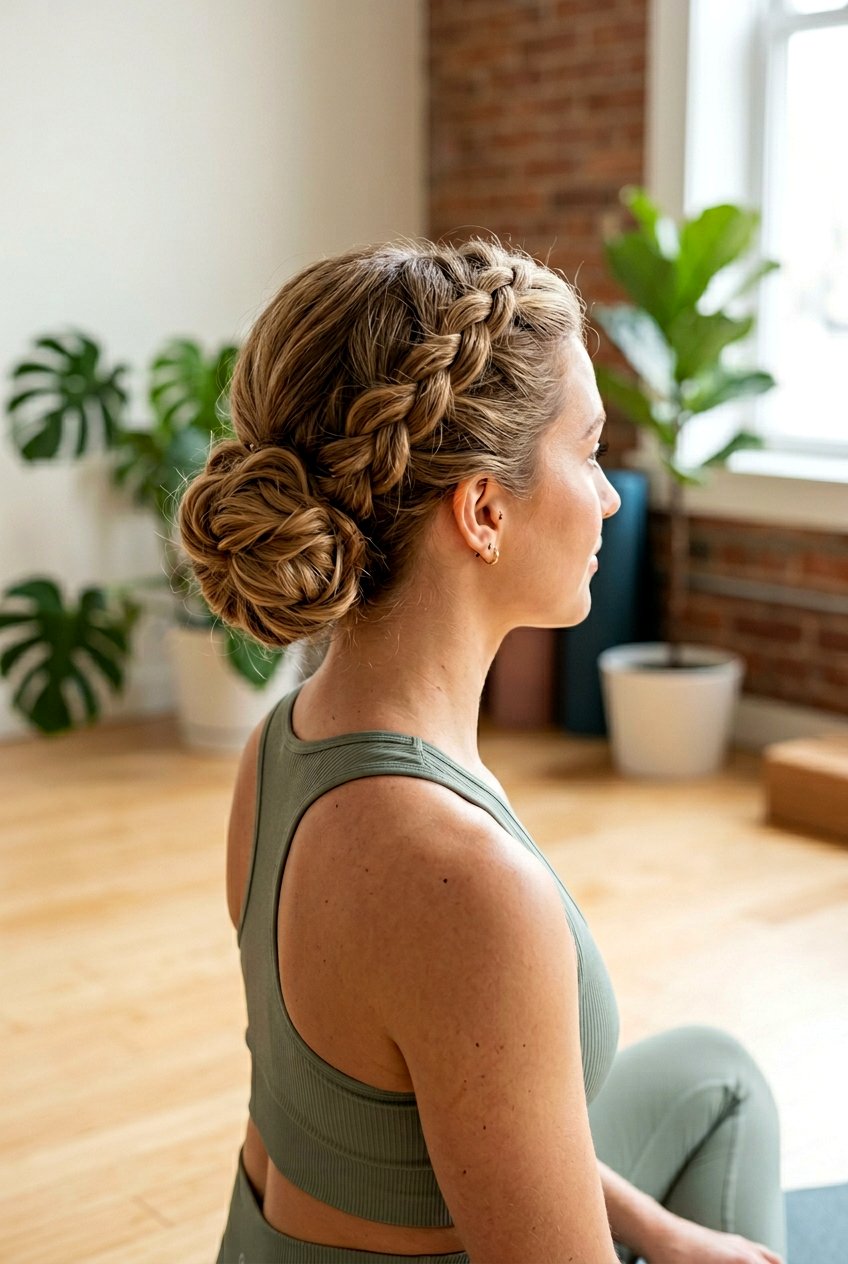
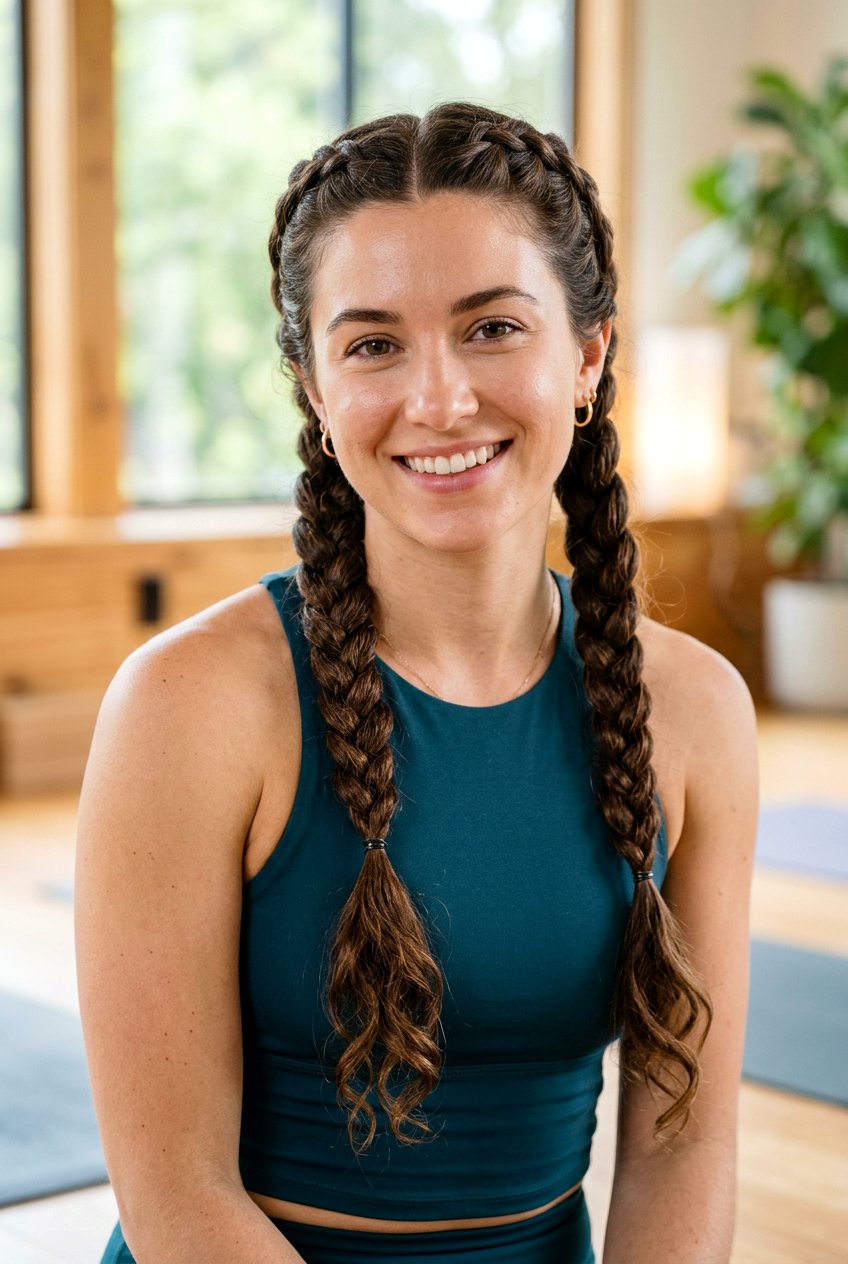
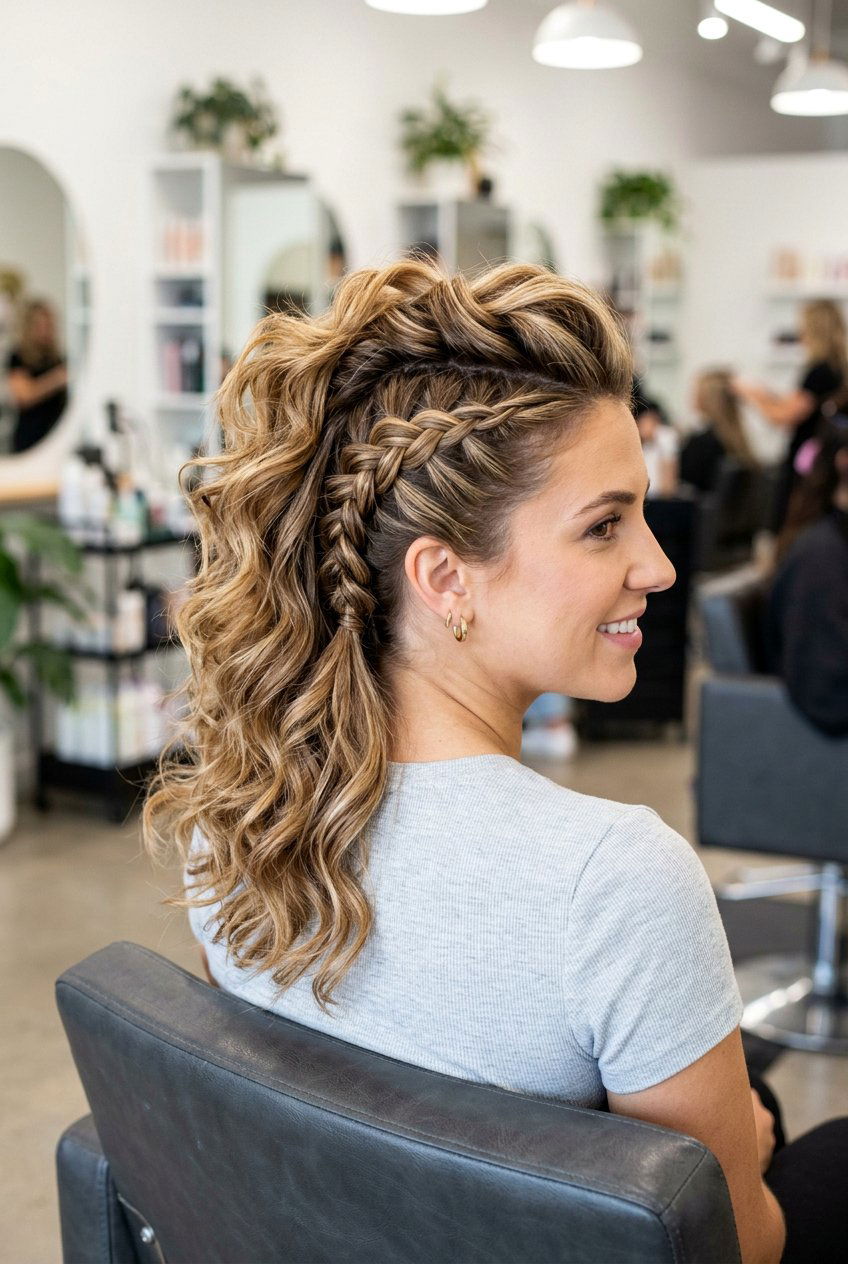
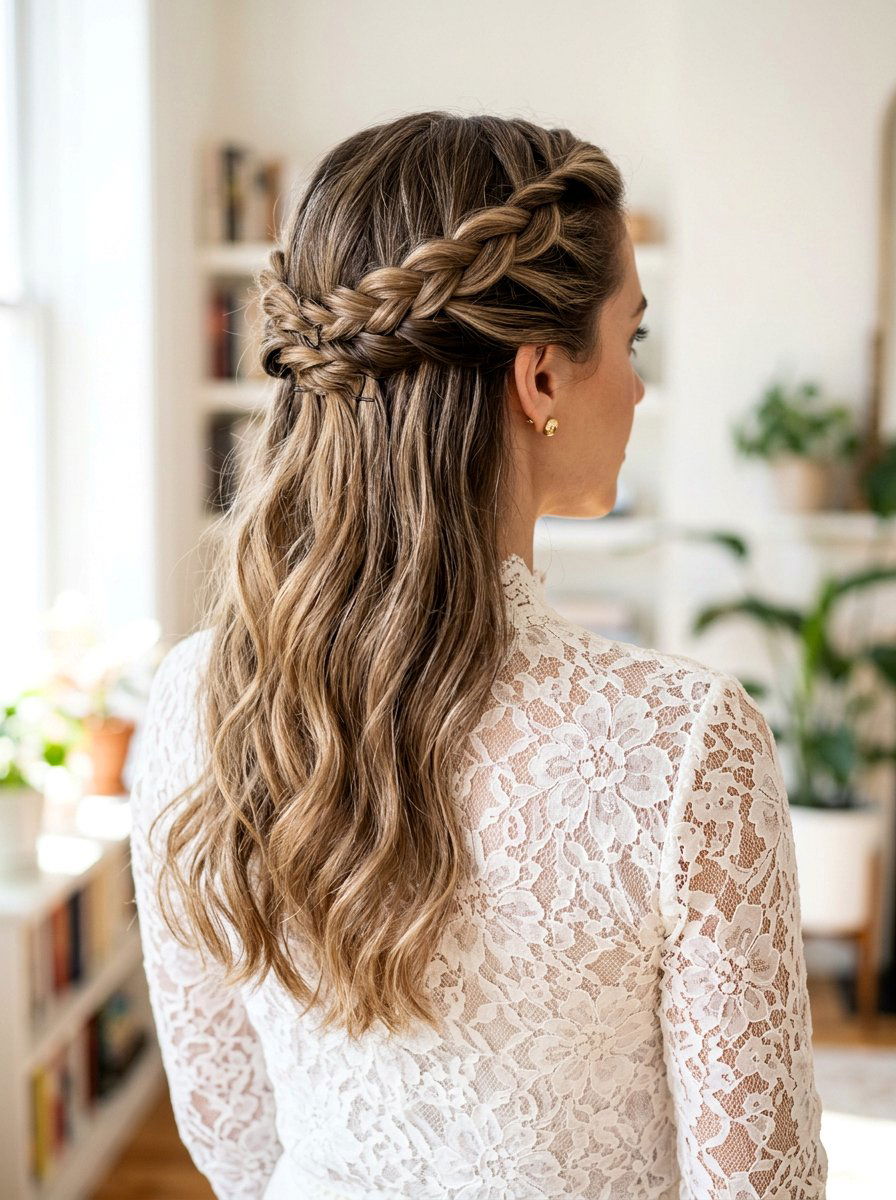
5. Braided Low Bun
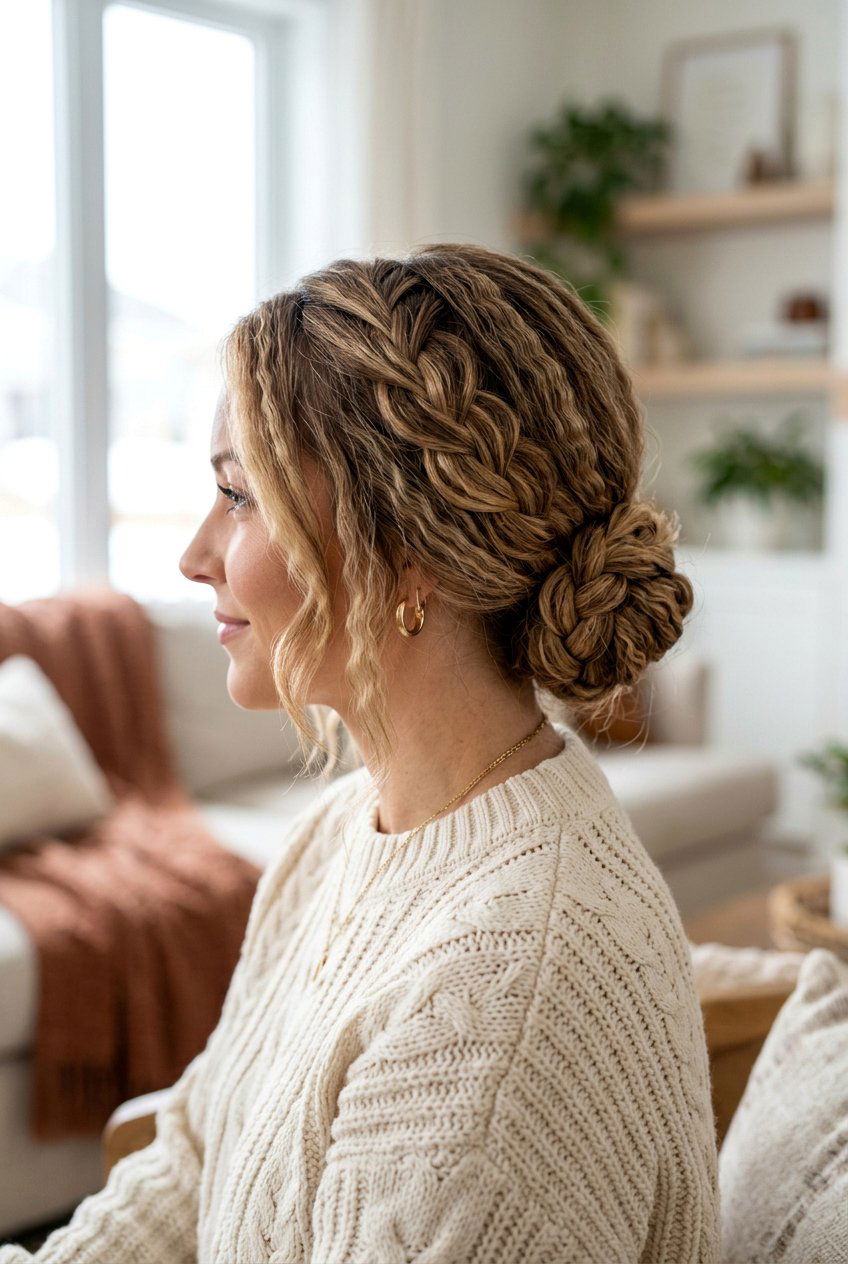
What happens when you combine the structure of a braid with the volume of a bun? A braided low bun is the ultimate solution for those who want organized, uniform waves from the mid-shaft down. Braid your hair into one or two standard three-strand braids, then coil those braids into a small bun at the nape of your neck. This “double-set” technique ensures that the very ends of your hair—which often fall out of traditional braids—are tucked away and curled. When you unravel the style, you’ll have a sophisticated, crimped-wave texture that looks intentional and chic, especially on hair with highlights or balayage.
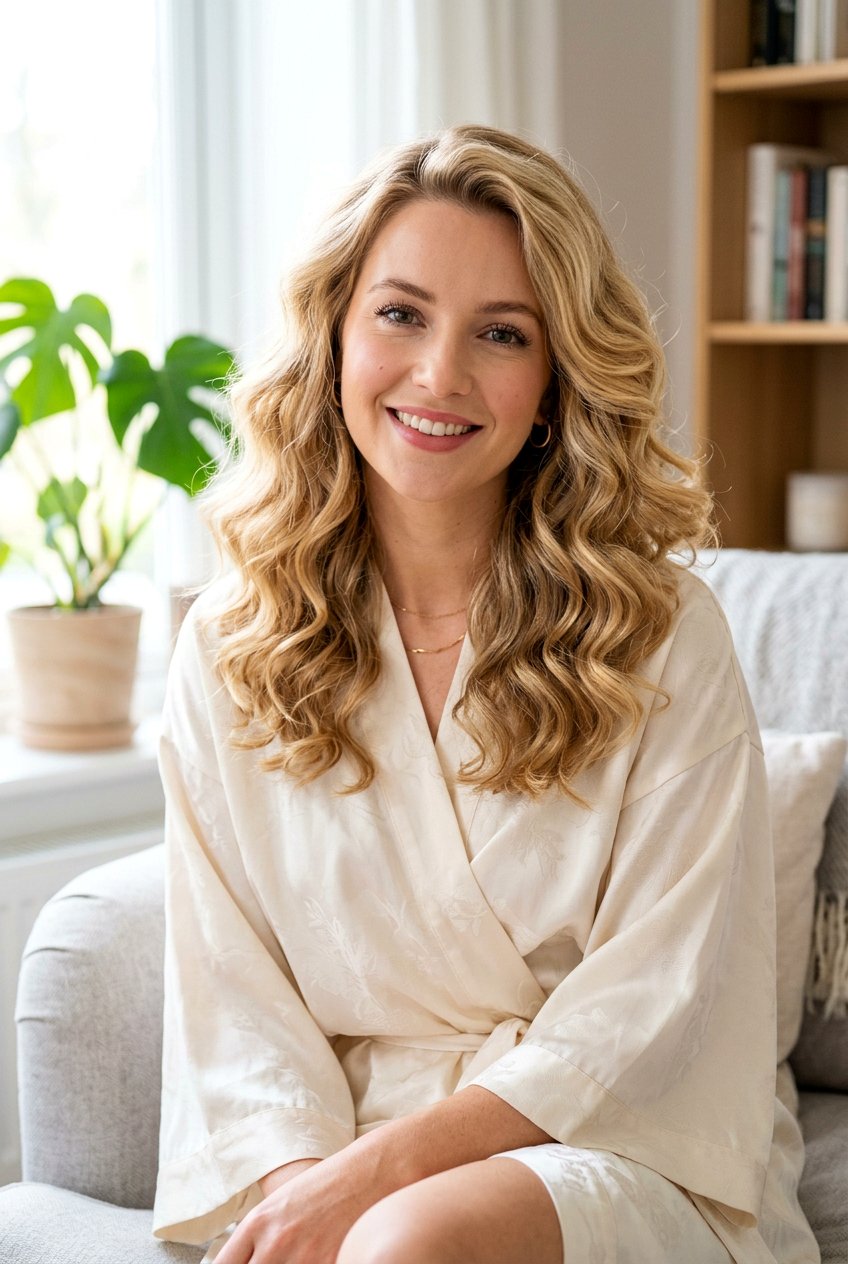
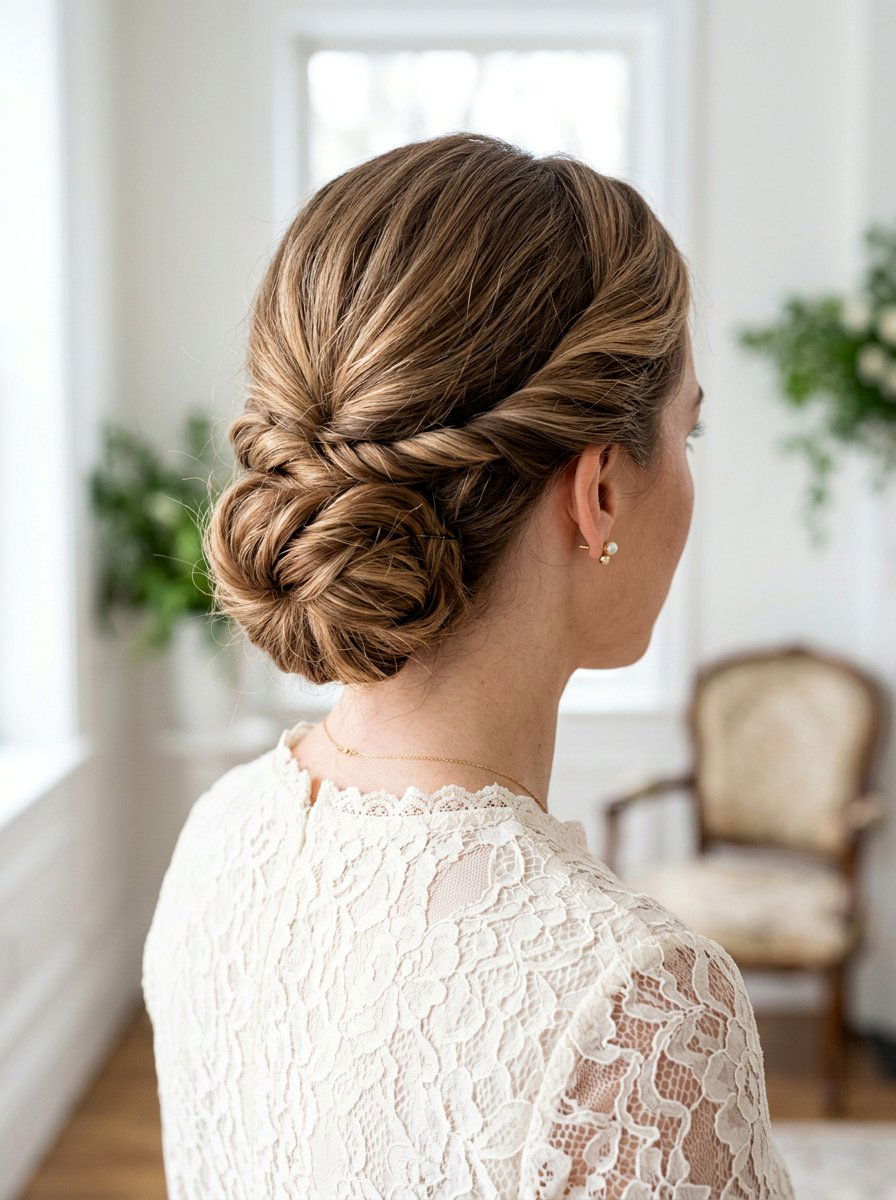
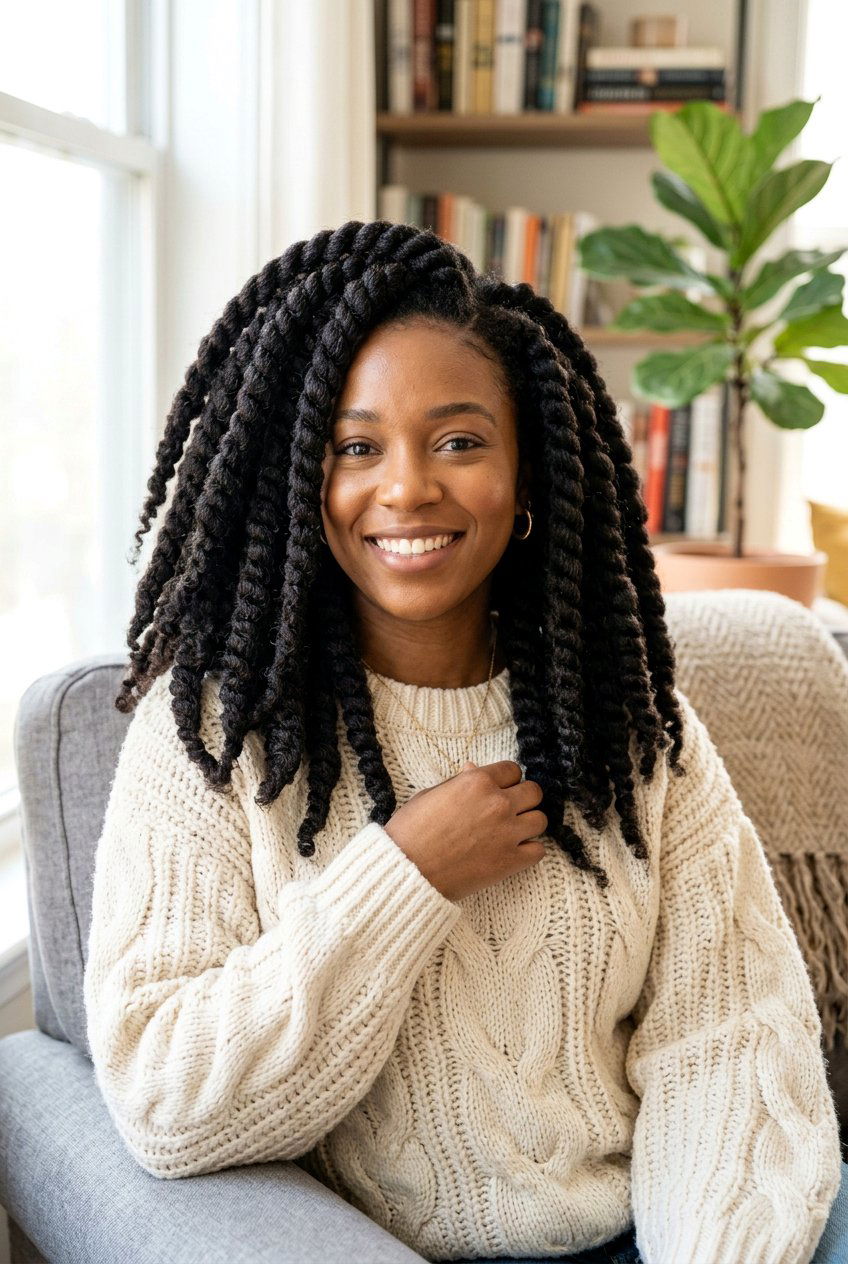
6. Twisted Rope Bun
Have you struggled with messy, tangled results from traditional braids? The rope twist involves taking two sections of hair and twisting them individually before crossing them over each other. Once you reach the ends, roll that “rope” into a bun. For shoulder length hair, this creates a much smoother, more elegant curl pattern than a three-strand braid. It mimics the look of a large-barrel curling iron, giving you those “Hollywood Glam” waves without the heat damage. Since the hair is twisted tightly, it also helps to compress the cuticle, resulting in a shinier and more frizz-free finish once the hair is released.
7. Donut Shaper Curls
Do you own a foam “donut” hair stuffer? While usually meant for updos, these are incredible for creating uniform, large-scale curls. Slide the donut over a ponytail and wrap your shoulder length hair around the foam ring, pinning the ends in place. The foam acts as a soft cushion, making it much easier to sleep on than hard plastic rollers. Because the diameter of the donut is consistent, your curls will all have the same shape and size. This method is particularly effective for people with fine hair, as the mechanical action of wrapping around the foam provides a significant boost in visible hair density.
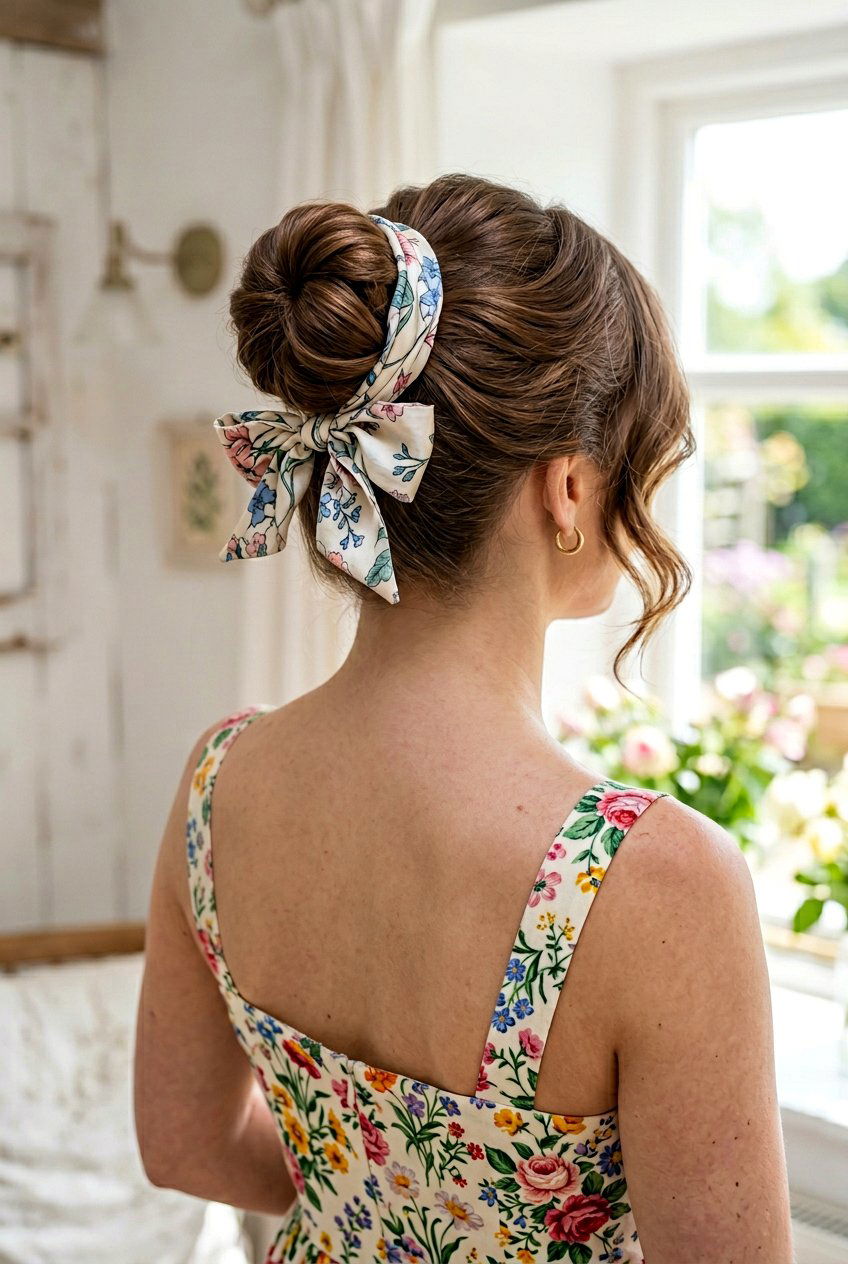
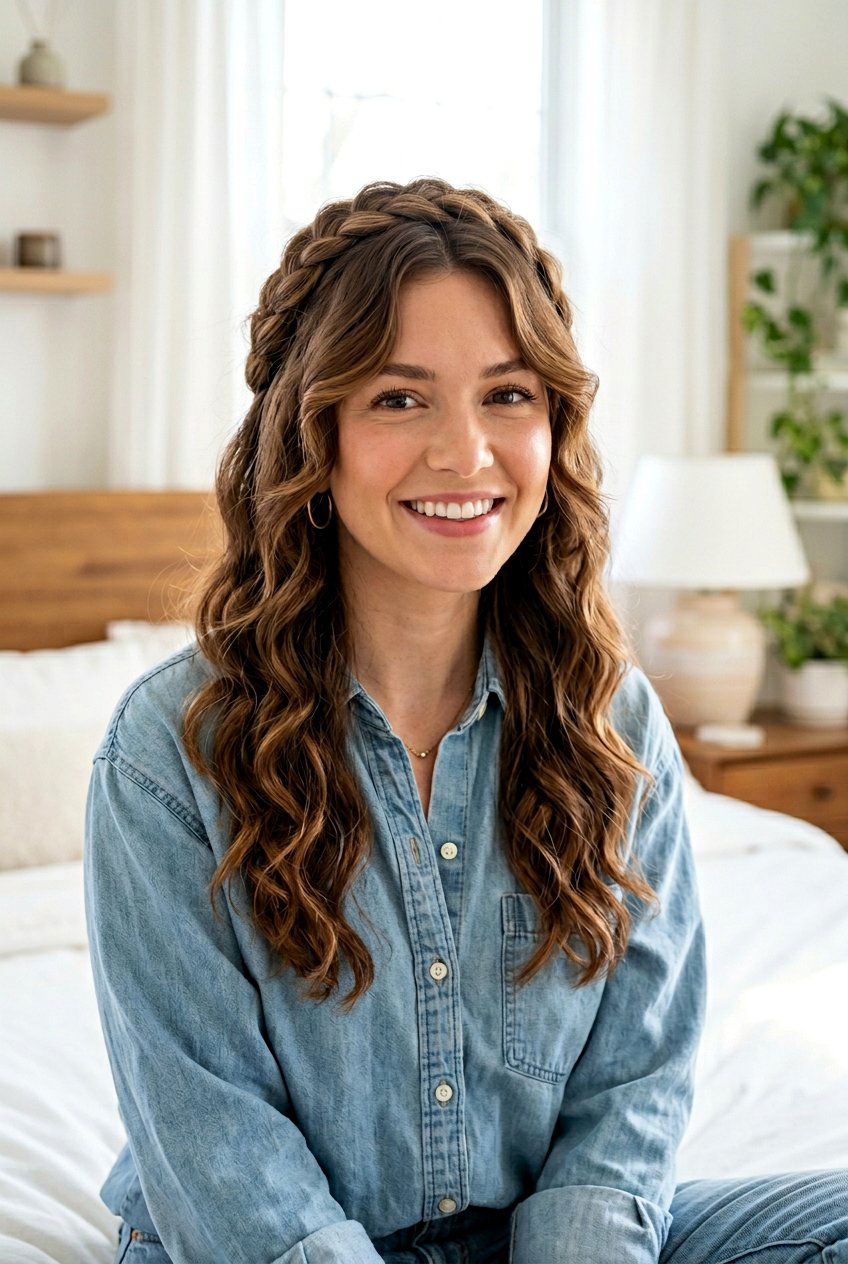
8. French Braid Bun
Are you trying to get curls that start closer to your roots? A French braid that ends in a tucked bun is the answer. Start braiding at your hairline, pulling in sections as you move toward the back of your head. Once you run out of hair to add, roll the remaining tail into a tiny bun and secure it with a U-pin. This ensures the top of your shoulder length hair has plenty of “lift” and movement. It is a fantastic choice for active sleepers, as the French braid is one of the most secure heatless styles, meaning you won’t wake up to a frizzy mess.
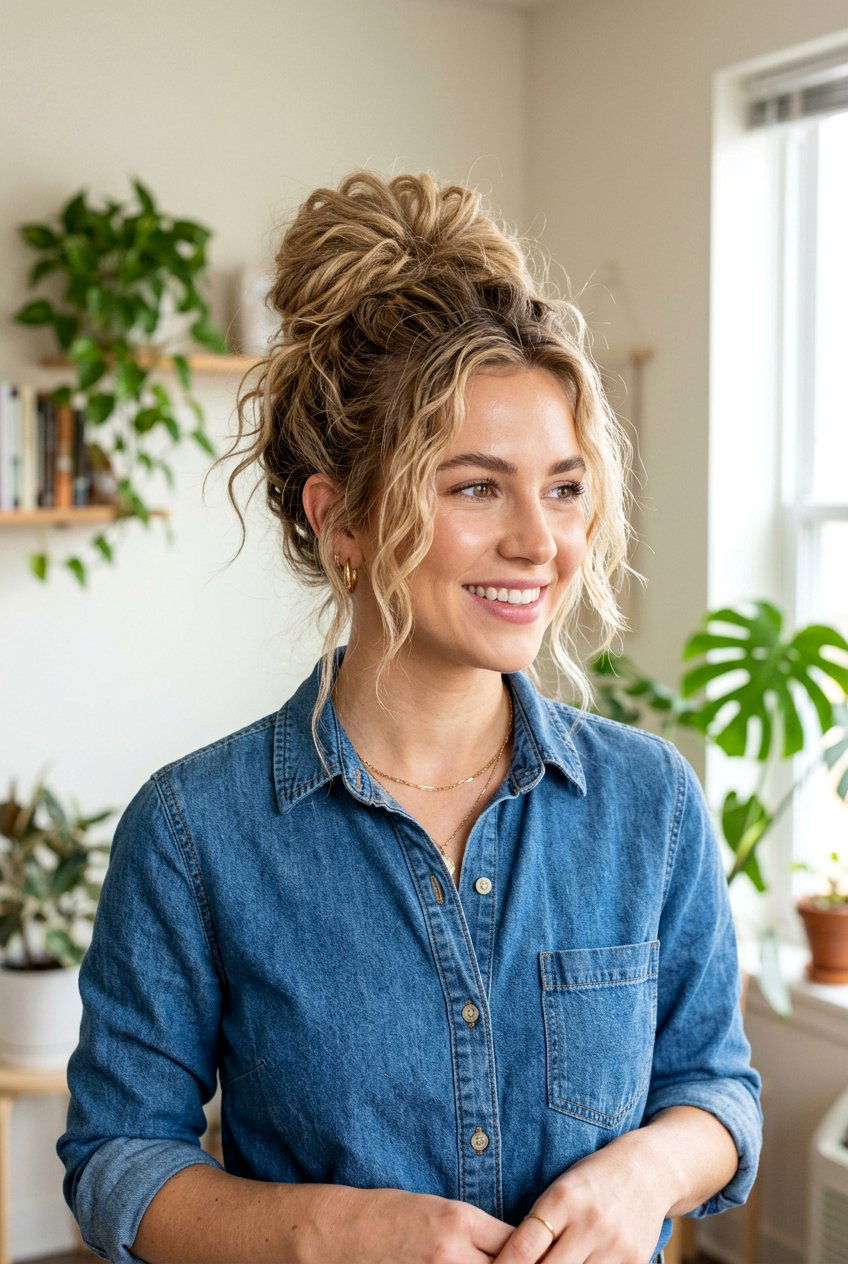
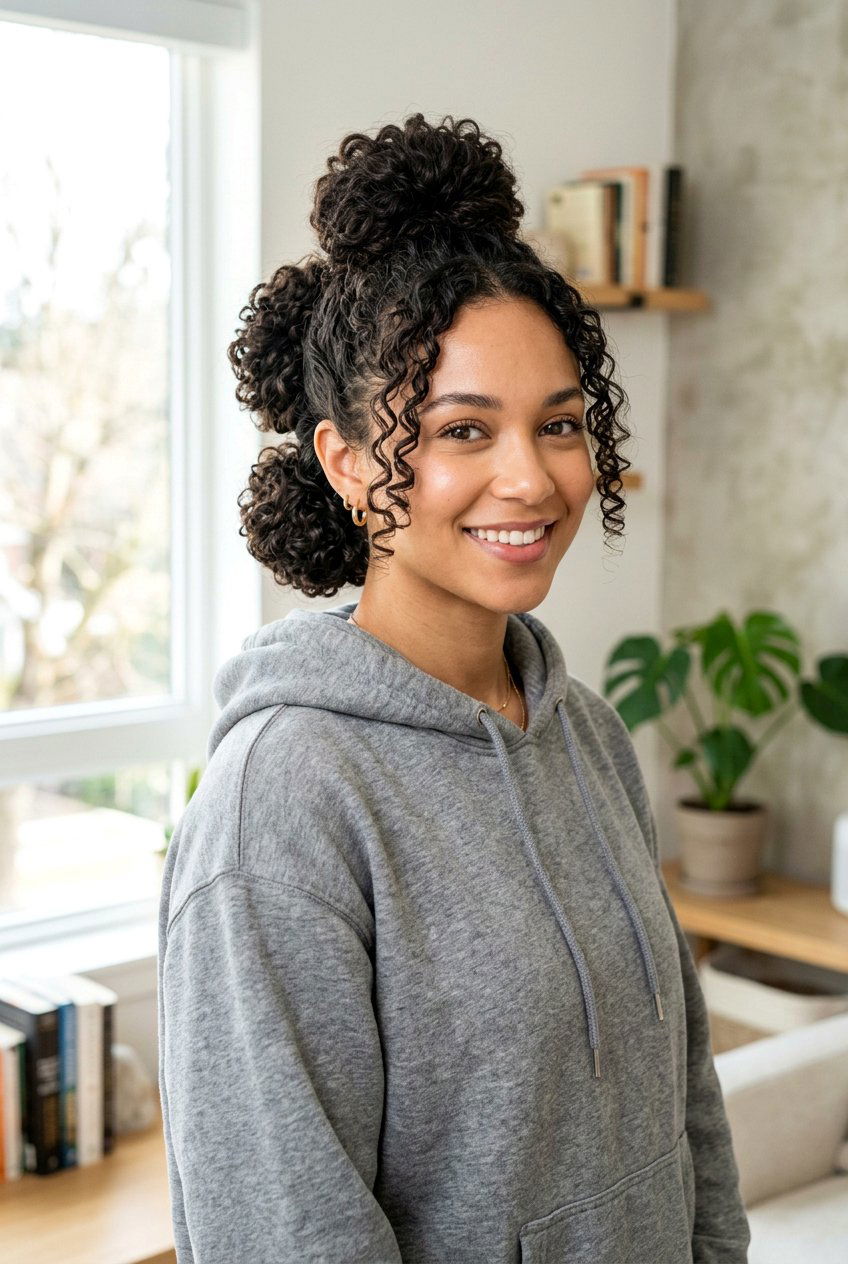
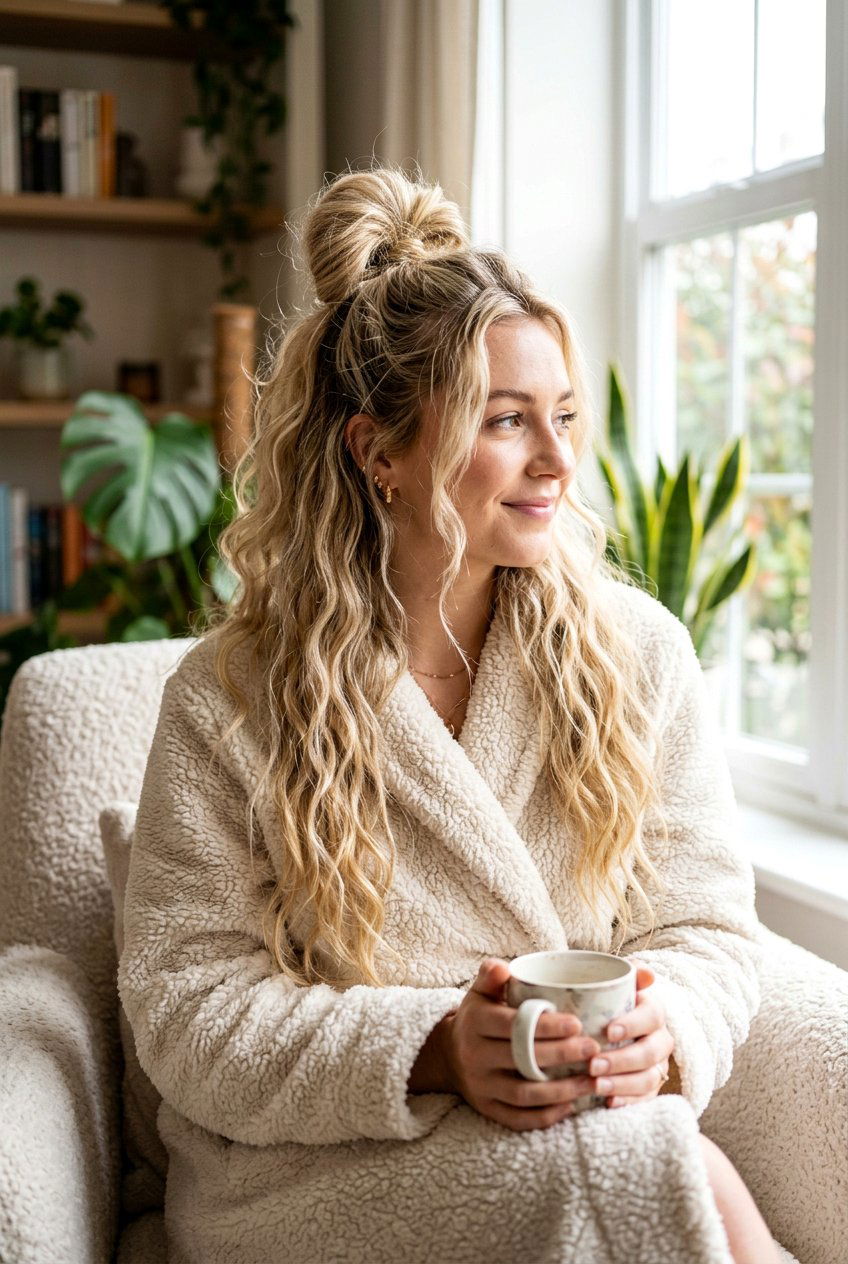
9. Top Knot Volume

Do you want to focus more on body and lift than actual ringlets? The high top knot is the go-to for maximizing volume on shoulder length hair. Flip your head upside down and gather all your hair at the very top of your forehead. Twist it loosely and secure it with a soft clip or scrunchie. Sleeping with your hair directed “up” trains the roots to stand away from the scalp. When you take it down, you’ll have an explosion of volume at the crown and a gentle, natural bend at the ends. It is the easiest way to revive a flat, day-two haircut without washing.
10. Pineapple Bun Technique
Are you worried about ruining your natural curl pattern while you sleep? The “pineapple” is a loose bun positioned at the very front of the head, designed to protect the integrity of your curls. For those with shoulder length hair that already has some natural wave, this prevents the hair from being crushed between your head and the pillow. By gathering the hair in a loose, looped bun on top, you ensure the “canopy” or top layer of your hair remains frizz-free. In the morning, a quick shake and a drop of hair oil are all you need to look refreshed.
11. Low Chignon Waves
Is your hair too short to reach a high bun comfortably? A low chignon positioned at the base of the neck is a stylish way to set your hair for the next day. Divide your hair into two sections, twist them toward the center, and secure them into a flat, horizontal roll. This method creates wide, romantic waves that frame the face beautifully. Because the bun sits low, it is ideal for people who sleep on their backs. It produces a more relaxed, “bohemian” wave pattern that looks effortless and modern, especially when paired with a center part.
12. Multi-Bun Texture
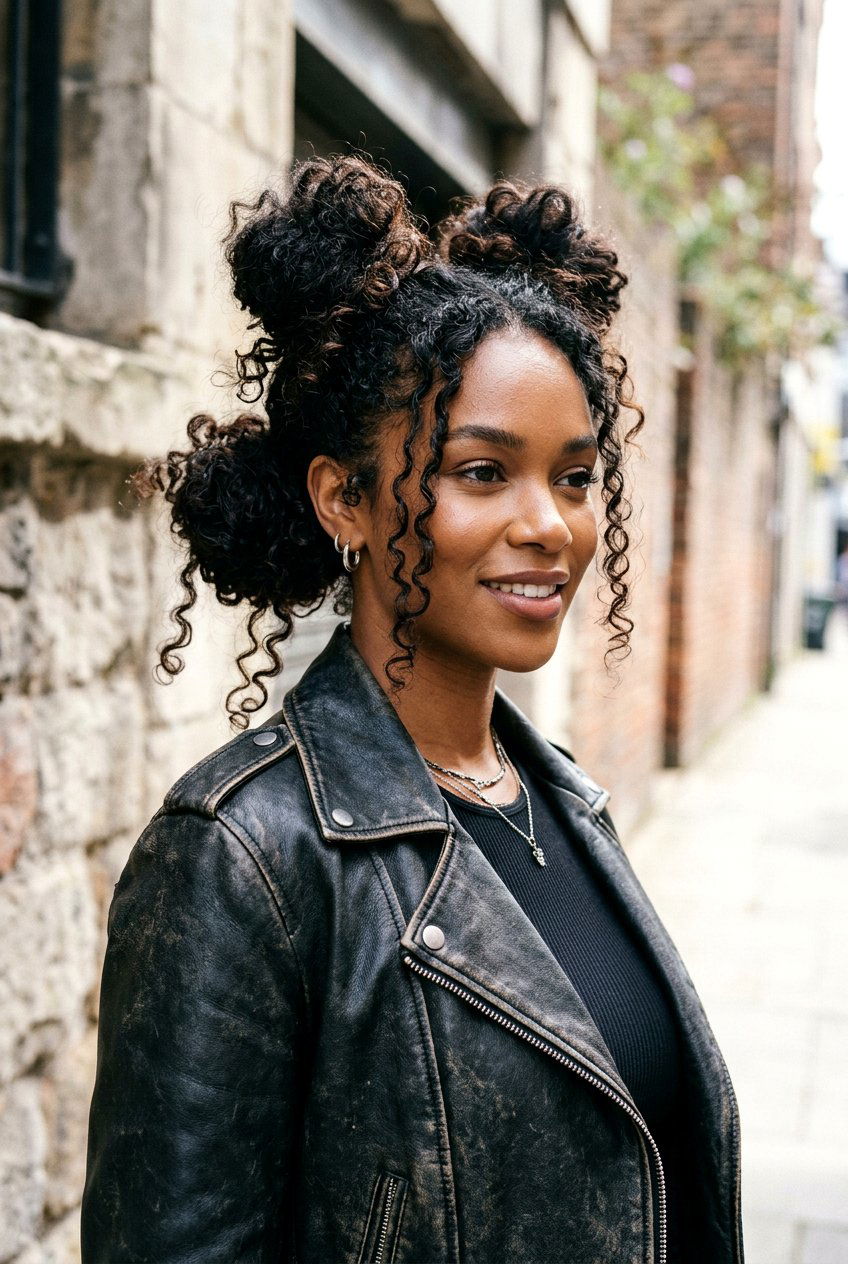
Do you want a look that has a lot of “shredded” and edgy texture? Instead of one or two buns, try creating four or five mini buns all over your head. This “Bantu-adjacent” style creates a more random, multi-directional curl pattern that looks very natural. For shoulder length hair, this is often the best way to ensure that the shorter layers at the front and back are all given equal attention. The result is a high-fashion, high-volume look that mimics a professional “texture spray” finish. It is a bold choice for anyone who wants their hair to be the centerpiece of their outfit.
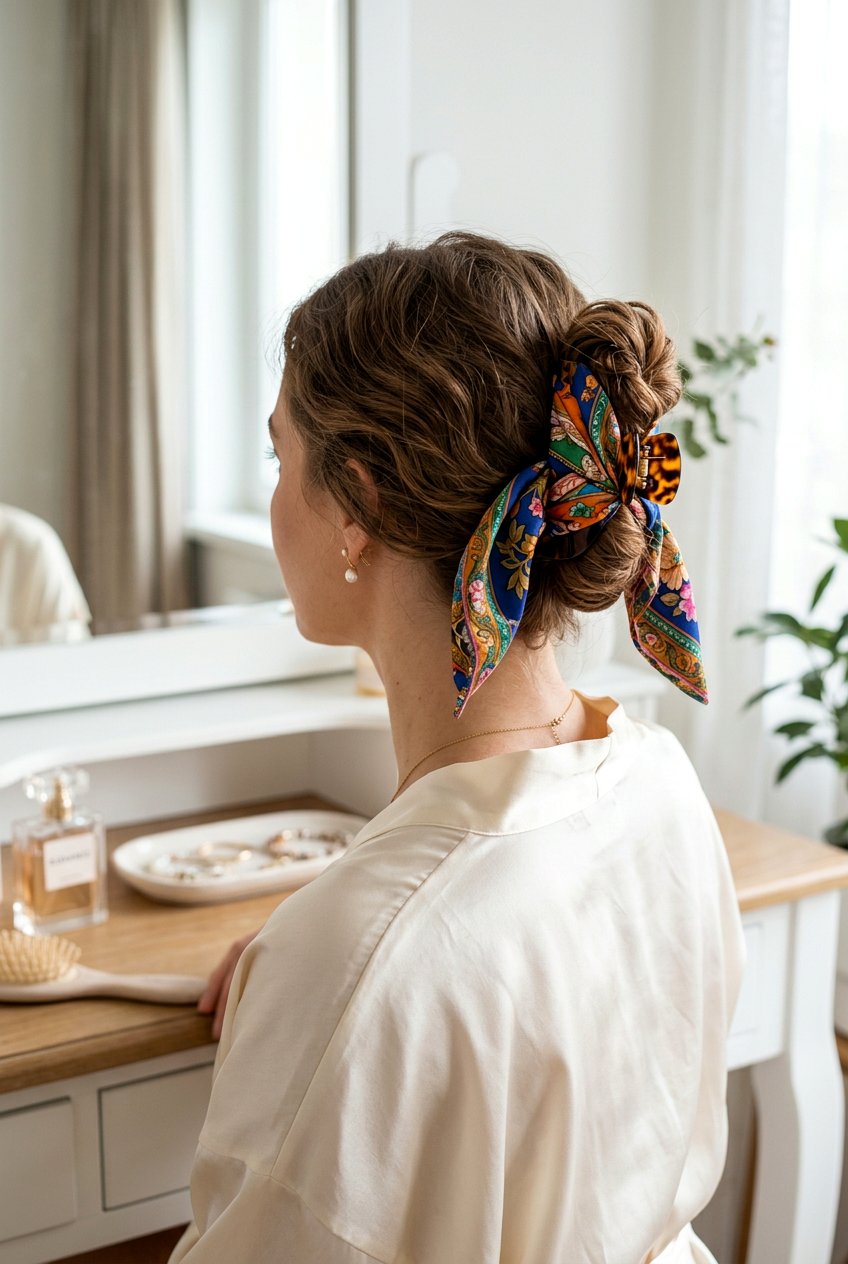
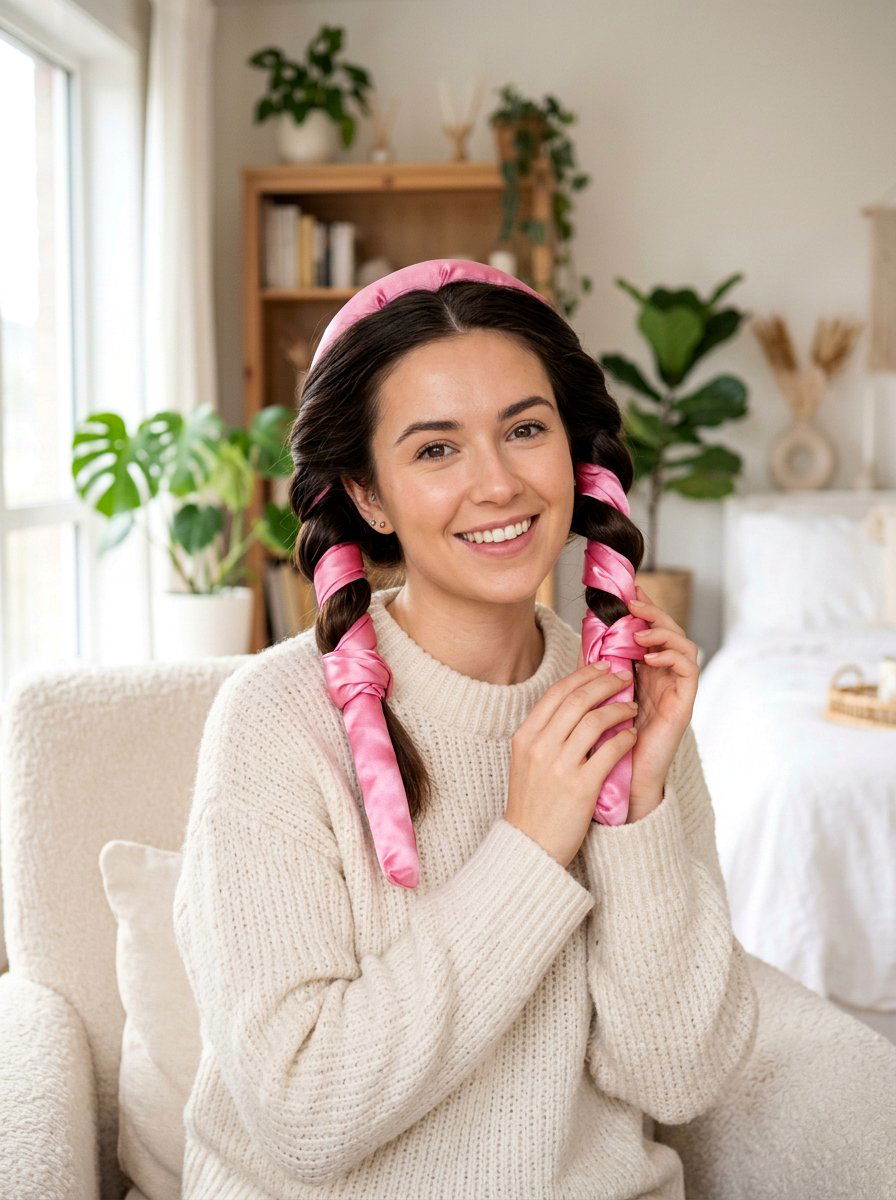
13. Ribbon Wrapped Bun
Have you considered using a silk ribbon to enhance your overnight curls? Wrap a long silk ribbon or a bathrobe tie around the base of your ponytail before coiling it into a bun. As you twist the hair, incorporate the ribbon into the wrap. The fabric adds thickness to the “curler,” which results in a larger, more voluminous loop. For shoulder length hair, this prevents the curls from being too tight or “shirley temple” style. The ribbon also absorbs any excess moisture, helping your hair dry faster while you sleep. You’ll wake up with glossy, oversized waves that look extremely expensive.
14. Messy Bun Crinkle
Are you a fan of the 90s “crimped” aesthetic? If you put your shoulder length hair into a very messy, haphazard bun while it is slightly more damp than usual, you will get a unique, crinkled texture. The key is to use many small bobby pins to secure random loops of hair rather than one smooth wrap. This creates various “pivot points” for the hair to dry around, resulting in an edgy, editorial look. Once you take it down, avoid using a brush; instead, use your fingers to “rake” through the hair to keep that cool, textured vibration intact.
15. Side Bun Symmetry

Do you find that one side of your hair always looks better than the other? Creating two low buns directly behind your ears can help fix this. By focusing the tension on the sides rather than the top or back, you ensure the hair that frames your face gets the most definition. For shoulder length hair, this helps create a “flaring” effect that makes the hair look wider and more voluminous. It is a very comfortable sleeping position for side-sleepers, as the buns sit in the hollow area between your jaw and shoulder, keeping your hair safe from friction.
16. Triple Stacked Buns
Do you have layers that always fall out of your overnight styles? The triple stack involves making three small buns in a vertical line down the back of your head (Mohawk style). This is the absolute best method for shoulder length hair with short layers, as it catches every single strand. The top bun provides volume, the middle bun provides the main waves, and the bottom bun ensures the nape hair isn’t left straight. When released, you get a seamless transition of curls from root to tip that looks like it was done with multiple different wand sizes.
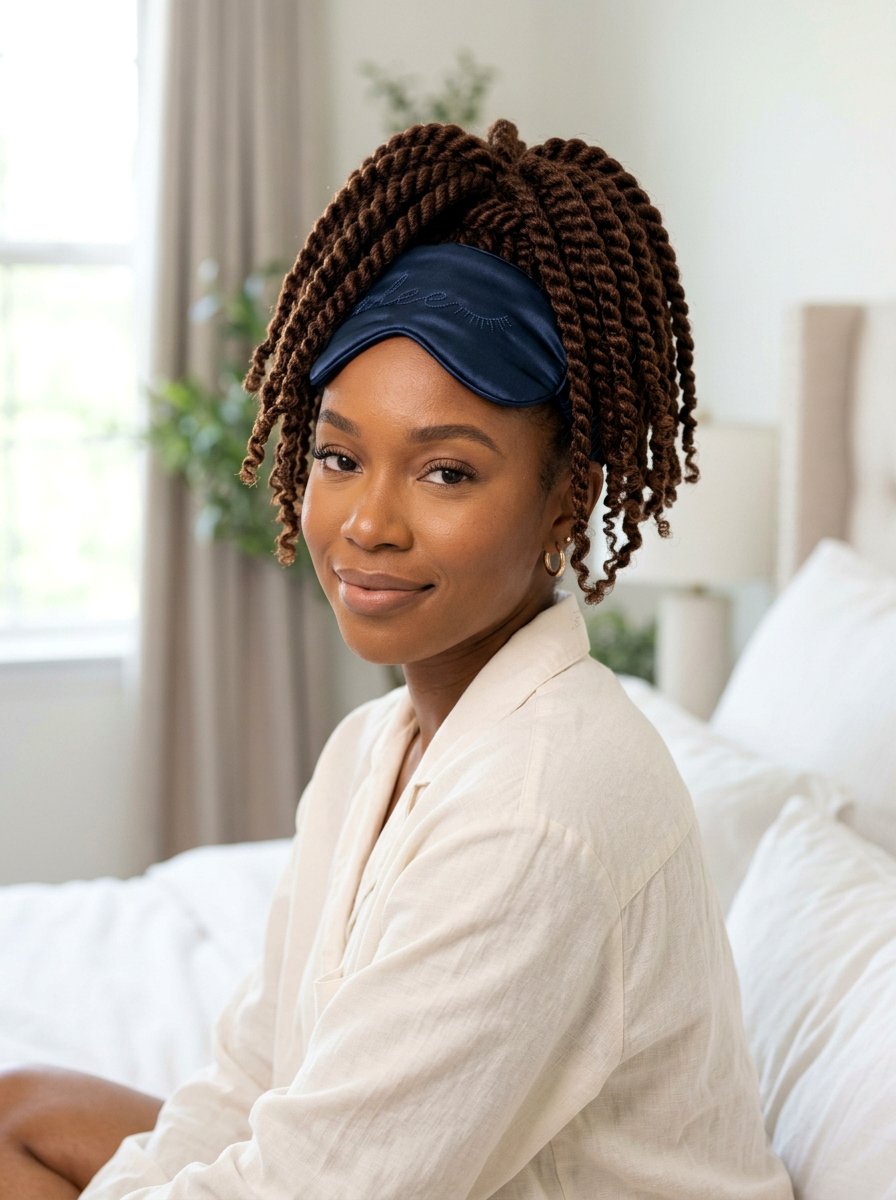
17. Scarf Covered Bun
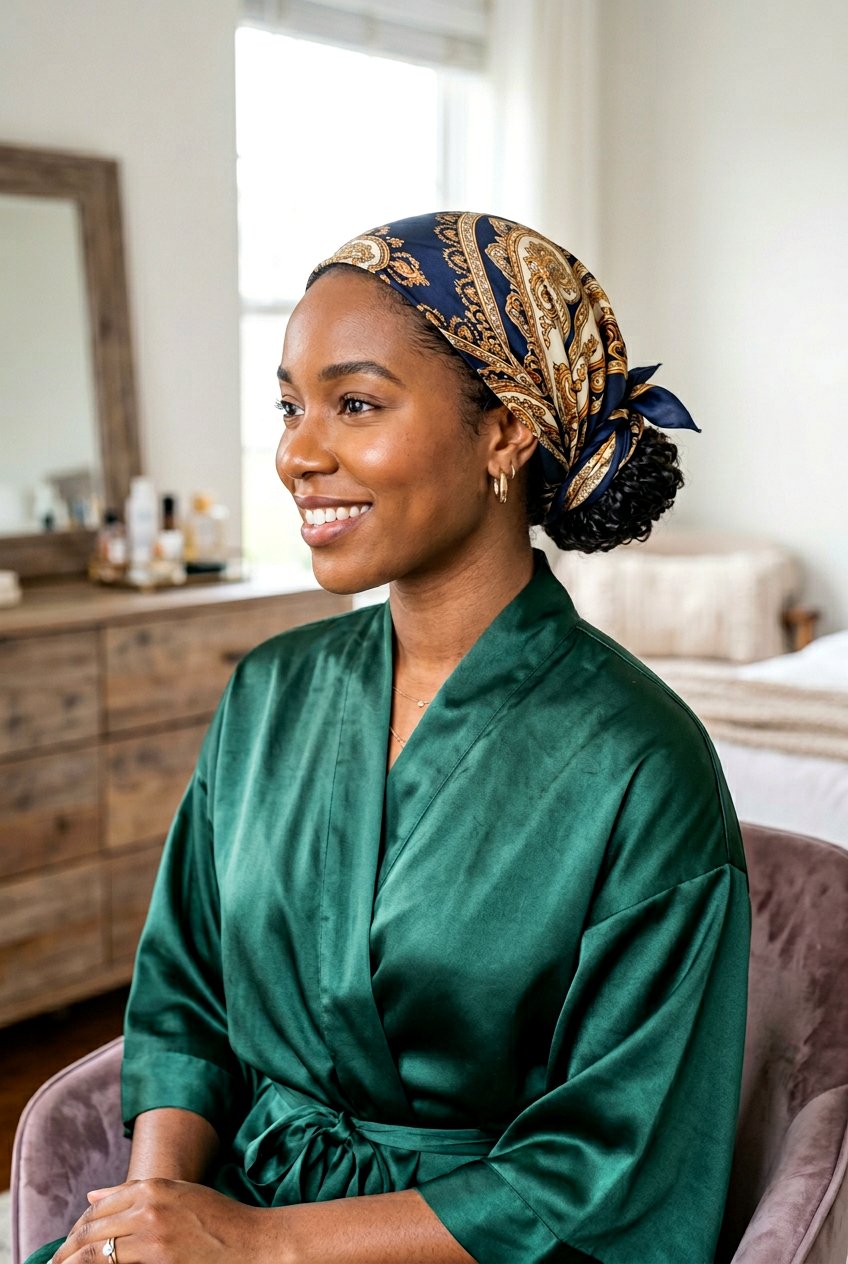
Are you struggling with frizz ruining your hard work? After you have secured your hair into your preferred bun style, wrap your entire head in a silk or satin scarf. This “cockpit” for your hair keeps the humidity stable and prevents your pillowcase from roughing up the hair cuticle. For shoulder length hair, which can sometimes be prone to “flyaways” at the ends, the scarf acts as a secondary setting tool. You will notice a significant difference in the shine and “finished” look of your curls when they are protected by silk throughout the night.
18. Octopus Bun Method
Have you heard of the “Octopus” heatless curler? It’s a headband with several fabric “tentacles” hanging down. You wrap your hair around each strip and then tuck the ends up into a bun-like cluster at the top. For shoulder length hair, this is a fantastic way to get very organized, uniform curls without the bulk of a single large bun. It distributes the weight of your hair evenly across your head, making it one of the most comfortable options for a full night’s rest. The result is a head full of bouncy, medium-sized ringlets that look incredibly consistent.
19. Tucked Headband Bun
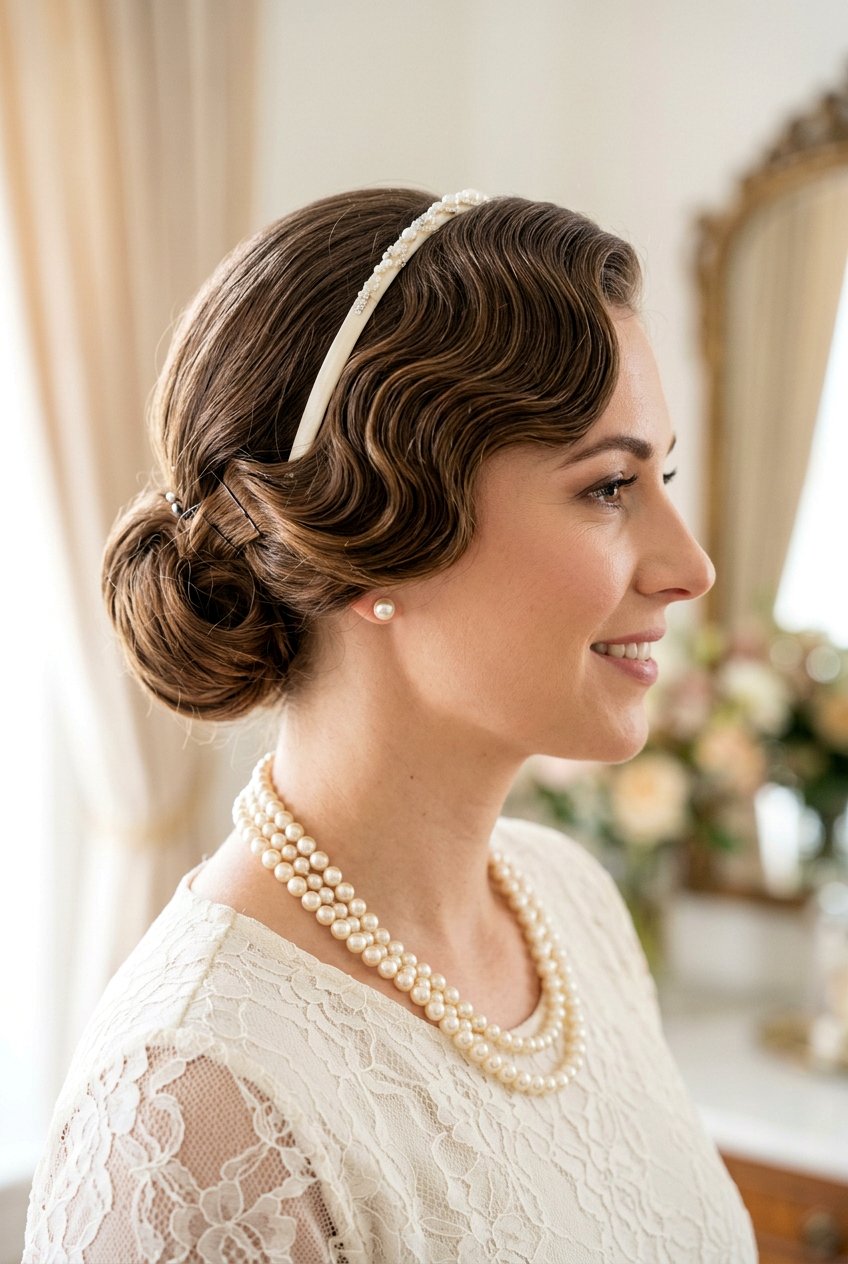
Do you want waves that look like a classic 1920s finger wave? Place a stretchy headband over your hair (like a crown) and start tucking sections of your hair over and under the band until all the hair is wrapped around it. This creates a continuous, horizontal “bun” around the circumference of your head. For shoulder length hair, this is an excellent way to get a vintage, glamorous wave. Because the hair is wrapped in a flat, wide manner, the curls turn out more like elegant ripples than tight spirals. It’s a sophisticated look that transitions perfectly from the bedroom to a wedding.
20. Half Up Bun Curls

Are you someone who likes a “mix” of textures? Try putting only the top half of your shoulder length hair into an overnight bun while leaving the bottom half straight or in a loose braid. This “half-up” approach creates a very modern, layered look. The top sections will have a lot of bounce and height, while the bottom stays more elongated. This prevents the hair from looking too “round” or poofy, which can sometimes happen with shorter lengths. It’s a great styling choice for someone who wants to maintain a bit of their natural length while still adding some flair.
Conclusion:
Mastering the art of overnight bun curls for shoulder length hair is the ultimate “cheat code” for a stress-free morning routine. By choosing the right method—whether it’s the high-volume sock bun or the structured Bantu knot—you can customize your look to fit your personal style and hair type. Not only does this save you precious time in the morning, but it also significantly improves the health of your hair by eliminating daily heat exposure. Remember to start with slightly damp hair and use a silk scarf or pillowcase to ensure your results are frizz-free and shiny. With these twenty techniques in your styling kit, your shoulder length hair will never have a boring day again.
You'll Like These Styles:

Leave a Reply