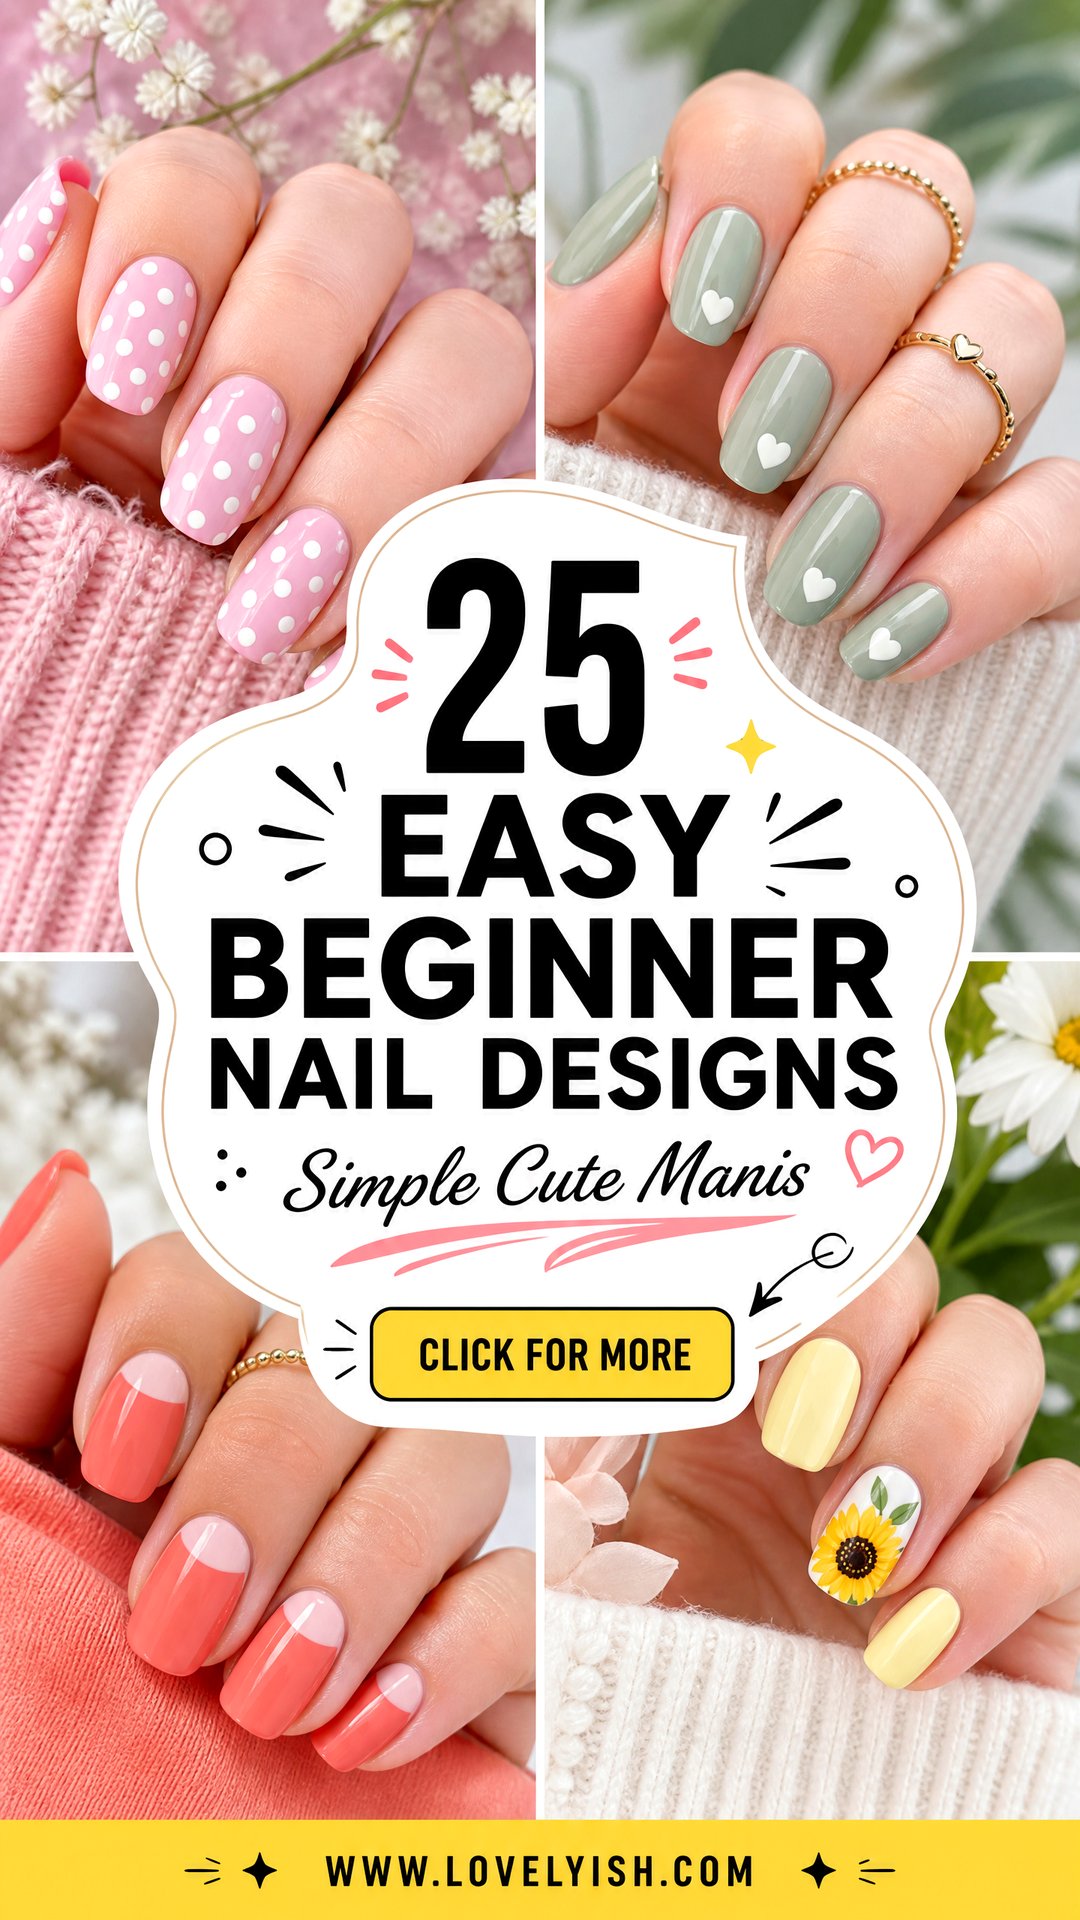
Starting your nail art journey doesn’t have to feel intimidating. With a few basic tools like a dotting pen, striping tape, or even a toothpick, you can recreate stunning salon-worthy looks at home. This curated list of 25 beginner nail designs covers everything from classic French tips to playful polka dots, soft ombré fades, and minimalist accent details. Each design is forgiving, easy to repeat, and looks polished even if your lines aren’t perfectly straight. Whether you prefer soft pastels, bold pops of color, or quiet neutrals, you’ll find a complete nail set look here that fits your vibe. Grab your favorite polishes, set aside an hour, and let’s create something beautiful together.
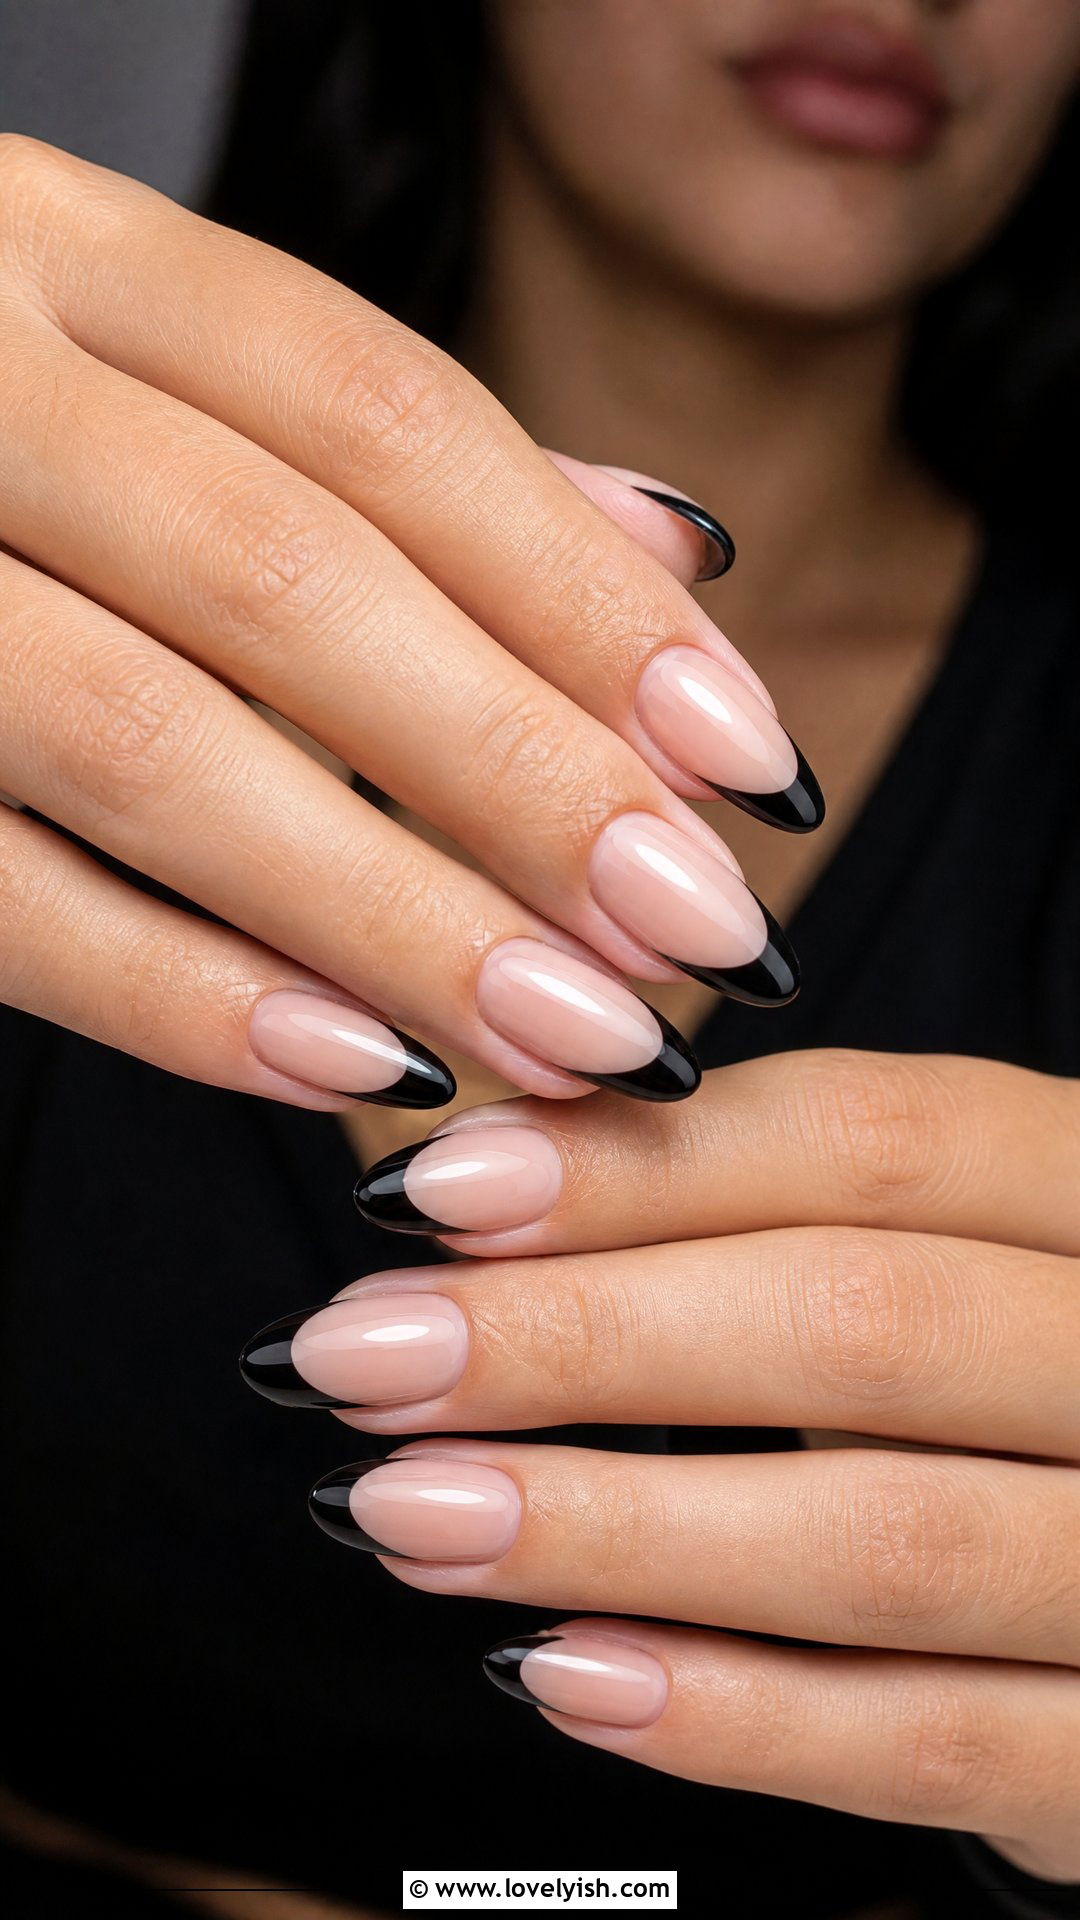
1. Classic White French Tip Nails
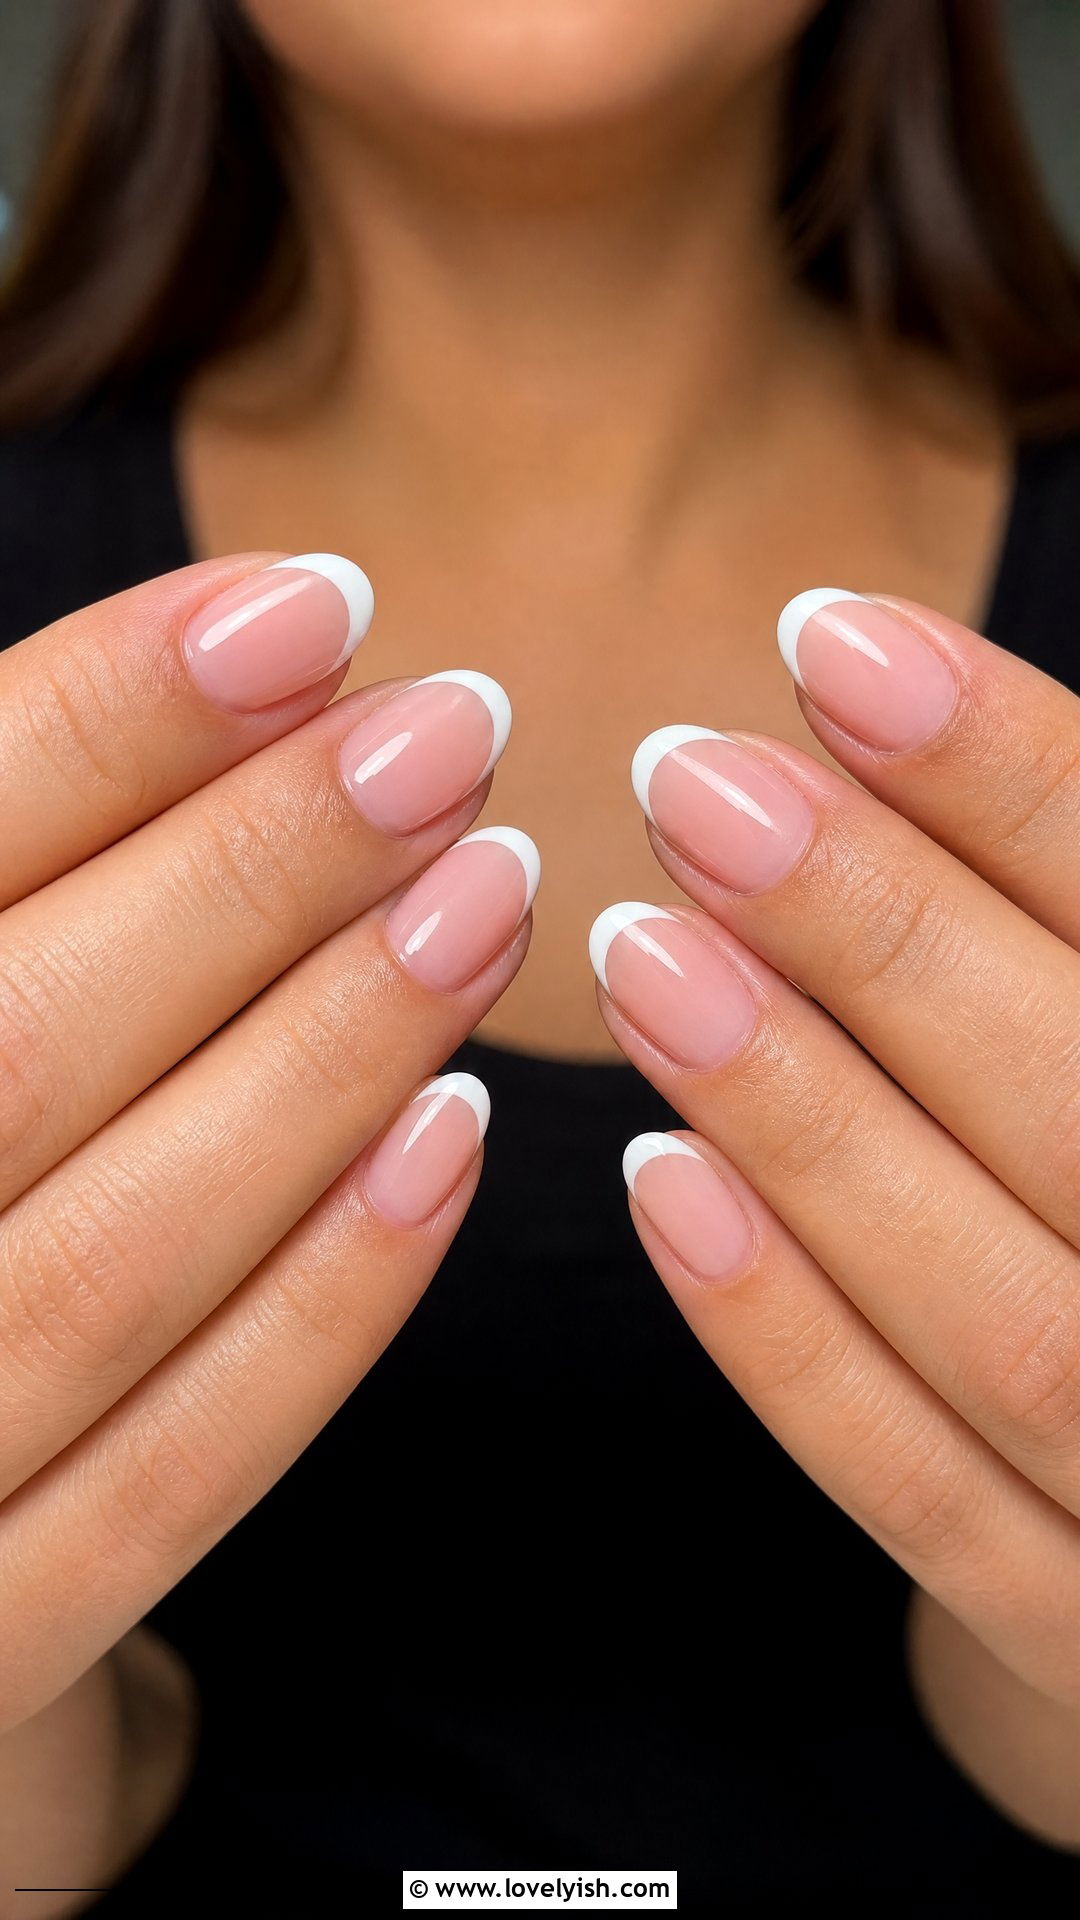
The white French tip is the ultimate starter look because it’s clean, timeless, and forgiving. Beginners love this design because guide stickers do most of the work for you. Start with a sheer pink or milky base coat across all five nails. Once dry, place curved French tip stickers slightly above the natural smile line, then paint white polish over the exposed tips. Peel off the stickers while the polish is still slightly wet for crisp edges. Finish with a glossy top coat to seal everything in. The result feels fresh, polished, and works for school, work, or weekend brunch. It’s hands-down the most reliable beginner nail design you’ll keep coming back to.
2. Pastel Pink Polka Dot Nails
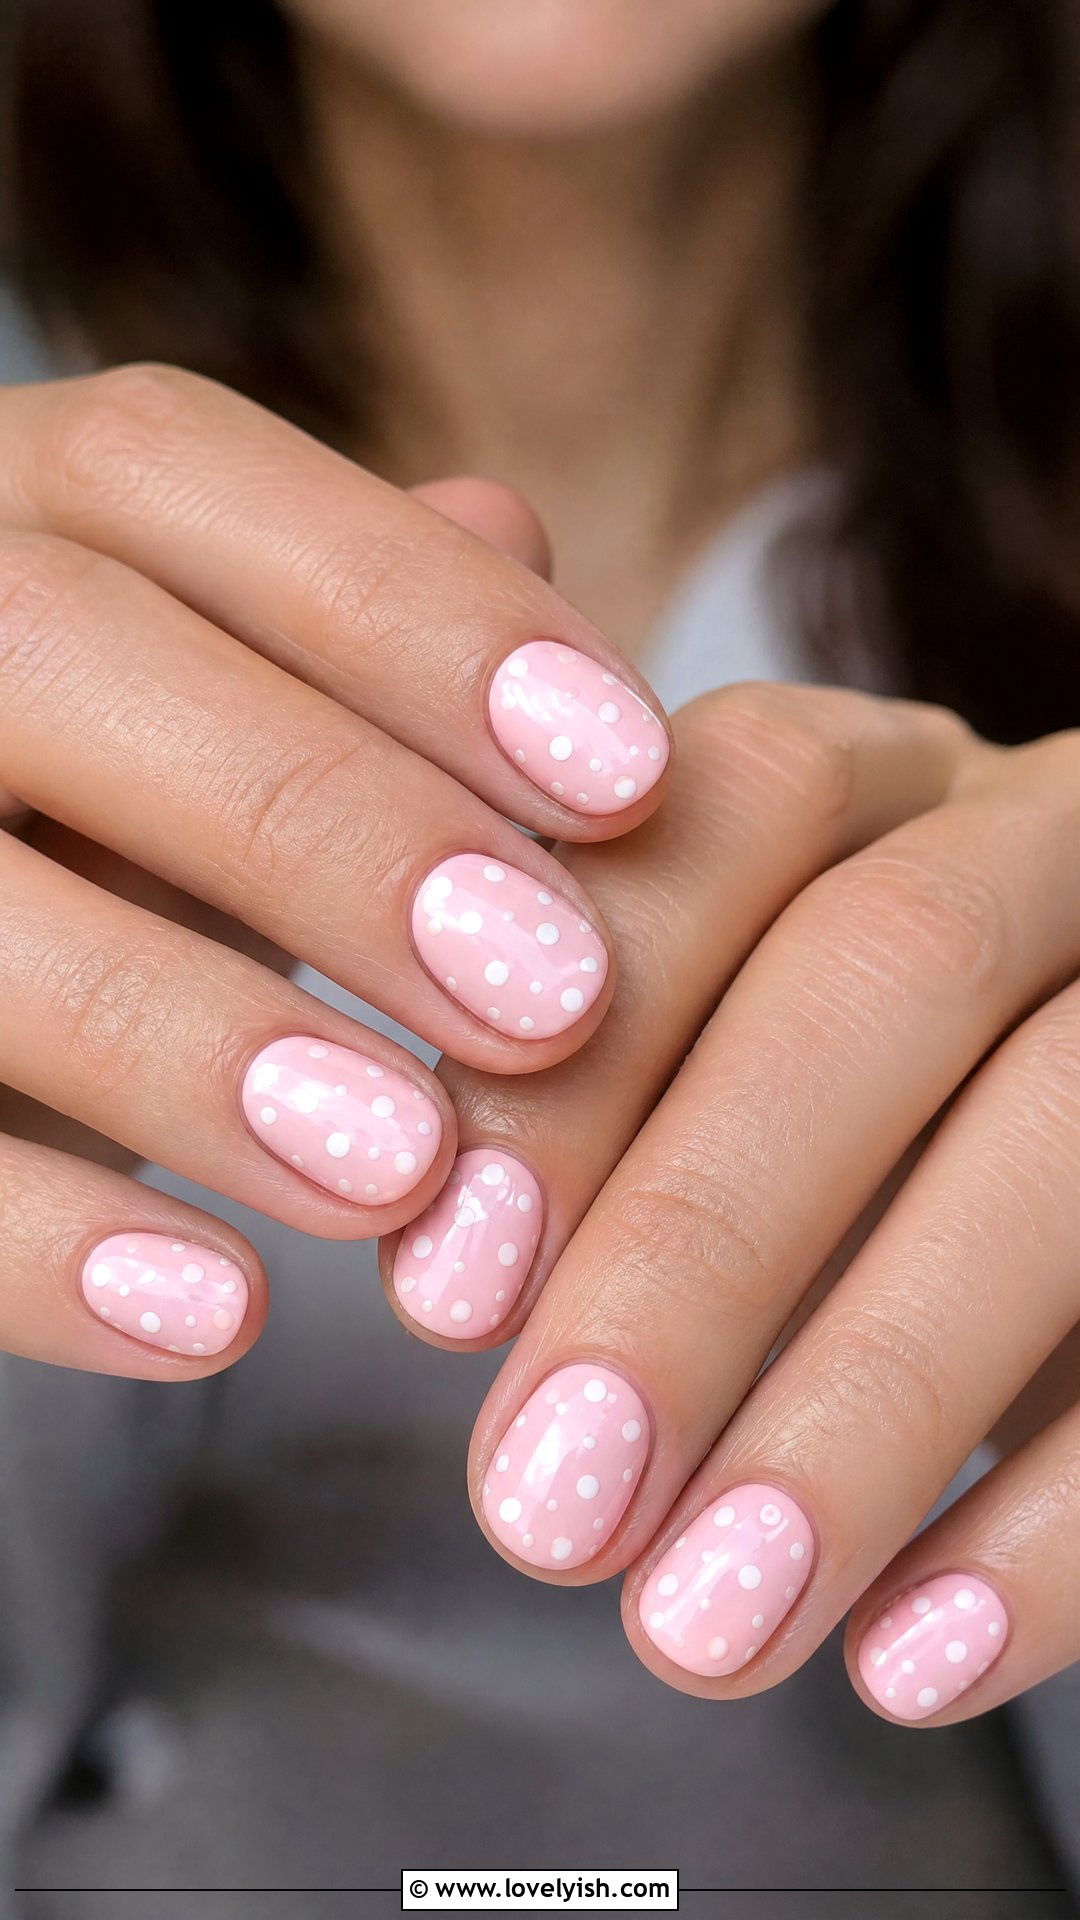
Polka dots are the friendliest pattern for newbies because perfection isn’t required. Paint all five nails in a soft pastel pink base and let them dry completely. Dip a dotting tool or toothpick into white polish, then press lightly onto each nail to create scattered dots of varying sizes. Some nails can have three dots, others five — randomness is what makes it look effortless. Cover everything with a glossy top coat to smooth the texture. This sweet, retro-inspired look feels playful without being overwhelming. It pairs beautifully with spring outfits, sundresses, and casual everyday wear, making it one of the easiest beginner nail designs to master in under twenty minutes.
3. Milky White Daisy Accent Nails
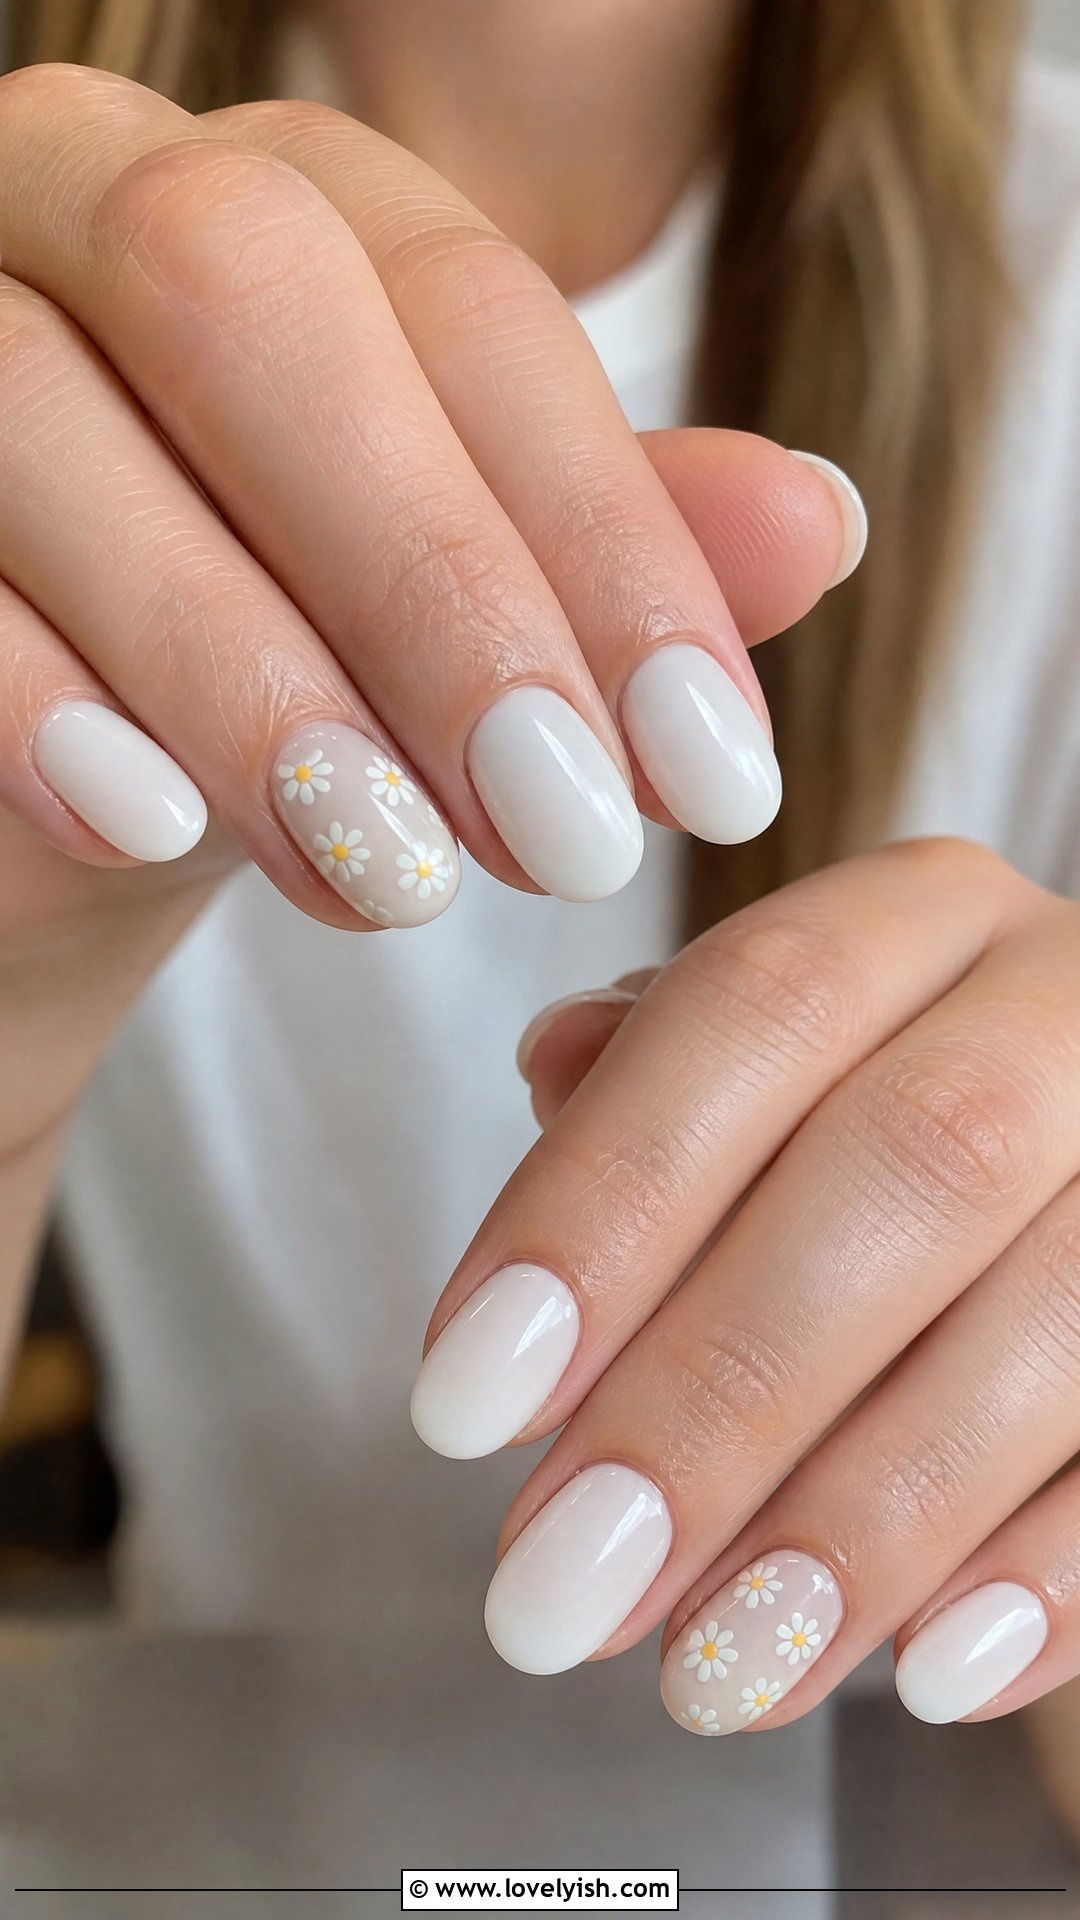
Tiny daisies look impressively detailed but rely on the simplest dotting technique. Paint all five nails with two coats of milky white polish for a clean, semi-sheer base. On the ring finger of each hand, use a dotting tool to make five small yellow dots arranged in a circle. Add a tiny white dot in the center, then connect the petals with a toothpick if needed. The other four nails stay clean milky white for balance. Top everything with a glossy finish. This design feels fresh, springy, and feminine without being fussy. It’s perfect for beginners who want to dip a toe into floral nail art without learning brush strokes.
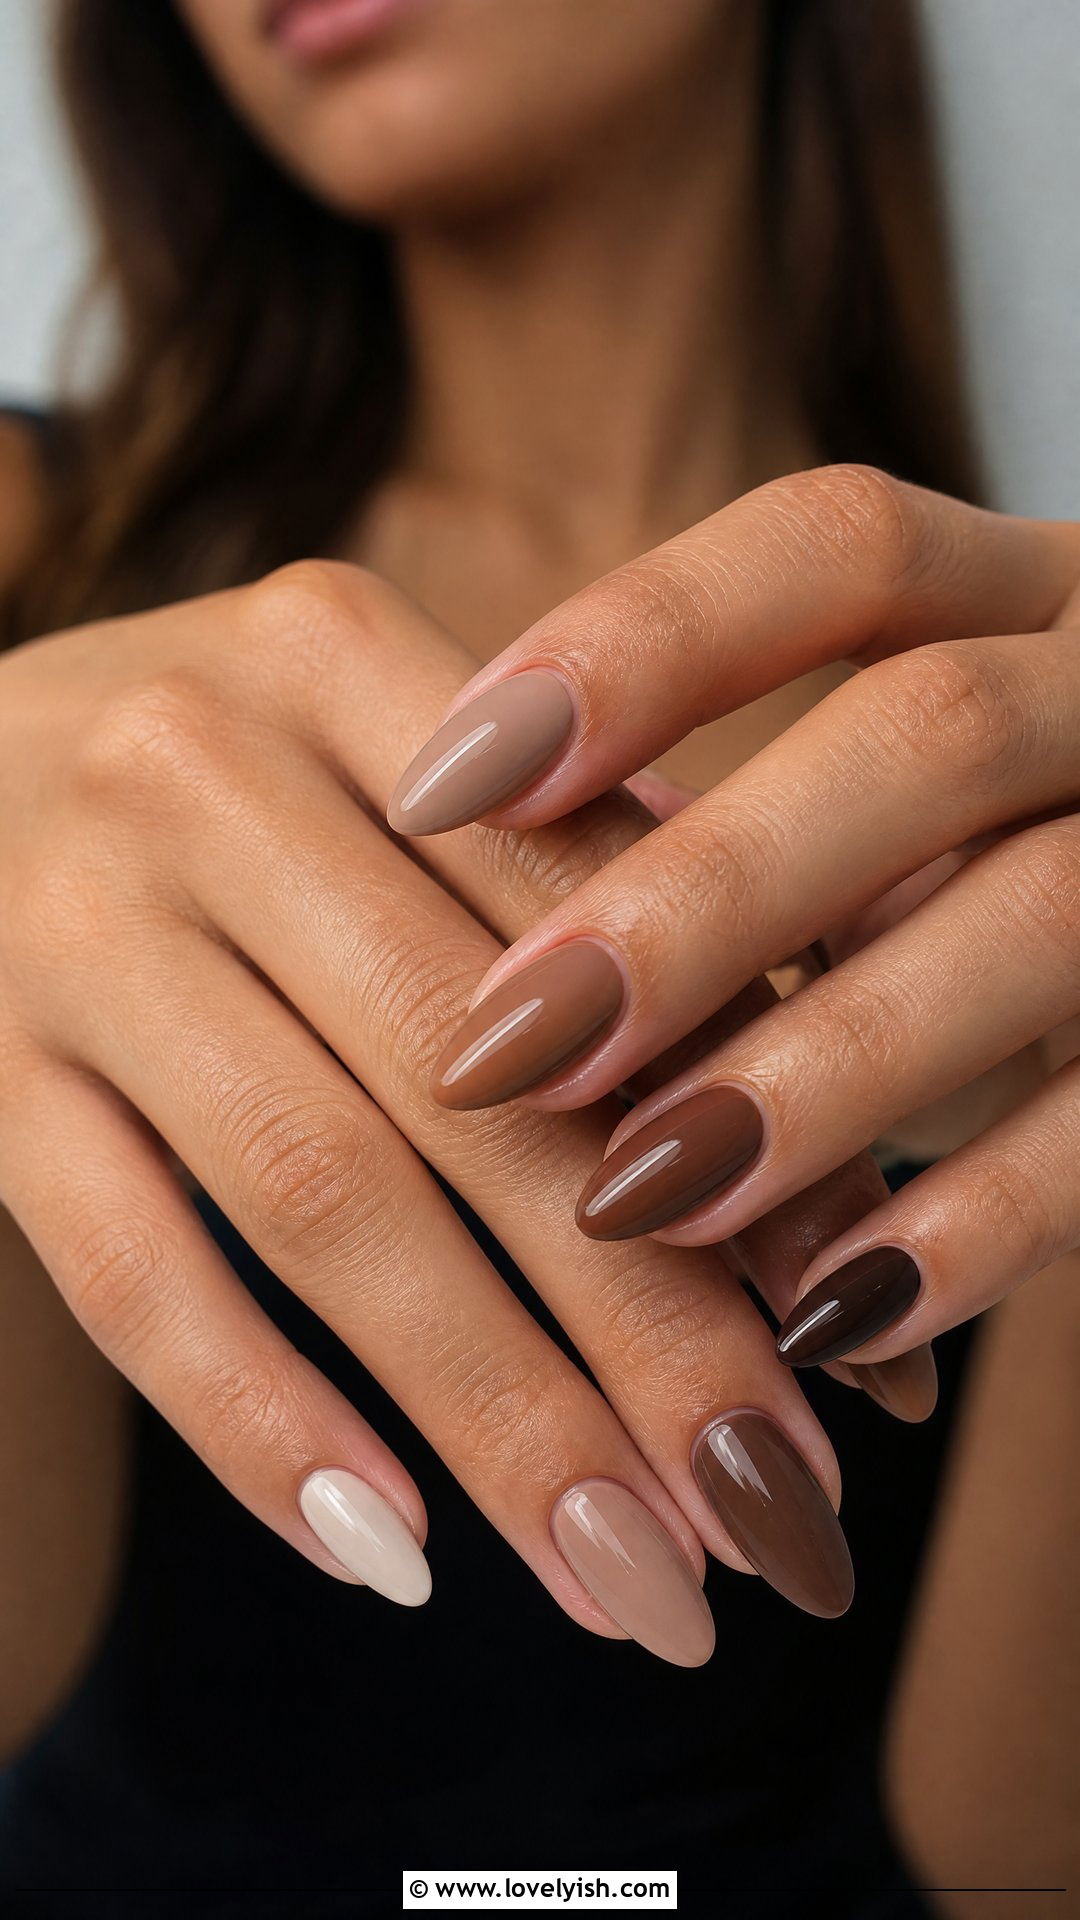
4. Nude Nails with Gold Foil Flecks
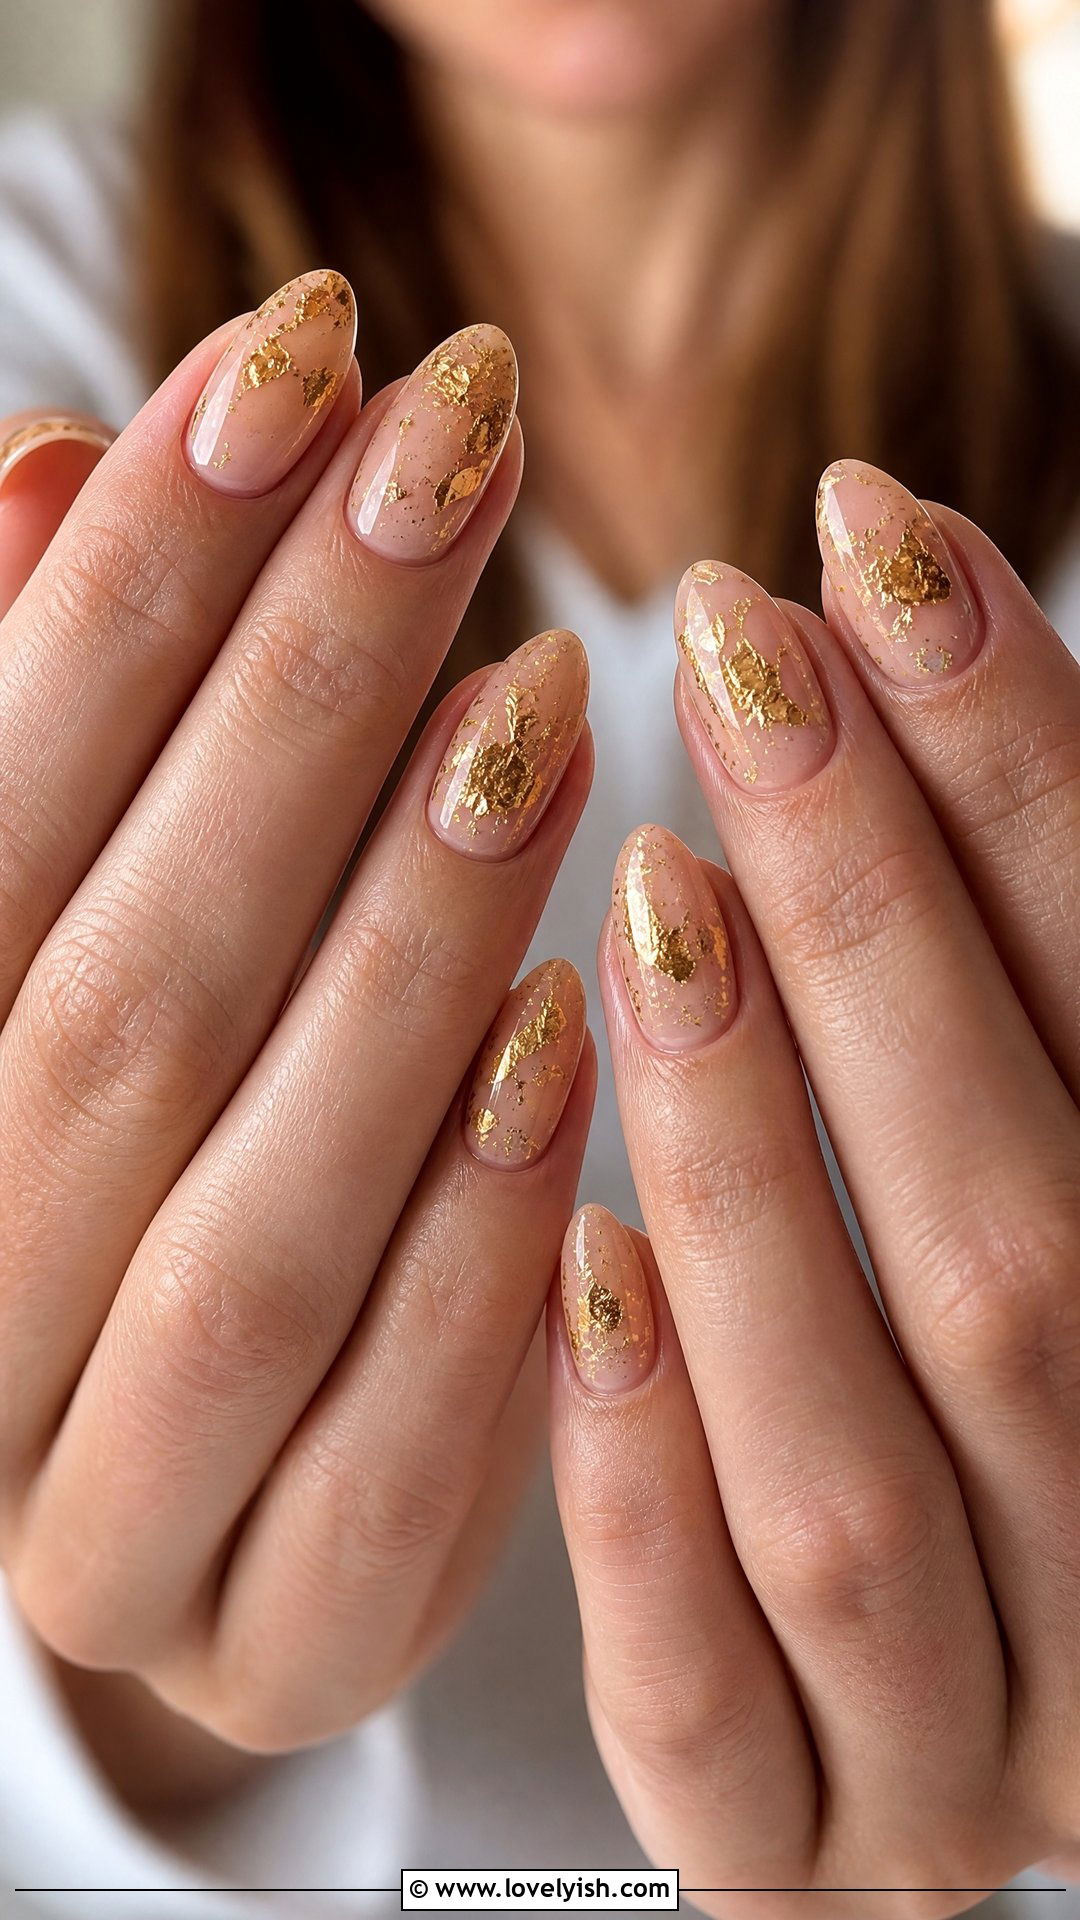
If you want elevated nails with almost zero skill required, gold foil is your shortcut. Paint all five nails in a warm nude polish and let them dry until tacky. Press tiny pieces of gold leaf foil onto random spots using tweezers or your fingertip — uneven placement actually looks more luxe. Don’t cover the entire nail; let the nude base show through. Seal with a thick glossy top coat to smooth the edges of the foil. This design reads expensive and editorial but takes about fifteen minutes. It’s a favorite for weddings, birthdays, or anytime you want that quiet luxury vibe without learning intricate freehand techniques.
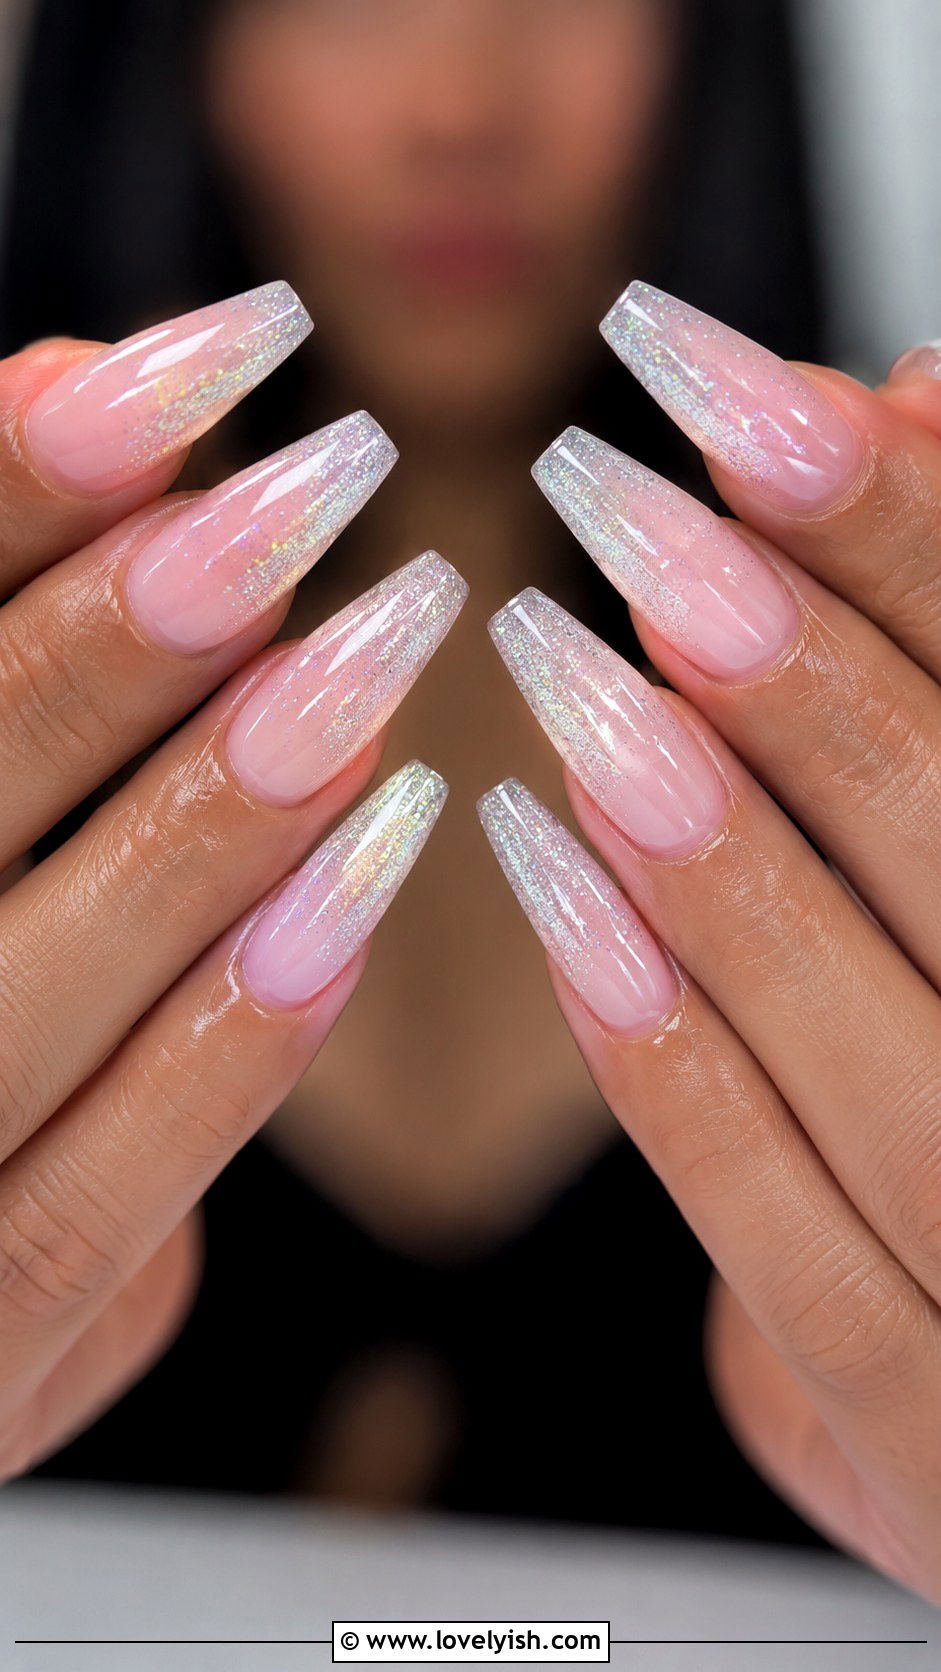
5. Soft Pink Glitter Gradient Nails
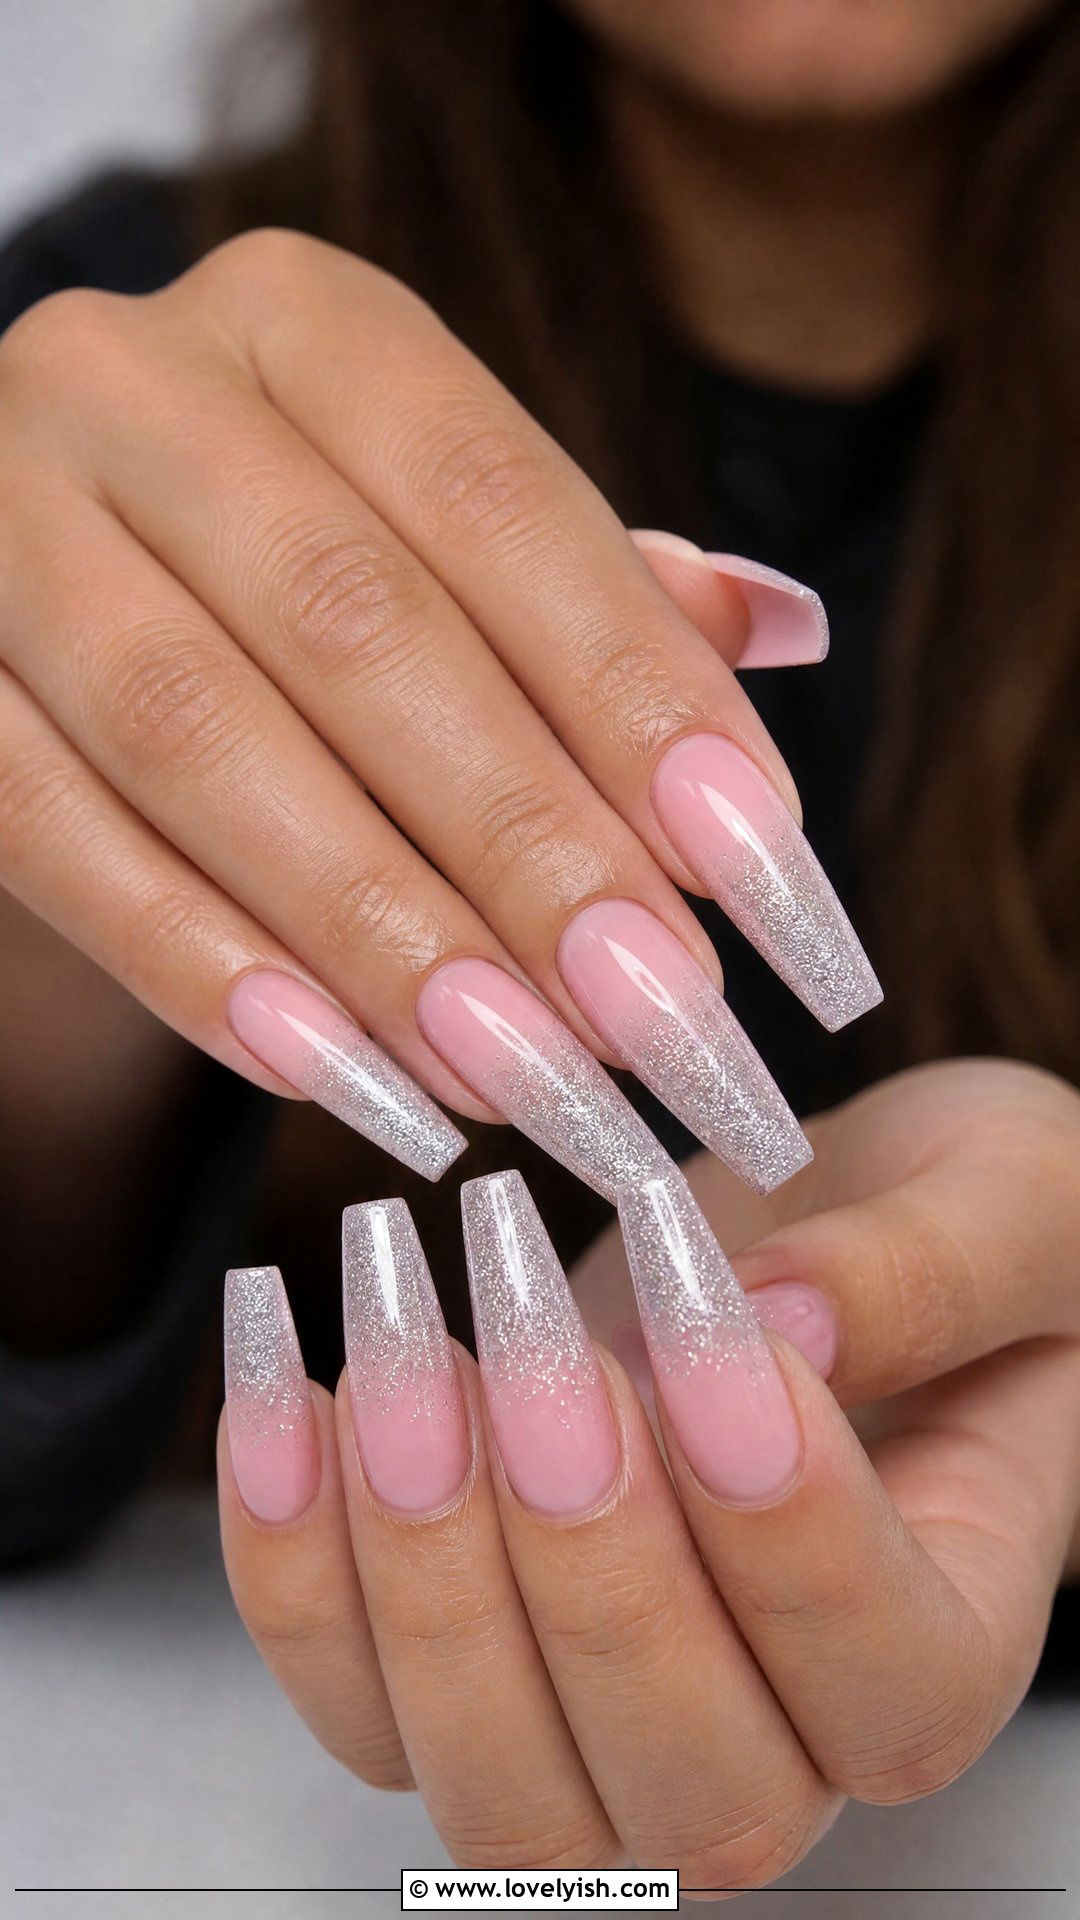
A glitter gradient adds sparkle without requiring any precise lines. Begin with two coats of soft baby pink polish on all five nails. While the second coat is still slightly wet, dip a small makeup sponge into fine silver glitter polish and dab it onto the tips, fading down toward the middle of the nail. Build up the sparkle gradually so the gradient stays soft. The bottom half should remain solid pink. Finish with a glossy top coat to lock in the glitter and smooth the texture. This dreamy, princess-coded look is perfect for parties, birthdays, or simply lifting your mood on a regular Tuesday.
6. Black and White Stripe Nails
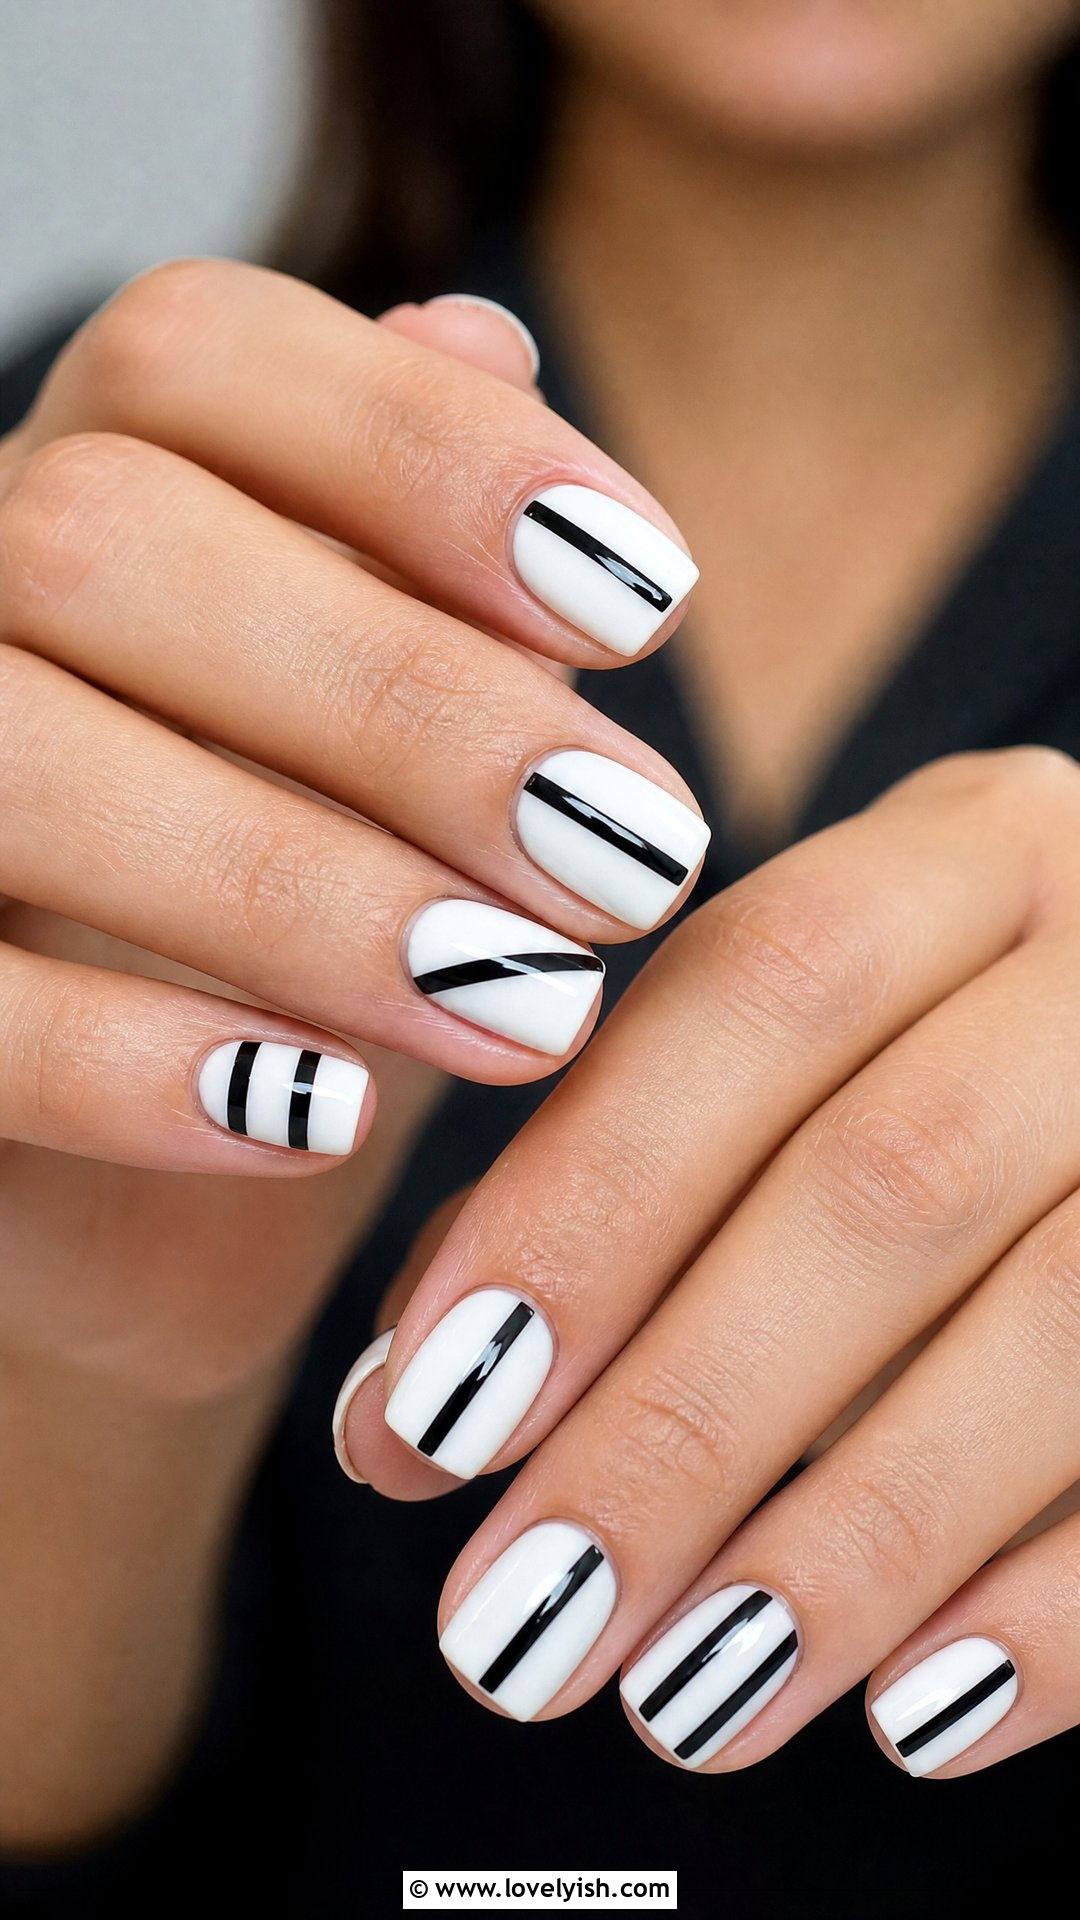
Stripes look graphic and modern but only require striping tape or a steady hand. Paint all five nails with crisp white polish and let them fully dry. Lay thin striping tape diagonally or vertically across each nail in a pattern you like — try one stripe on some nails, two on others. Brush black polish over the exposed sections, then peel the tape off immediately for sharp lines. Seal with a glossy top coat. This monochrome look feels chic and minimal, pairing perfectly with neutral outfits or a structured blazer. It’s a confidence-boosting beginner nail design that proves you don’t need fancy tools to look put-together.
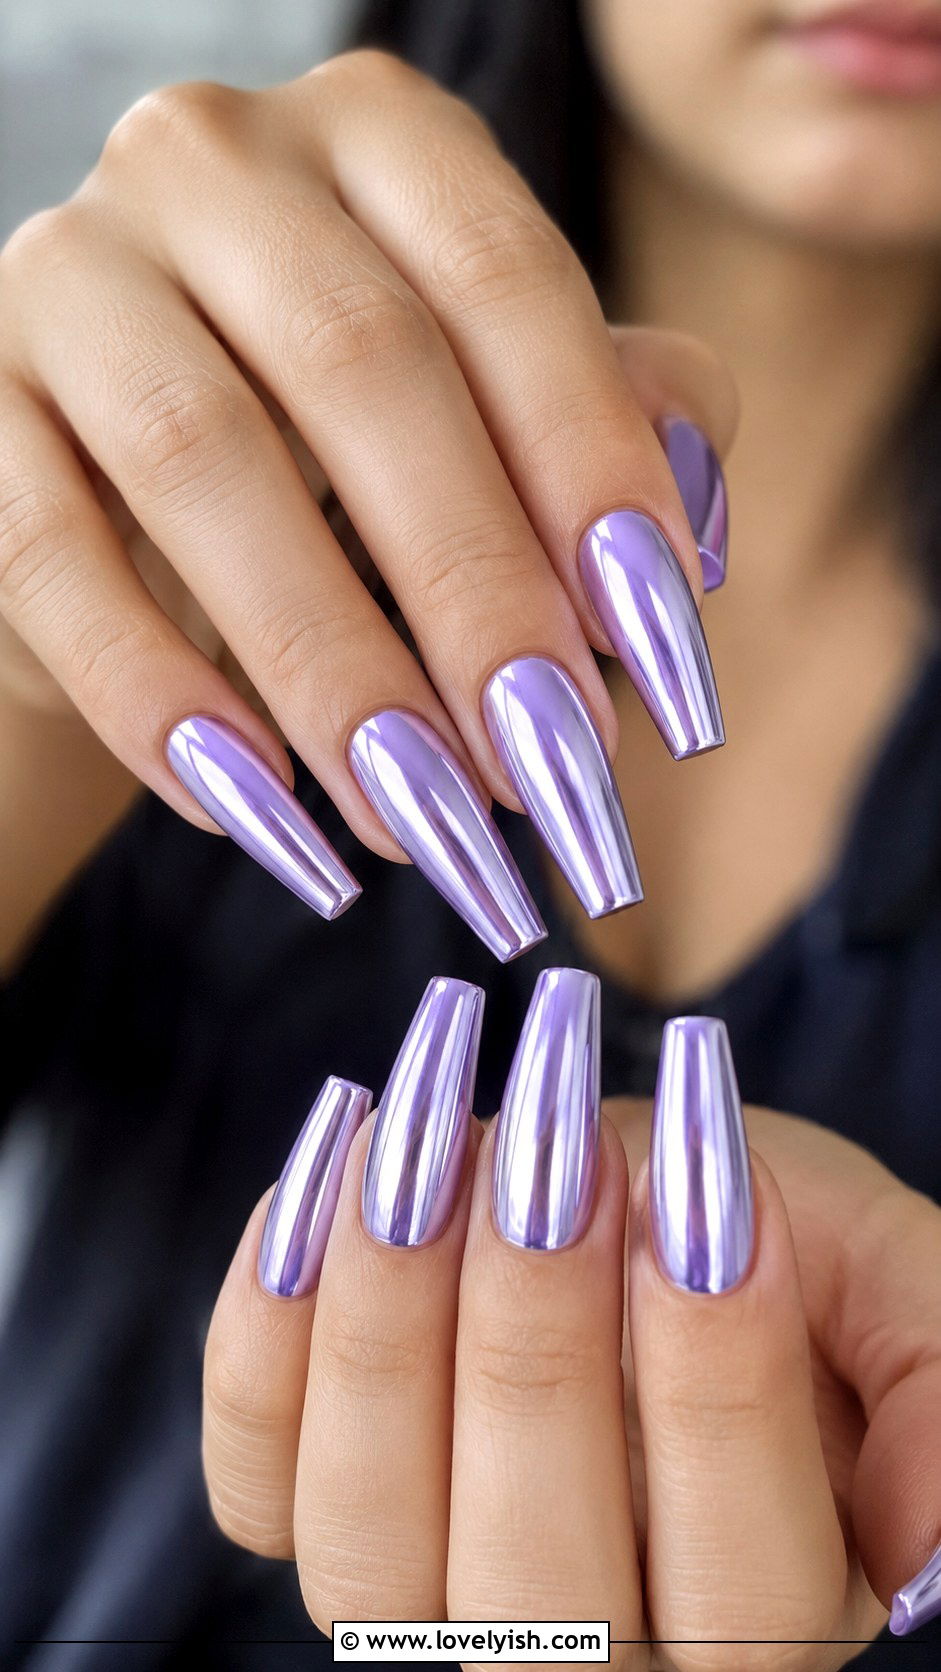
7. Lavender Ombre Nails
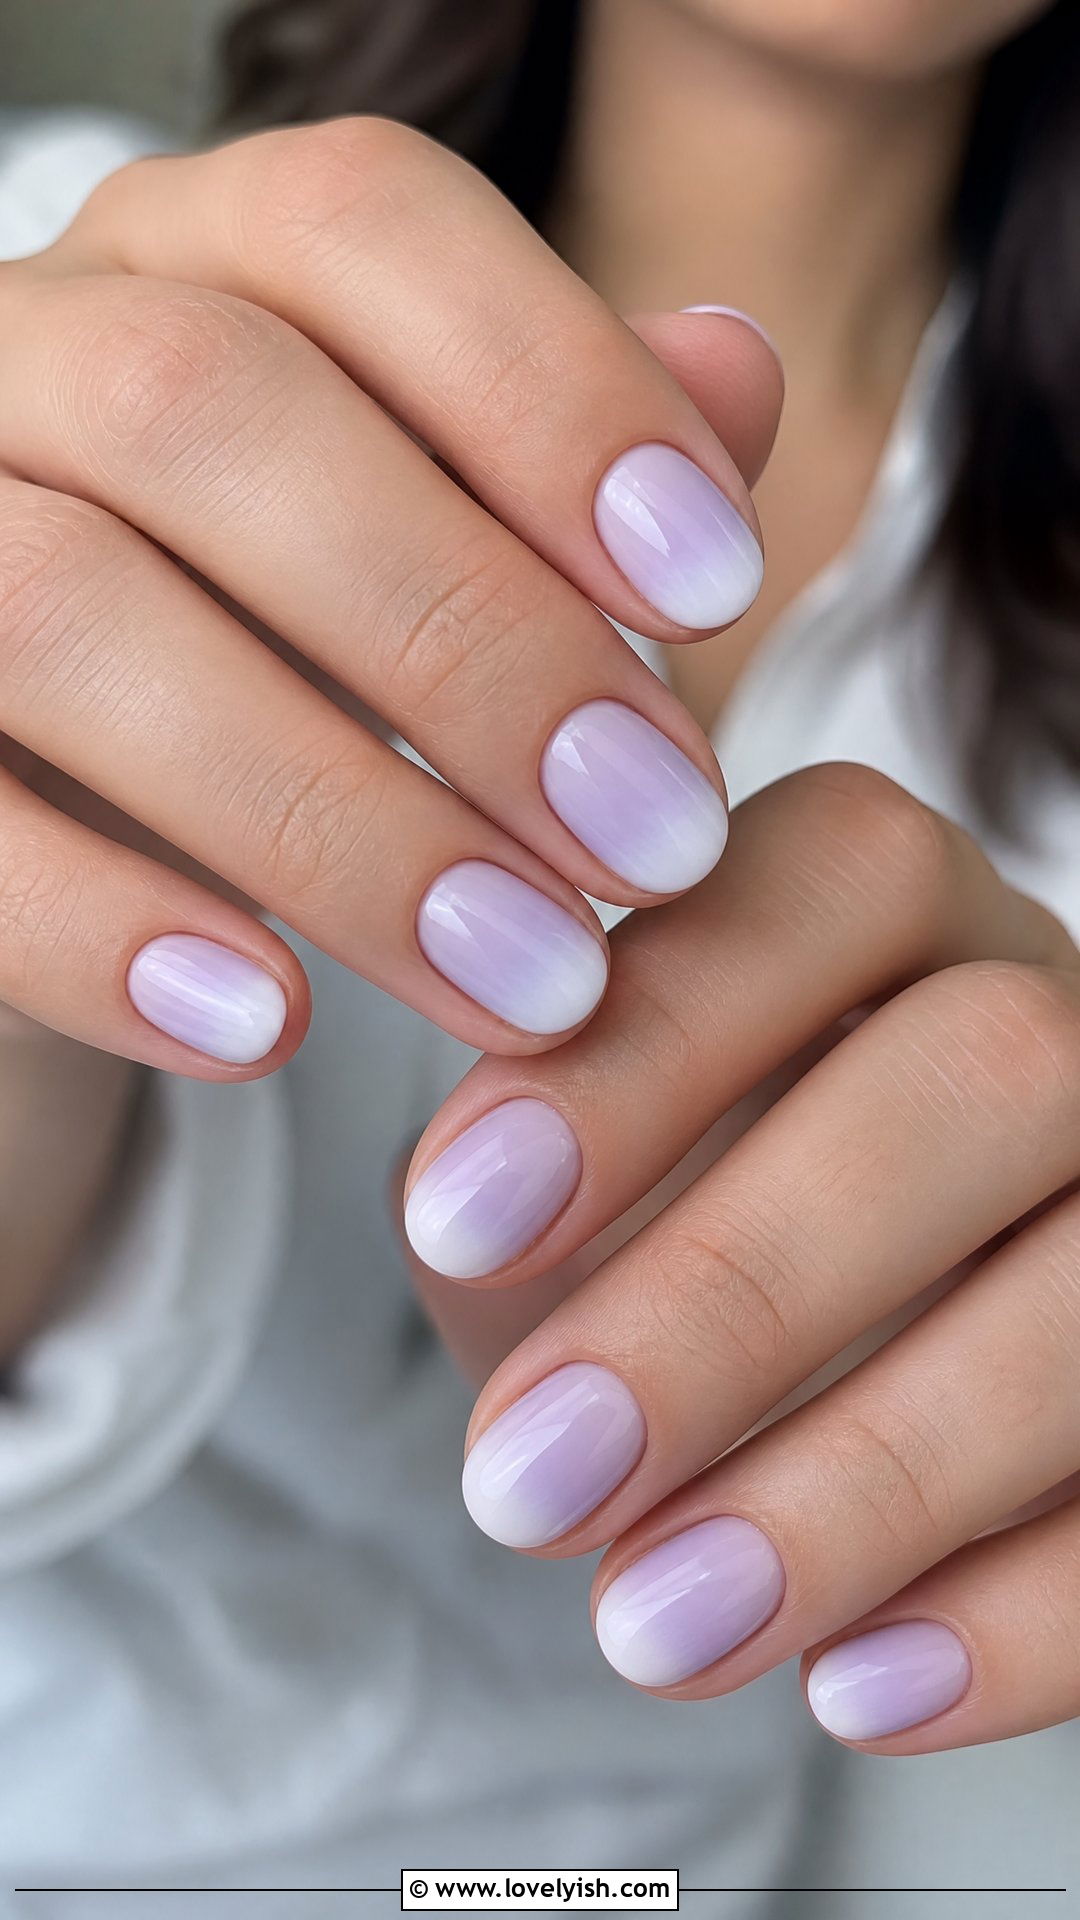
Ombré nails look soft and dreamy yet rely on one beginner-friendly trick: a makeup sponge. Paint all five nails with a white base coat so the colors stay vibrant. Once dry, paint stripes of light lavender and white polish side by side onto a small sponge. Press the sponge gently onto each nail, rocking back and forth to blend the colors seamlessly. Repeat two or three times until the gradient looks smooth. Clean up the cuticle area with a small brush dipped in nail polish remover. Finish with a glossy top coat. This calming, pastel look is especially flattering on shorter nails and feels effortlessly modern.
8. Sheer Jelly Pink Nails
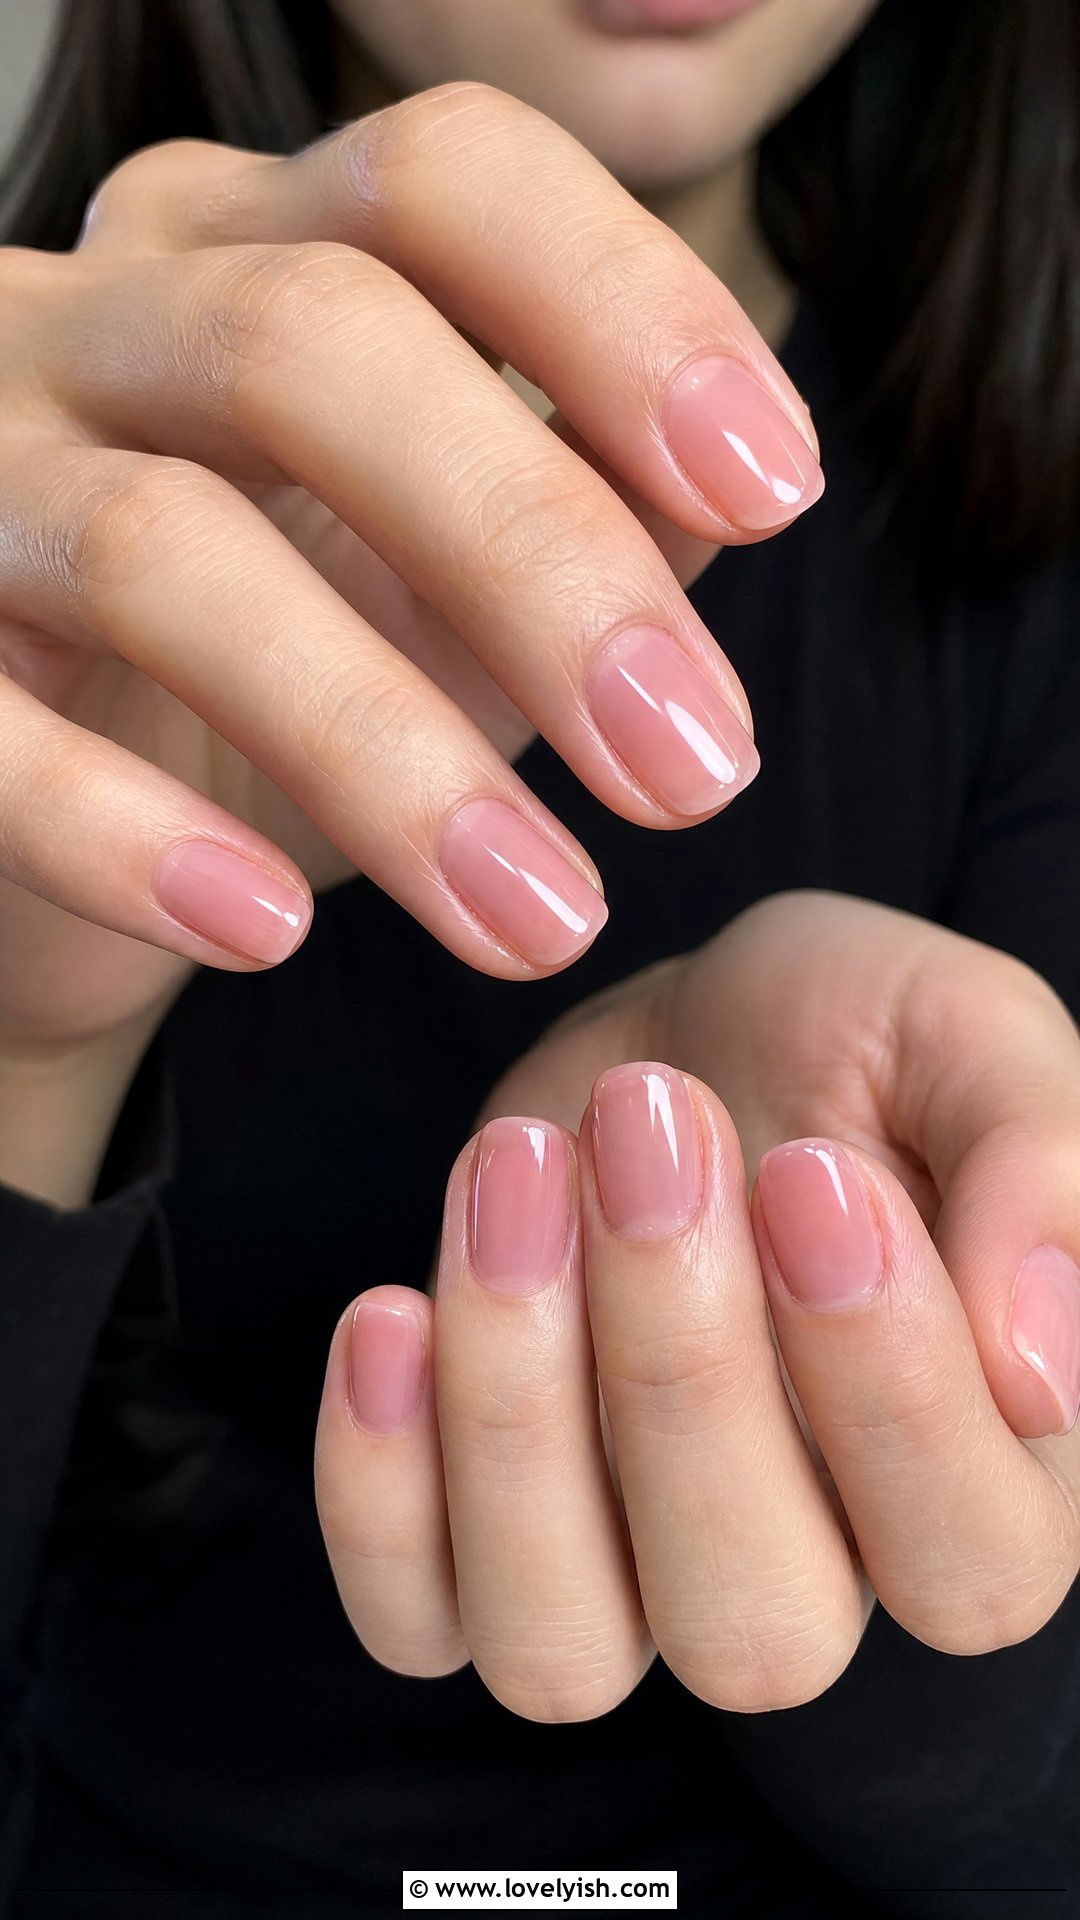
Jelly nails are having a major moment, and they’re embarrassingly easy to recreate. Apply two thin coats of a sheer pink jelly polish across all five nails — the goal is a translucent, glossy finish that lets your natural nail show through slightly. Skip the base color underneath for that signature glass-like effect. Add a thick layer of high-shine top coat to amplify the wet look. This design works beautifully on short, square, or oval shapes, giving your hands a clean, healthy appearance. It’s the ultimate low-effort beginner manicure that still looks polished, and it pairs effortlessly with any outfit, season, or mood you’re in.
9. Baby Blue Cloud Nails
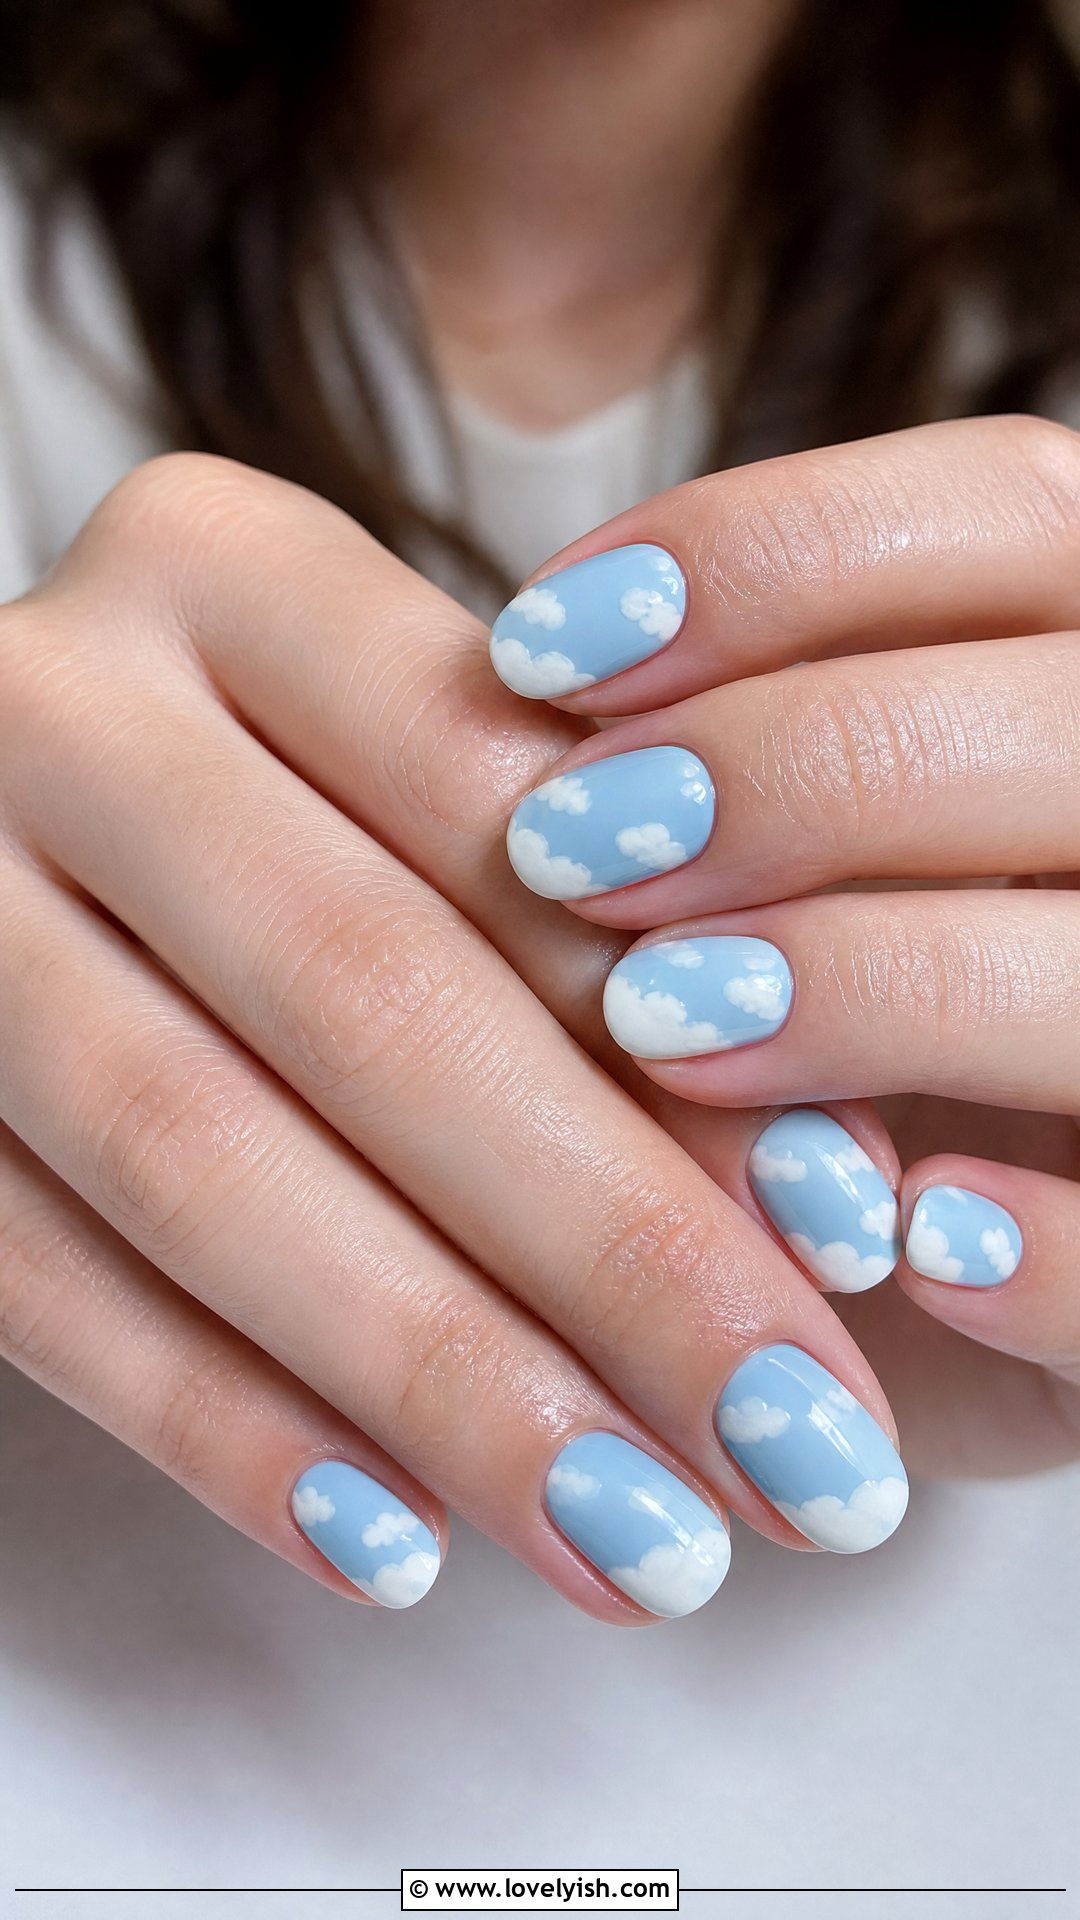
Cloud nails are cute, cozy, and surprisingly forgiving for first-timers. Paint all five nails in a baby blue base and let them dry. Using white polish and a small detail brush or dotting tool, create soft, fluffy cloud shapes by drawing rounded bumps along the bottom of each nail. The clouds don’t need to match — varied sizes look more whimsical. Fill in the cloud shapes with white polish and smooth any edges with a clean brush. Top with glossy finish. This dreamy, sky-inspired look feels playful and youthful, making it perfect for casual days, vacations, or anyone who loves soft, mood-lifting designs without committing to complicated technique.
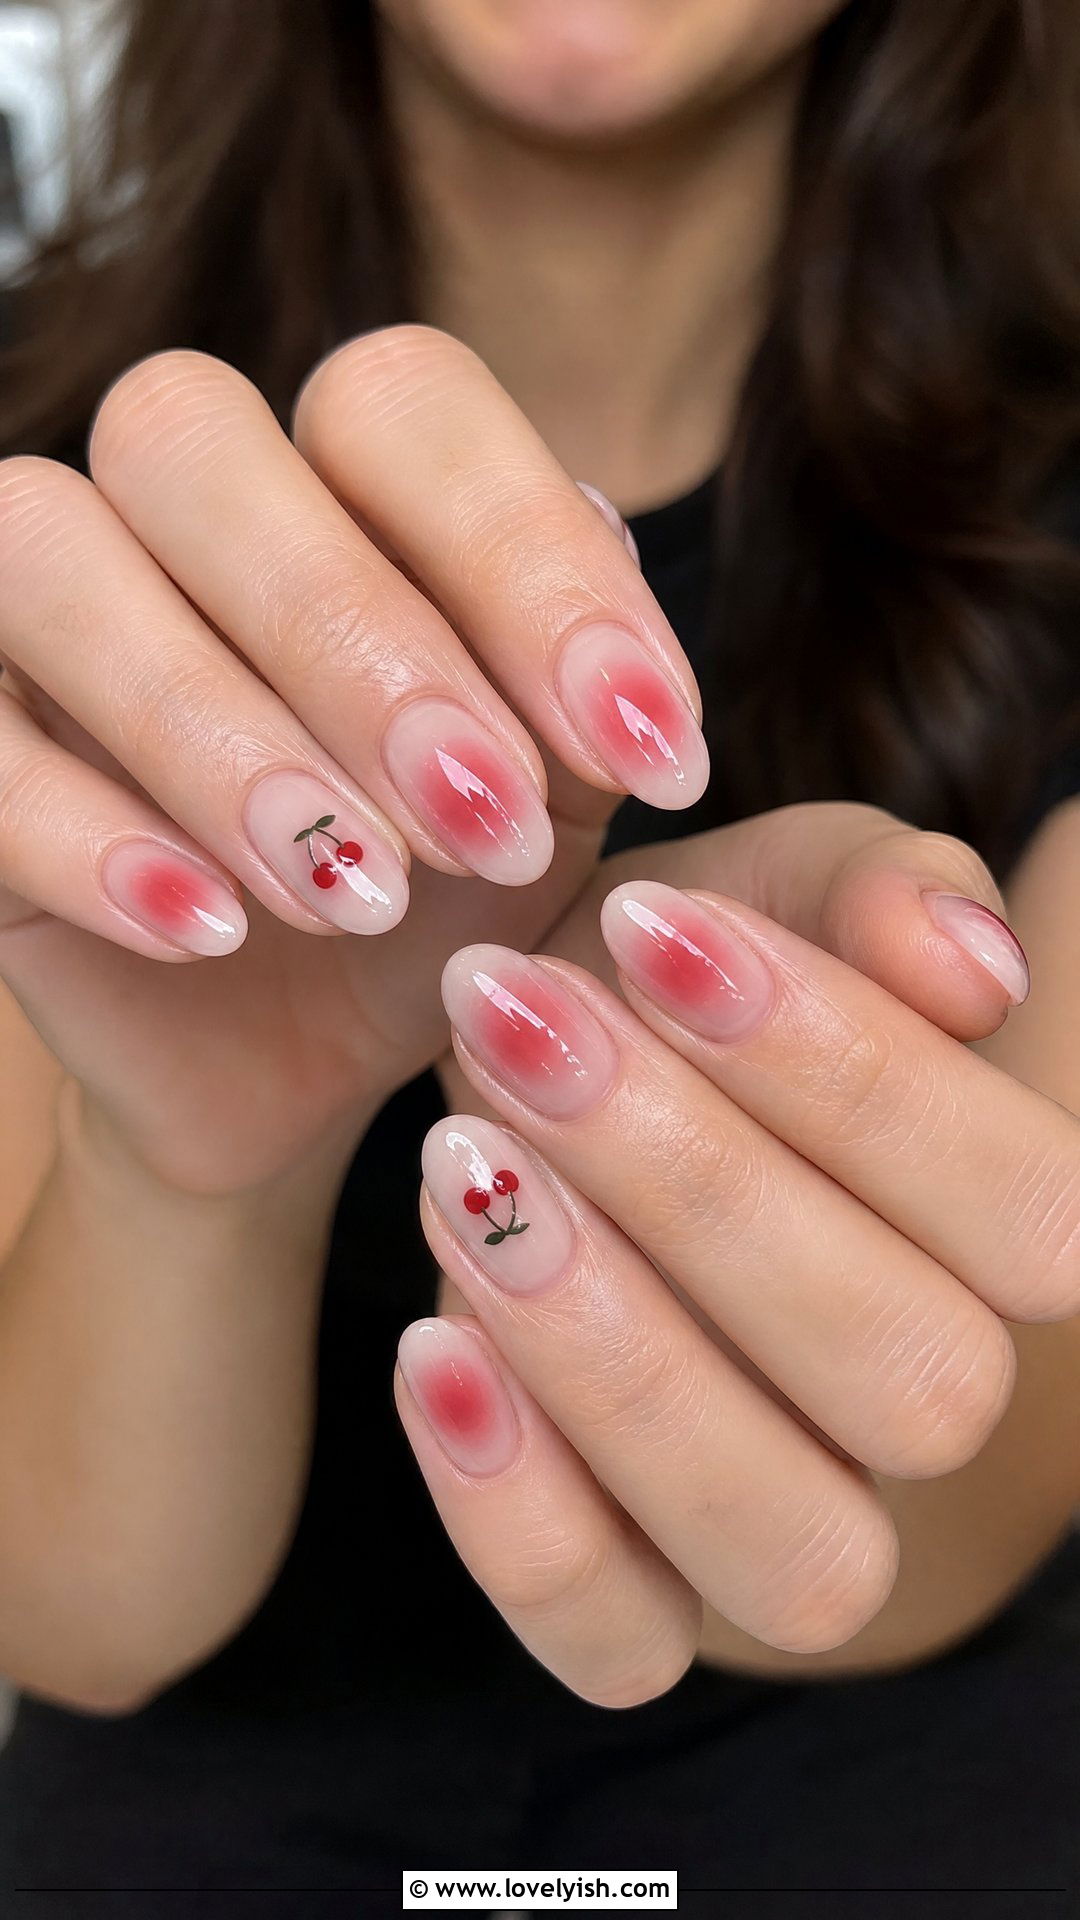
10. Red Cherry Accent Nails
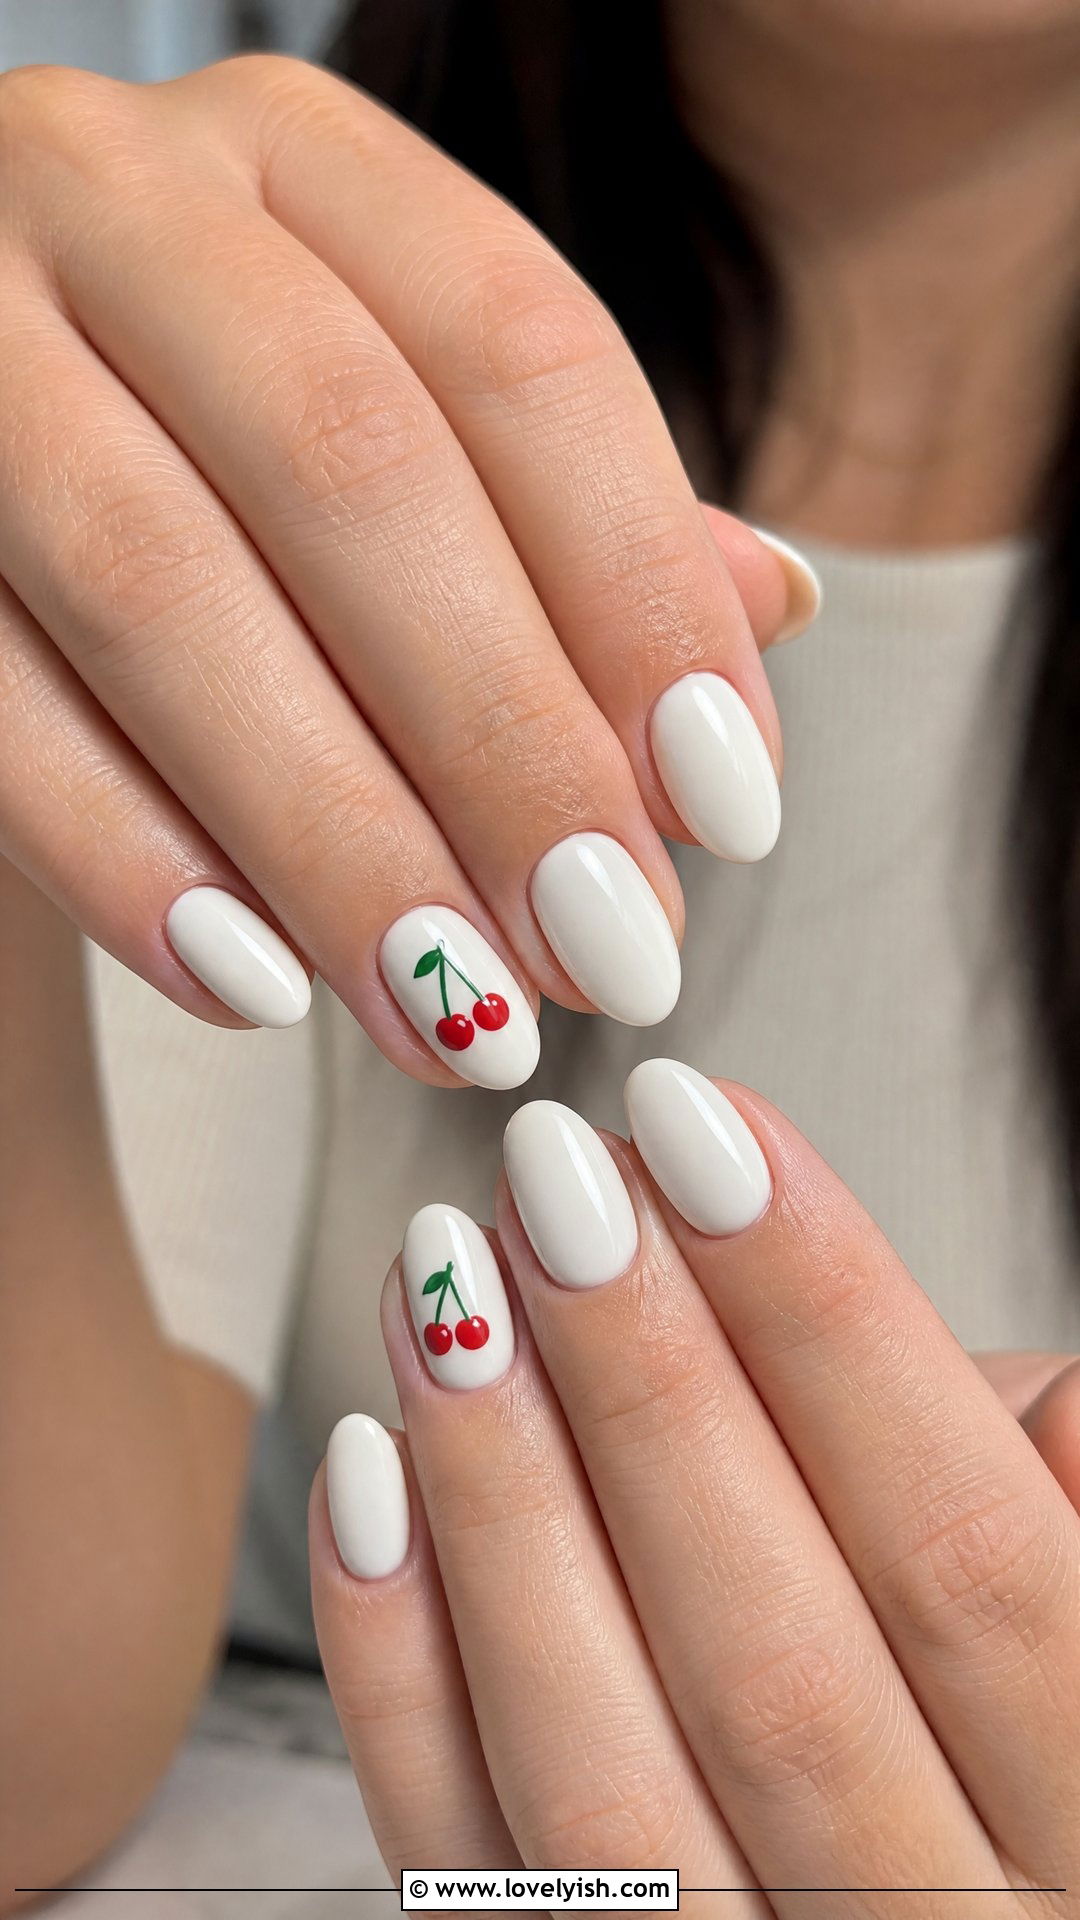
Cherry nails balance sweetness and boldness in the easiest way. Paint all five nails with a creamy white or sheer pink base. On each ring finger, use red polish and a dotting tool to create two small dots side by side, then connect them with a thin green stem using a toothpick. Add a tiny green leaf at the top. The remaining four nails stay clean and minimal. Finish with a glossy top coat. This retro-inspired design feels fun, fresh, and summer-ready. It’s beginner-friendly because the cherries are essentially just two dots, yet the look reads as detailed nail art that everyone will compliment.
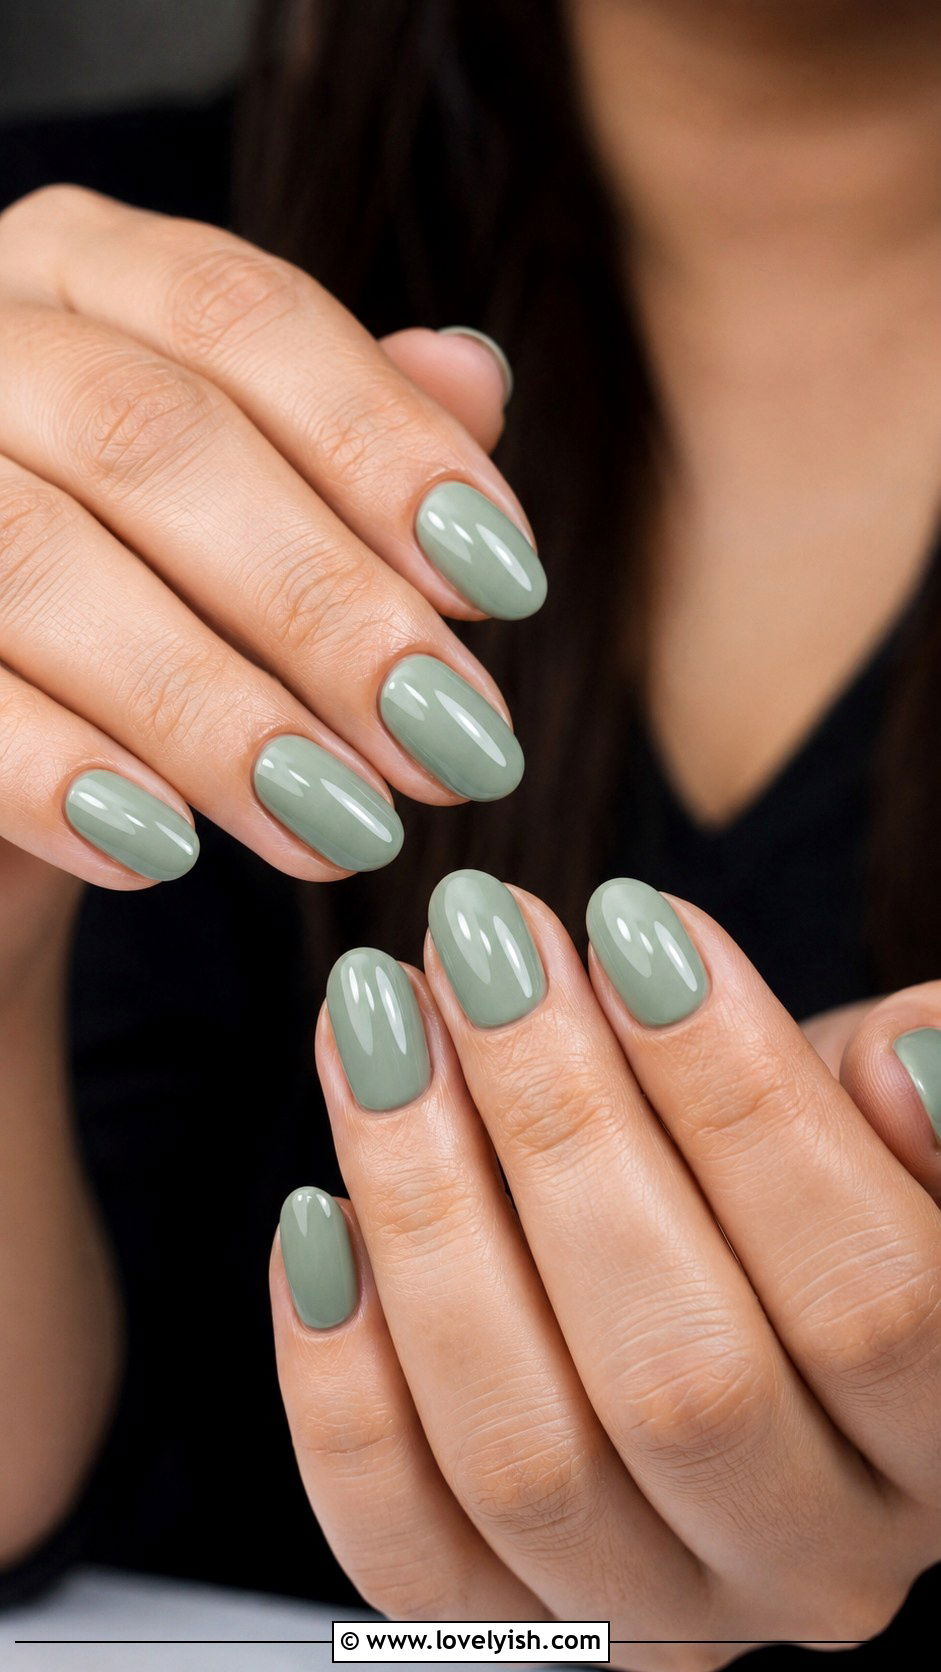
11. Sage Green Heart Nails
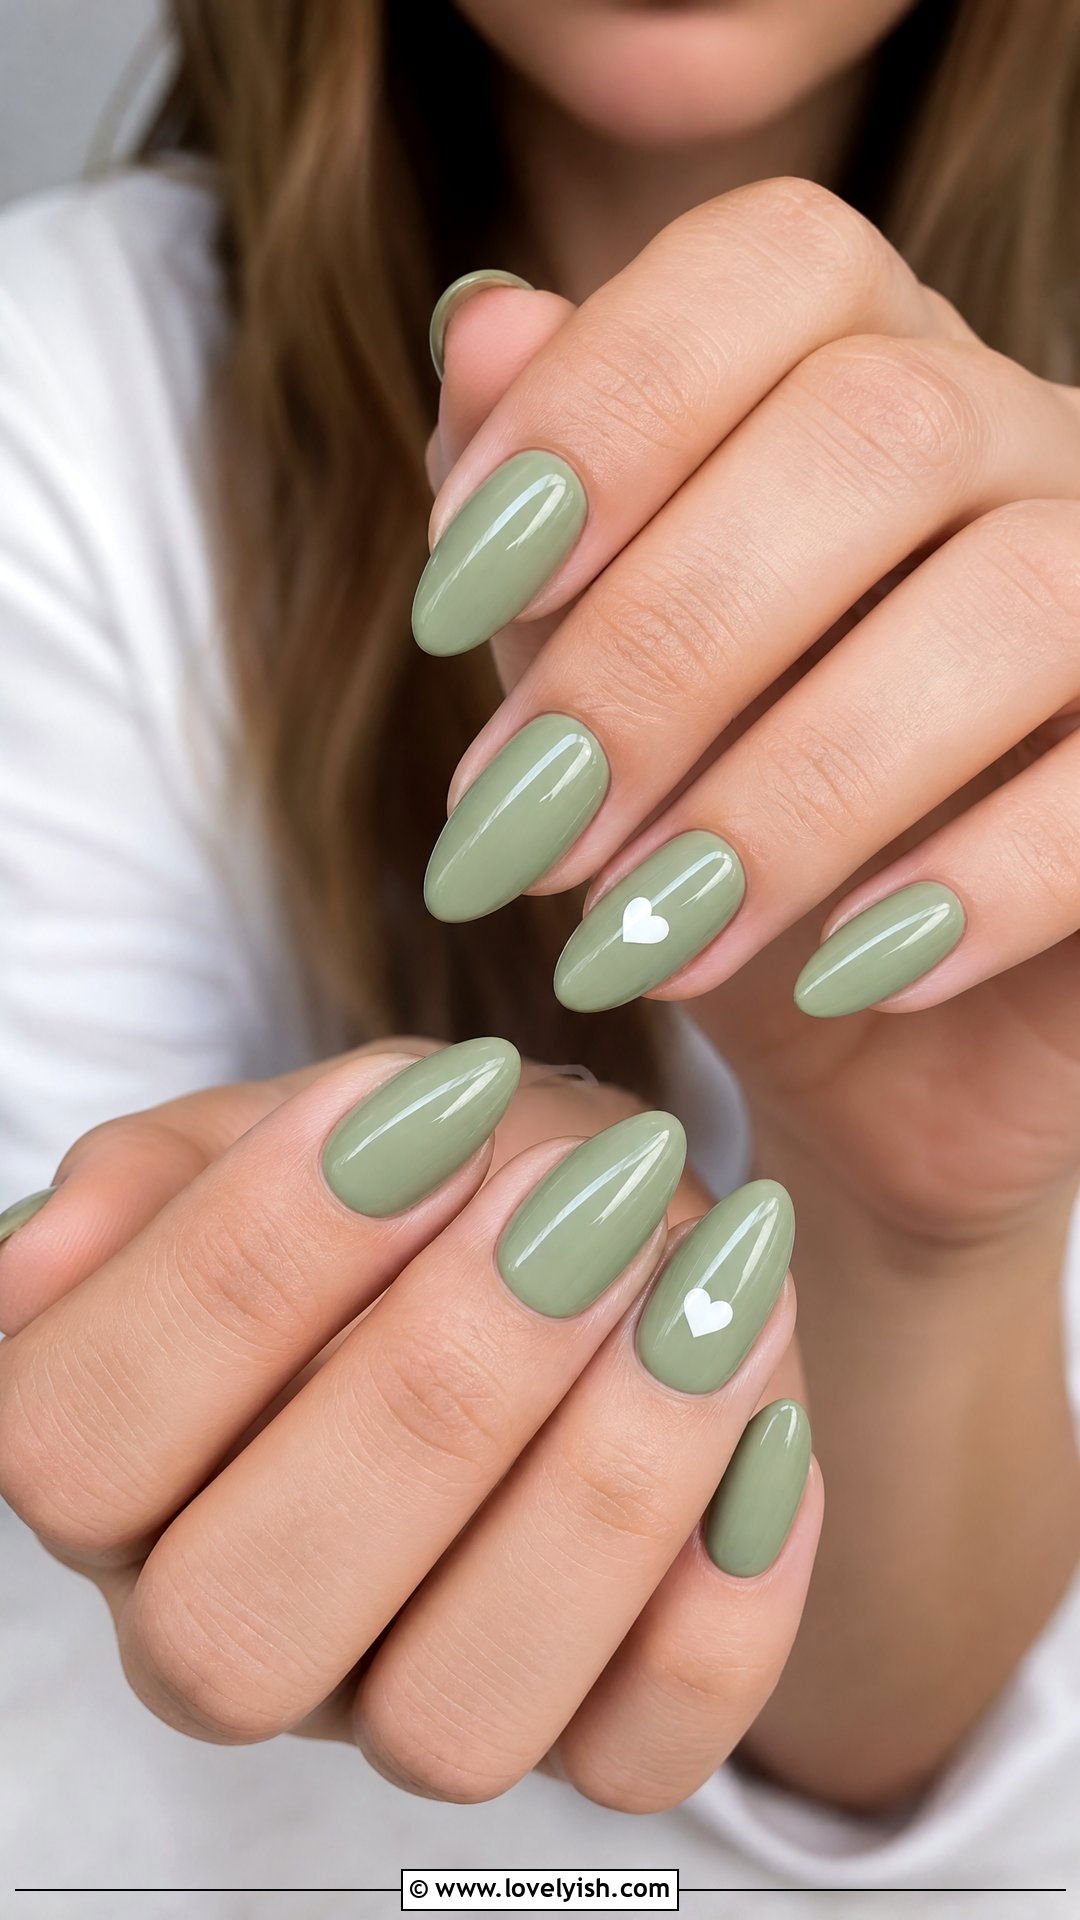
Hearts look impressively cute but require nothing more than two dots and a toothpick. Paint all five nails in a soft sage green base and let them dry fully. On just the ring finger, make two small white dots side by side, then drag the bottom edges of both dots downward into a point using a toothpick to form a tiny heart. Keep the other four nails plain sage green. Seal everything with a glossy top coat. This minimalist accent design feels modern and lighthearted without being overly girly. Sage green is universally flattering across skin tones, making this a foolproof beginner nail design for everyday wear.
12. Peach Abstract Swirl Nails
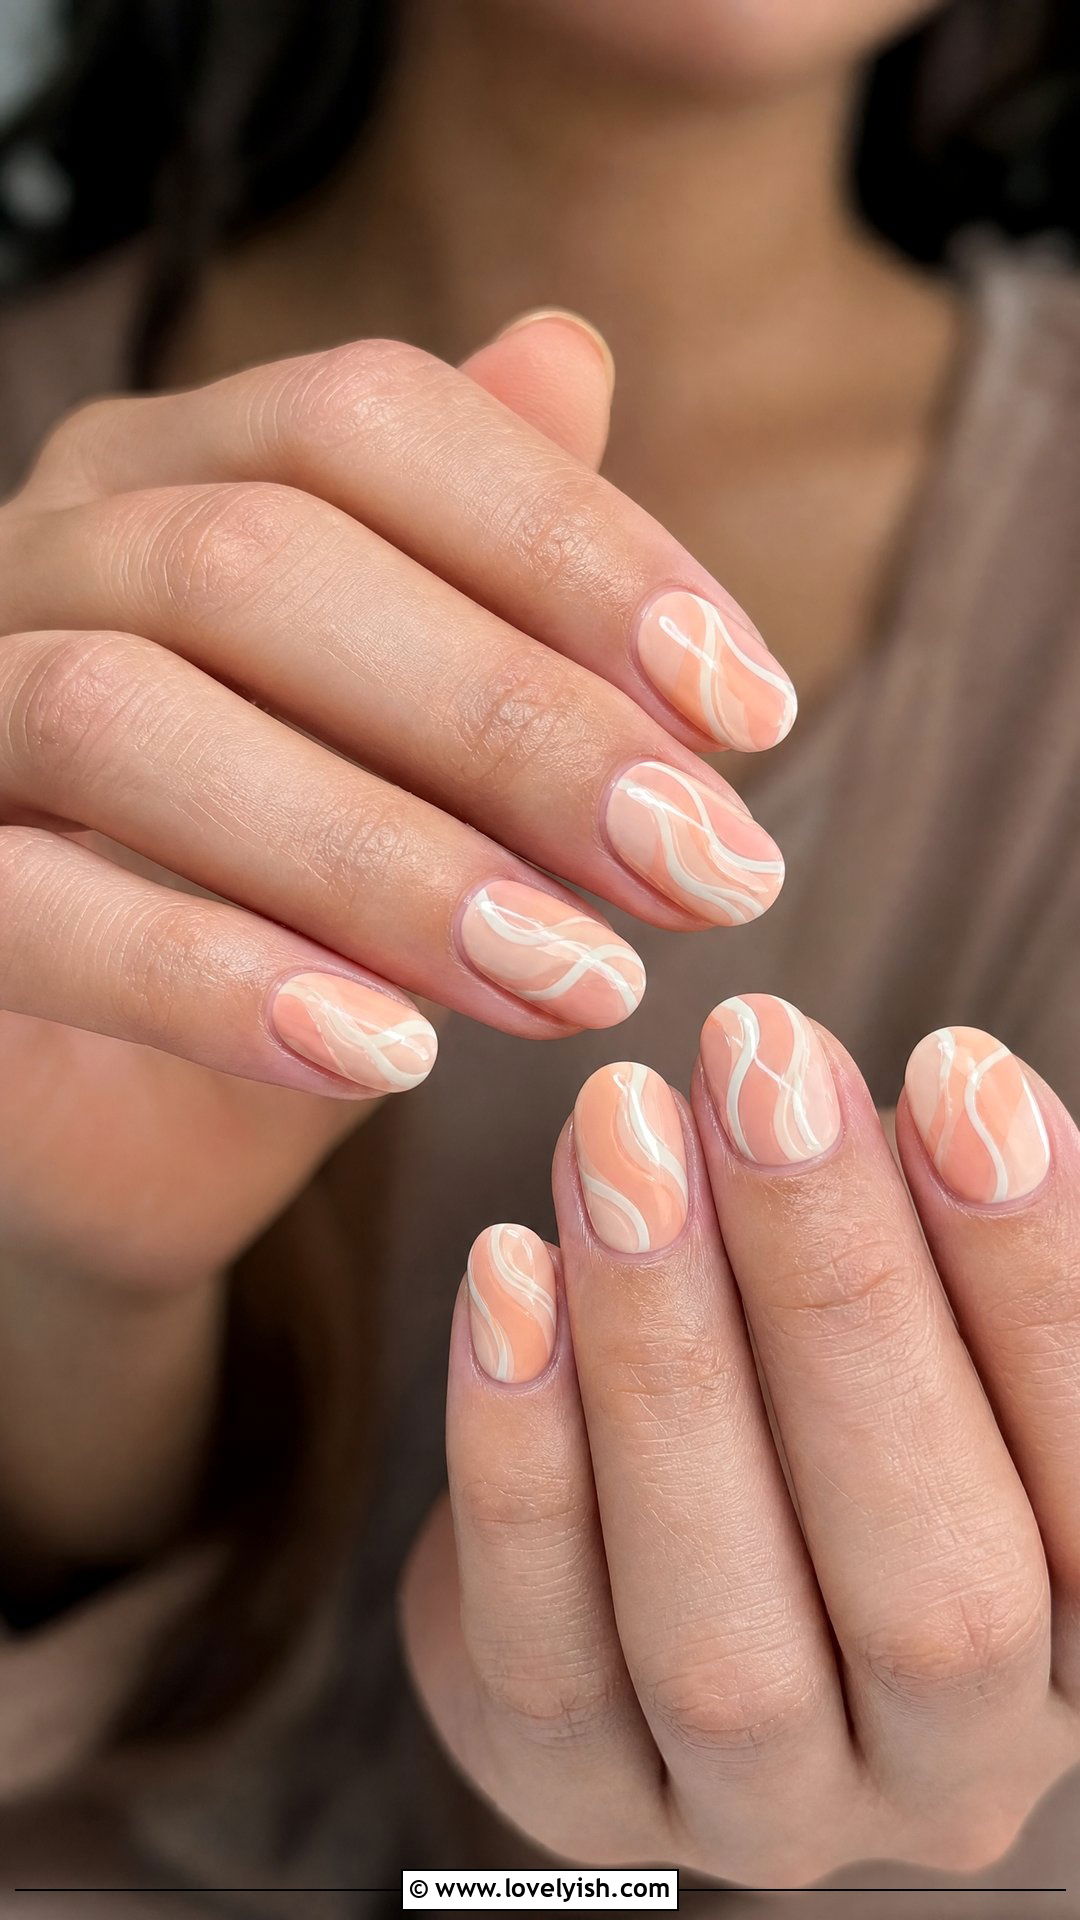
Abstract swirls are forgiving because imperfection is part of the charm. Paint all five nails with a creamy peach base. Once dry, dip a thin nail art brush or toothpick into white polish and draw soft, wavy lines across each nail in random directions. Some swirls can curve more, others can be straighter — the goal is organic movement. Don’t overthink the shapes. Finish with a glossy top coat to blend everything together. This artsy, retro look feels playful and editorial at the same time. It’s a favorite among beginners who want to experiment with freehand designs without worrying about straight lines or symmetry.
13. Beige Nails with Black Line Art
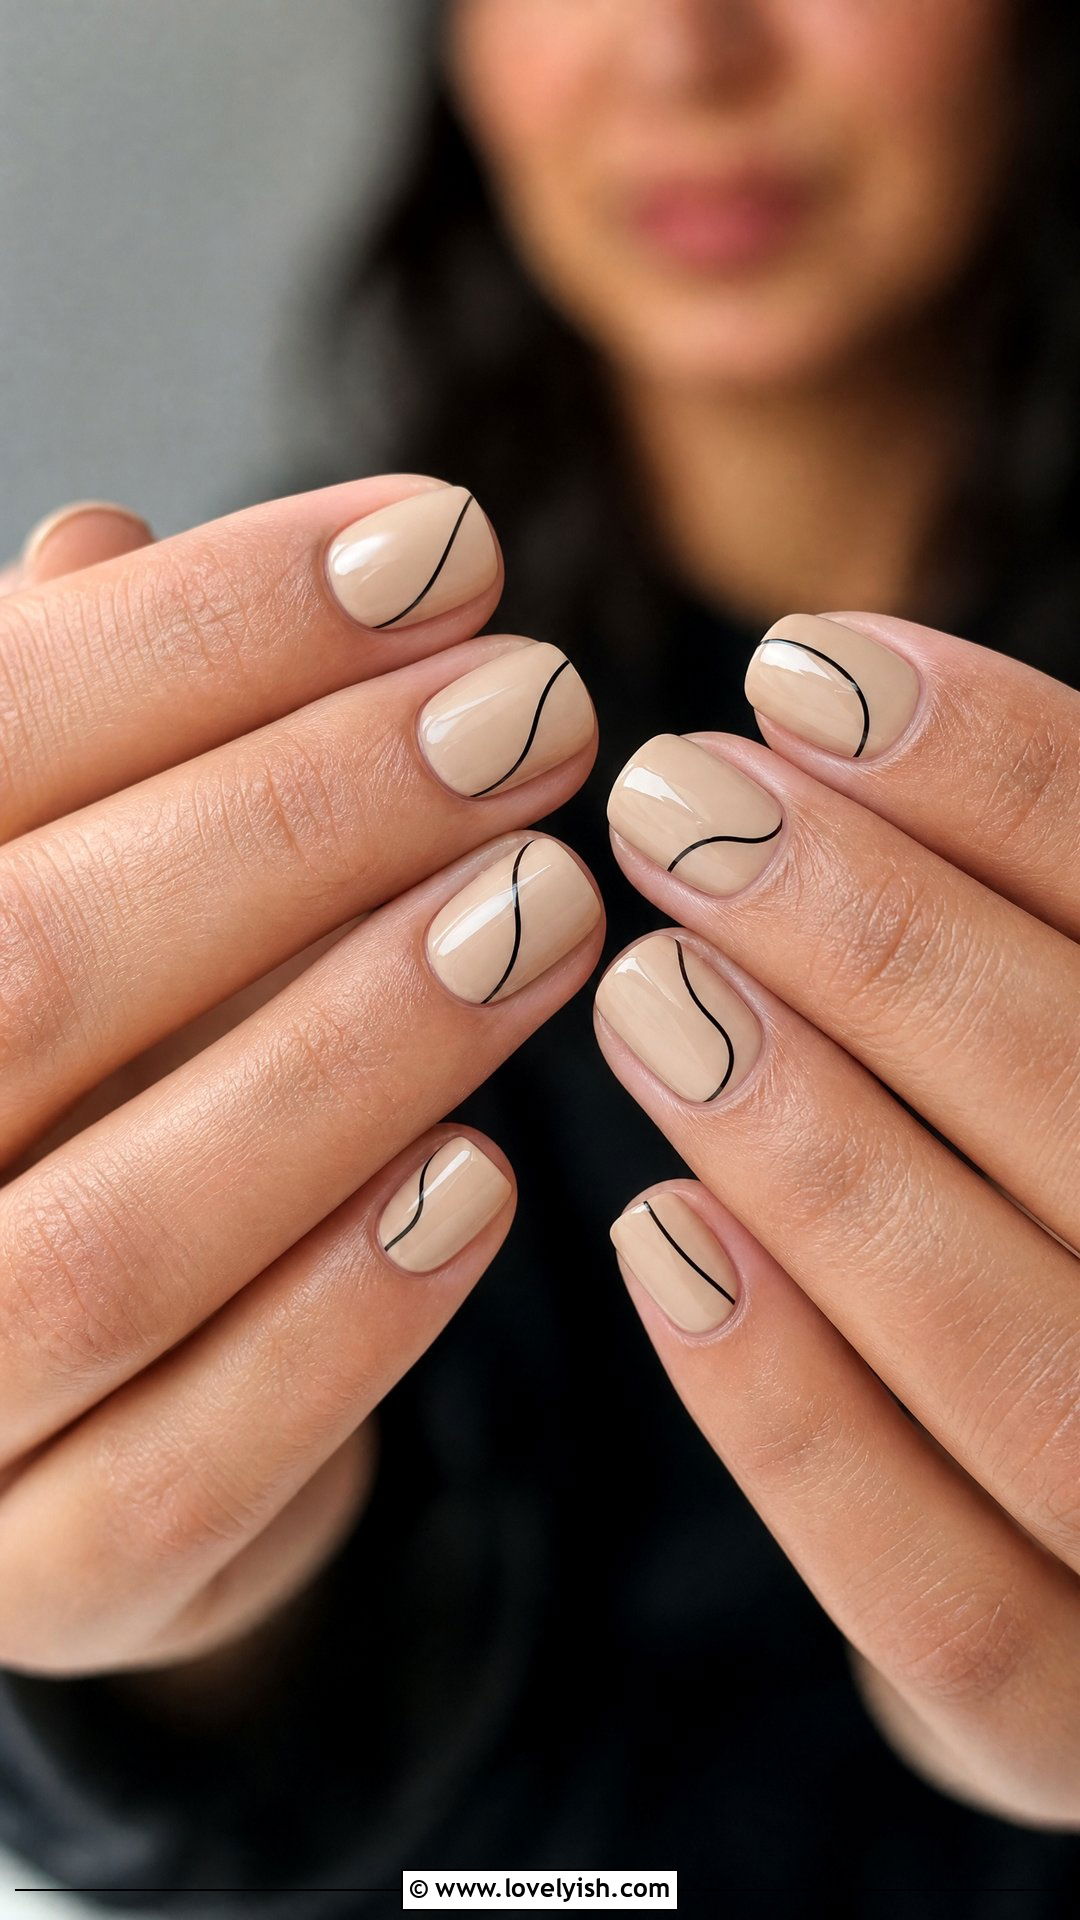
Minimalist line art looks like gallery-worthy nail design but only needs one steady stroke. Paint all five nails in a warm beige or oat tone. Once dry, use a thin striping brush dipped in black polish to draw a single asymmetrical line across each nail — try diagonal lines, gentle curves, or one squiggle per nail. Variety keeps it interesting. Don’t aim for perfection; slightly imperfect lines look more artistic. Finish with a matte or glossy top coat depending on your preference. This understated beginner design feels chic, gender-neutral, and editorial. It’s the kind of look that fits everywhere, from coffee runs to office settings to weekend outings.
14. Coral Half-Moon Nails
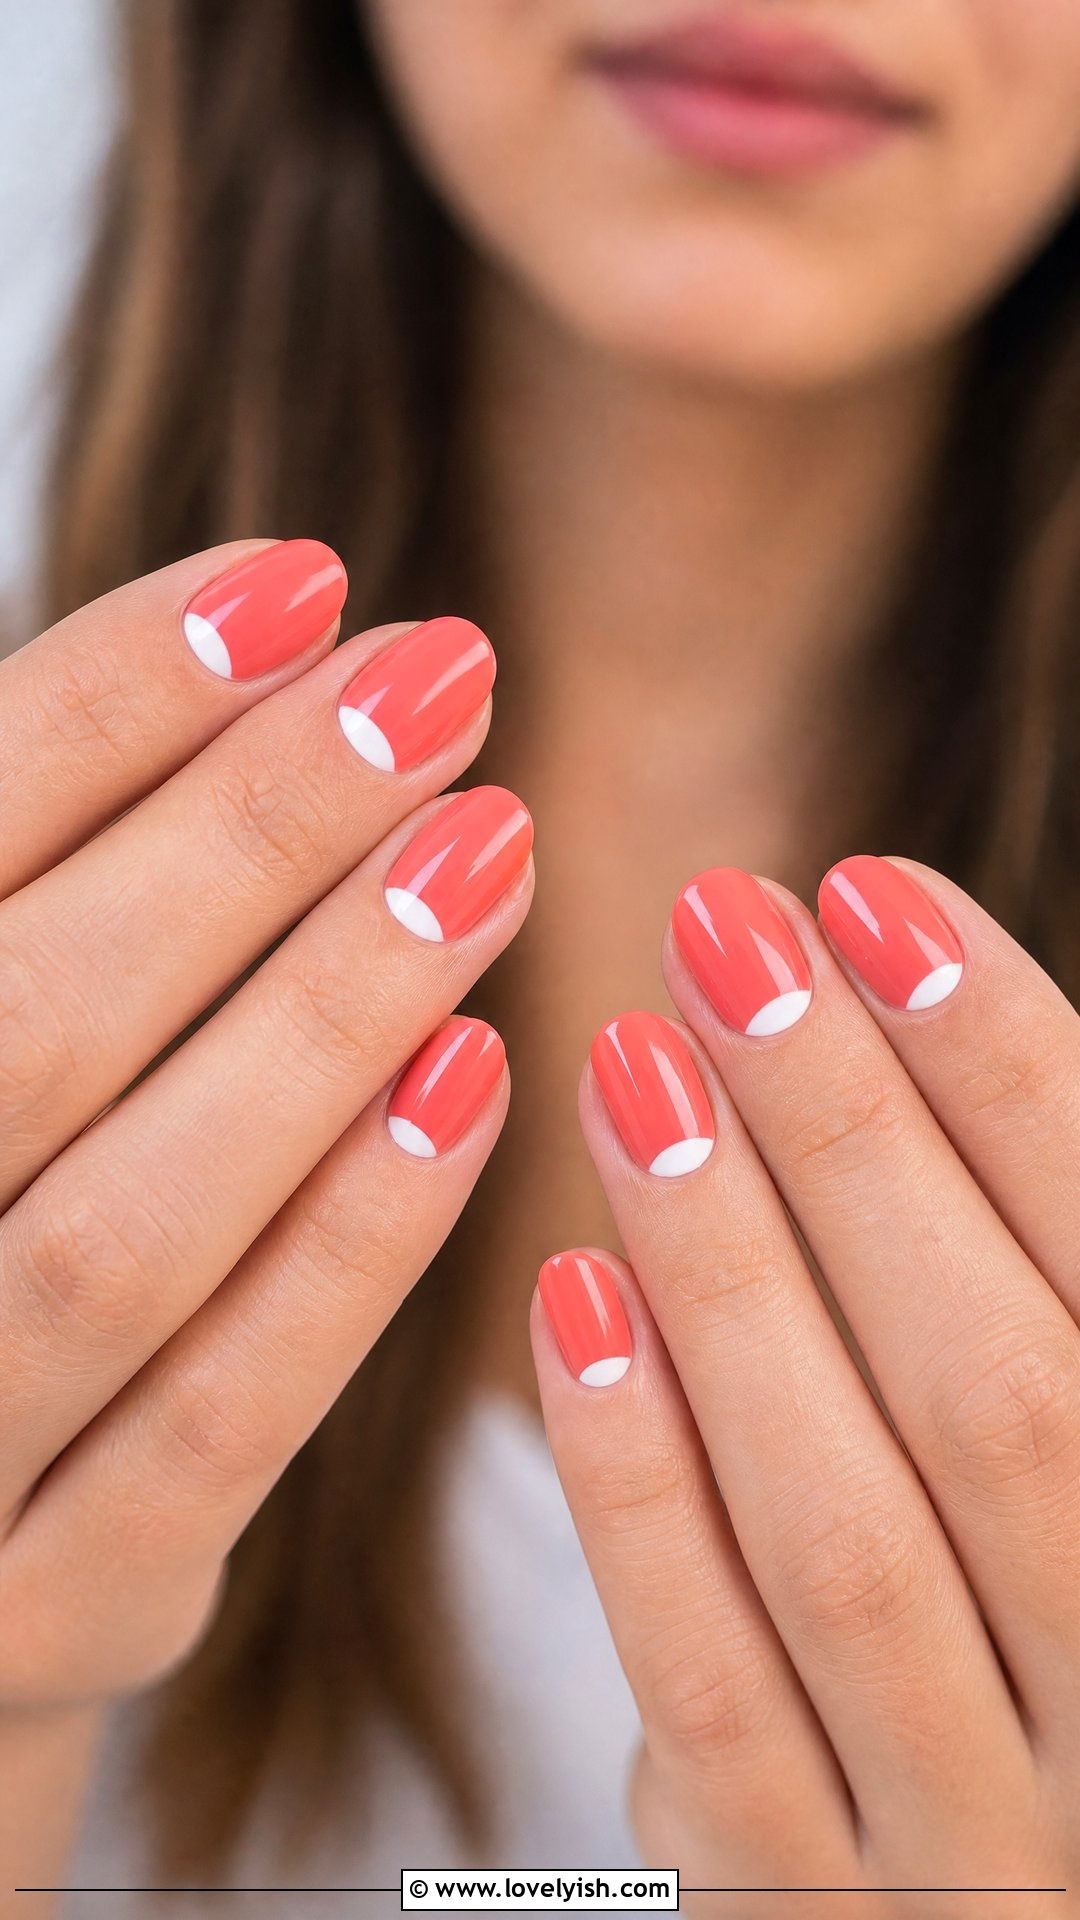
Half-moon nails offer vintage charm with a modern beginner-friendly twist. Paint all five nails with two coats of vibrant coral polish. Once fully dry, place a small round sticker (like a hole-punch reinforcer) at the base of each nail near the cuticle, leaving a curved crescent of natural nail exposed. Paint that exposed half-moon with white polish or leave it bare for negative space drama. Peel off the stickers carefully and seal with a glossy top coat. This retro-inspired look feels cheerful and bright, perfect for summer or tropical getaways. Coral universally flatters most skin tones, making this beginner design a flattering, head-turning choice.
15. Glossy Mauve Single Stripe Nails
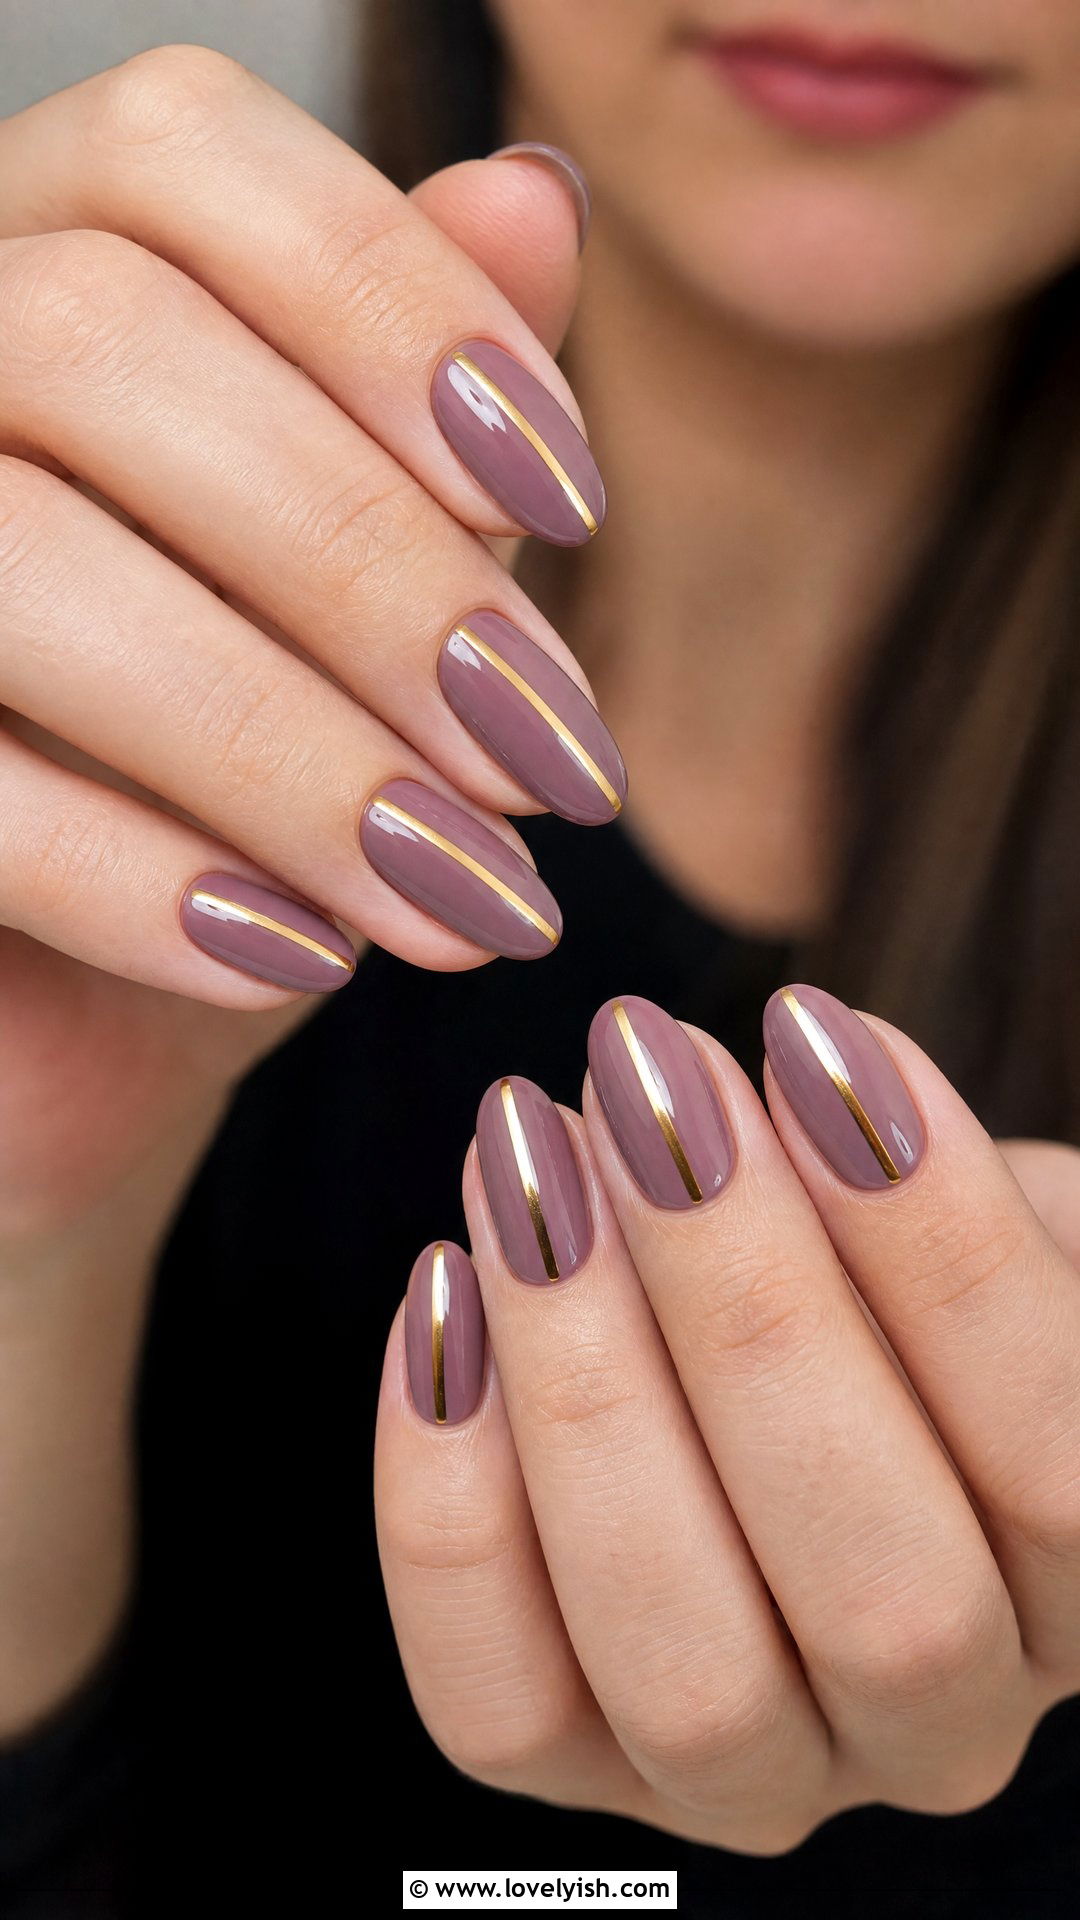
Sometimes one simple stripe is all you need. Paint all five nails with two coats of dusty mauve polish for a sophisticated, muted base. Once dry, use a thin striping brush or nail tape to draw one vertical or horizontal gold metallic line across each nail. Keep the placement consistent — all vertical down the center, or all horizontal across the tip. Finish with a glossy top coat. This refined, grown-up beginner nail design feels polished and intentional without requiring intricate skill. The mauve and gold combination reads luxe and timeless, making it ideal for work events, dinners with friends, or anytime you want a quietly elegant manicure.
16. White Smiley Face Nails
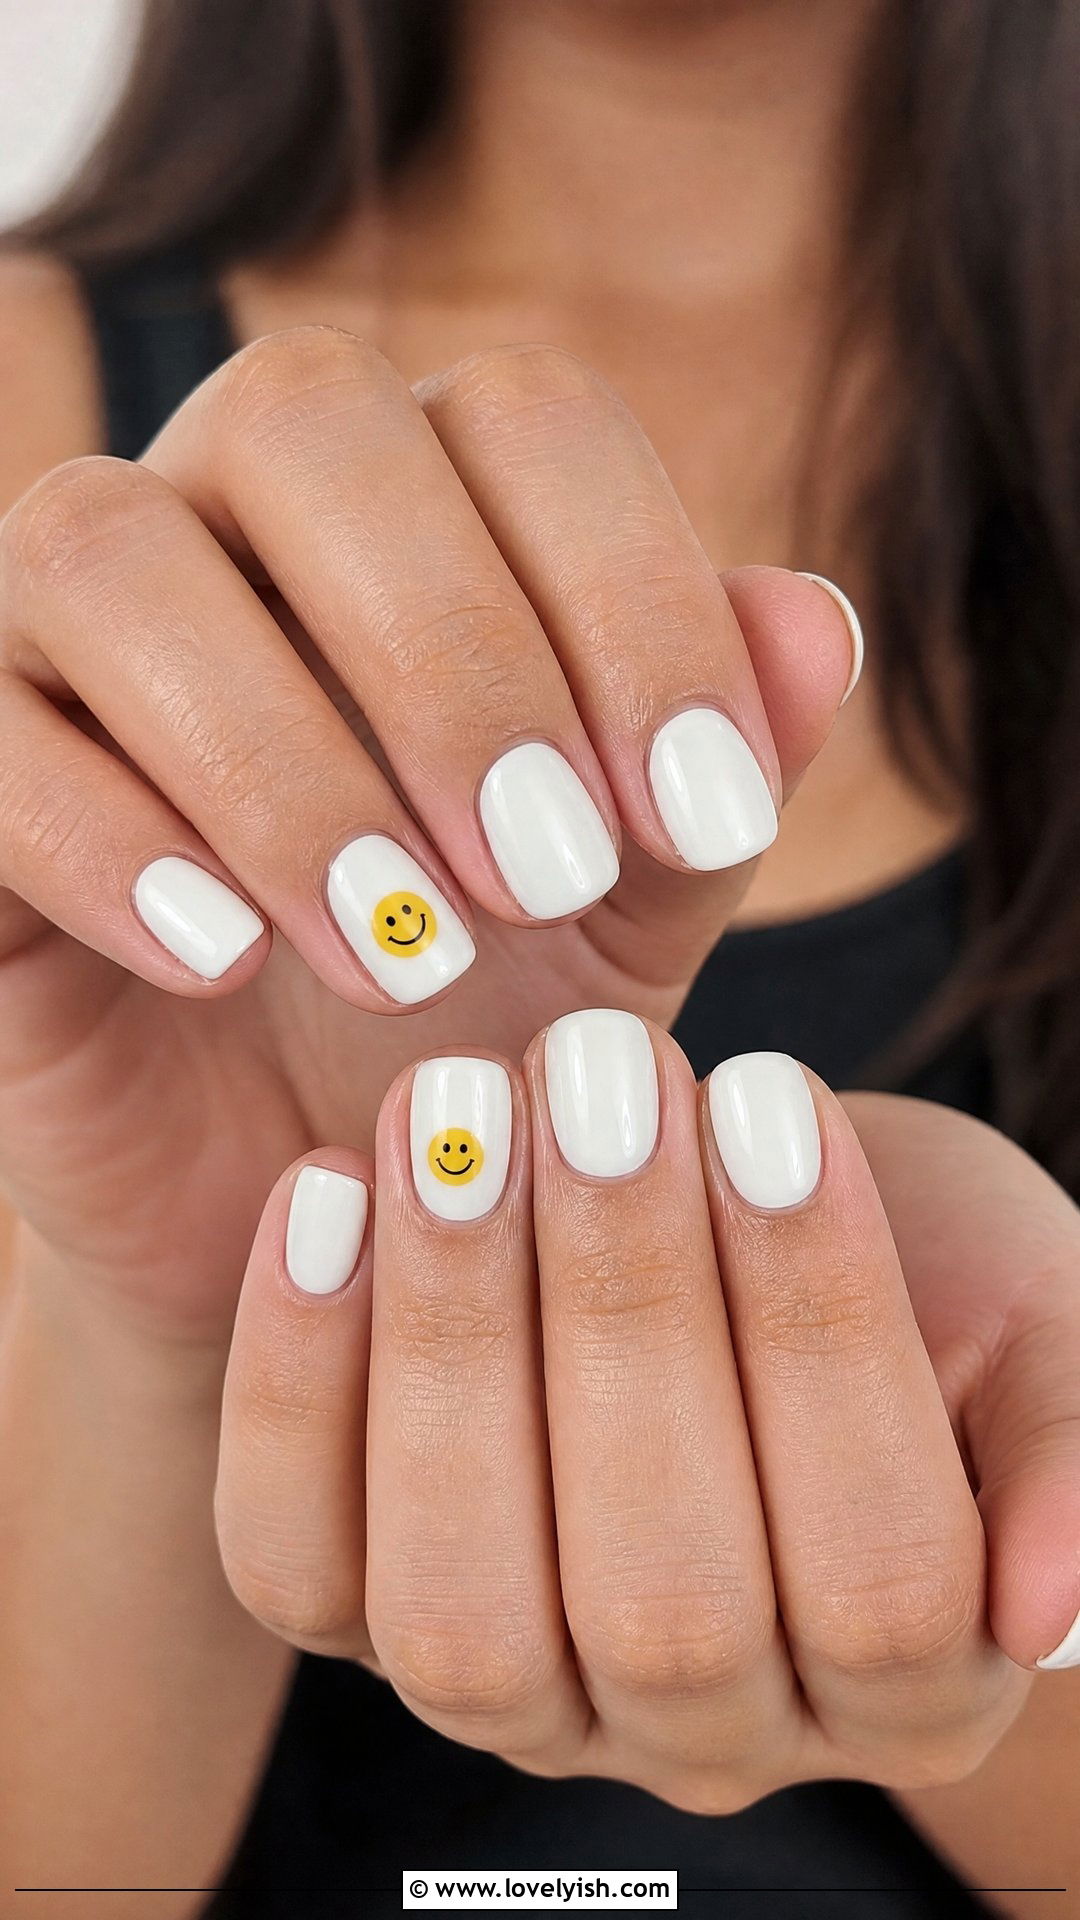
Smiley face nails bring instant joy and they’re shockingly easy. Paint all five nails in a creamy white base. Once dry, use yellow polish and a dotting tool to create one small filled-in circle on each ring finger. While the yellow is still wet, dip a toothpick into black polish and add two tiny dots for eyes and a small curved line for the smile. The other four nails stay plain white. Top with a glossy finish. This nostalgic, retro-inspired beginner design adds personality without being overly busy. It’s especially fun for casual outings, festivals, or anyone who loves a playful, conversation-starting manicure.
17. Pink and White Color Block Nails
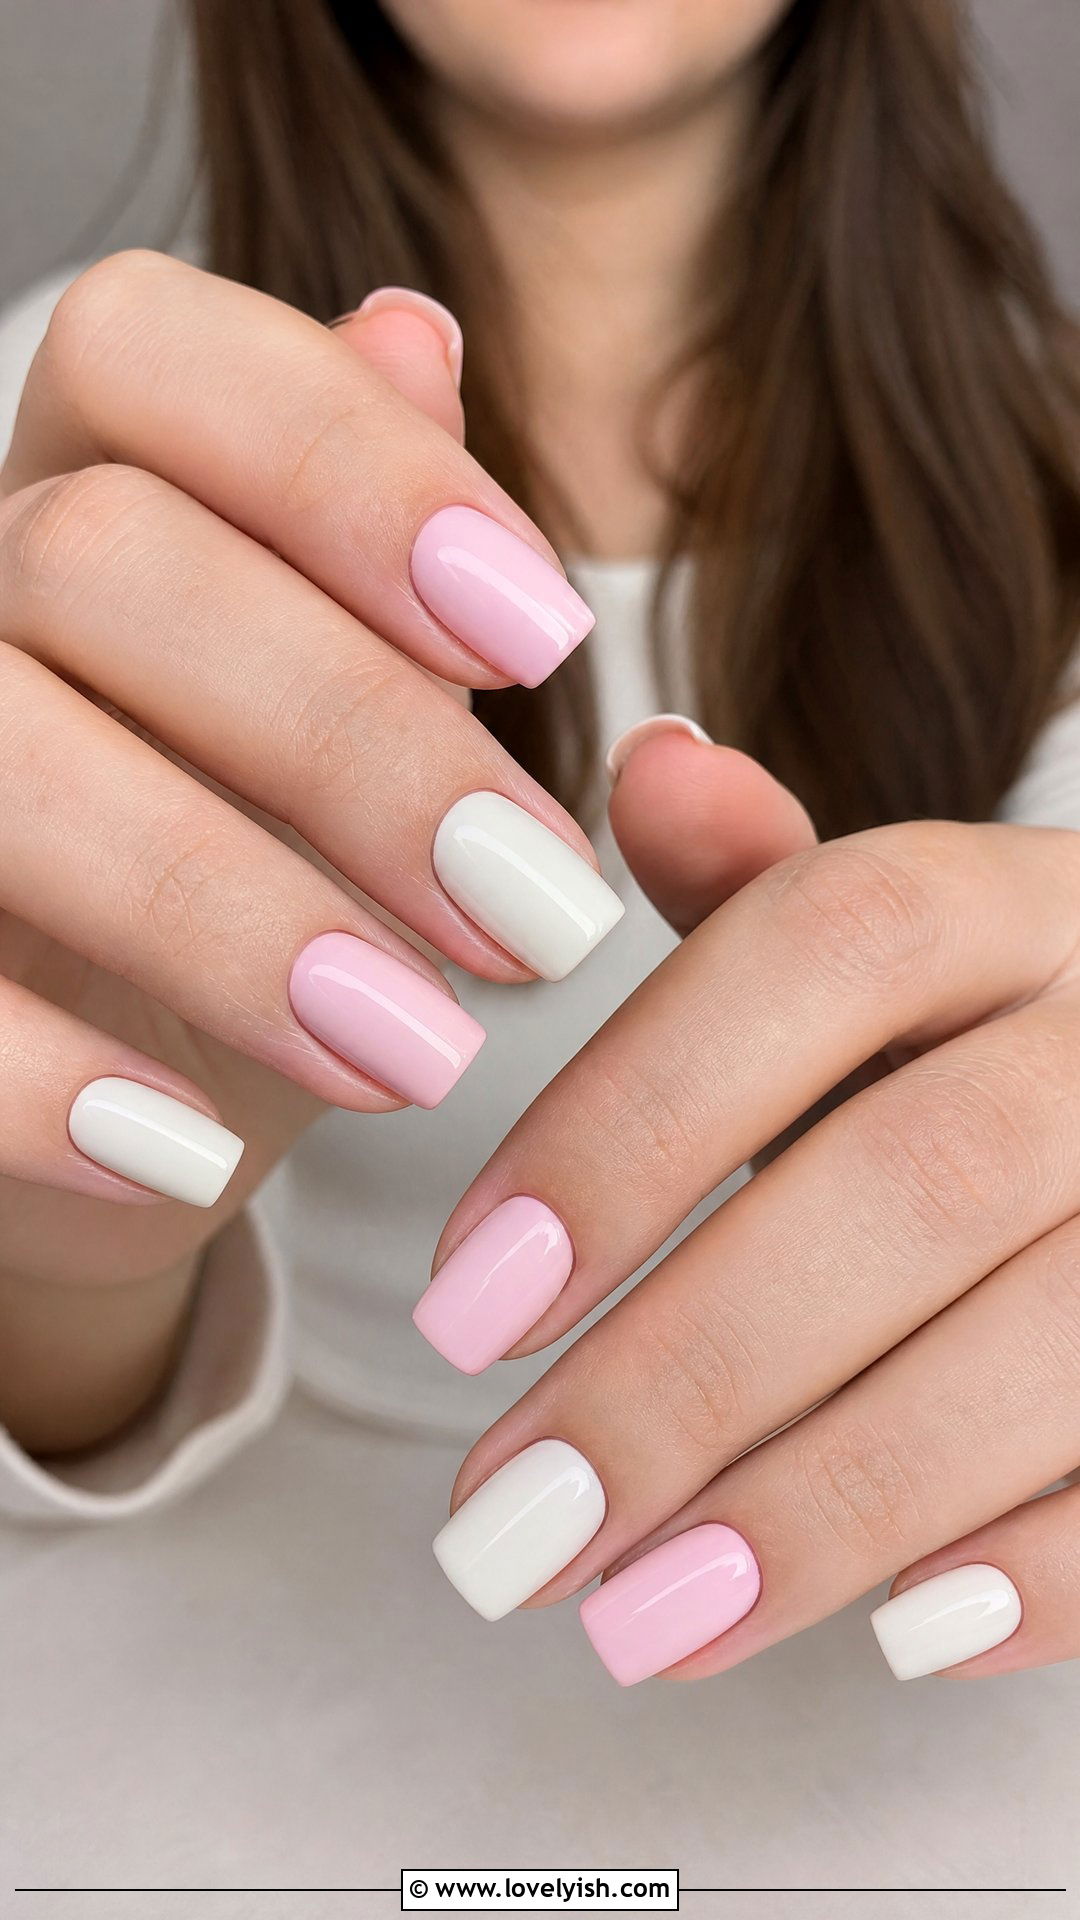
Color blocking is one of the cleanest beginner techniques you can learn. Paint two nails (like the thumb and middle finger) with a soft baby pink polish and the remaining three nails with a creamy white. Mix up the order on each hand for a modern asymmetric feel. Make sure to apply two even coats of each color so the finish looks crisp. Seal everything with a glossy top coat. This minimalist beginner nail design feels fresh, contemporary, and editorial without requiring any actual nail art skills. It’s incredibly versatile — swap in any two coordinating colors like sage and cream, or peach and lilac.
18. Glazed Donut Pearl Nails
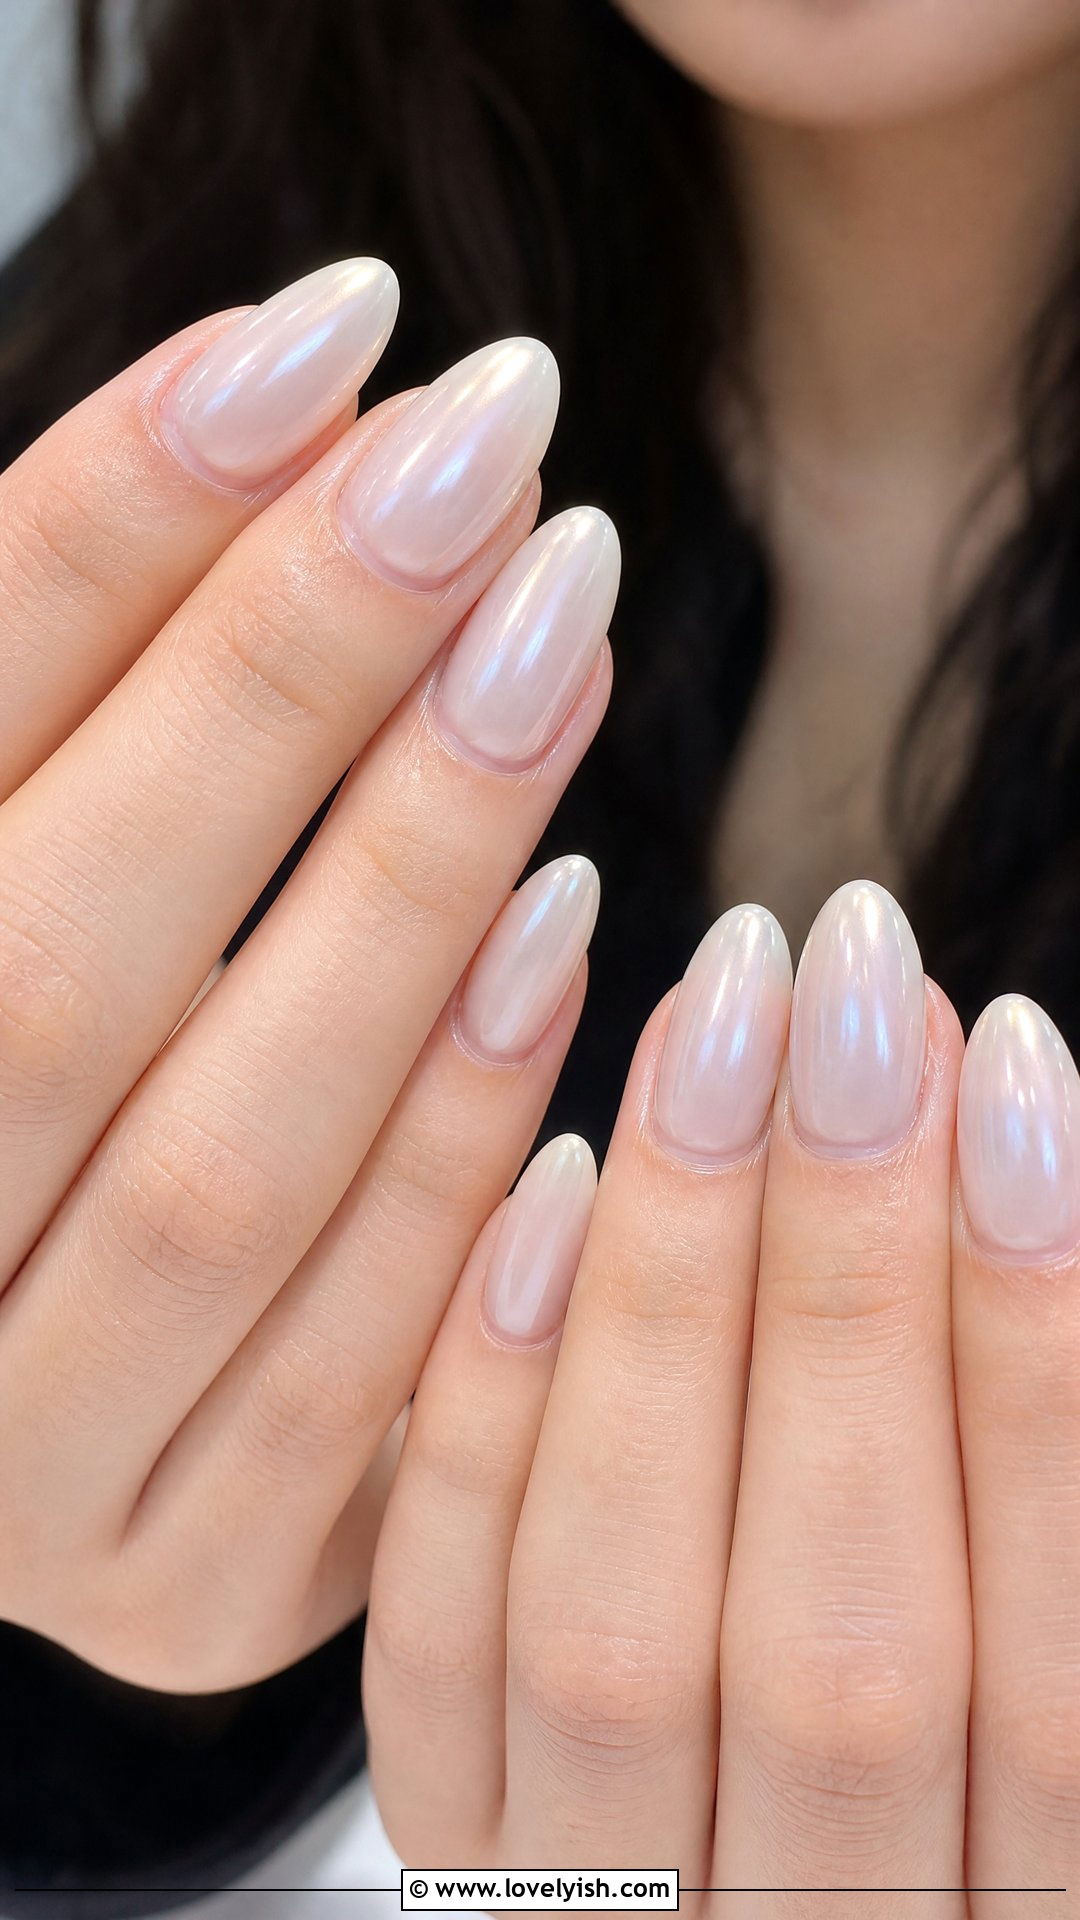
Glazed donut nails took over the internet for a reason — they’re dreamy and beginner-approved. Paint all five nails with a sheer milky white or light pink base. Once dry, layer a pearl or chrome powder top coat over each nail using a small applicator sponge or your fingertip, buffing gently until the surface looks iridescent and shimmery. Seal with a clear glossy top coat to lock in the shine. This soft, luminous look feels luxurious and clean, flattering every skin tone. It’s perfect for beginners who want a high-end finish without learning detailed designs. The shimmer does all the visual work for you.
19. Yellow Sunflower Accent Nails
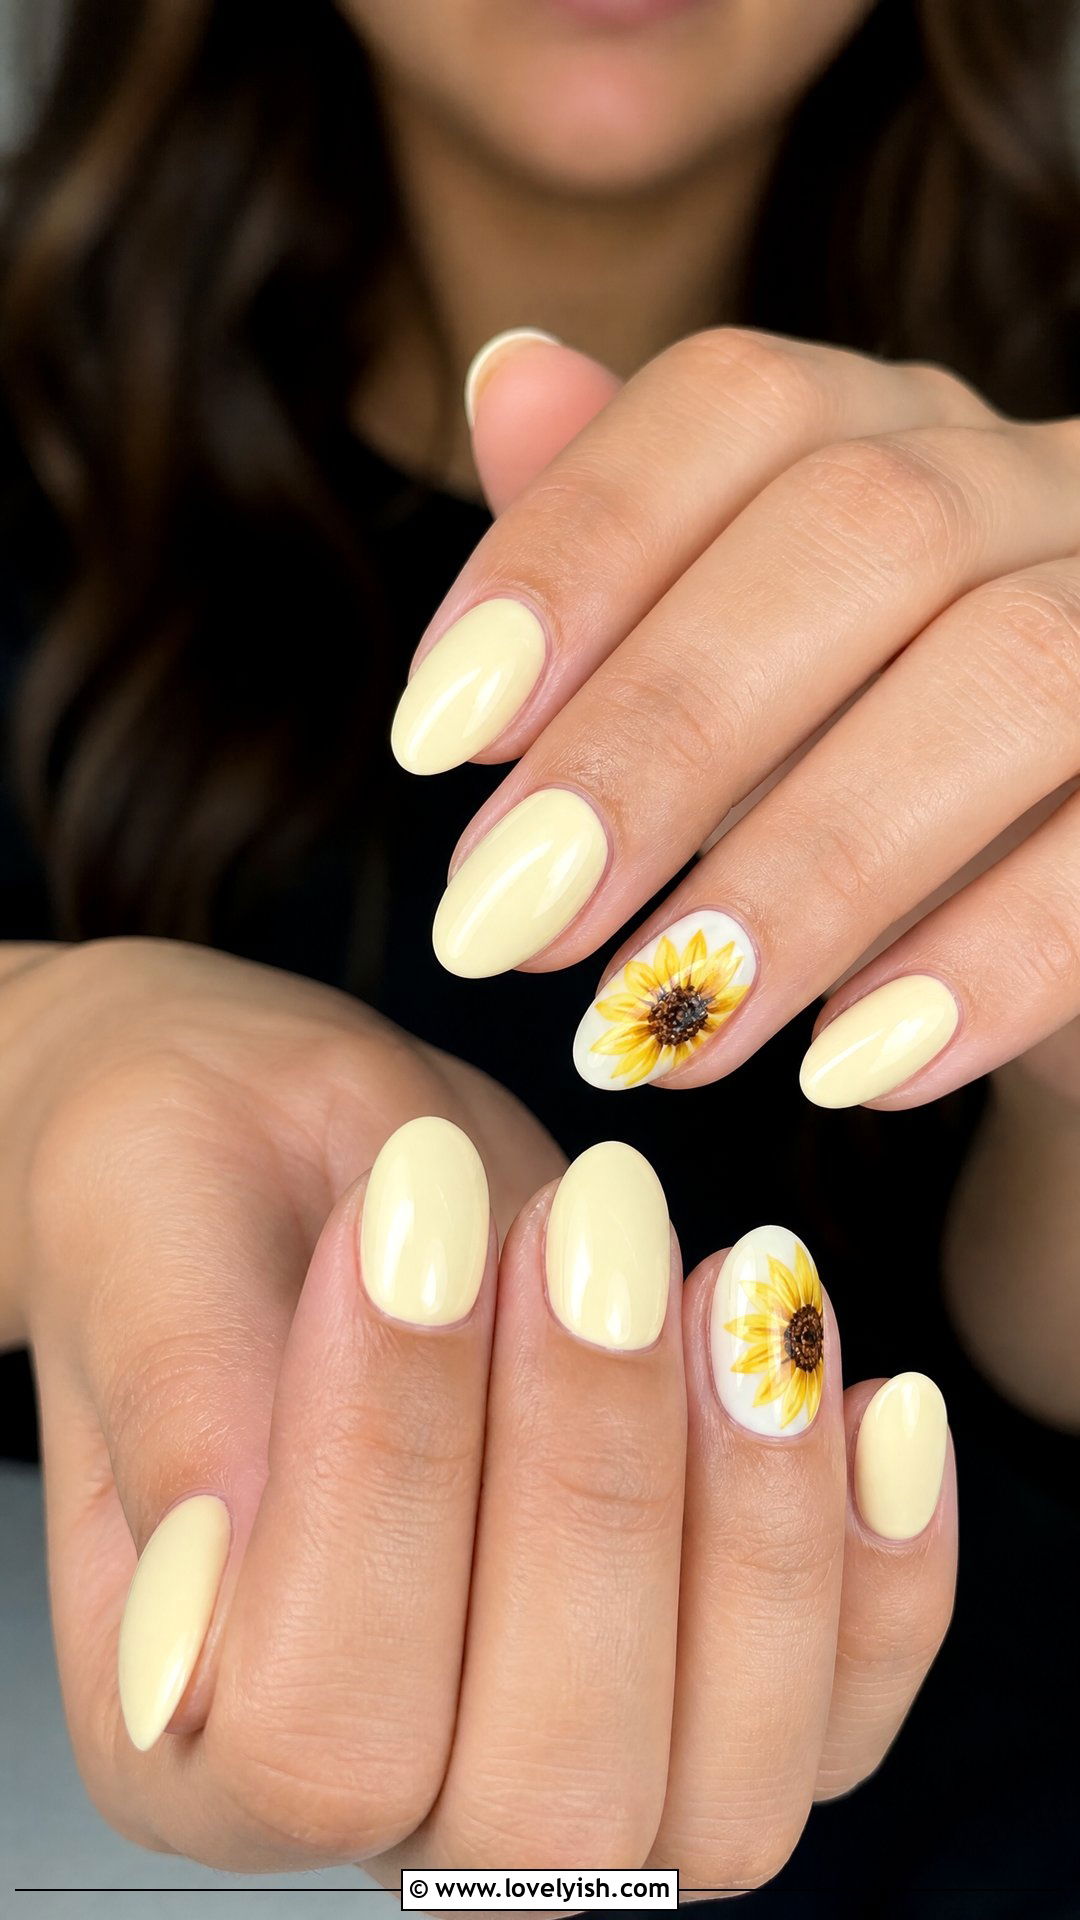
Sunflower nails feel cheerful and sunshine-coded for warm-weather days. Paint all five nails in a creamy off-white base. On the ring finger, use yellow polish and a dotting tool to create five or six small dots in a circle, forming the petals of a sunflower. Once dry, add a brown or dark amber dot in the center. Add a tiny green leaf detail near the bottom edge using a toothpick. The other four nails stay neutral. Top with a glossy finish. This whimsical, summery beginner design works beautifully on short and medium nail lengths. It’s a sweet way to bring florals into your manicure without freehand painting.
20. Sky Blue Star Nails
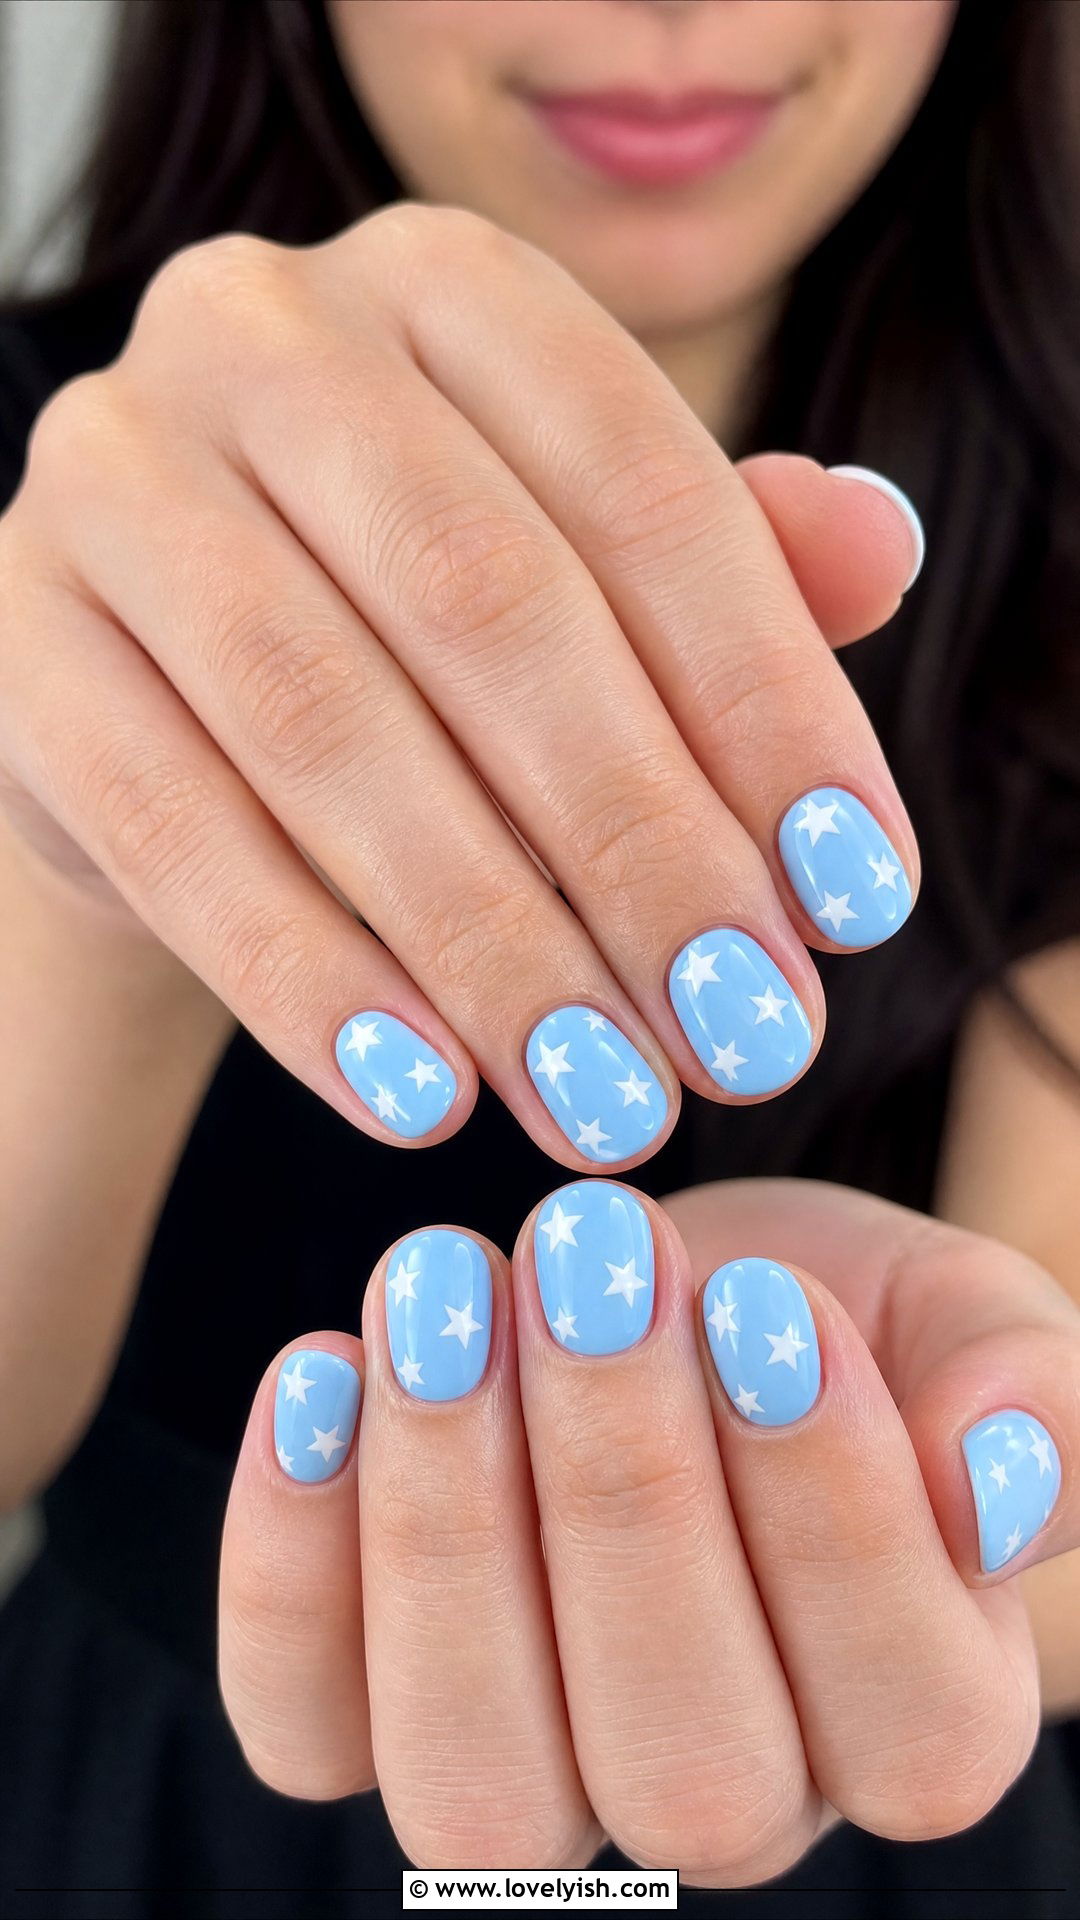
Stars are easier to draw than you’d think when you use the dot method. Paint all five nails with a soft sky blue base. Once dry, use white polish and a thin striping brush or toothpick to draw small five-point stars by making one center line and crossing it with two diagonal strokes. Scatter two or three stars per nail in random placement. Don’t worry about perfect symmetry — slightly uneven stars look more dreamy. Finish with a glossy top coat. This celestial-inspired beginner nail design feels magical and youthful. It pairs beautifully with summer dresses, denim, or any outfit that calls for a touch of whimsy.
21. Lilac Rhinestone Accent Nails
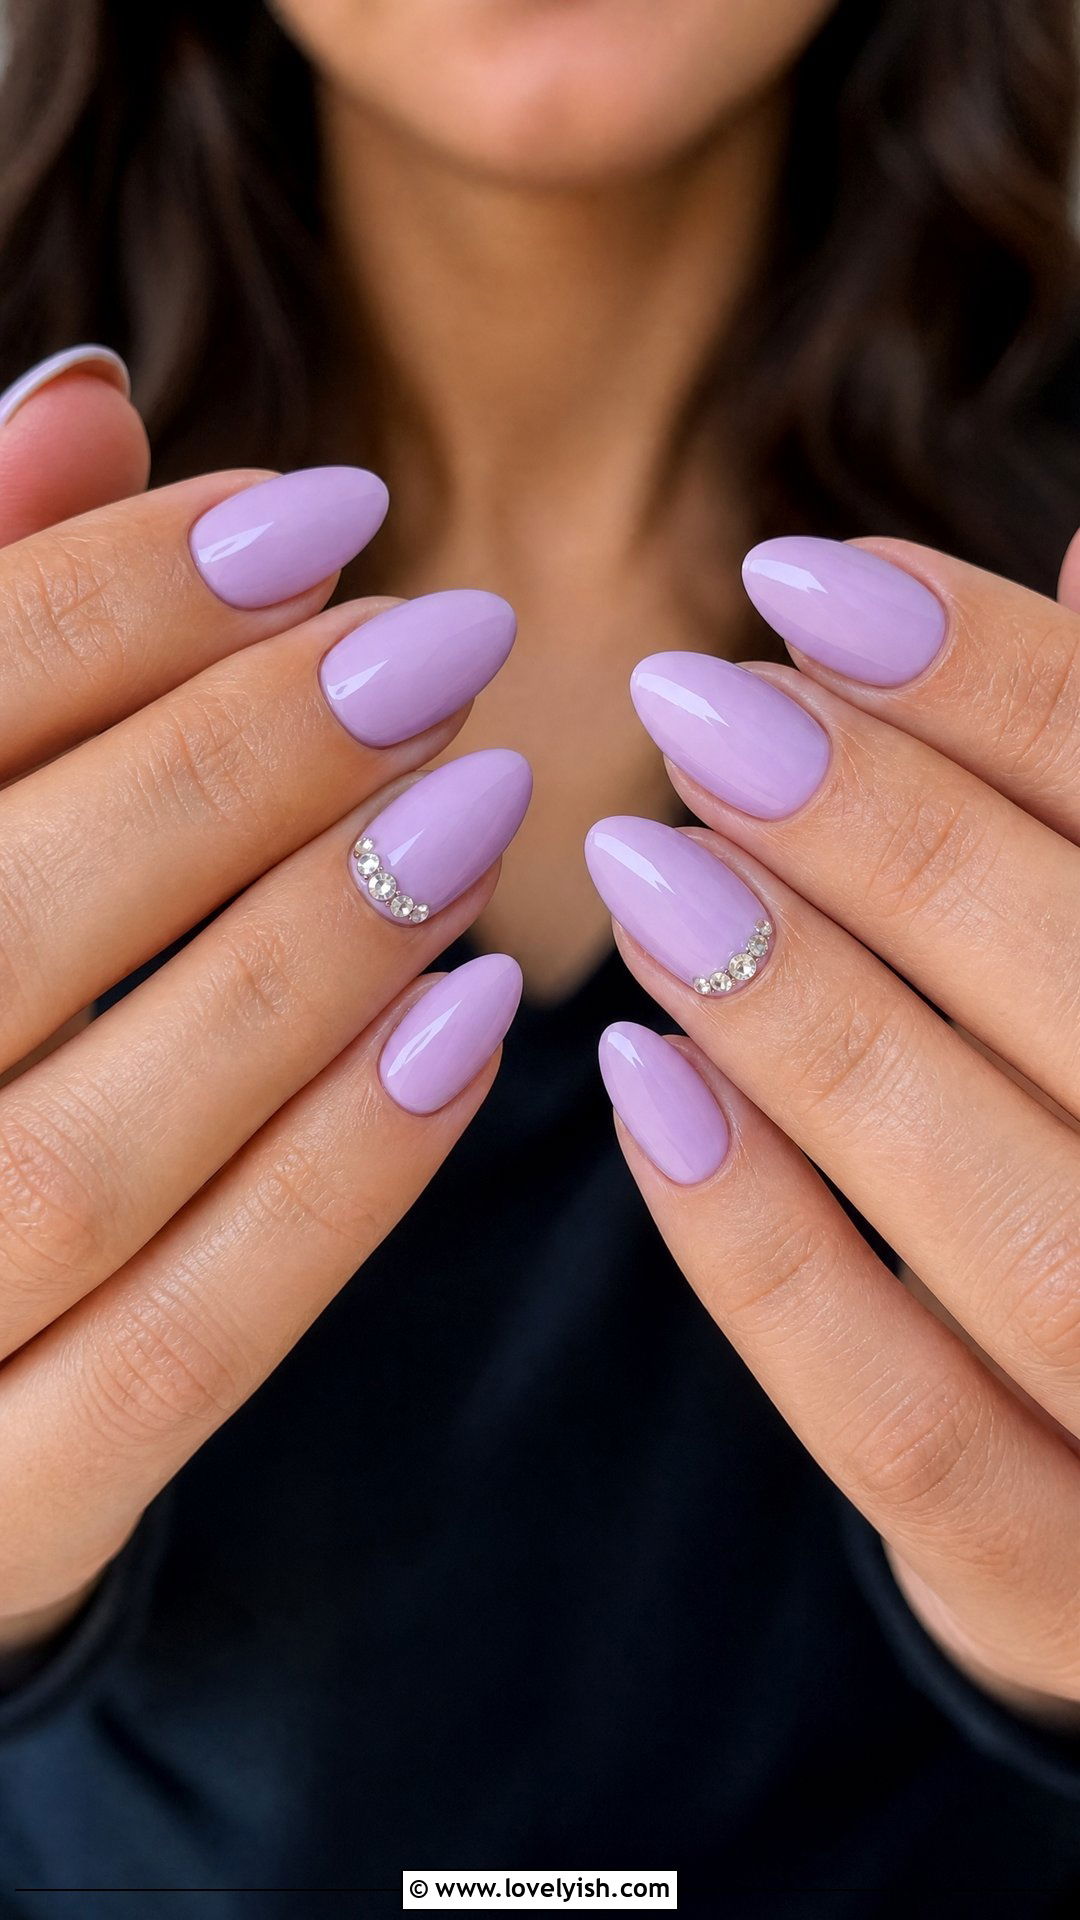
Adding rhinestones is the easiest way to elevate a basic mani into something special. Paint all five nails with two coats of light lilac polish. While the polish on your ring finger is still slightly tacky, use tweezers to place two or three small clear rhinestones along the cuticle line or in a small cluster. Press gently to secure them. Seal everything with a thick glossy top coat, dabbing extra around the rhinestones to lock them in. This beginner-friendly design looks bridal, polished, and feminine. Lilac feels especially fresh in spring and summer, while the rhinestones add just enough sparkle without going overboard.
22. Nude Nails with Negative Space Tip
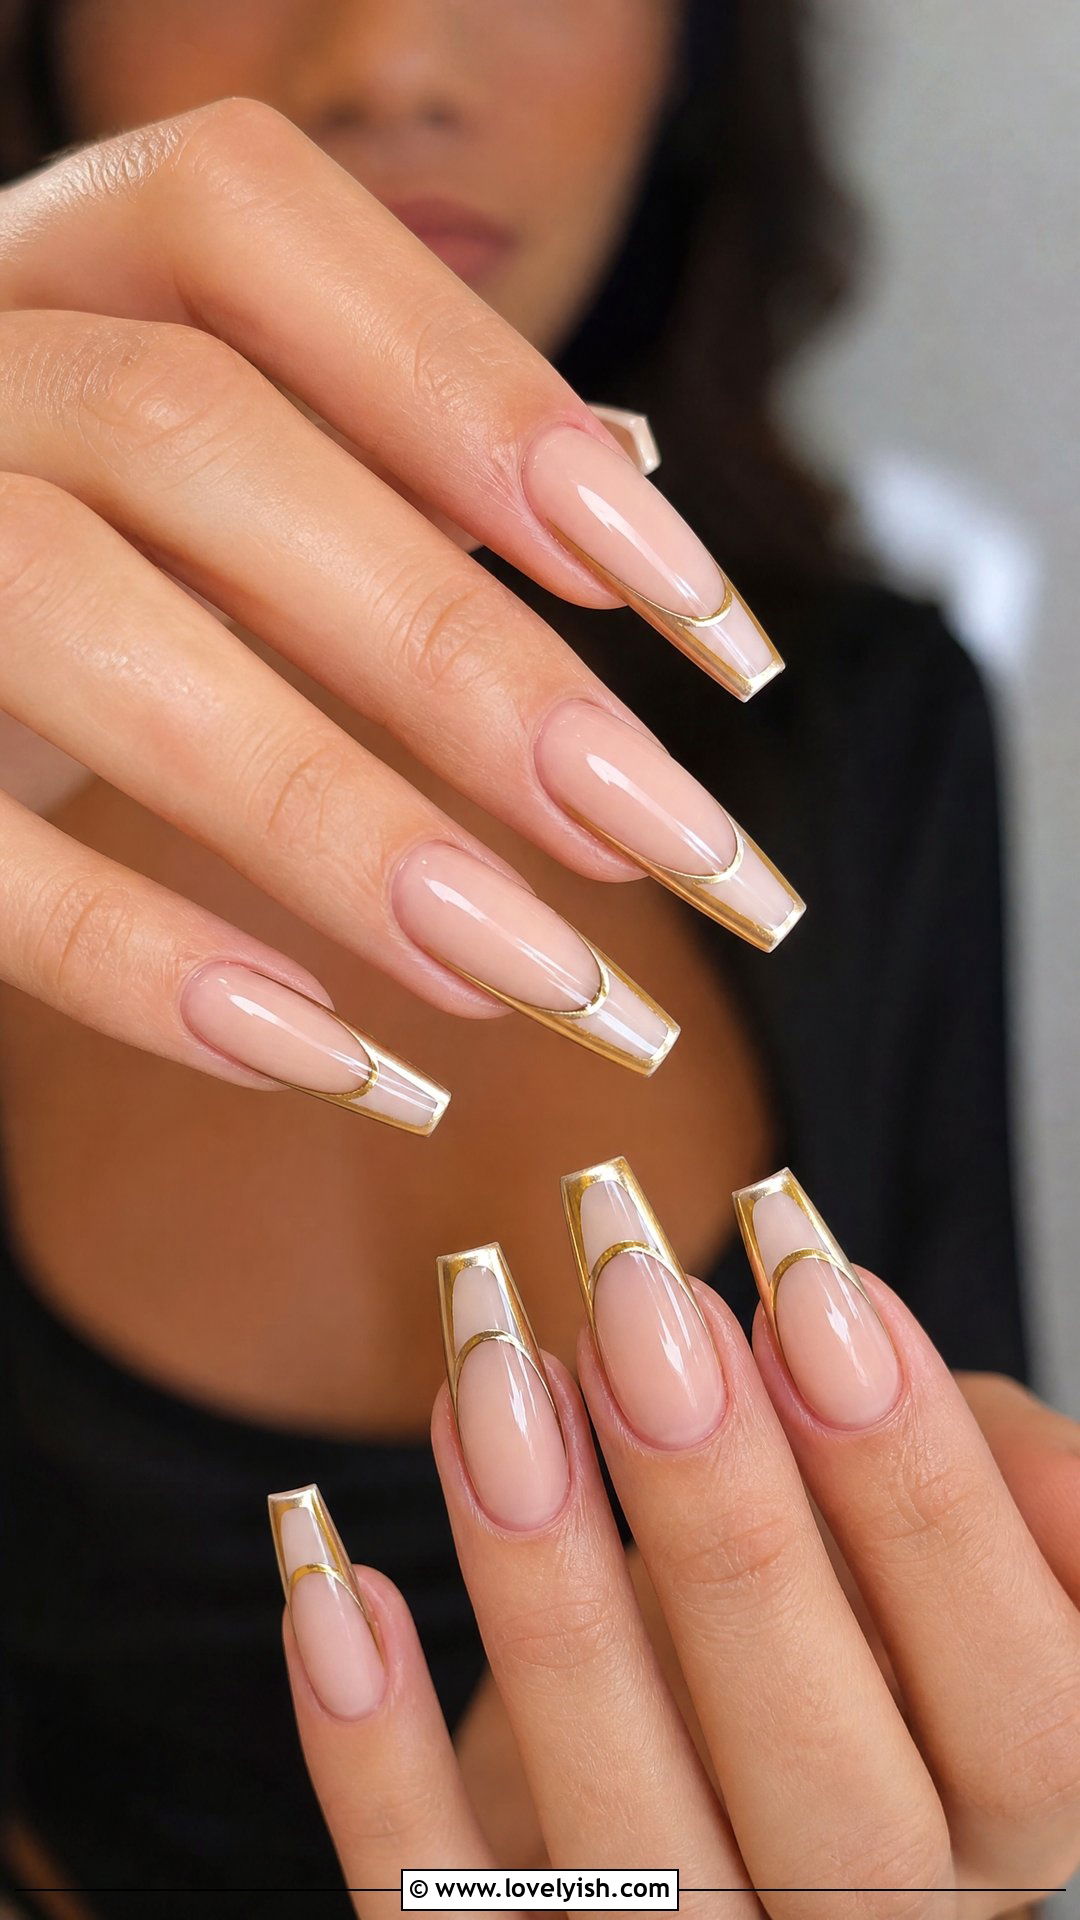
Negative space designs feel modern and minimal while staying super beginner-friendly. Apply a clear or sheer nude polish across all five nails as your base. Once dry, place French tip guide stickers across the smile line of each nail, but instead of painting white, use a metallic gold or soft pink polish for the tips. The natural nail showing through underneath creates that “negative space” effect. Peel the stickers off carefully and finish with a glossy top coat. This sleek, contemporary beginner nail design is perfect for anyone who loves understated style. It works for any occasion, from job interviews to weekend outings with friends.
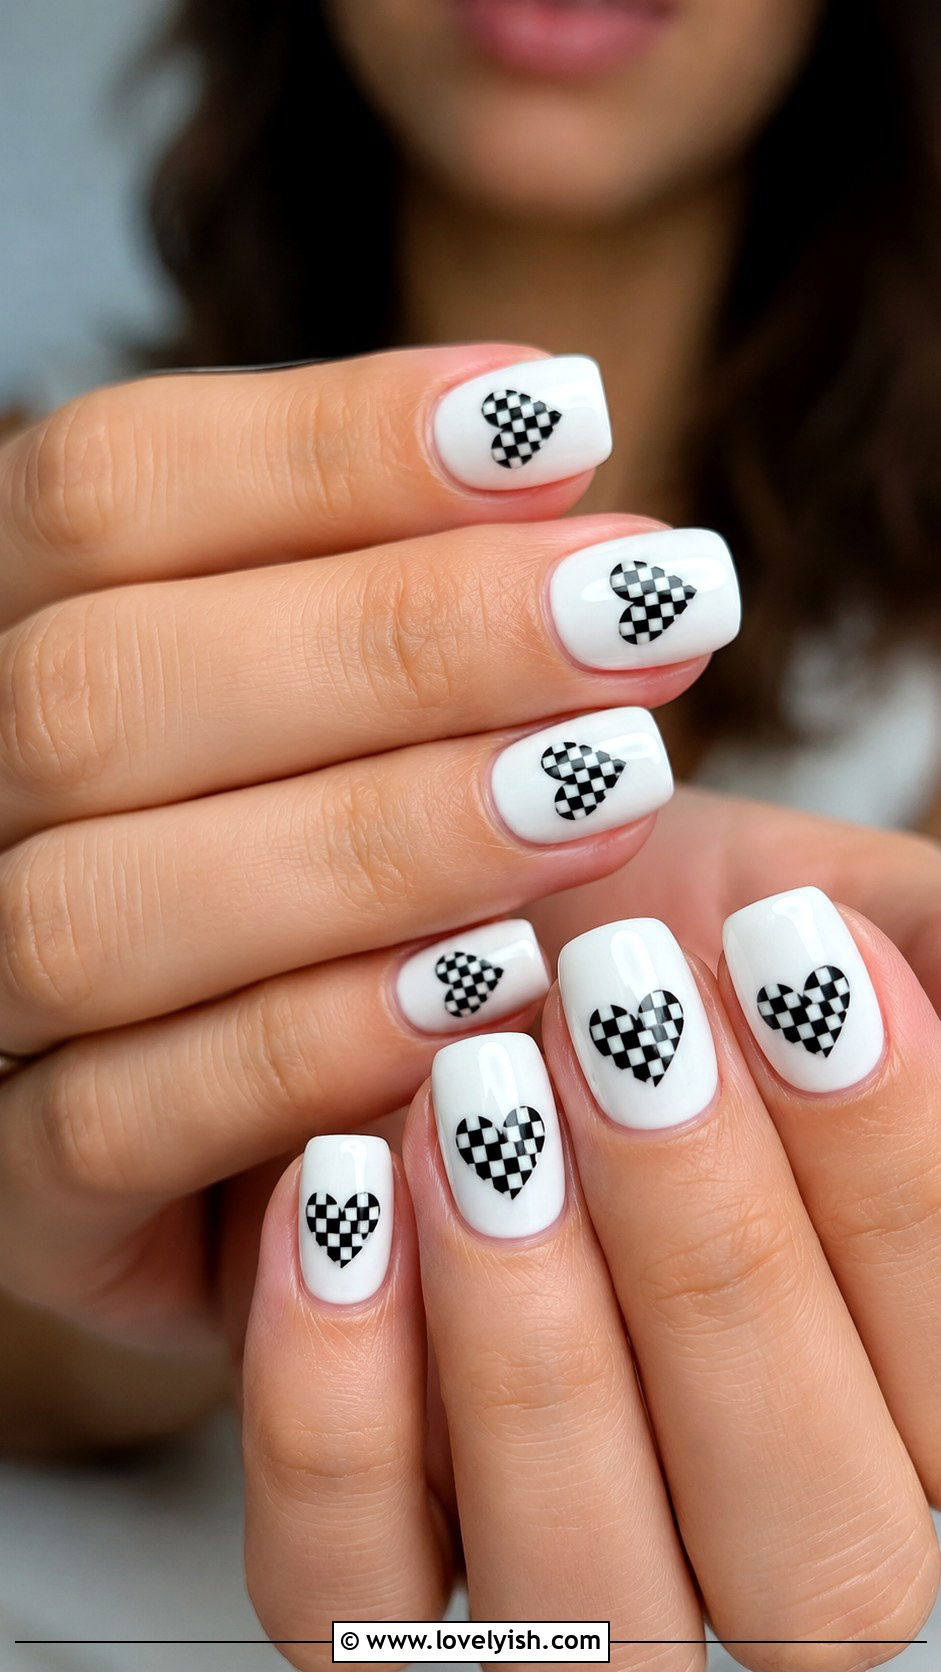
23. Mint Green Checkered Nails
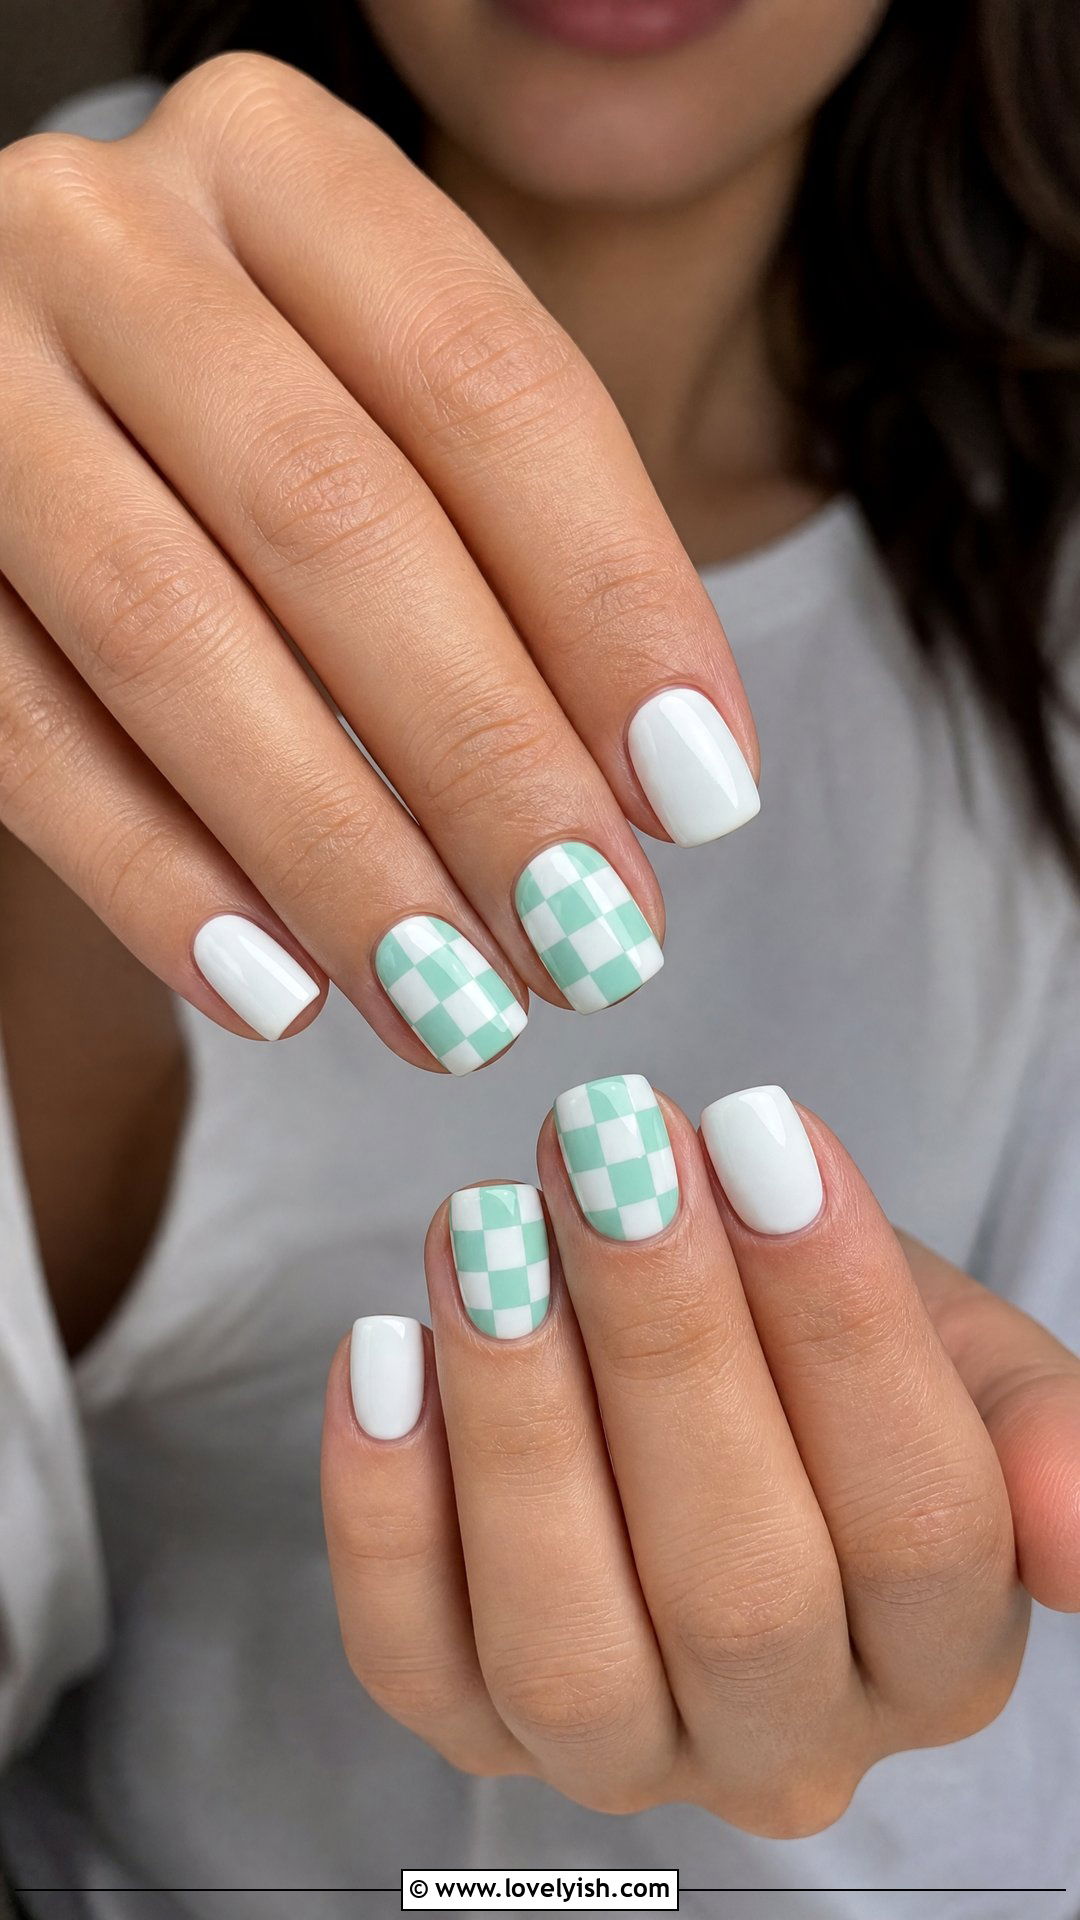
Checkered nails look bold and trendy but rely on simple square stamping or freehand grids. Paint all five nails with a crisp white base. On just two accent nails (the ring and middle fingers), use mint green polish and a small flat brush or square dotting tool to fill in alternating squares in a 3×3 grid pattern. The other three nails stay clean white for balance. Don’t stress about perfectly even squares — slight imperfection adds character. Finish with a glossy top coat. This Y2K-inspired beginner nail design feels playful, retro, and fun, making it ideal for casual outings, festivals, or anyone who loves bold, statement-making nails.
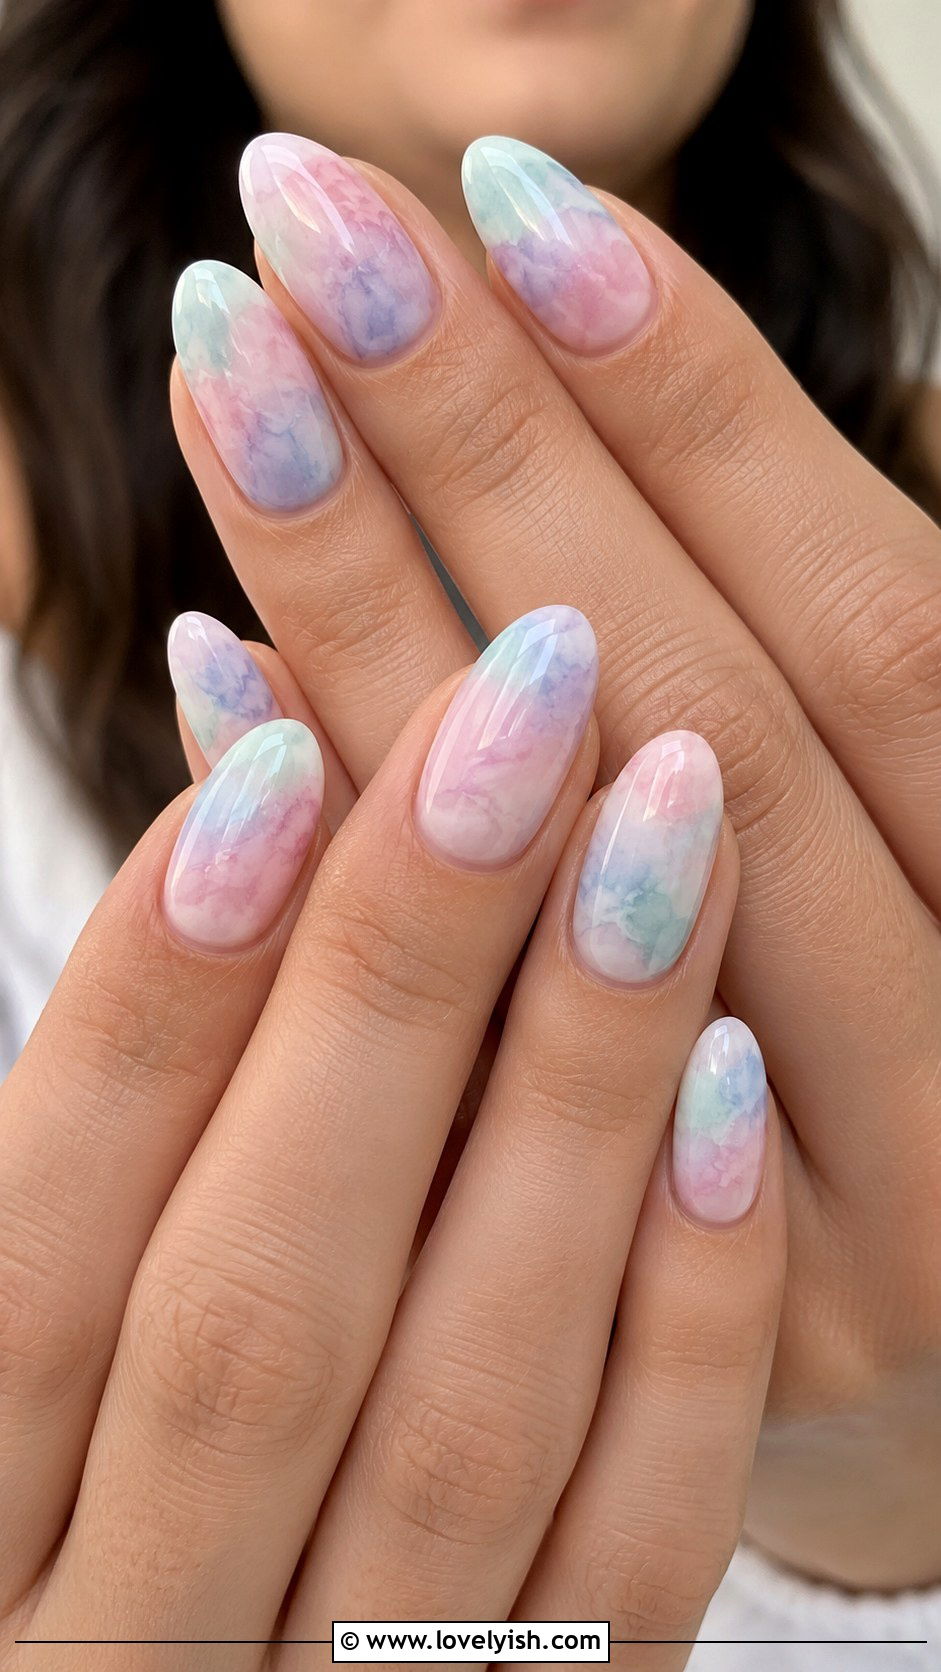
24. Dusty Rose Marble Nails
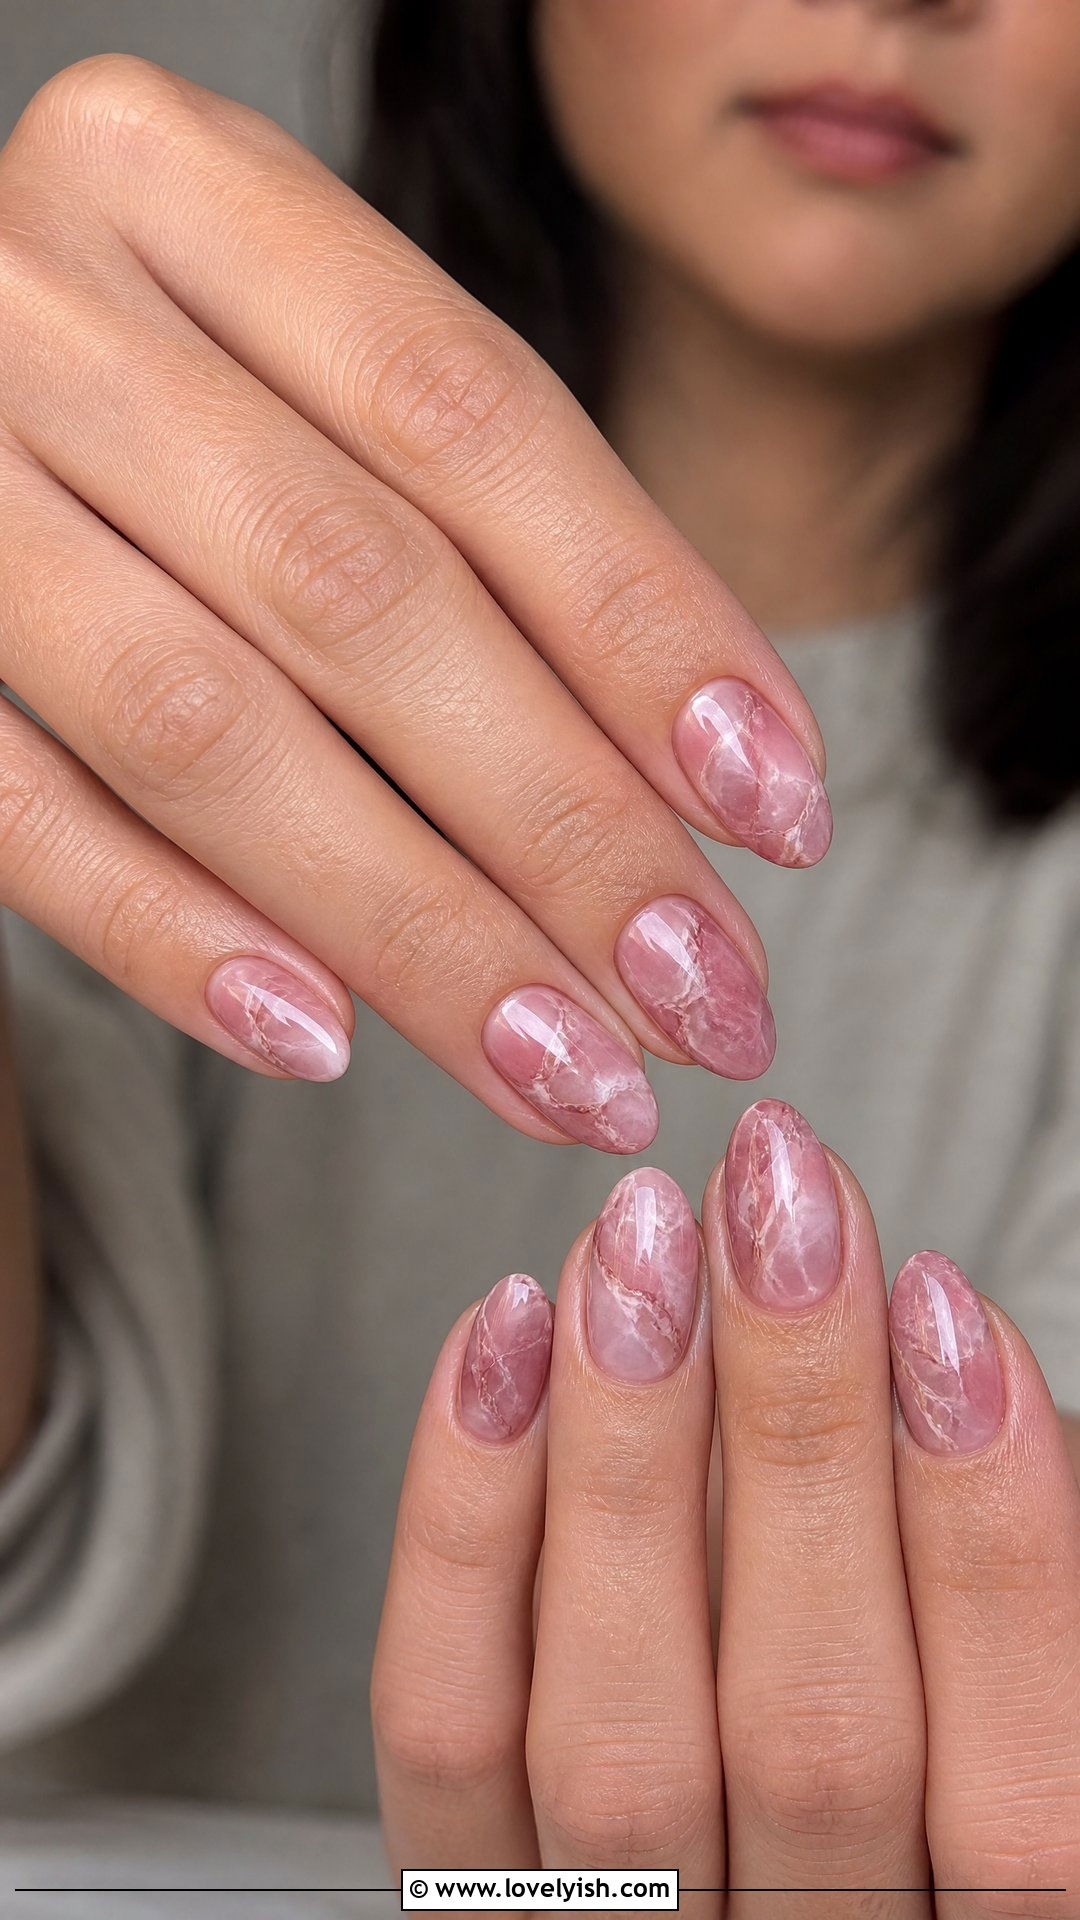
Marble nails look like fine art but actually rely on a sponge or water-drag technique. Paint all five nails with a dusty rose base. While the polish is still slightly wet, dab small amounts of white and slightly darker rose polish onto a sponge, then gently press it onto each nail. Use a thin brush or toothpick to drag the colors slightly, creating soft veining. Each nail will look unique, which is the beauty of marble. Finish with a glossy top coat to smooth everything. This sophisticated beginner nail design feels luxe and editorial. It’s a great way to practice freeform technique while still achieving a refined, salon-worthy result.
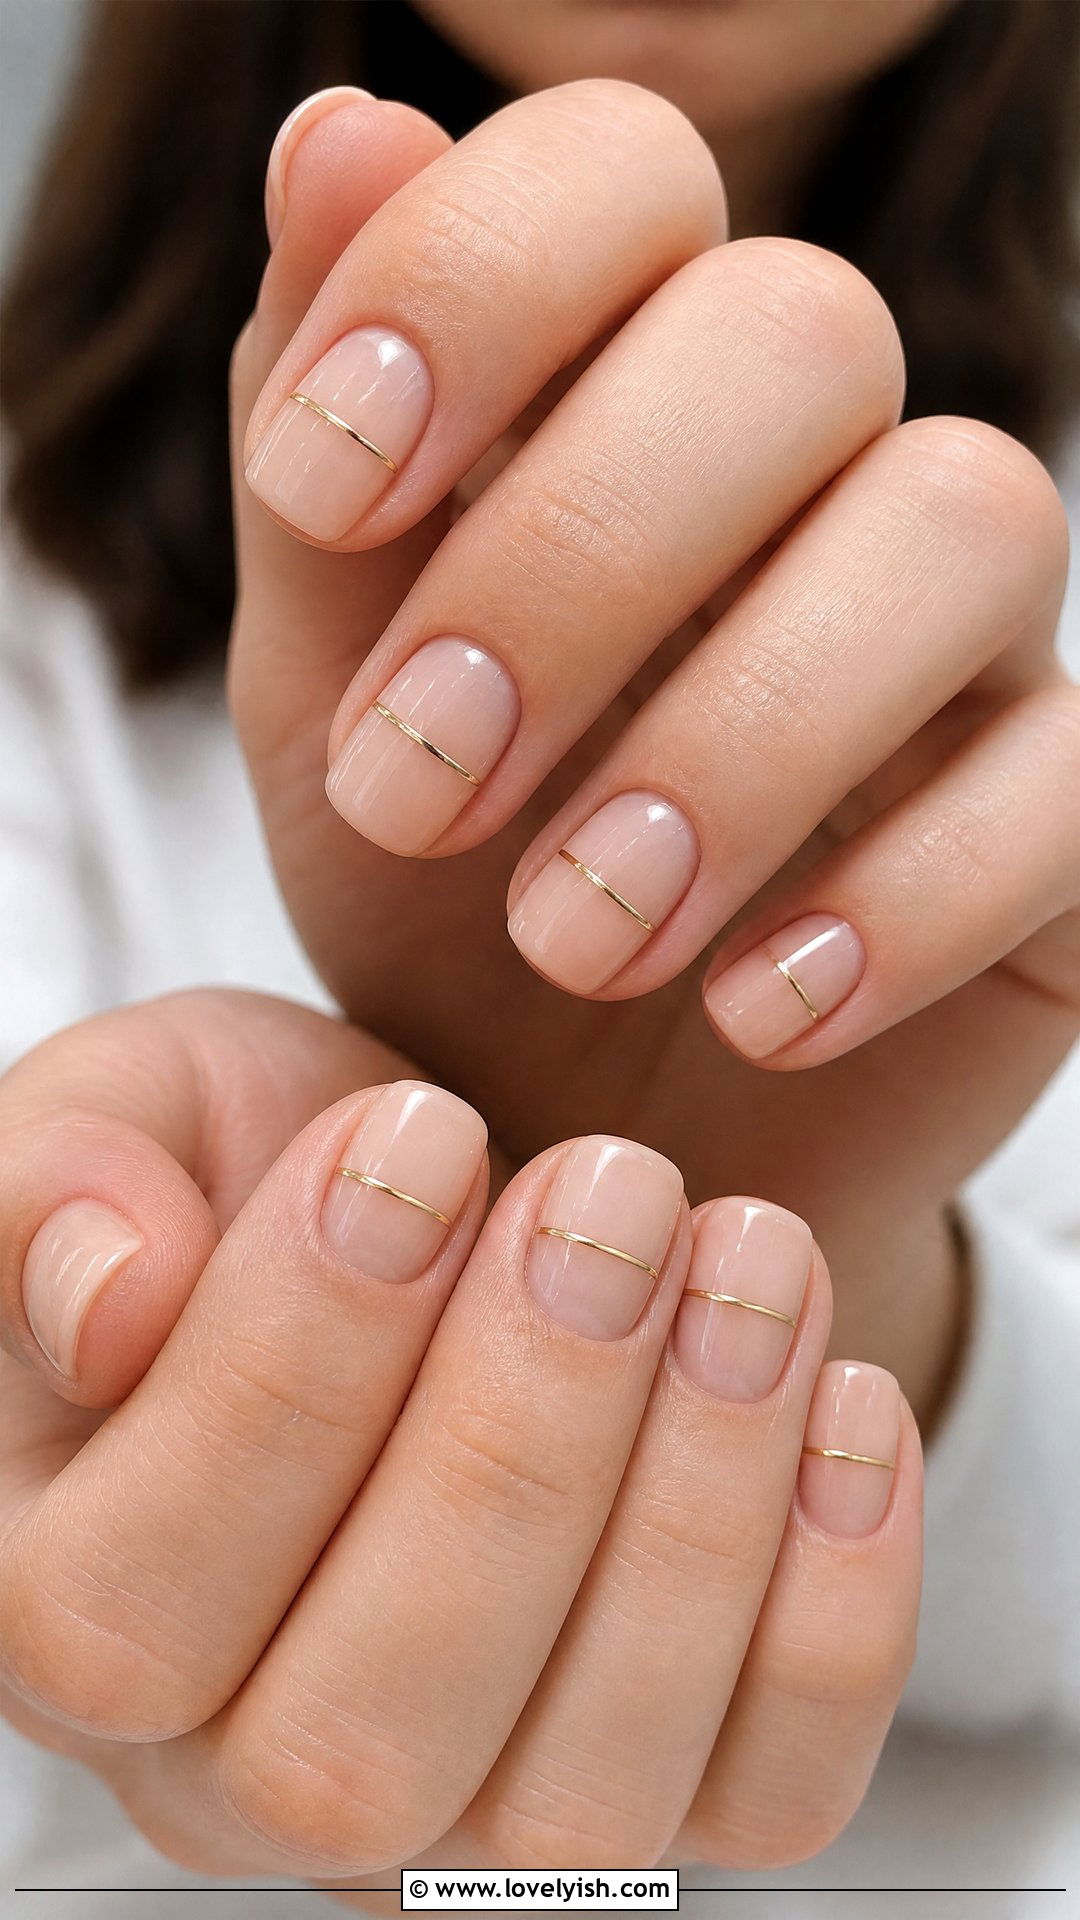
25. Glossy Nude Nails with Gold Stripe
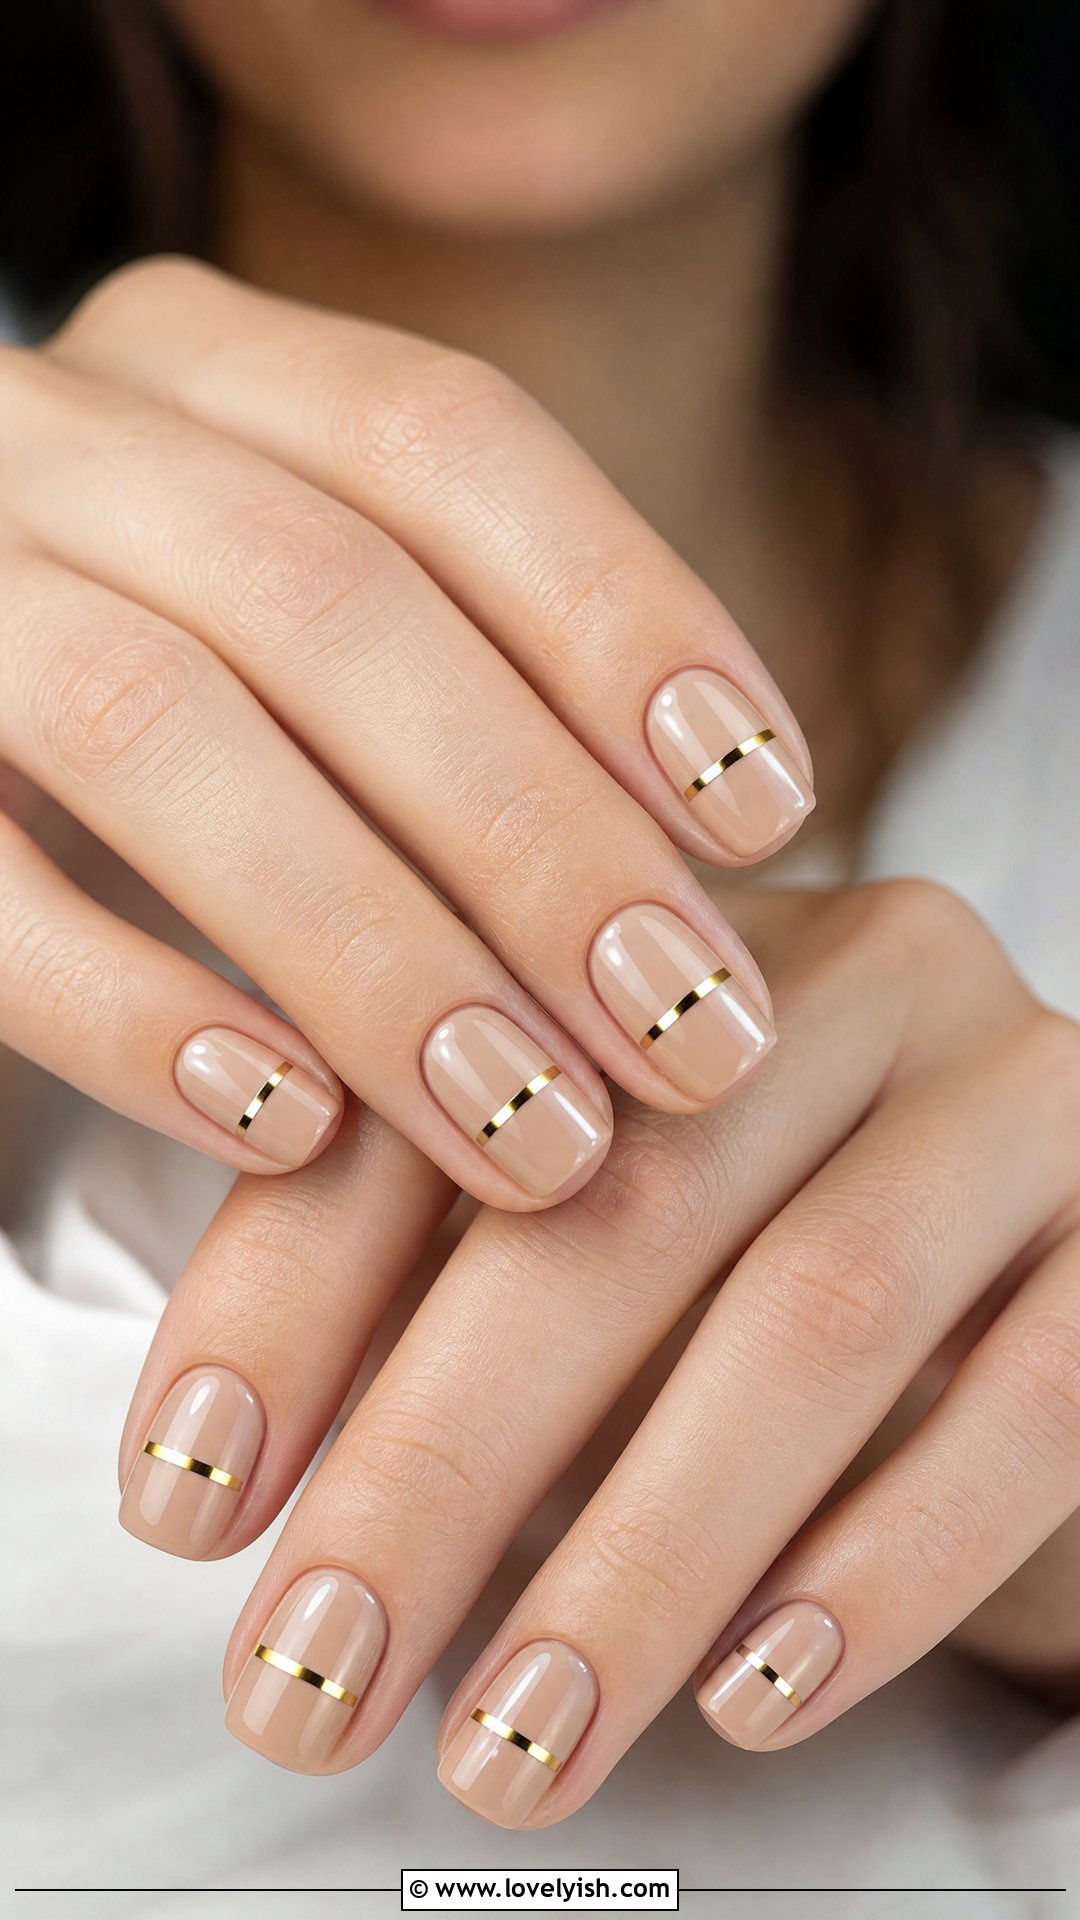
End your beginner journey with the most refined design of all. Paint all five nails with two even coats of warm nude polish for a clean canvas. Once fully dry, use thin striping tape or a fine nail brush to draw a single horizontal gold metallic line across the middle of each nail. Keep the placement consistent for a uniform finish. Peel off any tape carefully and seal with a glossy top coat. This minimal, elevated beginner nail design feels expensive and intentional without requiring complicated skills. It’s the kind of mani you’d see in editorial photoshoots, yet it’s completely doable at home in under thirty minutes.
Conclusion:
Starting with beginner nail designs is the best way to build confidence, develop your technique, and discover your personal style. From classic French tips to playful polka dots, dreamy ombrés, and minimalist accent details, these 25 looks prove that stunning nails don’t require expensive tools or years of practice. Use household items like toothpicks and makeup sponges, embrace small imperfections, and let each design teach you something new. As your skills grow, you’ll naturally start mixing techniques and creating signature looks of your own. Pick a few favorites from this list, gather your polishes, and treat yourself to a creative, relaxing manicure session this week.
You'll Like These Styles:

Leave a Reply