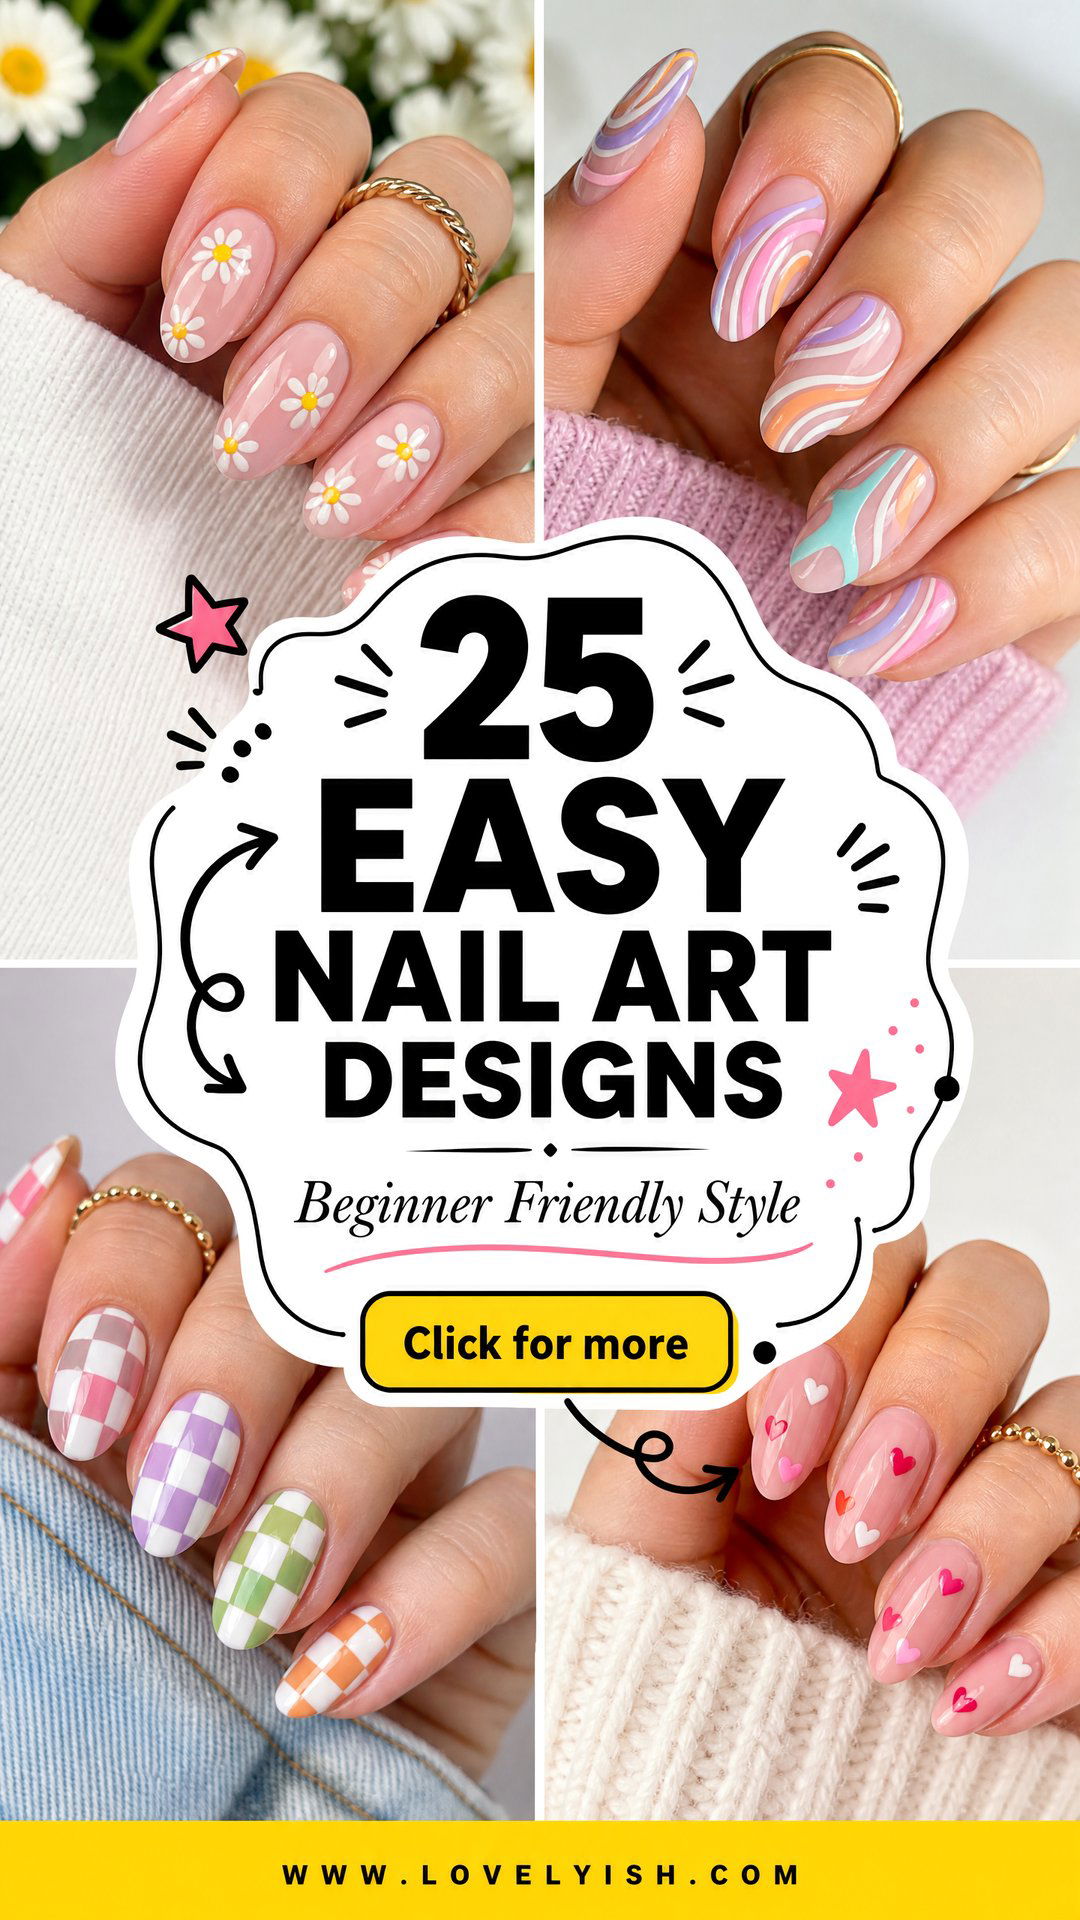
Painting cute nail art at home sounds intimidating until you realize most viral designs only need a bottle of polish, a toothpick, and a little patience. You don’t need a striping brush, dotting tools, or fancy stamping plates to create salon-worthy looks. With everyday items already in your bathroom drawer, beginners can pull off polished, Pinterest-ready manicures on a budget. This roundup of 25 easy nail art designs for beginners without tools focuses on full-set looks that anyone can recreate. From dotted florals and sponge ombre to freehand tips and tie-dye smoosh nails, every idea here is forgiving, low-stress, and beginner-friendly. Grab your favorite shades, a bobby pin or two, and let’s turn your kitchen table into a mini nail studio.
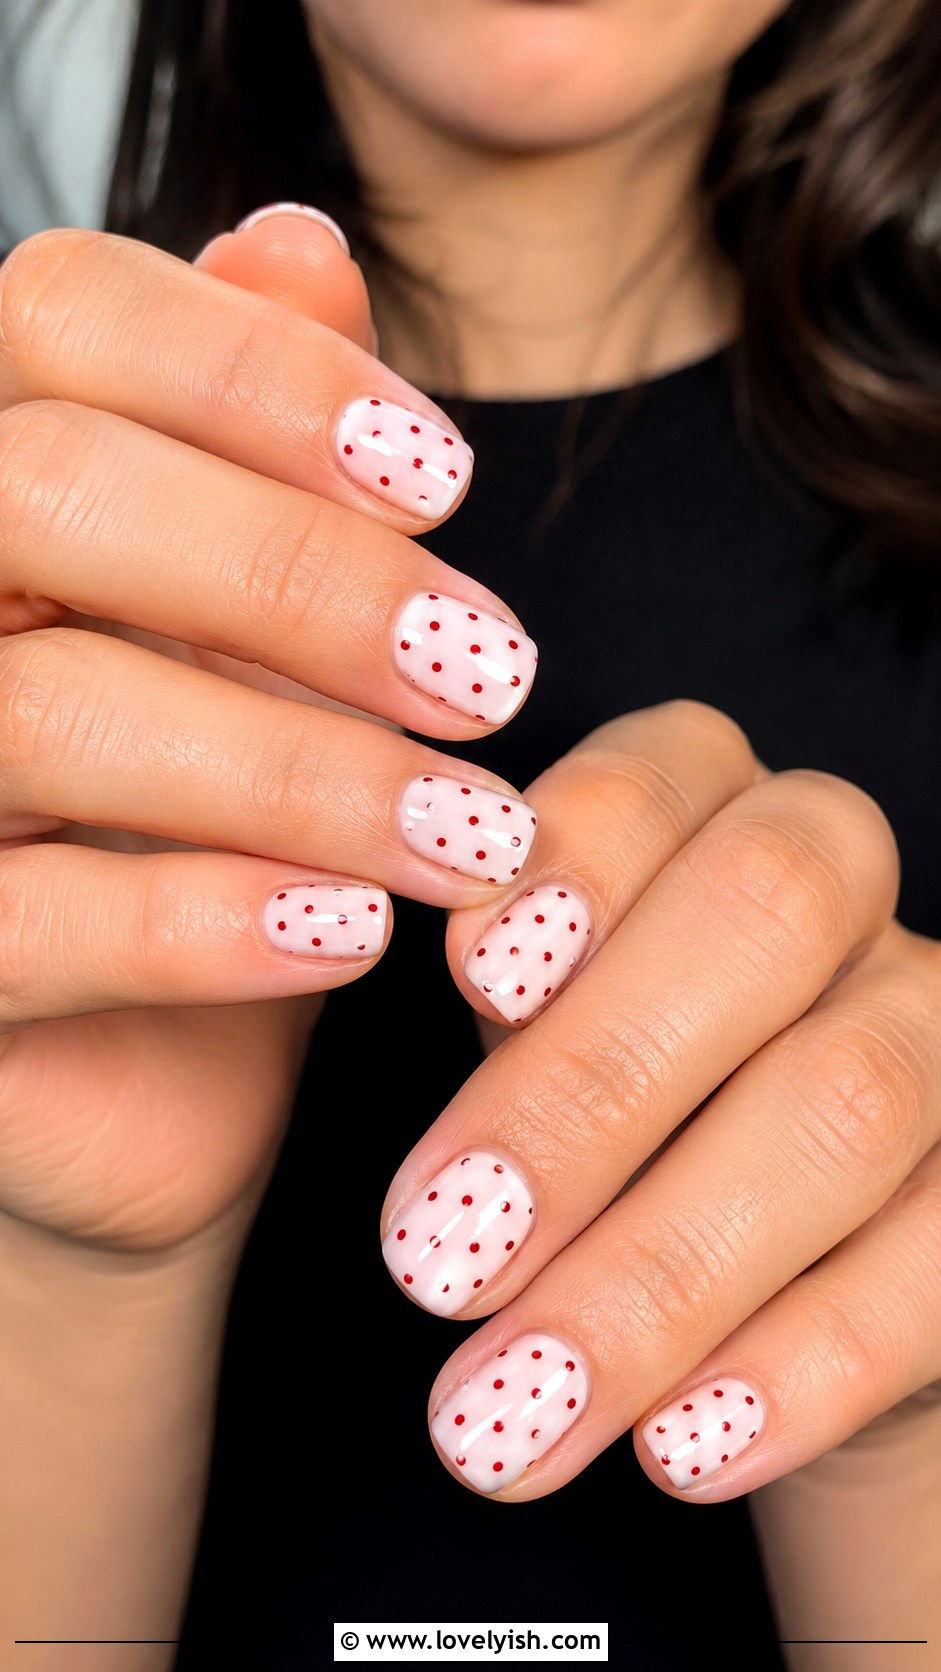
1. Polka Dot Nails With a Bobby Pin
Dots are the gateway drug of beginner nail art, and a bobby pin is the secret weapon. Start with a milky white base on all five nails, then dip the round end of a clean bobby pin into a contrasting polish like cherry red or navy. Press lightly to scatter even dots across each nail. Keep them random for a playful look or line them up in neat rows for retro charm. Reload polish every two or three dots so the size stays consistent. Finish with a glossy top coat to smooth everything out. This look reads cute, clean, and beginner-proof, and works on any nail length, from short squoval to long almond.
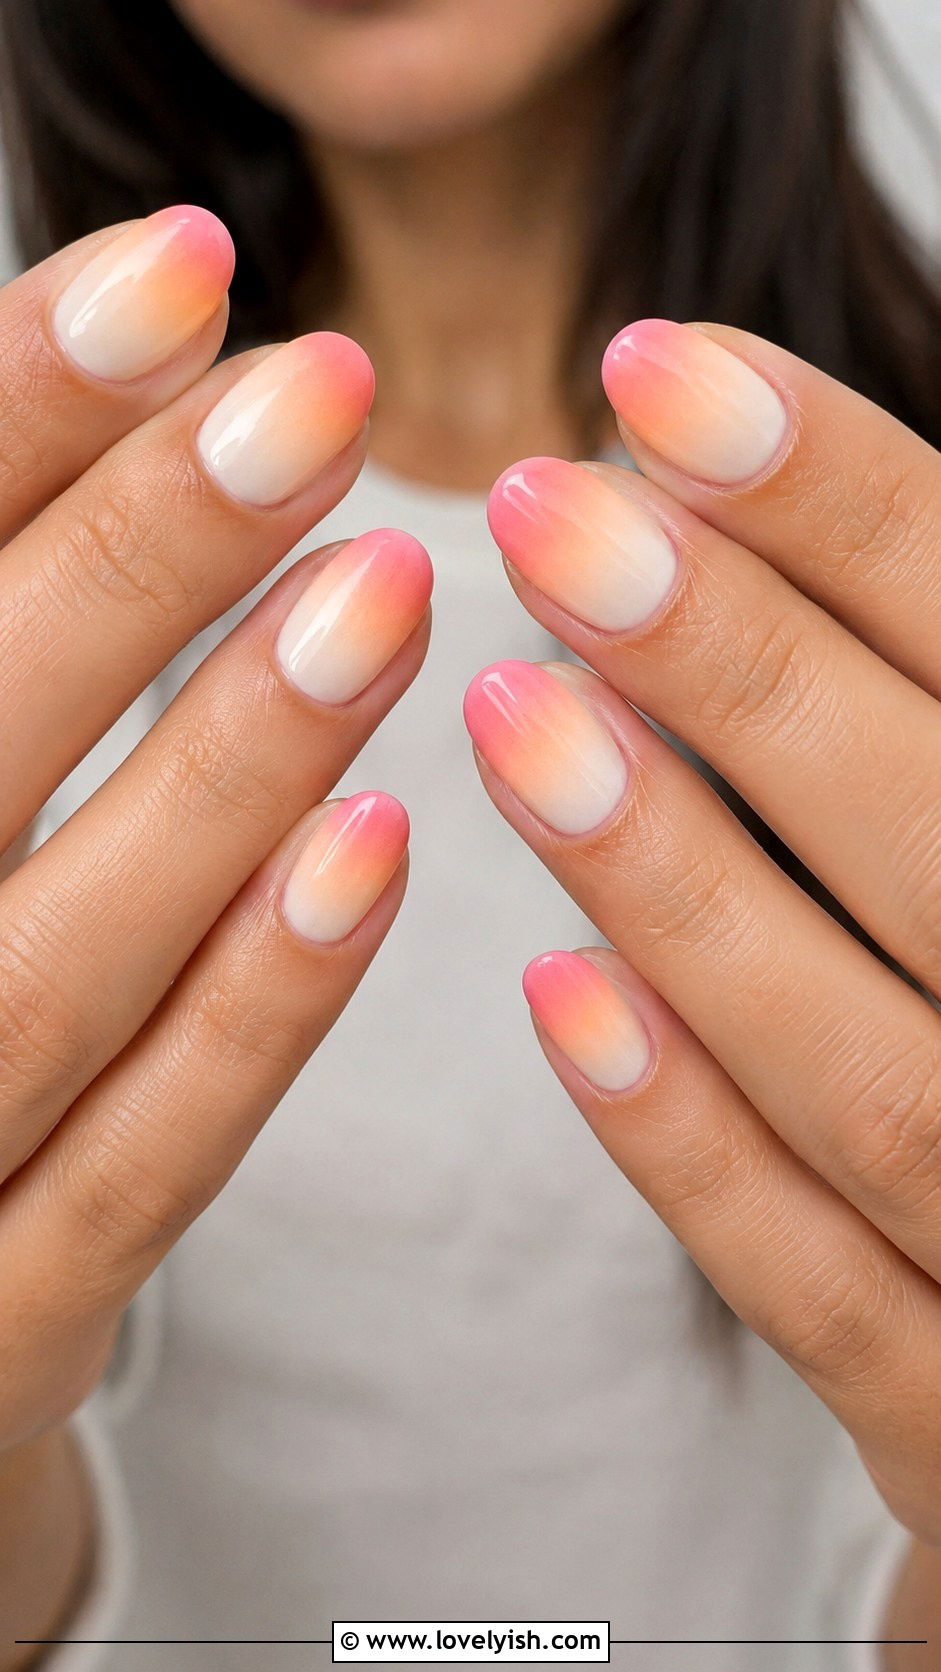
2. Sponge Ombre Sunset Nails
If you’ve ever wondered how people get those dreamy gradients, the answer is a regular makeup sponge. Paint all five nails a creamy white base and let it dry. Next, dab stripes of peach, coral, and soft pink polish onto the sponge, then press it gently against each nail in a rolling motion. Repeat two or three times until the colors blend smoothly from cuticle to tip. Clean up the skin around your nails with a cotton swab dipped in remover. Top everything with a glossy seal coat. The result is a warm sunset gradient that looks salon-level but takes zero special tools.
3. Plastic Bag Tie-Dye Smoosh Nails
This trick is messy, fun, and weirdly satisfying. Lay a plastic sandwich bag flat, then drip three drops of polish next to each other, like baby pink, lilac, and white. Gently swirl them with a toothpick, then press your nail straight into the puddle and wiggle slightly. Lift, and you’ve got a one-of-a-kind tie-dye smoosh on every finger. Each nail will look slightly different, which is part of the charm. Clean the edges with a brush dipped in remover, then seal with a glossy top coat. It’s a forgiving, low-stakes way to make abstract art happen on short or medium-length nails.
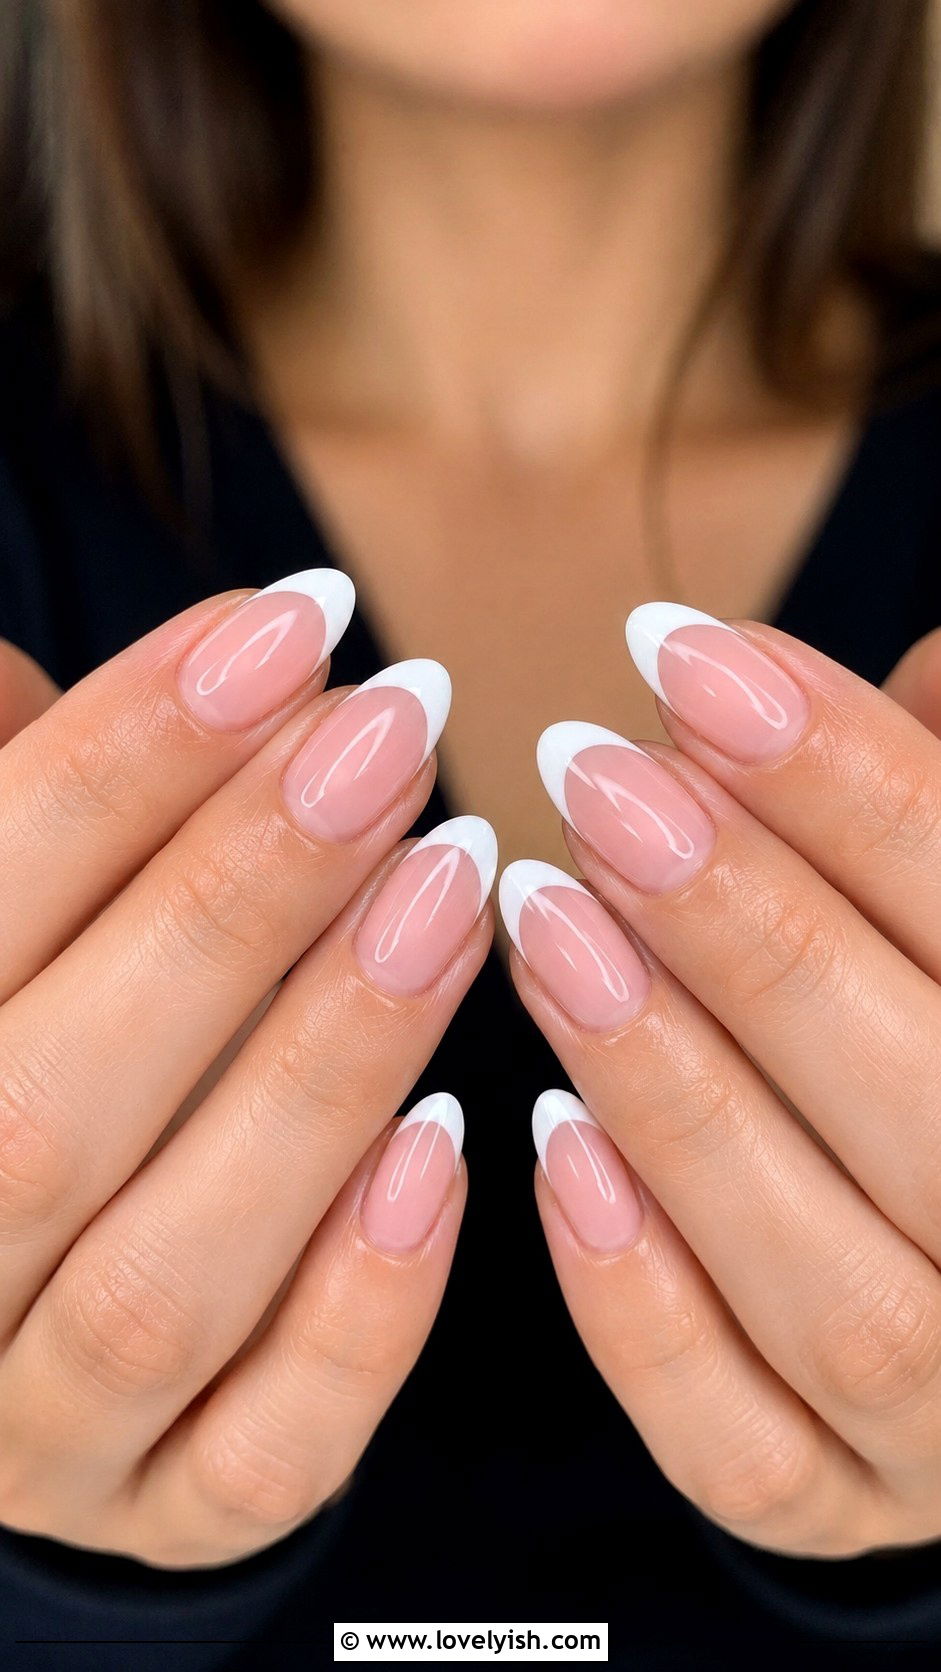
4. Freehand French Tip Nails
The classic French manicure is more beginner-friendly than it looks once you ditch the guides. Start with a sheer pink or nude base across all five nails. Wipe most of the polish off your white brush, then drag it slowly along the free edge of each nail in two short strokes that meet in the middle. Don’t worry about perfection, slight wobble actually adds a hand-painted feel. Clean up any smudges with a cotton swab and remover. Seal with a high-shine top coat. This timeless look flatters every skin tone and nail shape, especially short almond, squoval, and oval nails for an everyday minimalist vibe.
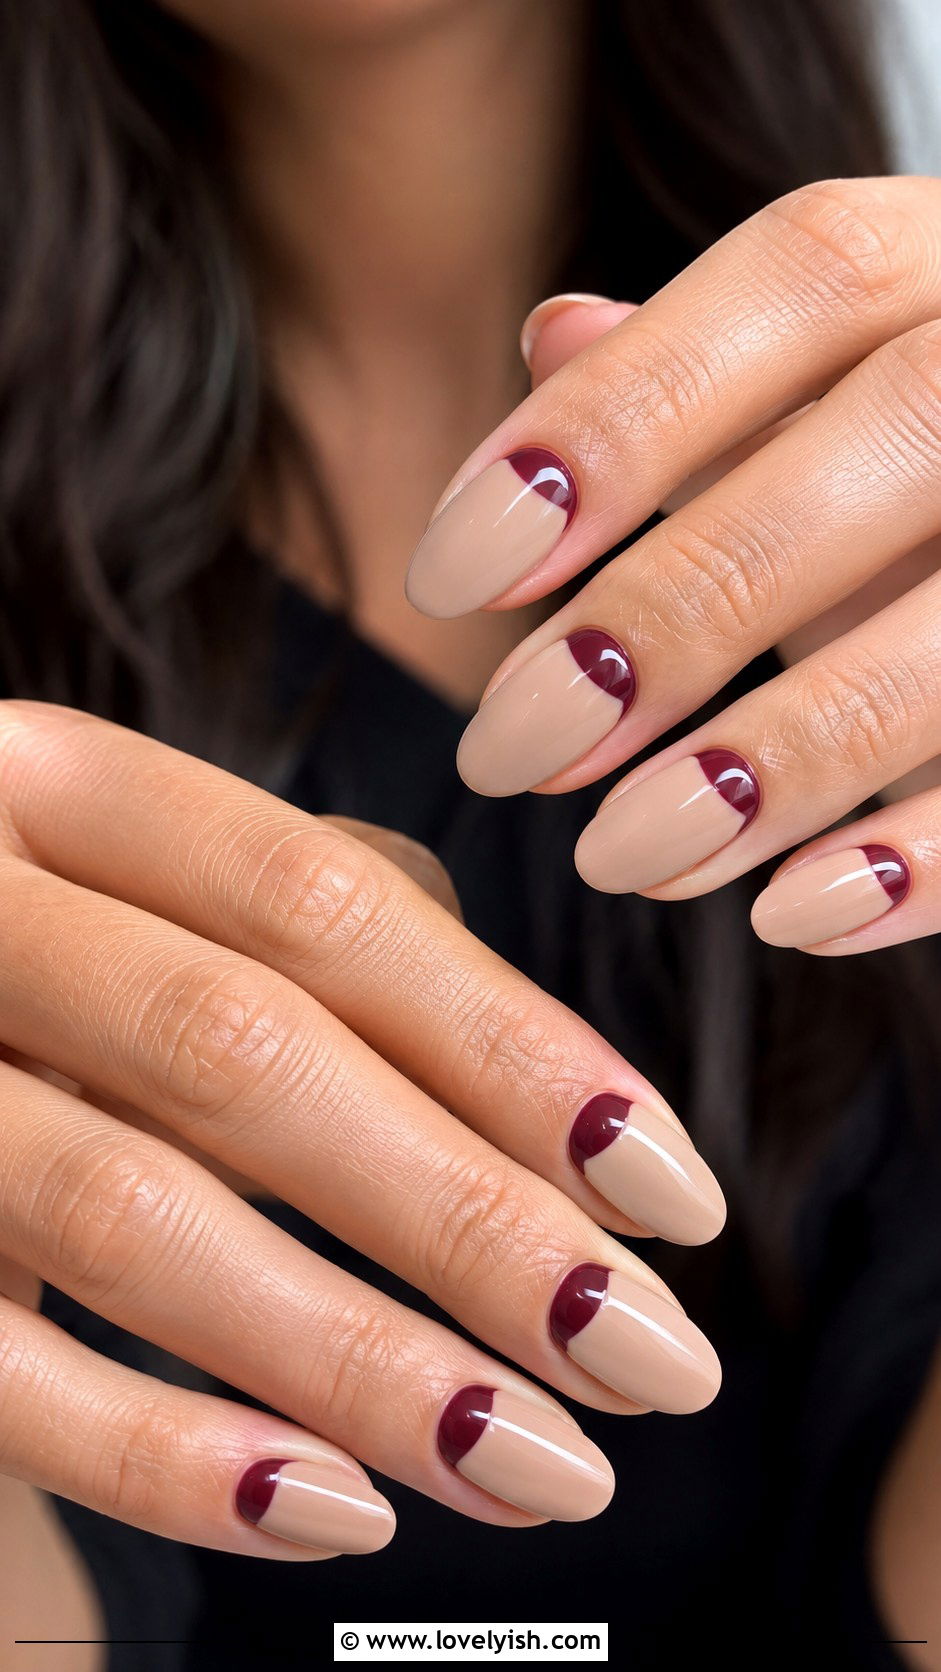
5. Half-Moon Nails With the Polish Brush
Half-moon nails are basically a French tip flipped upside down, and the polish brush handles it beautifully. Paint all five nails a soft beige or sheer pink base. Once dry, load your darker polish brush, like burgundy or black, and paint a small curved arc near the cuticle on each nail, leaving a sliver of base color showing. Use short, gentle strokes to keep the curve smooth. The contrast between the light base and dark moon feels vintage and editorial. Top with a glossy finish to lock it in. This design suits every nail shape and looks especially elegant on medium-length oval or almond nails.
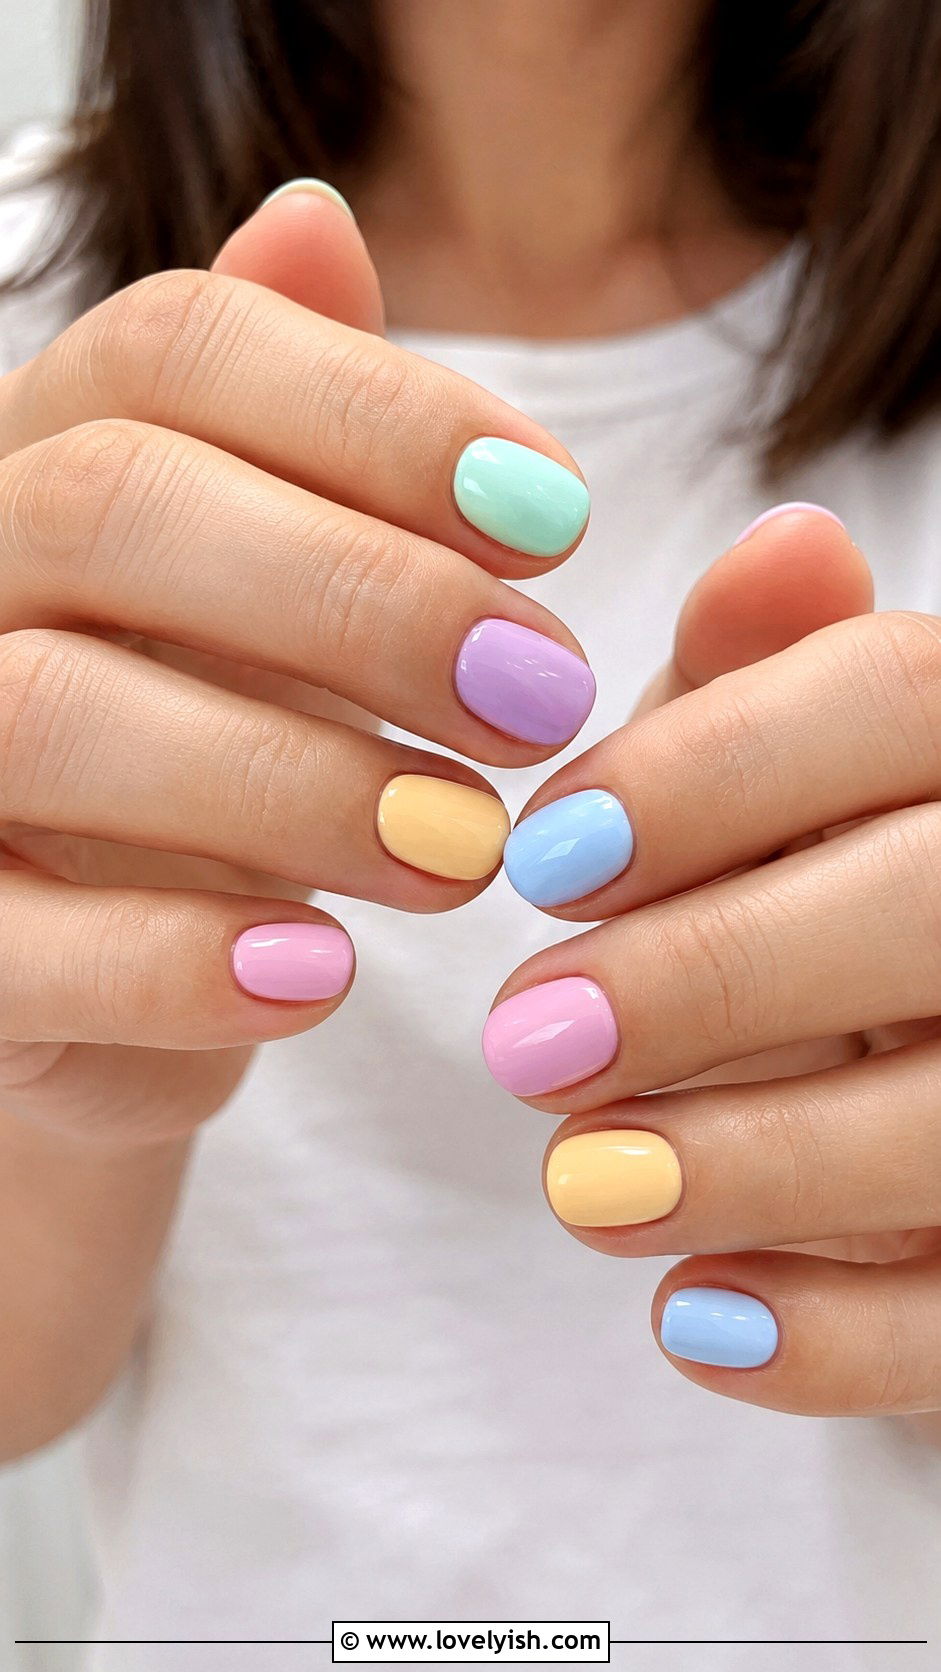
6. Skittle Rainbow Nails
When you can’t pick just one color, paint them all. Skittle nails are a no-rules trend where every nail wears a different shade. Pull out five of your favorite pastels, like mint, lavender, butter yellow, baby blue, and blush pink, and paint one color per finger. Apply two coats for full opacity, then seal with a glossy top coat. Keep the finishes consistent so the look feels intentional rather than random. The result is a candy-colored set that’s perfect for spring, summer, or any day you need a little serotonin. It’s also one of the easiest ways to use up half-empty polish bottles.
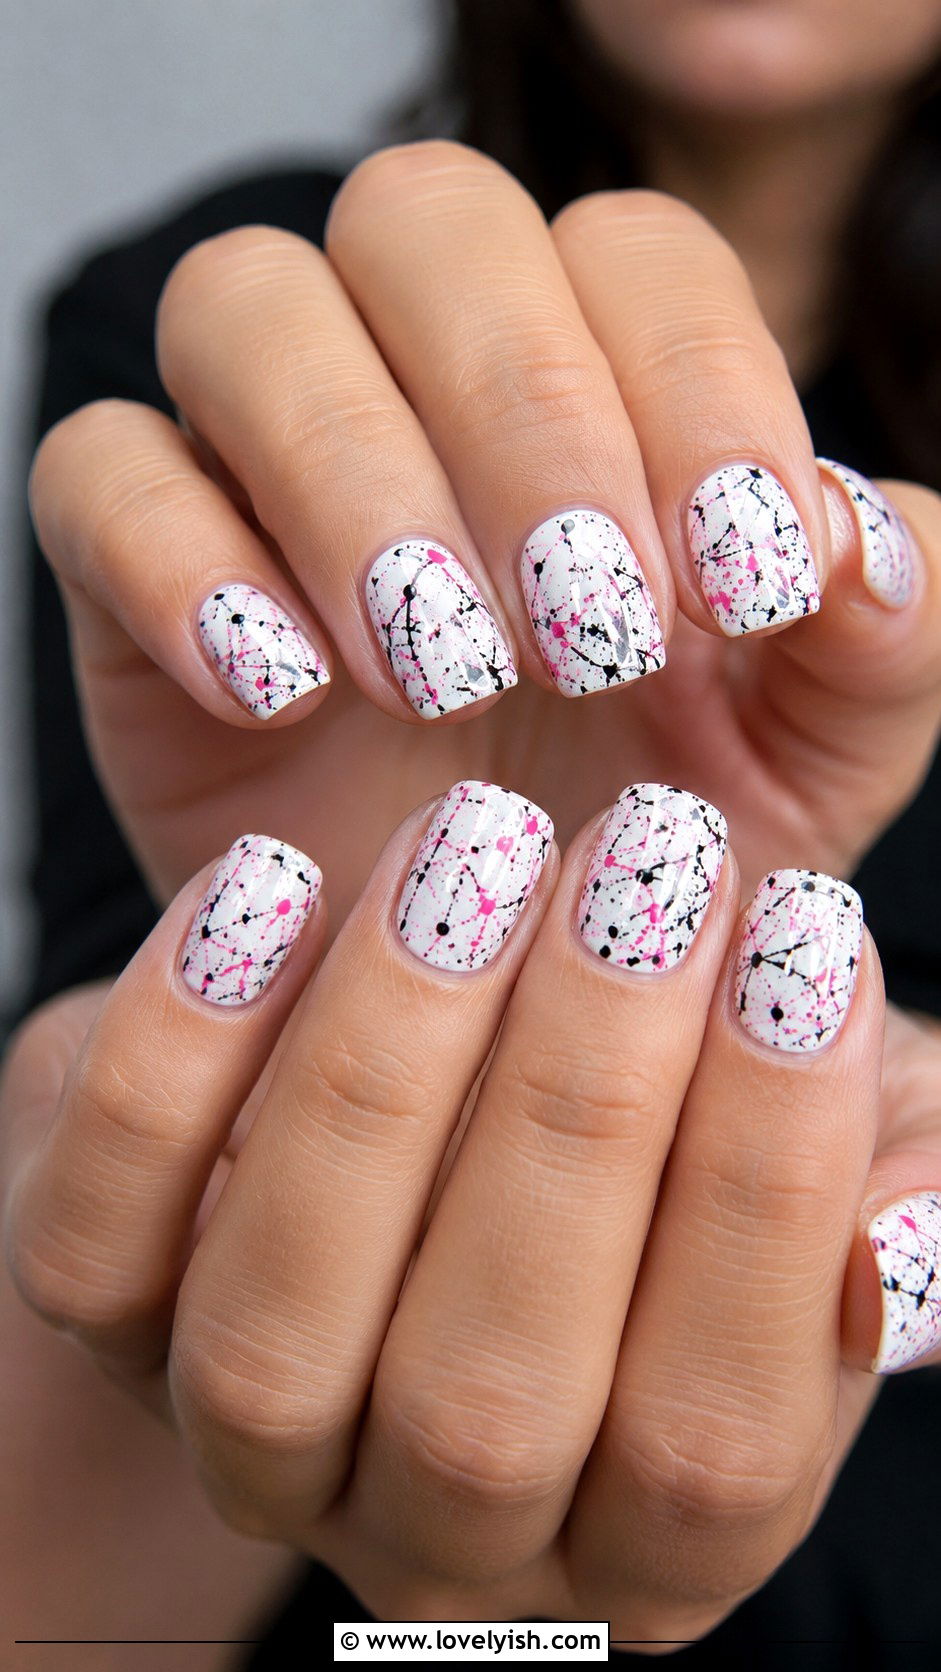
7. Straw Splatter Paint Nails
Splatter nails channel that paint-flicked-everywhere artist energy without needing actual paintbrushes. Start with a white or cream base on all five nails. Drop a small puddle of contrasting polish, like black, hot pink, or neon green, onto a piece of foil. Dip a regular drinking straw into the polish, hold it close to your nail, and blow sharply through the straw to spray fine specks onto the surface. Repeat with two or three colors for a layered effect. Clean up the skin with a cotton swab and remover, then top coat. The chaotic finish looks edgy and modern on short and medium nails alike.
8. Toothpick Daisy Nails
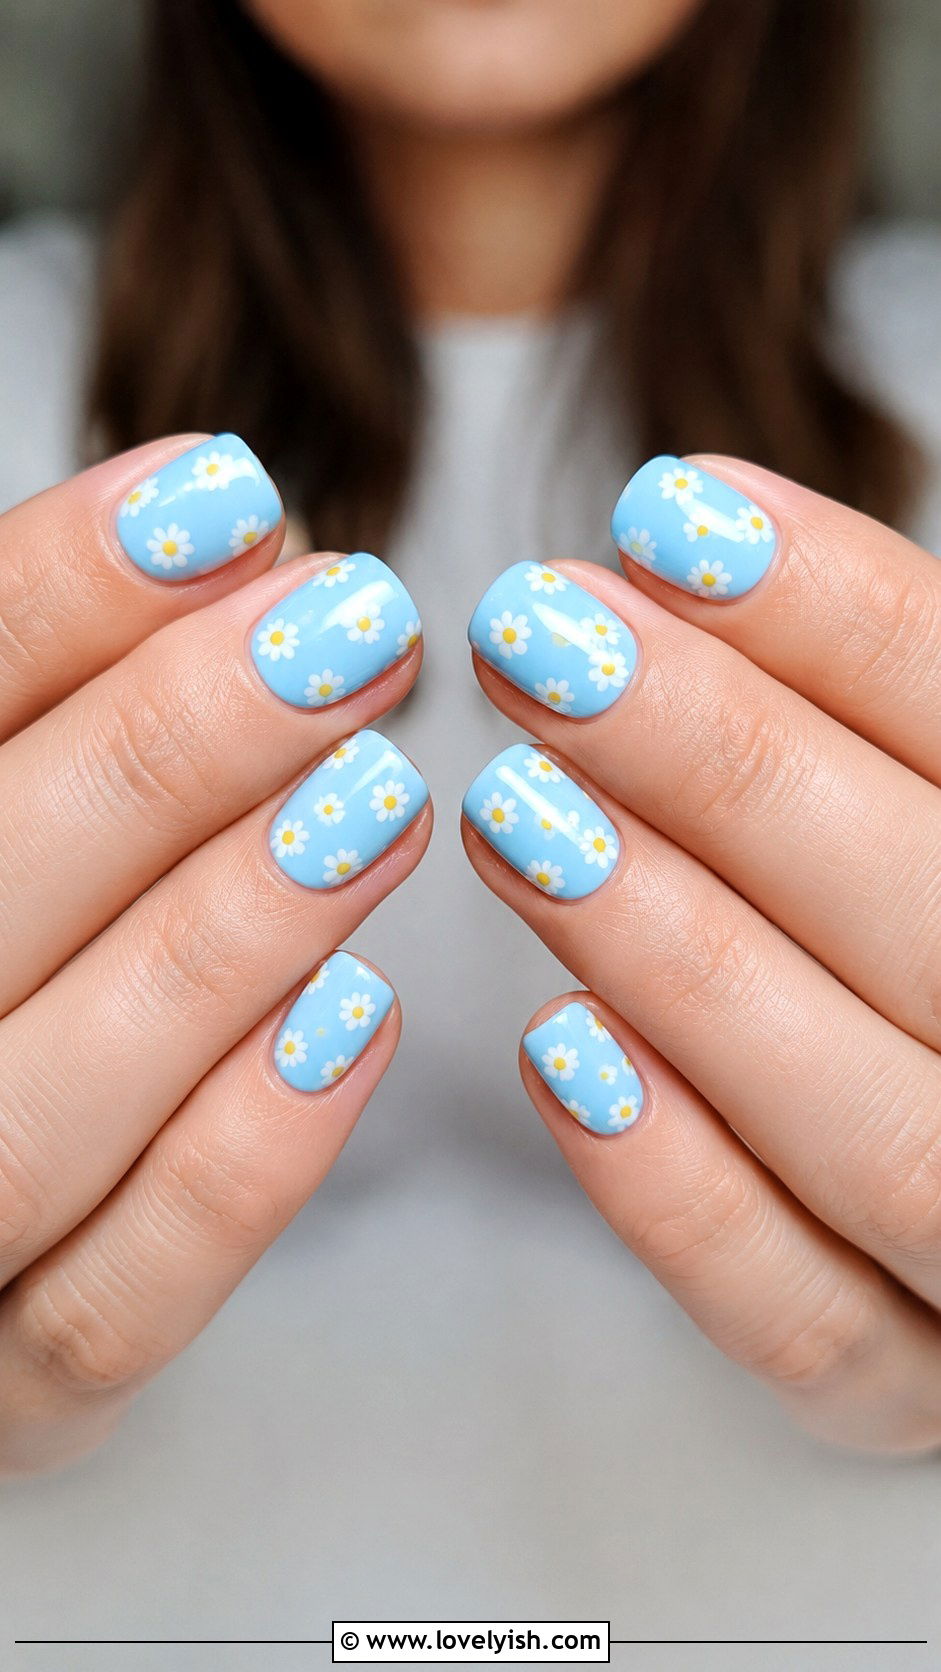
Tiny daisies are surprisingly easy with a toothpick. Paint all five nails a pastel base like baby blue or buttery yellow. Dip the pointed end of a toothpick into white polish and place five dots in a tight circle to form petals. Add a yellow dot in the center using a fresh toothpick. Scatter one or two daisies per nail, or feature a single bloom on each. Clean up any stray polish with a cotton swab, then finish with a glossy top coat to smooth the texture. This sweet floral set feels like spring and looks adorable on short squoval or oval nails.
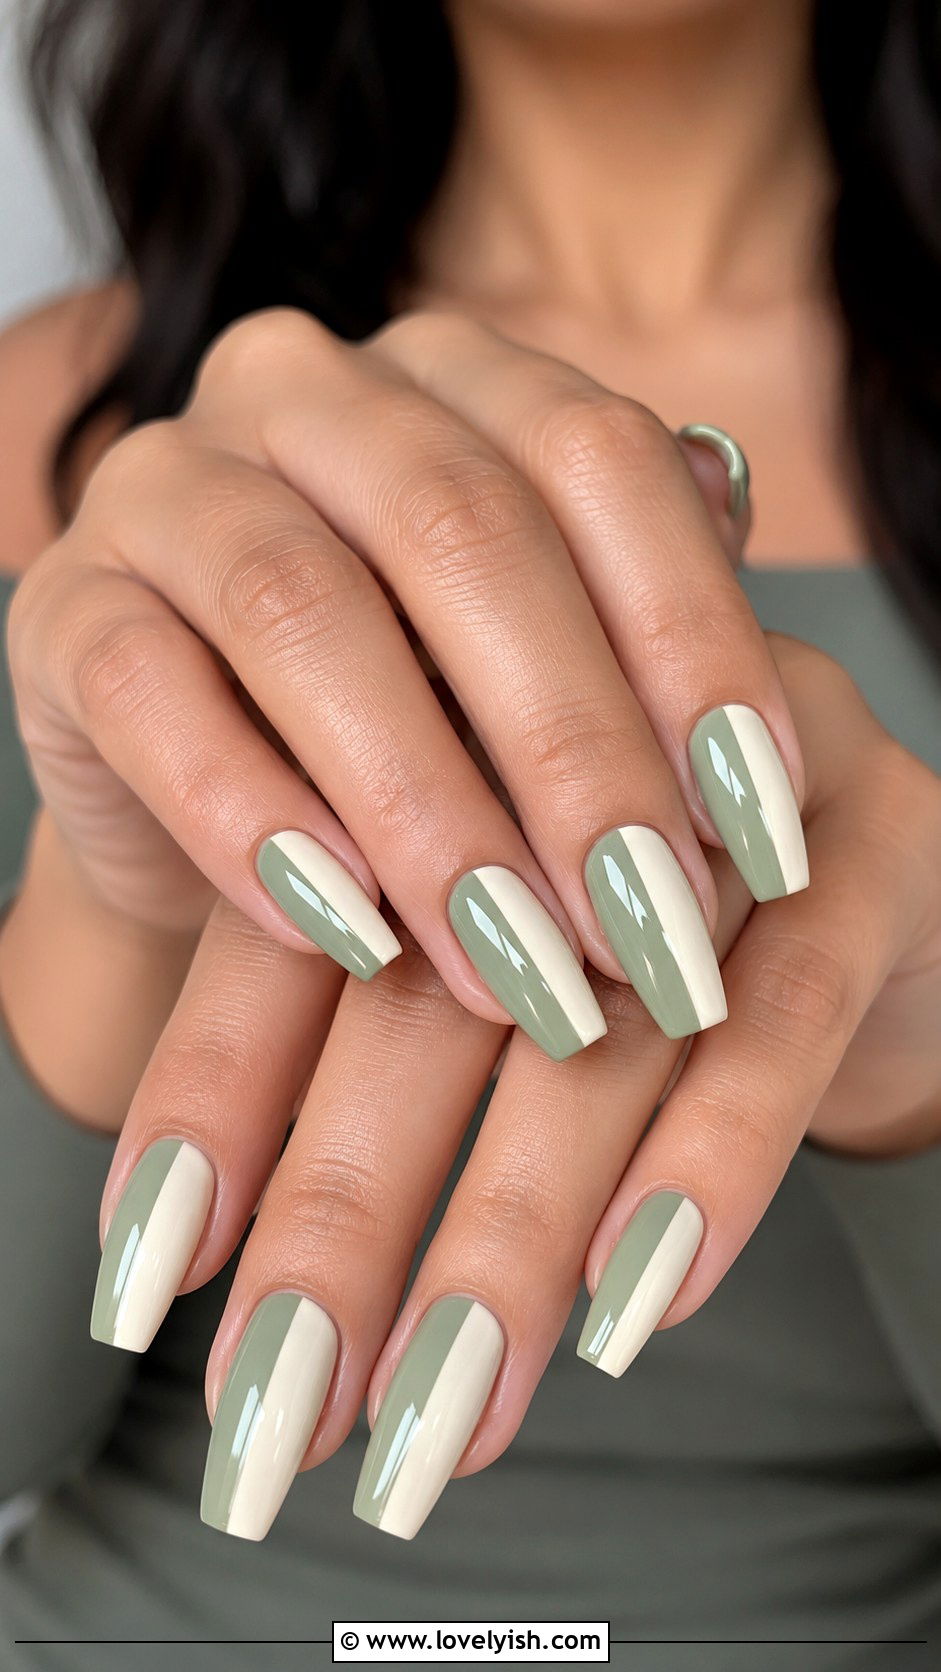
9. Color Block Two-Tone Nails
Color blocking is minimal, modern, and impossible to mess up. Choose two complementary shades, like sage green and cream, or terracotta and dusty pink. Paint each nail half one color and half the other, dividing them either horizontally across the middle or vertically down the center. Use slow, steady strokes from your polish brush, and don’t worry about a hairline-perfect divide. A slightly imperfect line gives it that hand-painted, art gallery feel. Once dry, run a top coat over everything to even out the texture. This design works beautifully on medium coffin or square nails and feels effortlessly chic without any tools beyond your brush.
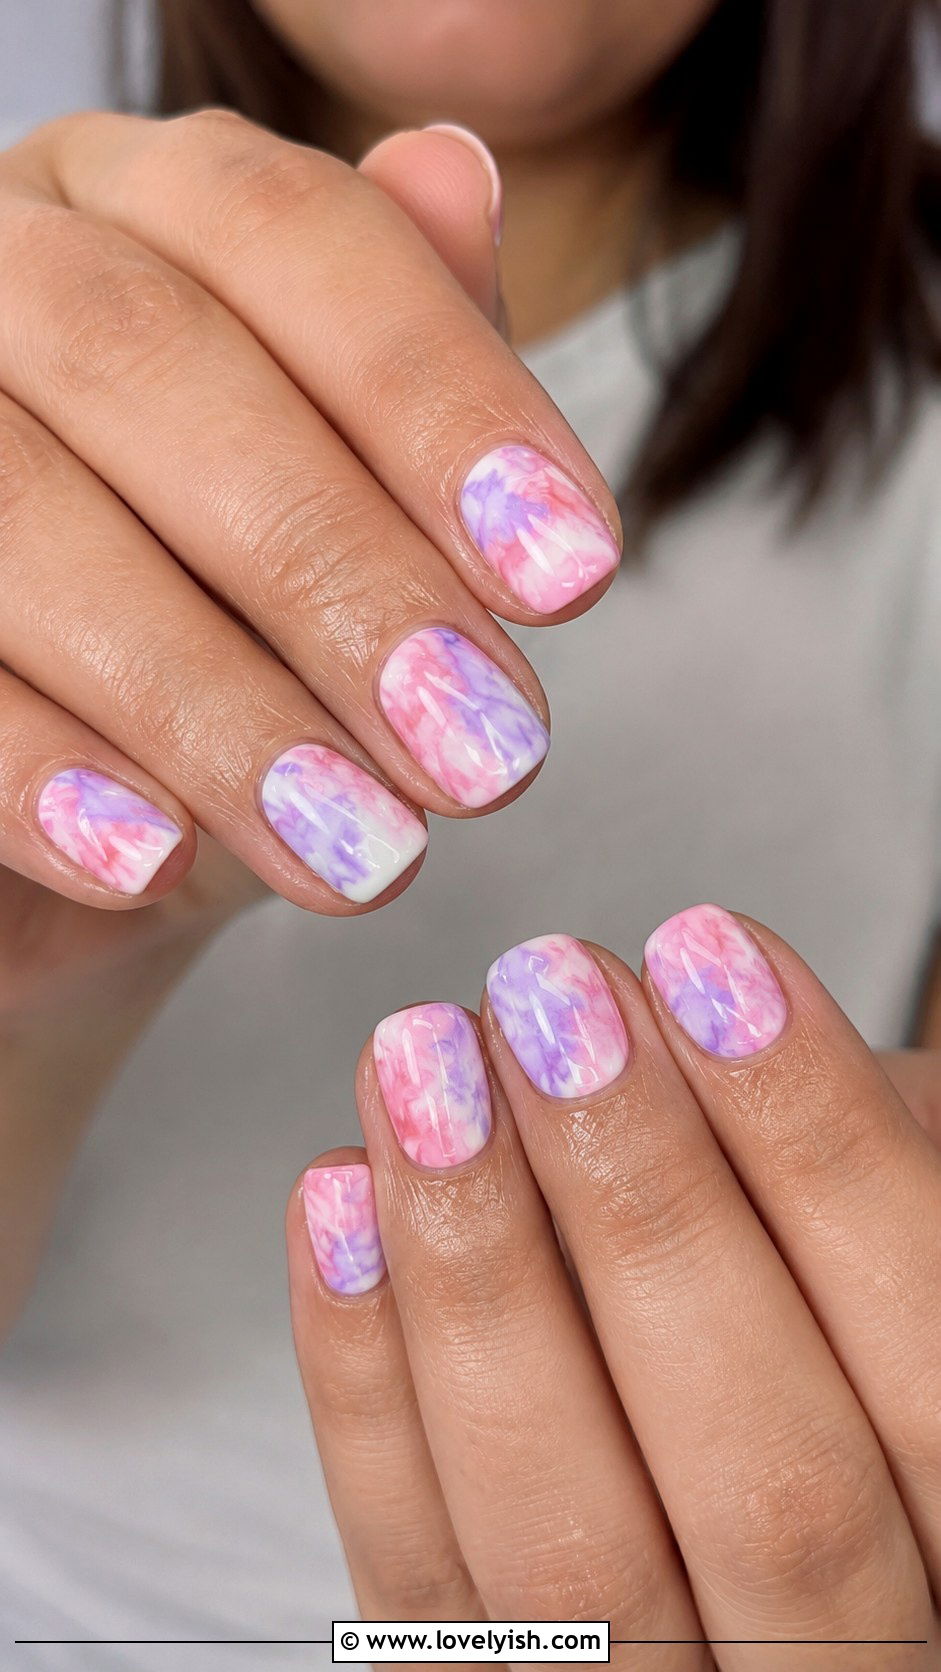
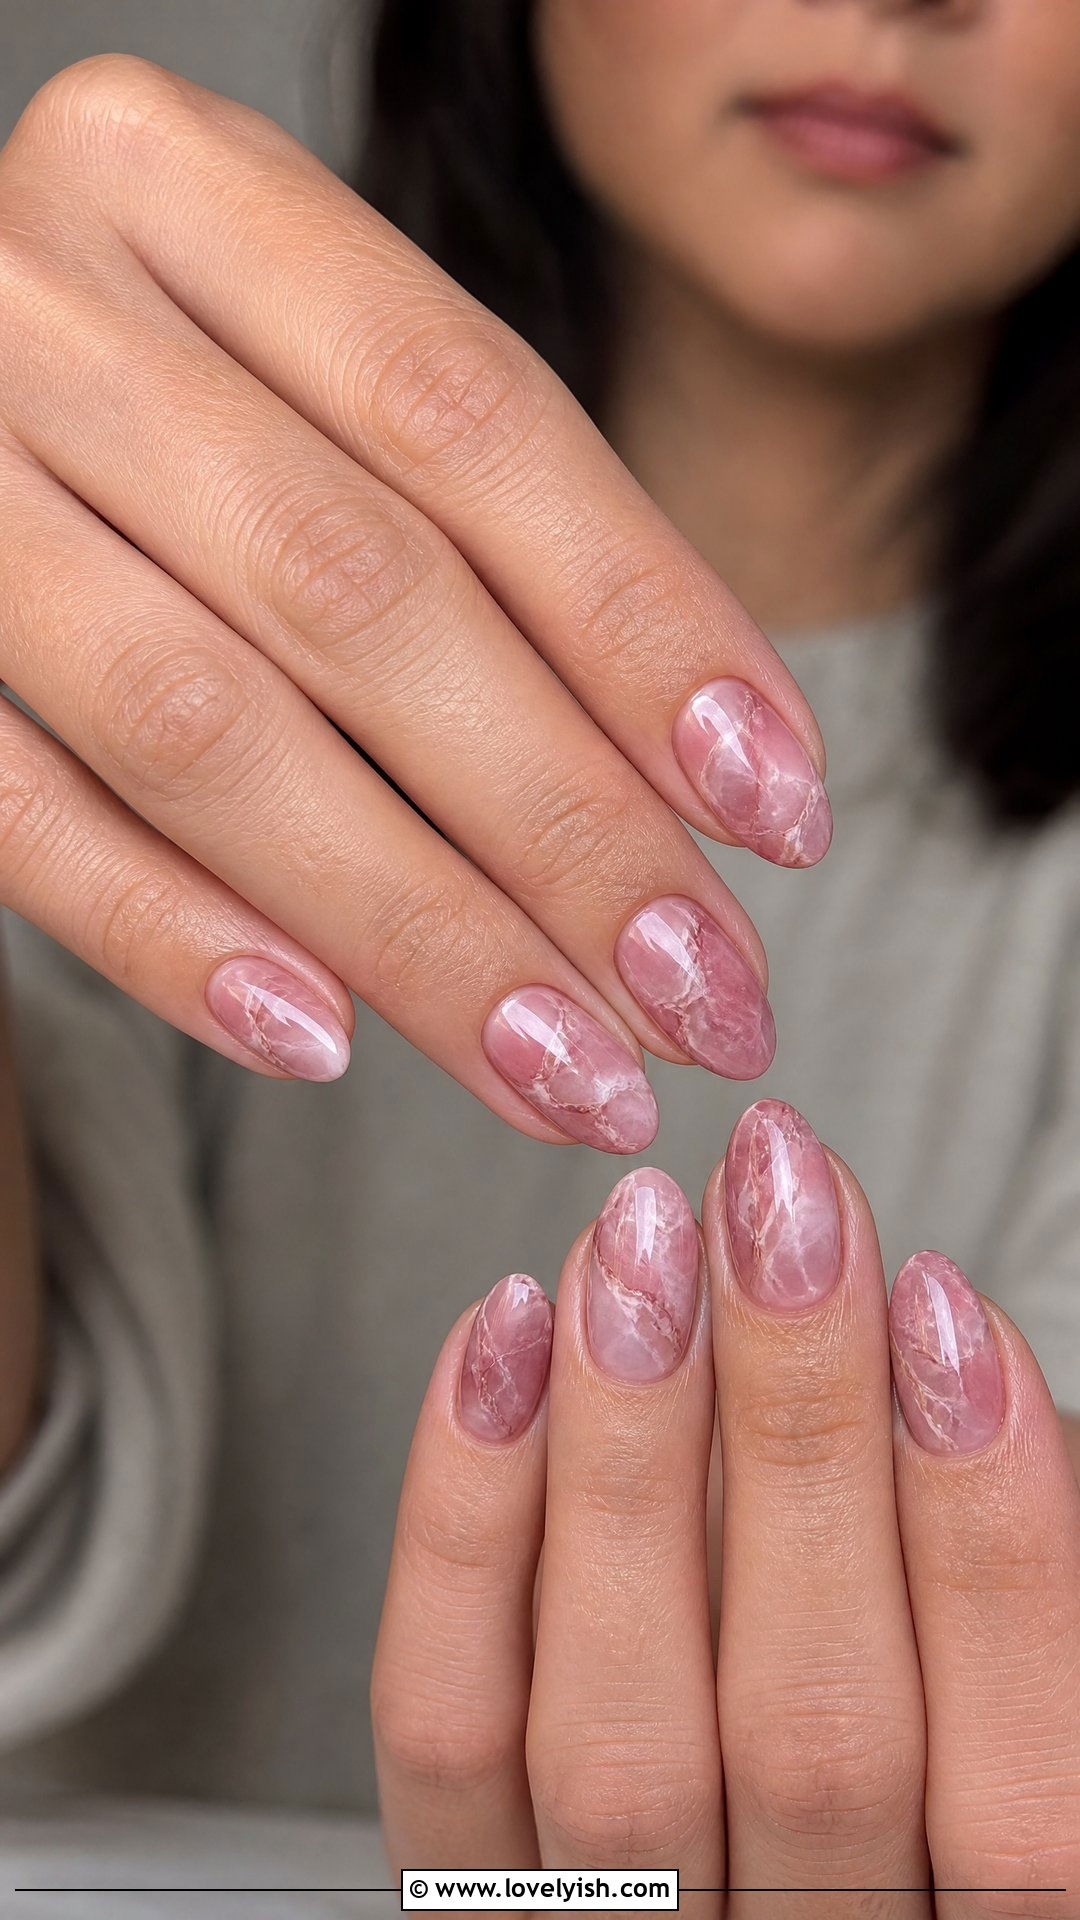
10. Toothpick Marble Swirl Nails
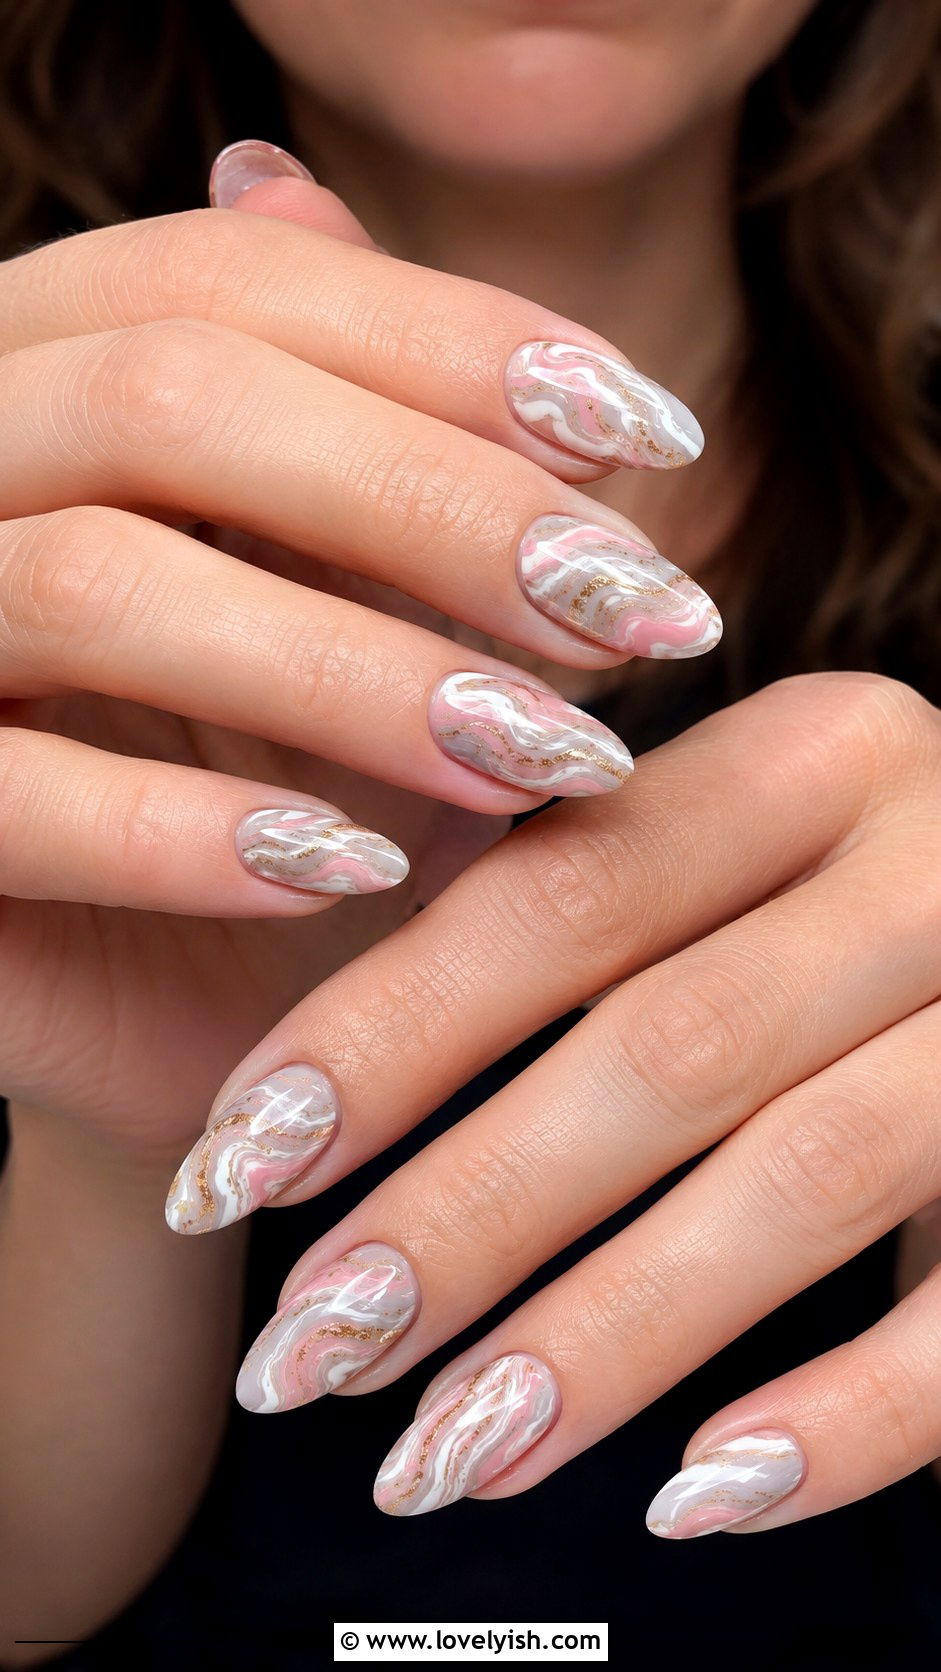
Marble nails look complicated but only need wet polish and a toothpick. Apply a white base coat and let it dry. Then, while still working on one nail at a time, drop two or three small pools of polish (think dusty pink, pale grey, and gold) directly on the nail. Use a toothpick to gently swirl the colors together in soft figure-eight motions. Don’t overwork it, the magic happens when the colors stay loose. Clean the skin edges with a cotton swab, then seal with a glossy top coat. Each nail becomes a tiny piece of stone-inspired art that feels luxe and editorial.
11. Heart Tip Nails

A heart-shaped French tip is the love-letter version of a classic manicure. Paint all five nails a sheer pink or milky white base. Once dry, dip a toothpick into red or hot pink polish and place two small dots at the free edge, side by side. Use the toothpick to gently drag the bottom of each dot down into a point, forming a heart. Repeat on every nail or just two accent nails. Top with glossy clear polish to smooth the lines. This Valentine’s-friendly look feels playful and feminine, and it works beautifully on short almond or oval nails for a delicate, doll-like finish.
12. Cow Print Nails With a Toothpick
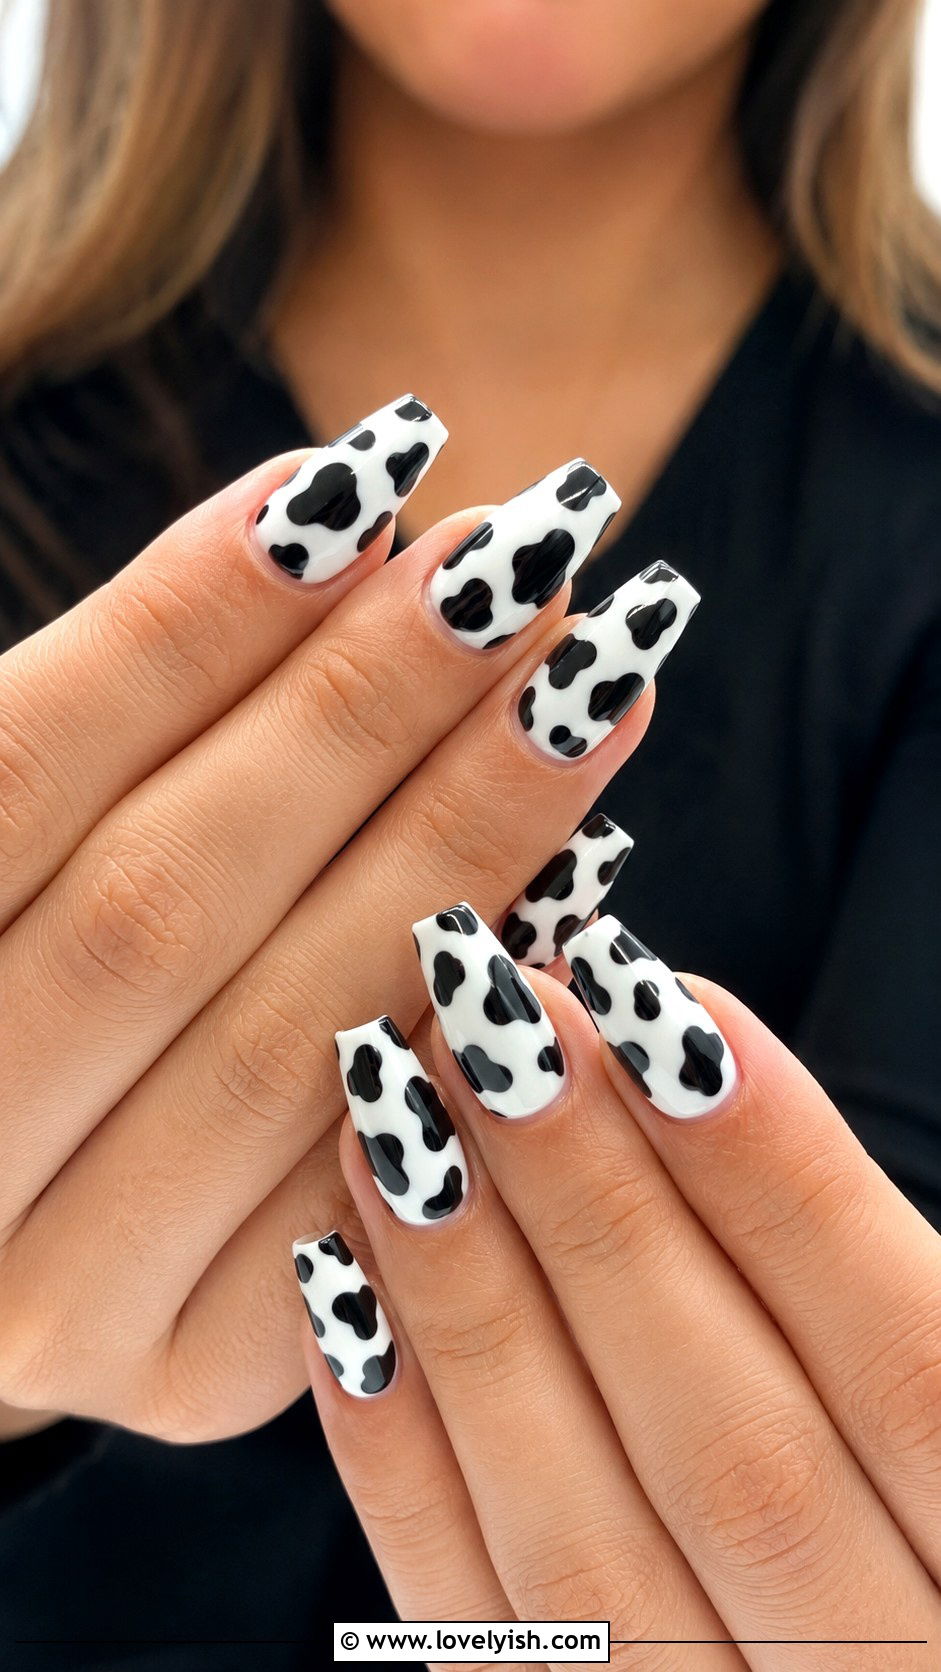
Cow print blew up on TikTok, and the freehand version is shockingly forgiving. Paint all five nails a clean white base, then use a toothpick dipped in black polish to draw irregular blobs across each nail. Vary the sizes, some big, some tiny, and let them touch the edges for that authentic cow print look. The shapes shouldn’t be uniform; lopsided is part of the vibe. Once dry, finish with a glossy top coat to smooth the surface. Swap black for brown, pink, or pastel blue to switch up the mood. This trendy print looks especially cool on medium coffin or square nails.
13. Diagonal Half-and-Half Nails
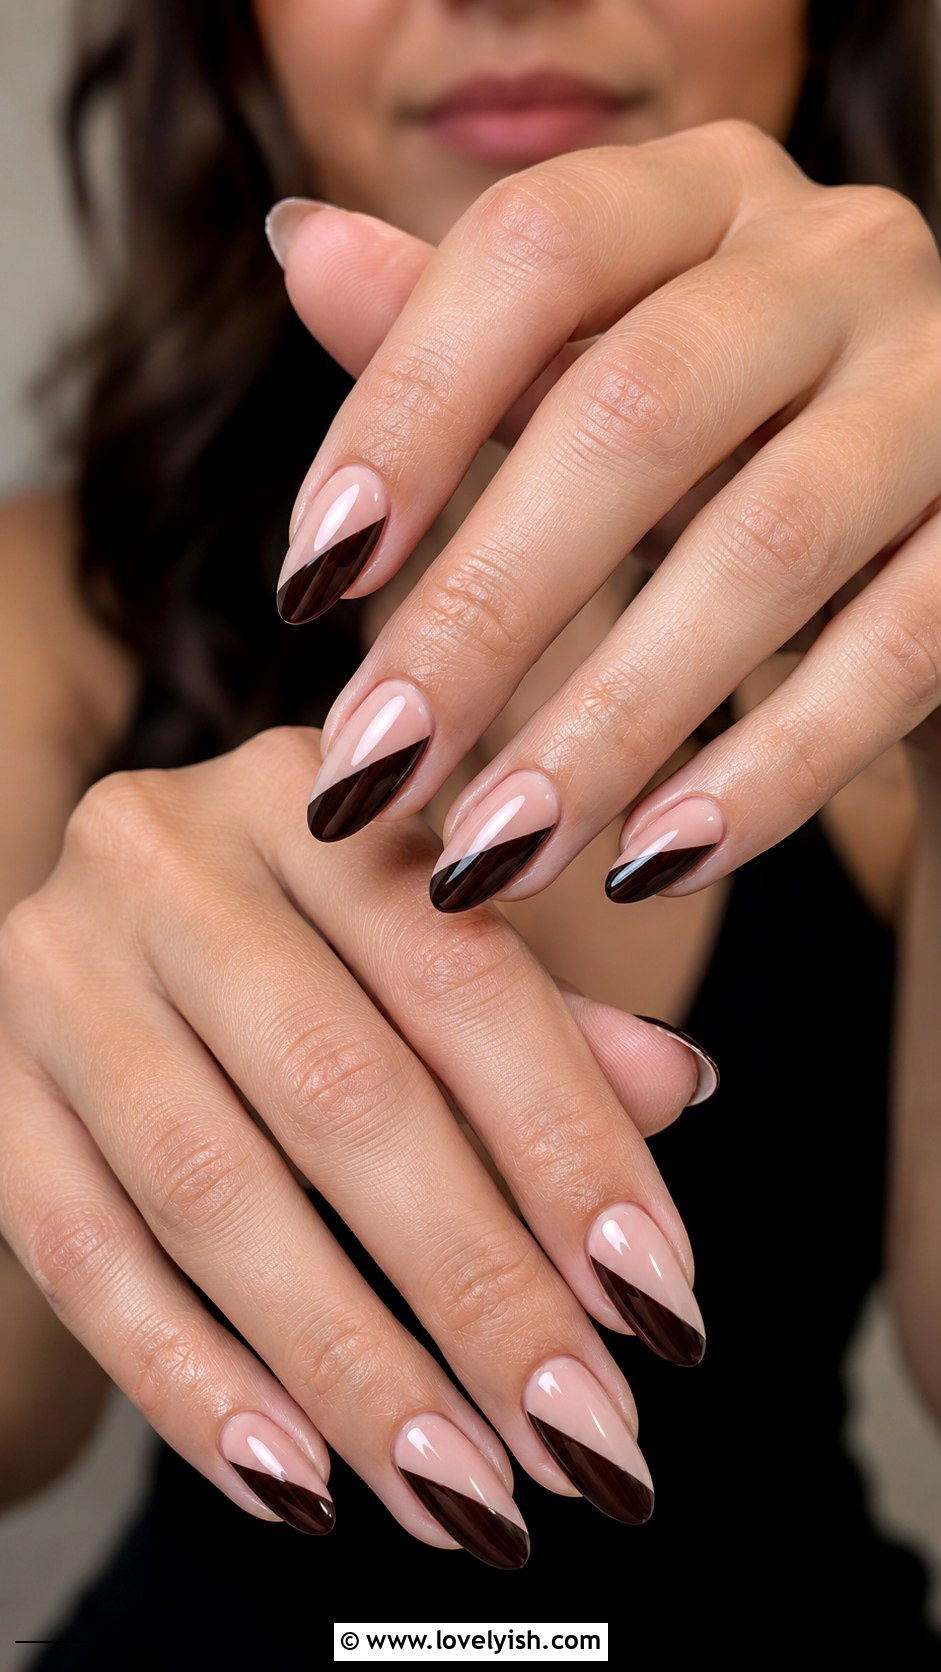
Diagonal color blocking adds instant edge to a basic mani. Paint all five nails a soft nude or cream base. Let it dry completely. Then, using your darker polish brush (something like espresso brown or deep emerald), paint a clean diagonal stripe from one corner of the nail to the opposite side, covering half the surface. Take your time and use slow brushstrokes for a crisp line. If your line wobbles, smooth it with a cotton swab dipped in remover. Top with glossy clear polish. The asymmetry feels modern and architectural, and the look reads polished and intentional on every nail shape, especially almond and squoval.
14. Glitter Gradient Tip Nails
A glitter gradient is the lazy girl’s secret to glam. Paint all five nails a soft pink, beige, or sheer base and let it dry. Pick up a fine glitter polish on the brush, then dab the brush concentrated at the free edge of each nail. As you move toward the cuticle, lift your pressure so the glitter scatters and fades naturally. Repeat once for more density at the tips. Seal with two coats of glossy top coat to smooth the texture. This sparkly fade is gorgeous for parties, holidays, or anytime you want low-effort shine. It looks especially pretty on medium almond and coffin nails.
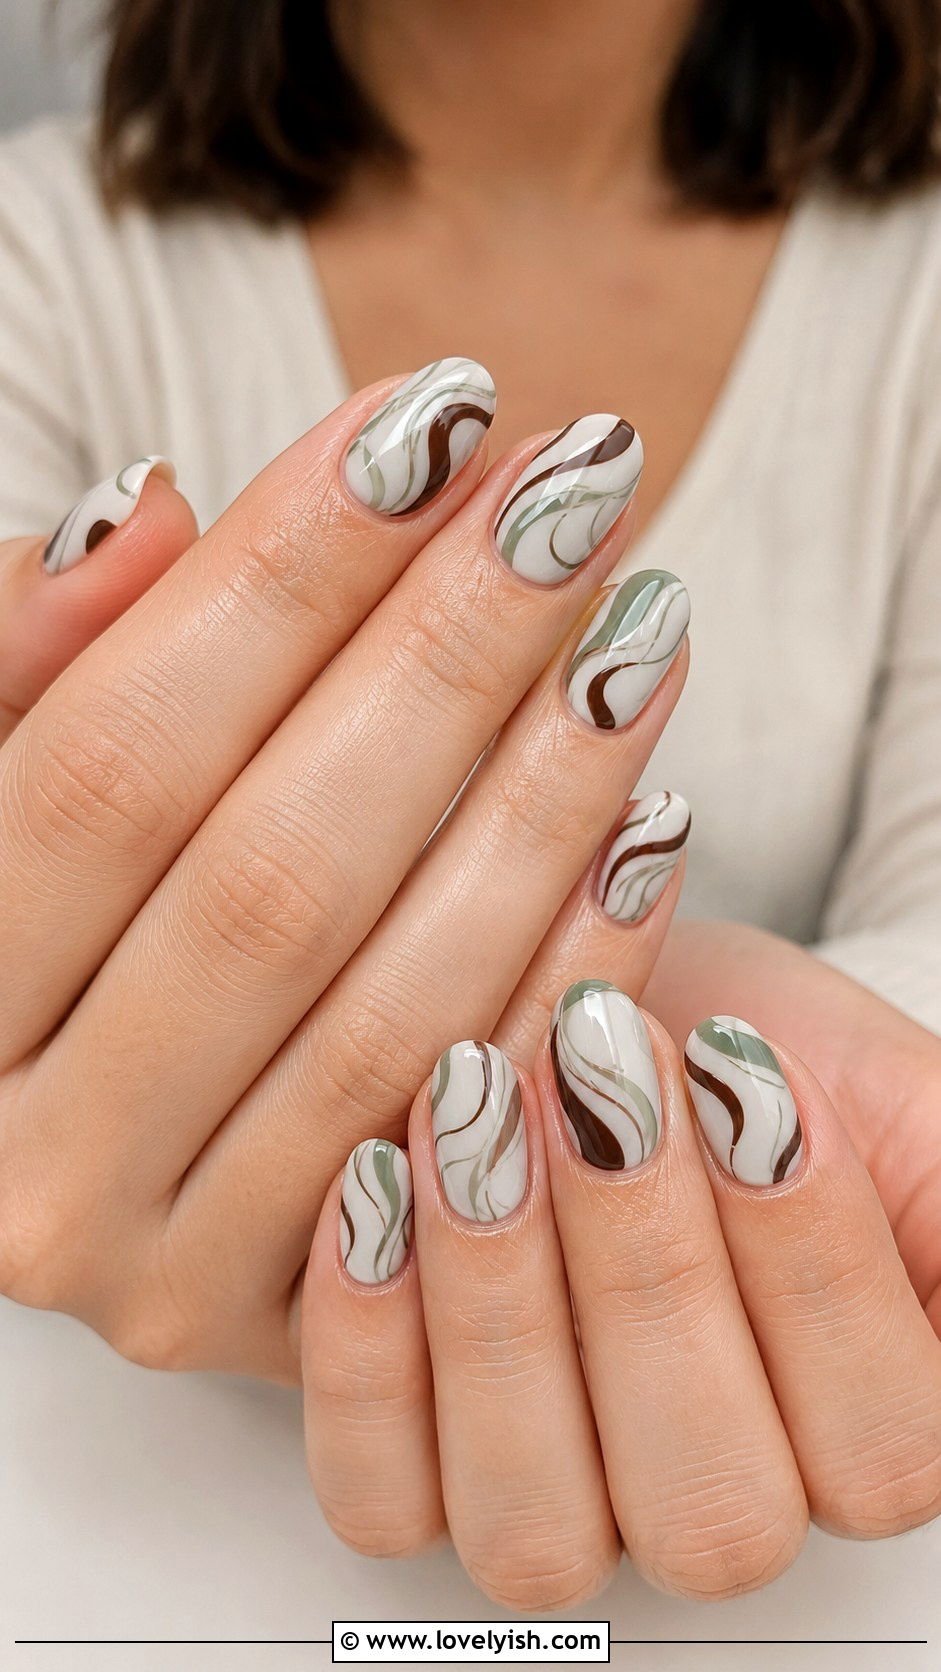
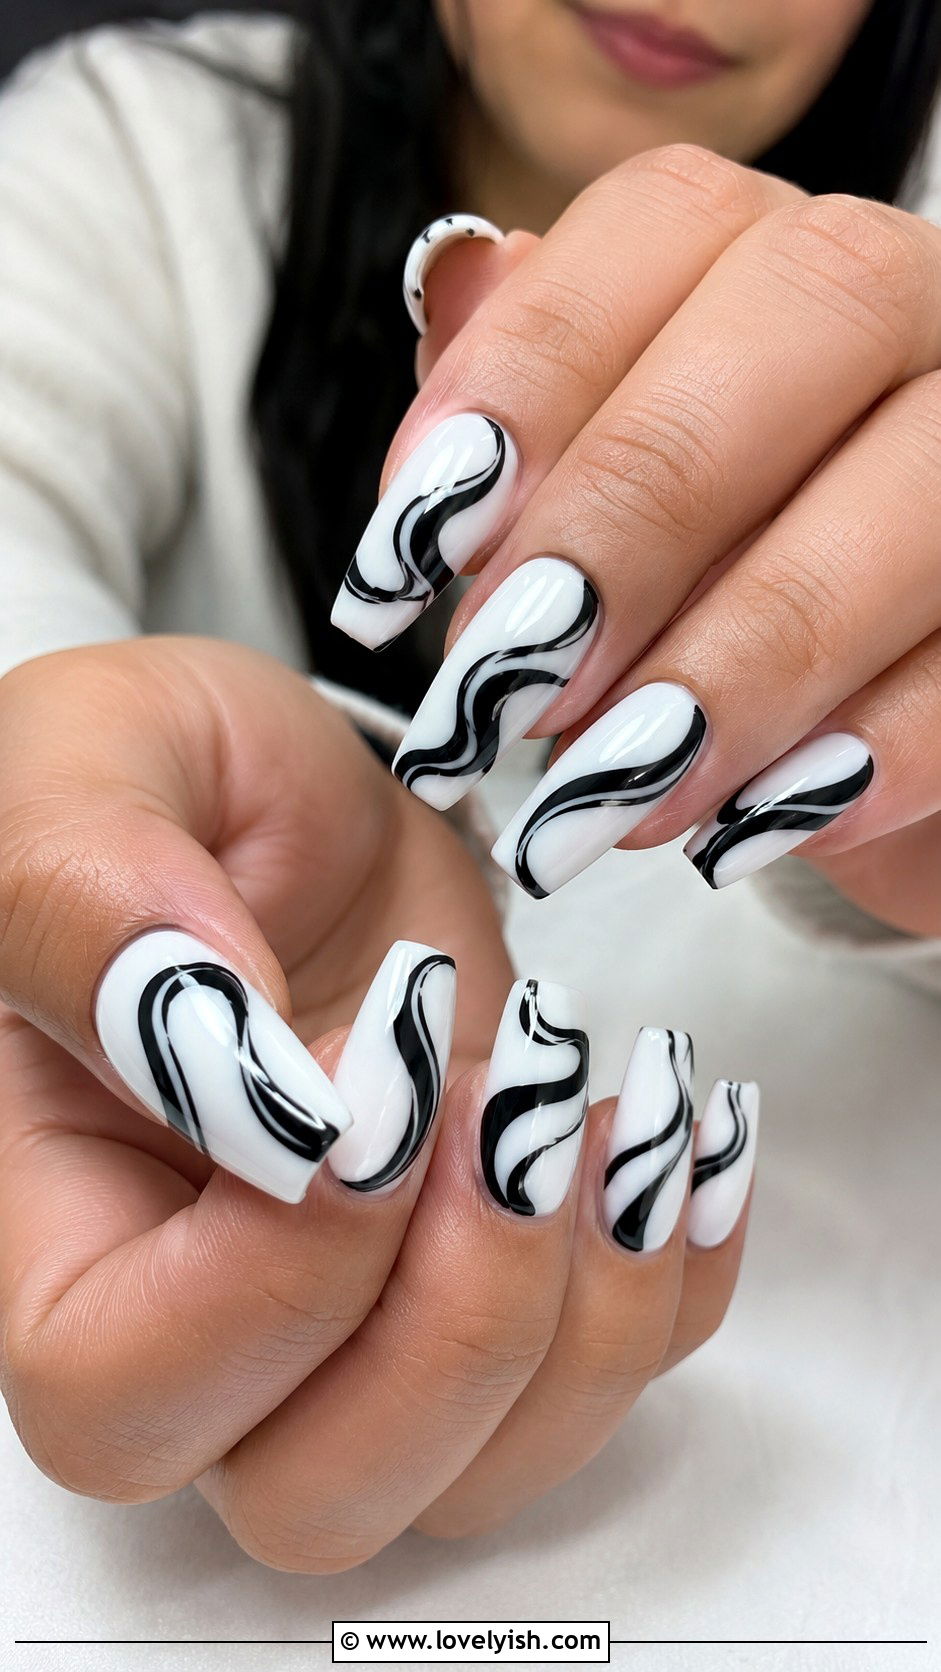
15. Abstract Toothpick Swirl Nails
Abstract swirls are everywhere right now, and a toothpick is all you need. Start with a milky white or nude base. While the base is still slightly tacky on the last coat, dip a toothpick in a contrasting polish like sage green, lavender, or chocolate brown, and draw loose, curving lines across each nail. Mix thick and thin lines, and let them flow off the edges. No two nails need to match. Clean the skin and apply a glossy top coat to even out any texture. The result is artsy and editorial, like something out of a 70s design magazine, and it suits every nail shape.
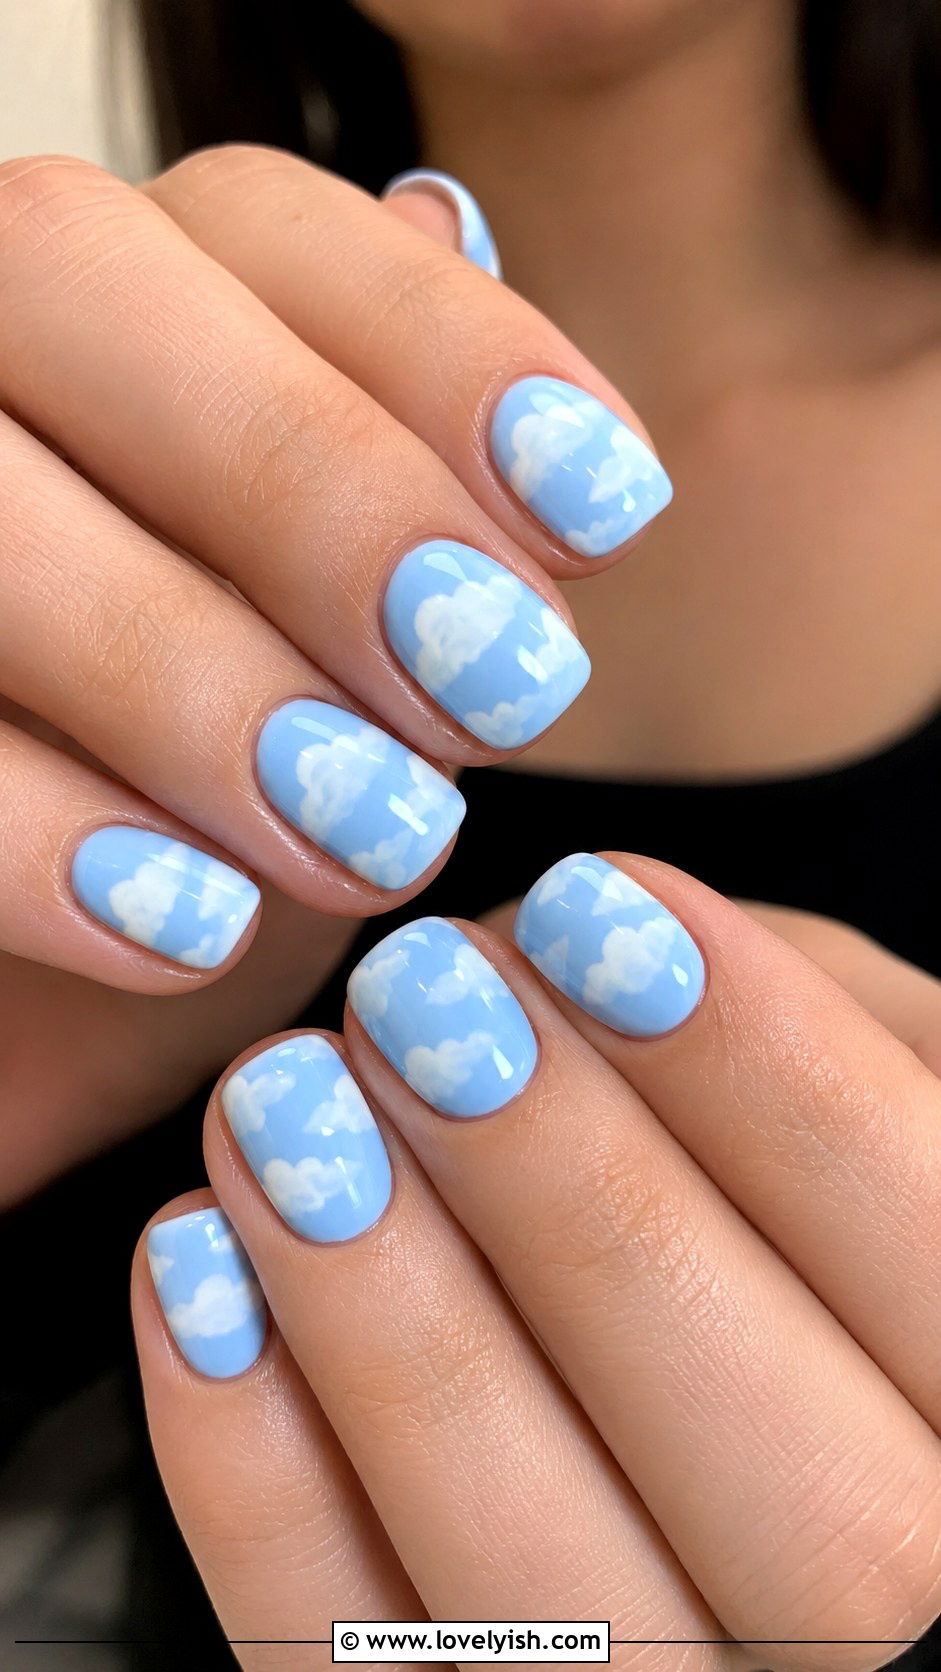
16. Cloud Nails With a Bobby Pin
Cloud nails are dreamy, soft, and made for blue-sky vibes. Paint all five nails a baby blue base. Dip the round tip of a bobby pin into white polish and dab two or three overlapping dots in a row to form a fluffy cloud shape. Add another small cloud below or beside the first for variety. Keep the cloud shapes uneven and rounded, just like real clouds. Once dry, seal with a glossy top coat. The look feels playful and whimsical, perfect for spring and summer. Cloud nails are especially cute on short squoval or round nails and read calm and feminine without trying too hard.
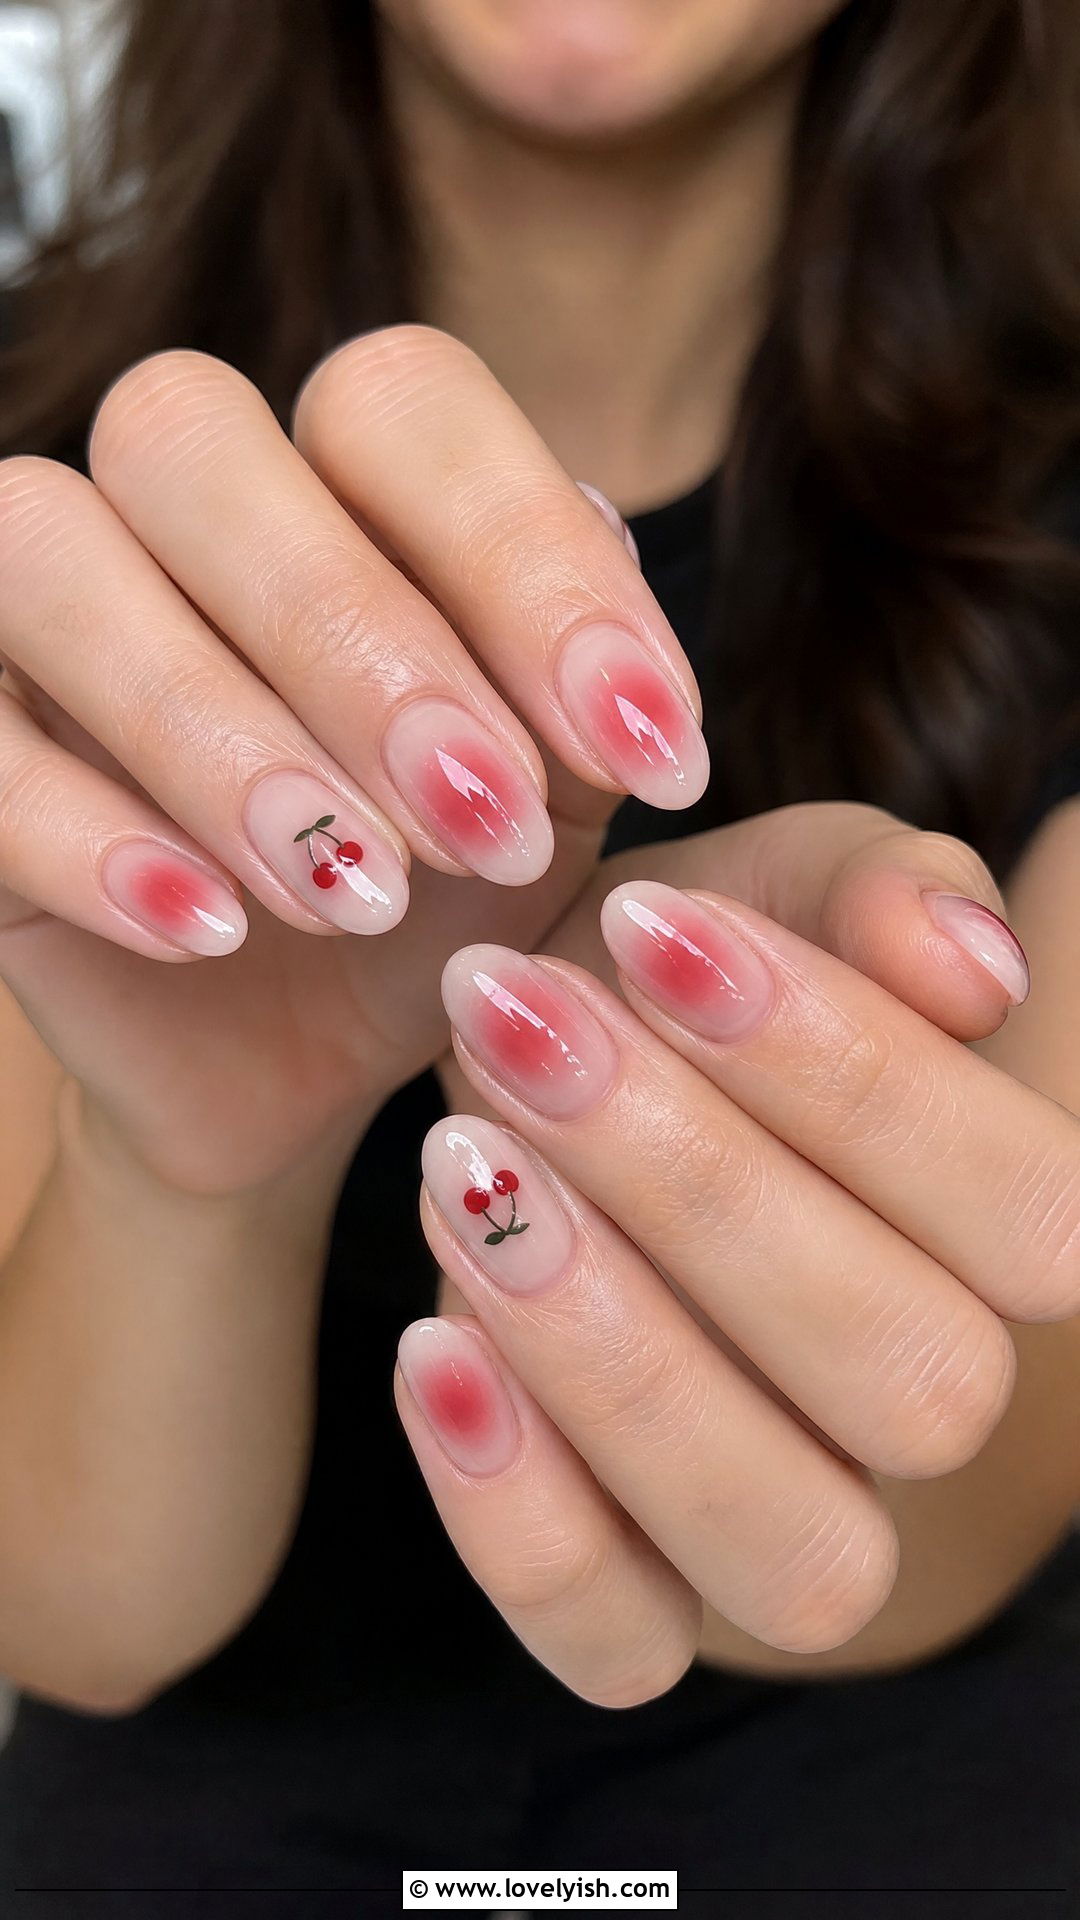
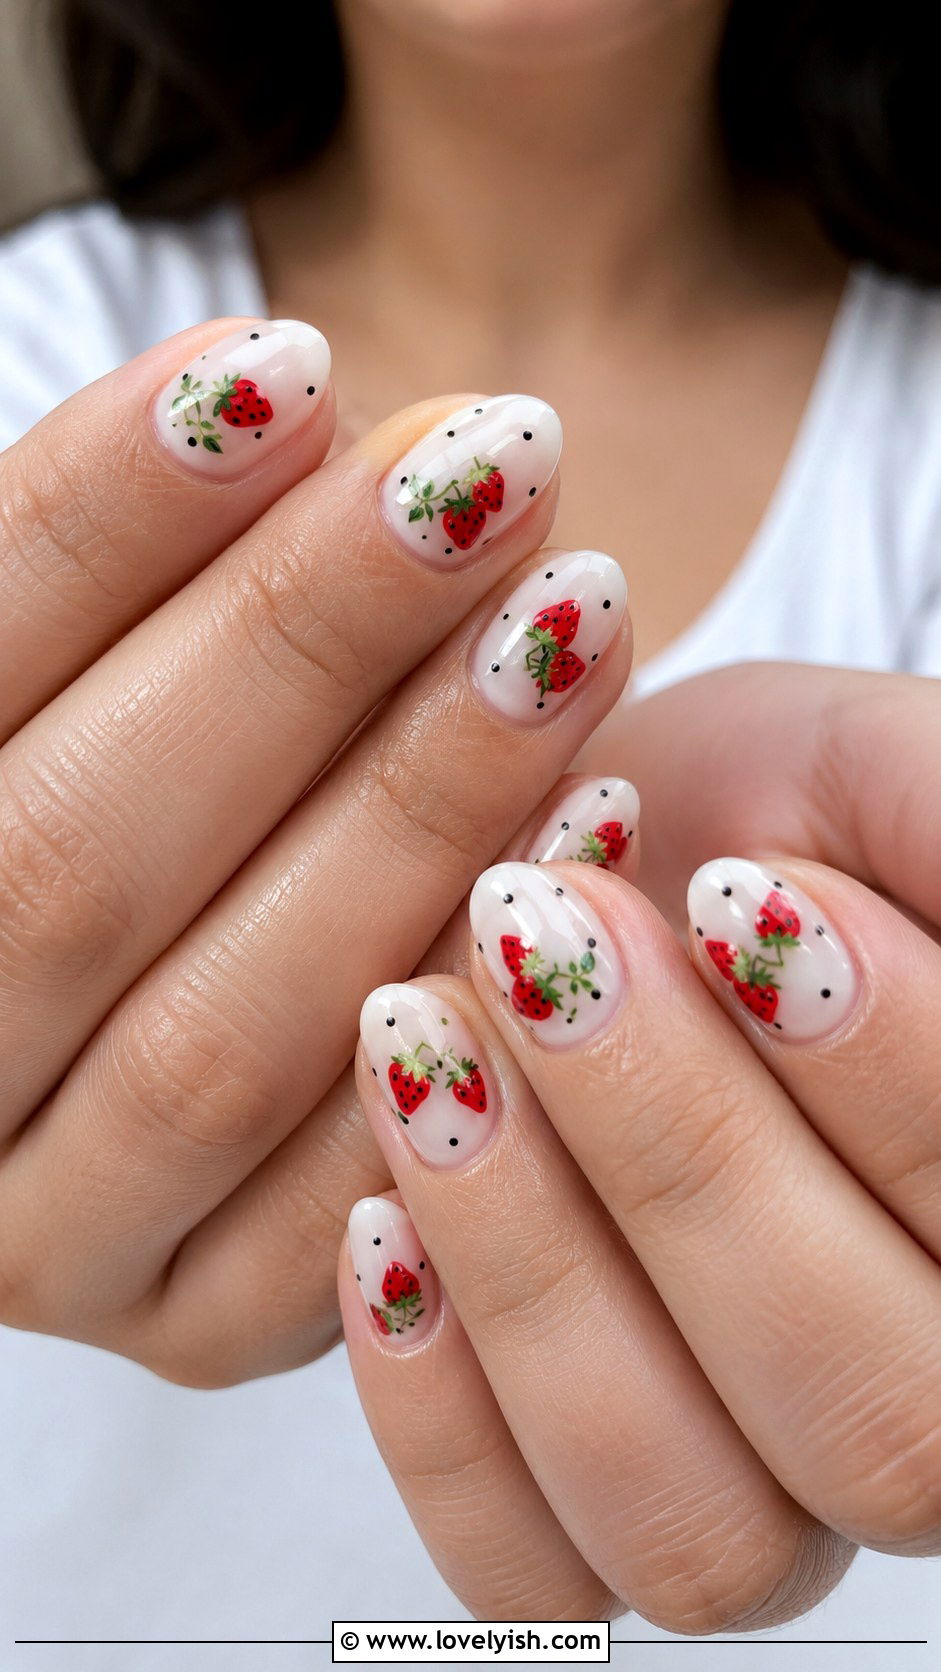
17. Strawberry Dot Nails
Strawberry nails are a fruit-trend favorite that’s much easier than they appear. Paint all five nails a milky white base. Dip the round end of a bobby pin in red polish and dot two small clusters of strawberries on each nail, keeping them roughly heart-shaped. Use a toothpick dipped in tiny black or yellow polish to add seed dots inside each strawberry. Add a tiny green leaf on top with the toothpick if you want extra detail. Top coat for shine. The result is a fresh, summery set that feels straight off a Pinterest board, and it works adorably on short almond or oval nails.
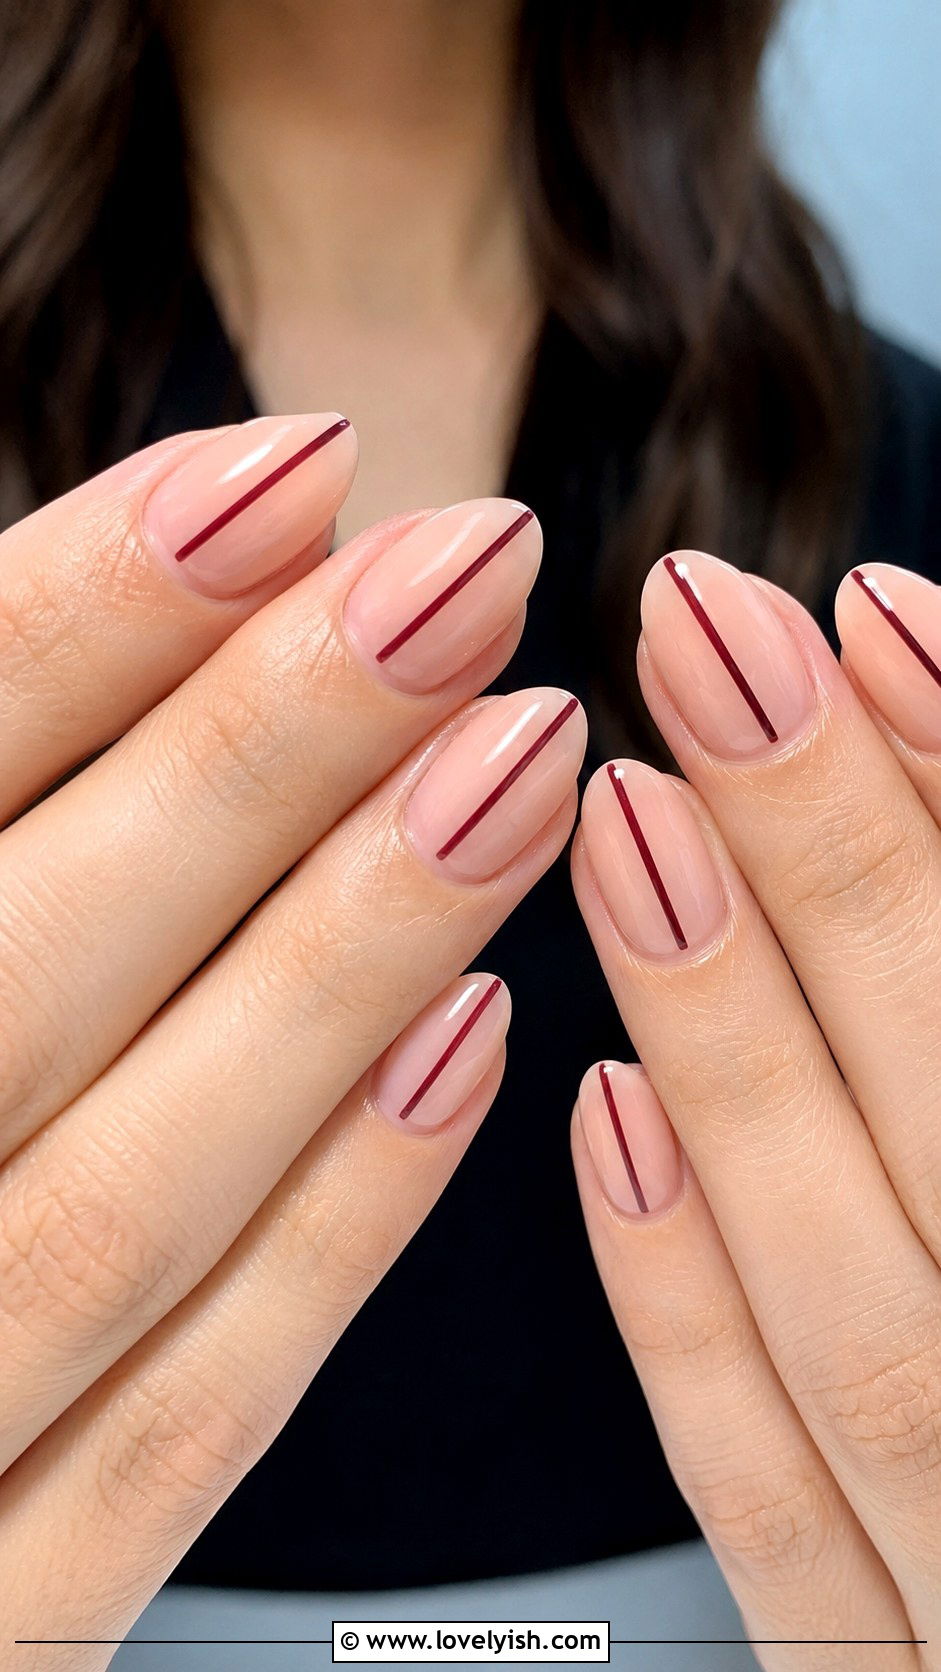
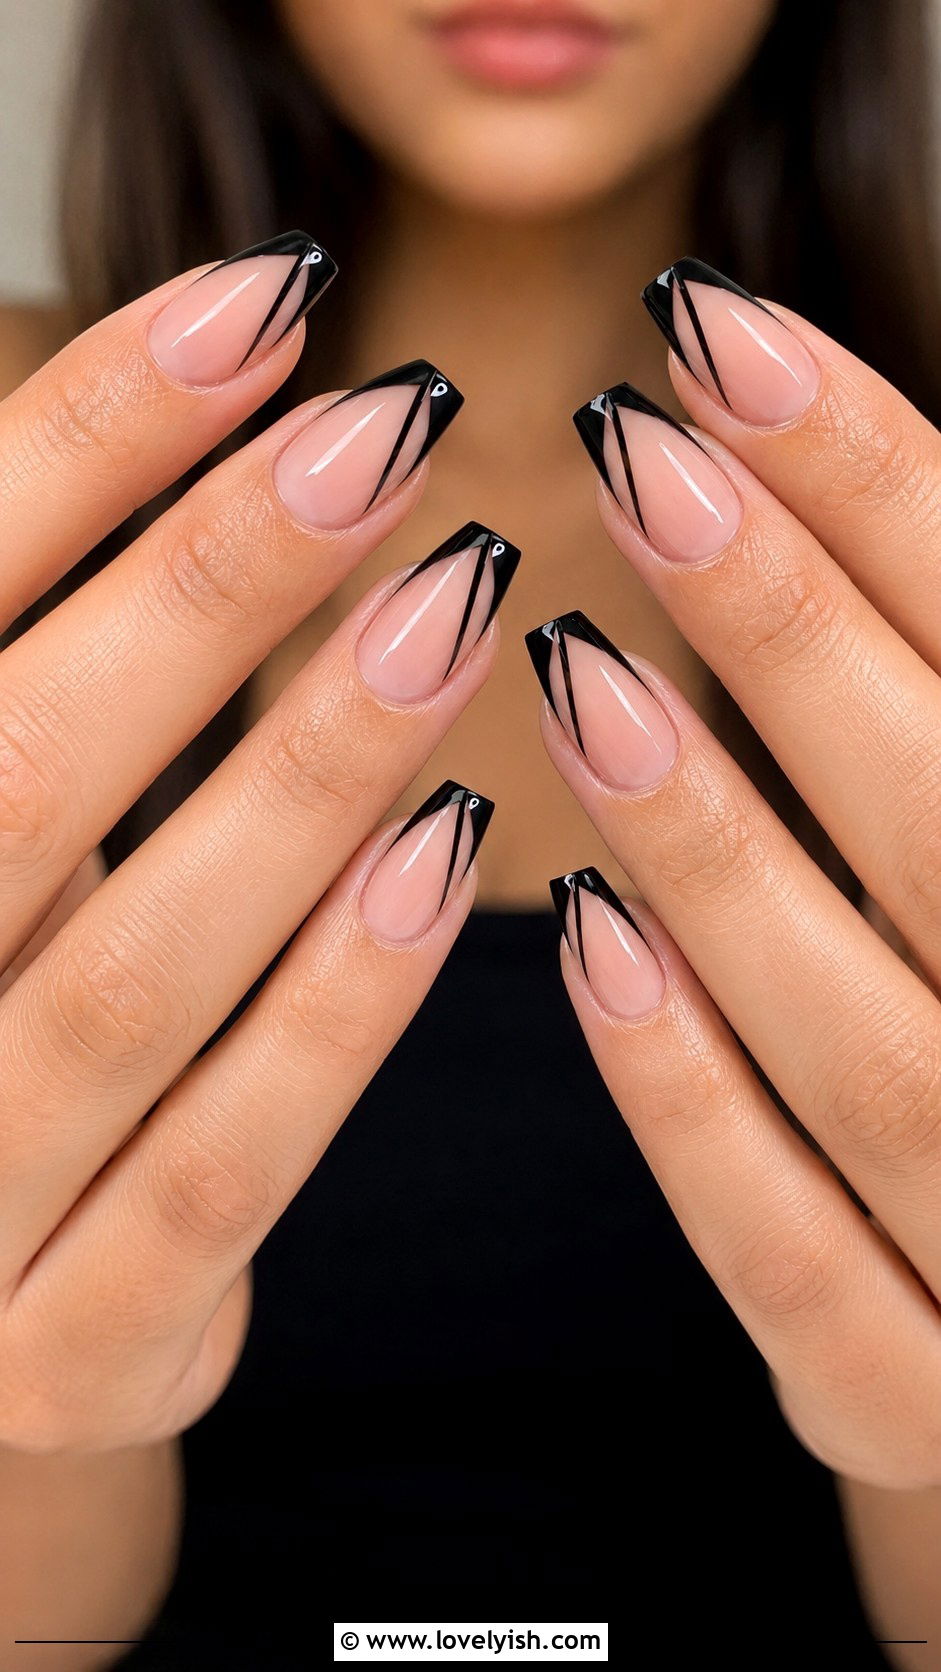
18. Negative Space Stripe Nails
Negative space designs let your natural nail peek through, and they look way more advanced than they are. Buff your nails clean and apply a clear base coat. Then, using a polish brush wiped almost dry, paint one thin vertical stripe down the center of each nail in a bold color like black, white, or burgundy. Keep the rest of the nail bare for that minimalist gallery look. Apply a glossy top coat over the entire nail to seal. The contrast between the natural nail bed and the single stripe feels editorial and modern. This look is especially flattering on medium oval or almond nails.
19. Watercolor Wash Sponge Nails
Watercolor nails feel like art class on your fingertips. Paint all five nails a sheer white base. Squeeze tiny dots of two or three pastel polishes onto a makeup sponge, like dusty pink, periwinkle, and mint. Dab the sponge softly across each nail, letting the colors bleed and blend. Repeat lightly until you get the soft, hazy effect you want. Don’t overdo it, less is more for a true watercolor wash. Clean the skin edges and finish with a glossy top coat. The dreamy, painterly result feels romantic and unique on every finger and looks especially lovely on medium almond or oval nails.
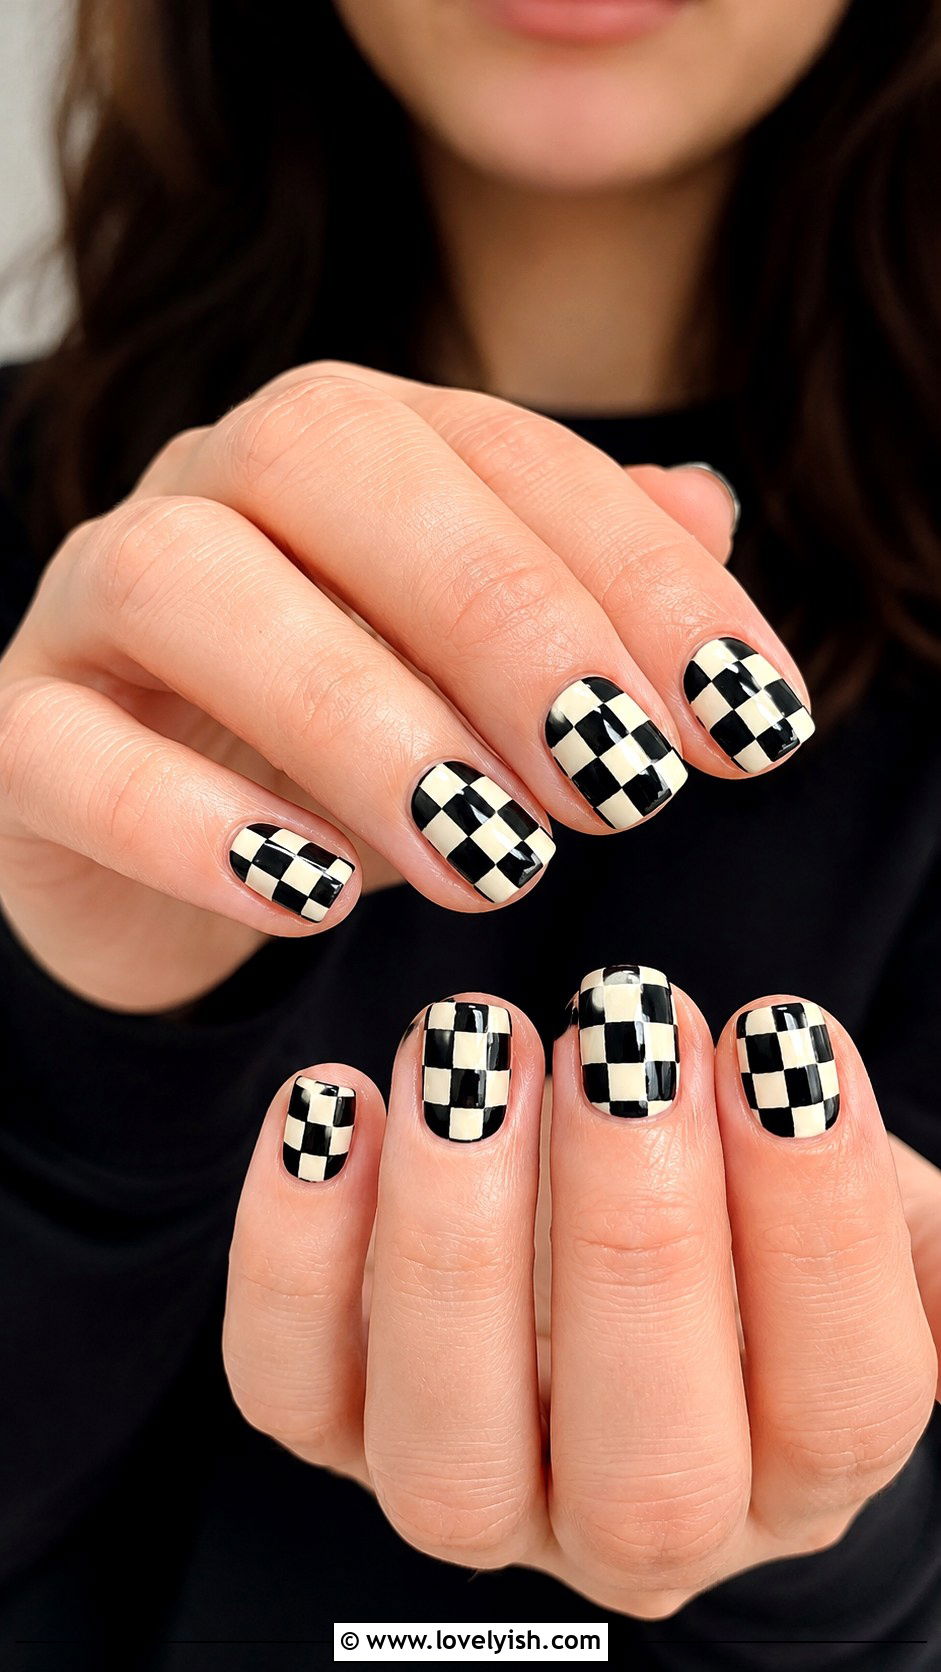
20. Freehand Checkerboard Nails
The checkerboard trend is bold, retro, and easier than it looks. Paint all five nails a cream or white base. Once dry, use the polish brush to paint small squares in a contrasting color (think black, lime green, or hot pink) across each nail in a grid pattern. Aim for three rows of three squares per nail, alternating colors like a tiny chessboard. Don’t sweat perfection, the slightly uneven squares look intentional and trendy. Clean the edges and seal with a glossy top coat. This design is bold and Y2K-inspired, looking especially cool on short square or squoval nails for that 90s skater aesthetic.
21. Confetti Speckle Nails
If you love a little chaos, confetti nails are pure joy. Paint all five nails a clean pastel base, like robin’s egg blue or butter yellow. Dip a toothpick into different bright polishes (red, white, black, neon pink) and tap small, irregular specks across each nail. Vary the size and spacing for a true confetti vibe. The randomness is the whole point, no two nails need to match. Seal everything with two coats of glossy top coat to smooth the texture. This cheerful look is perfect for birthdays, graduations, and celebrations. It works beautifully on every nail shape, especially short almond and squoval nails.
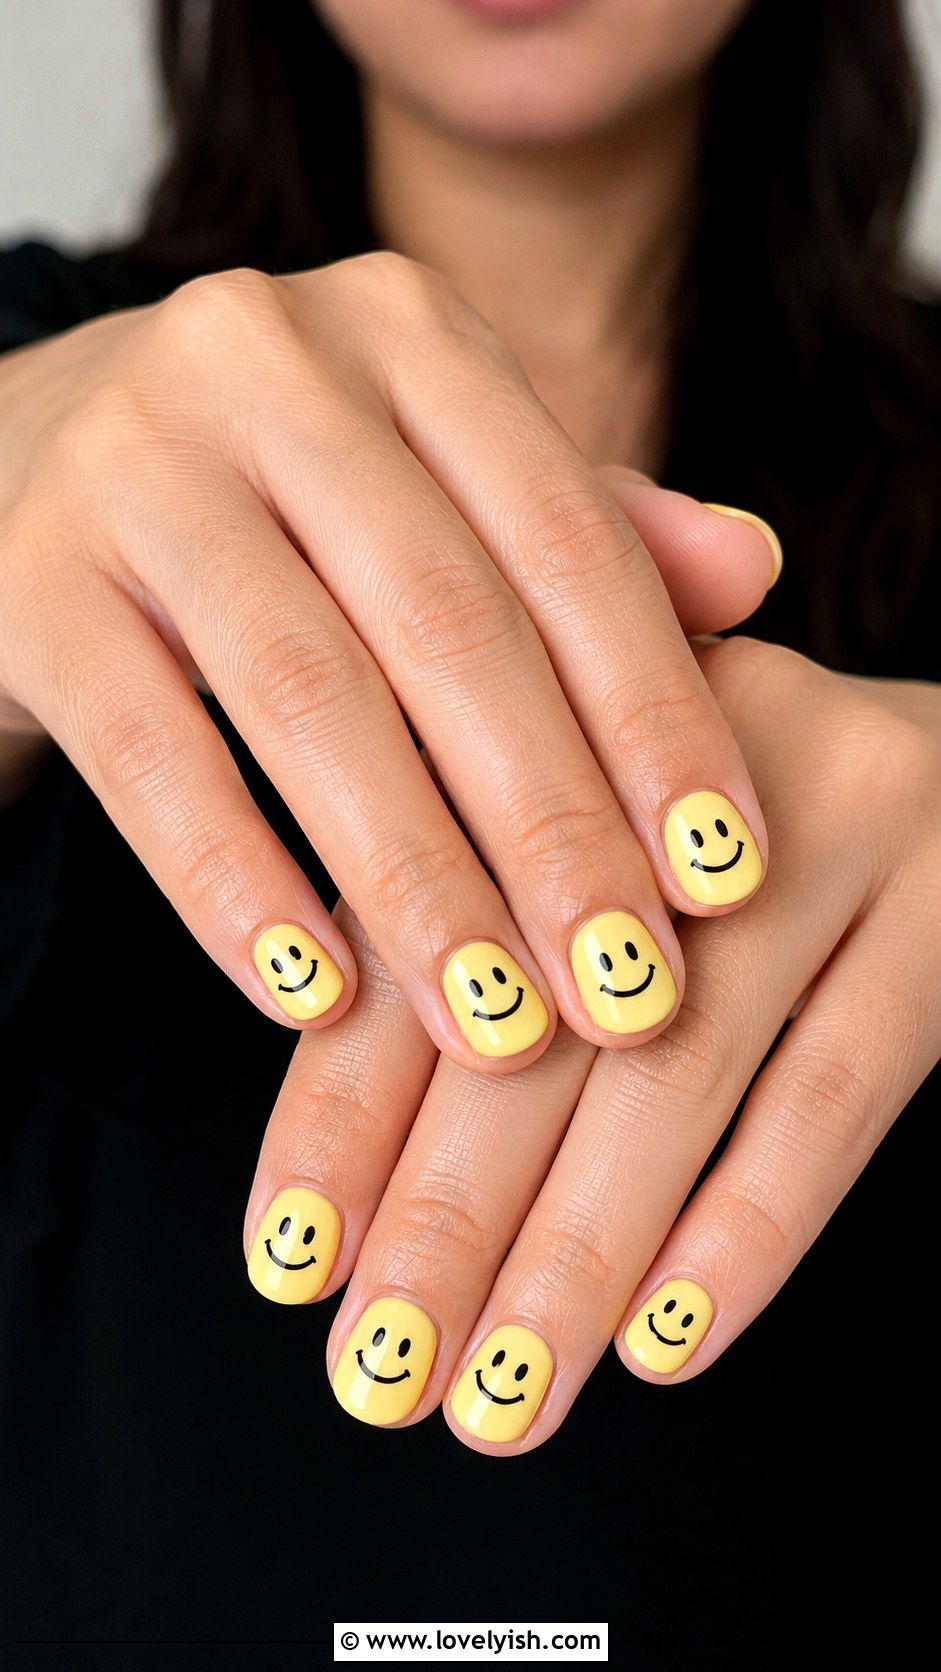
22. Smiley Face Dot Nails
Smiley faces never go out of style, and they’re foolproof to draw. Paint all five nails a soft yellow, white, or pastel base. Use the round end of a bobby pin dipped in black polish to make two small dots for the eyes on each nail. Then dip a toothpick into the same black polish and gently drag a small curve below to form the smile. Place one smiley per nail or scatter two on each. Clean up any wobbles with a cotton swab and remover, then finish with a glossy top coat. This feel-good design is youthful, retro, and works on every nail length and shape.
23. Star Tip Toothpick Nails

Star nails feel celestial and chic, and a toothpick handles the shape perfectly. Paint all five nails a deep navy, soft black, or dusty mauve base. Dip a toothpick into gold or silver polish and create five-point stars by drawing a small asterisk shape, then thickening the lines slightly. Place one star per nail, or cluster two or three at the tip. Don’t aim for perfection, hand-painted stars have charm. Top with a glossy seal coat for shine. This twinkly design feels magical and dreamy, and it suits every nail shape but looks particularly elegant on medium almond or coffin nails for an editorial finish.
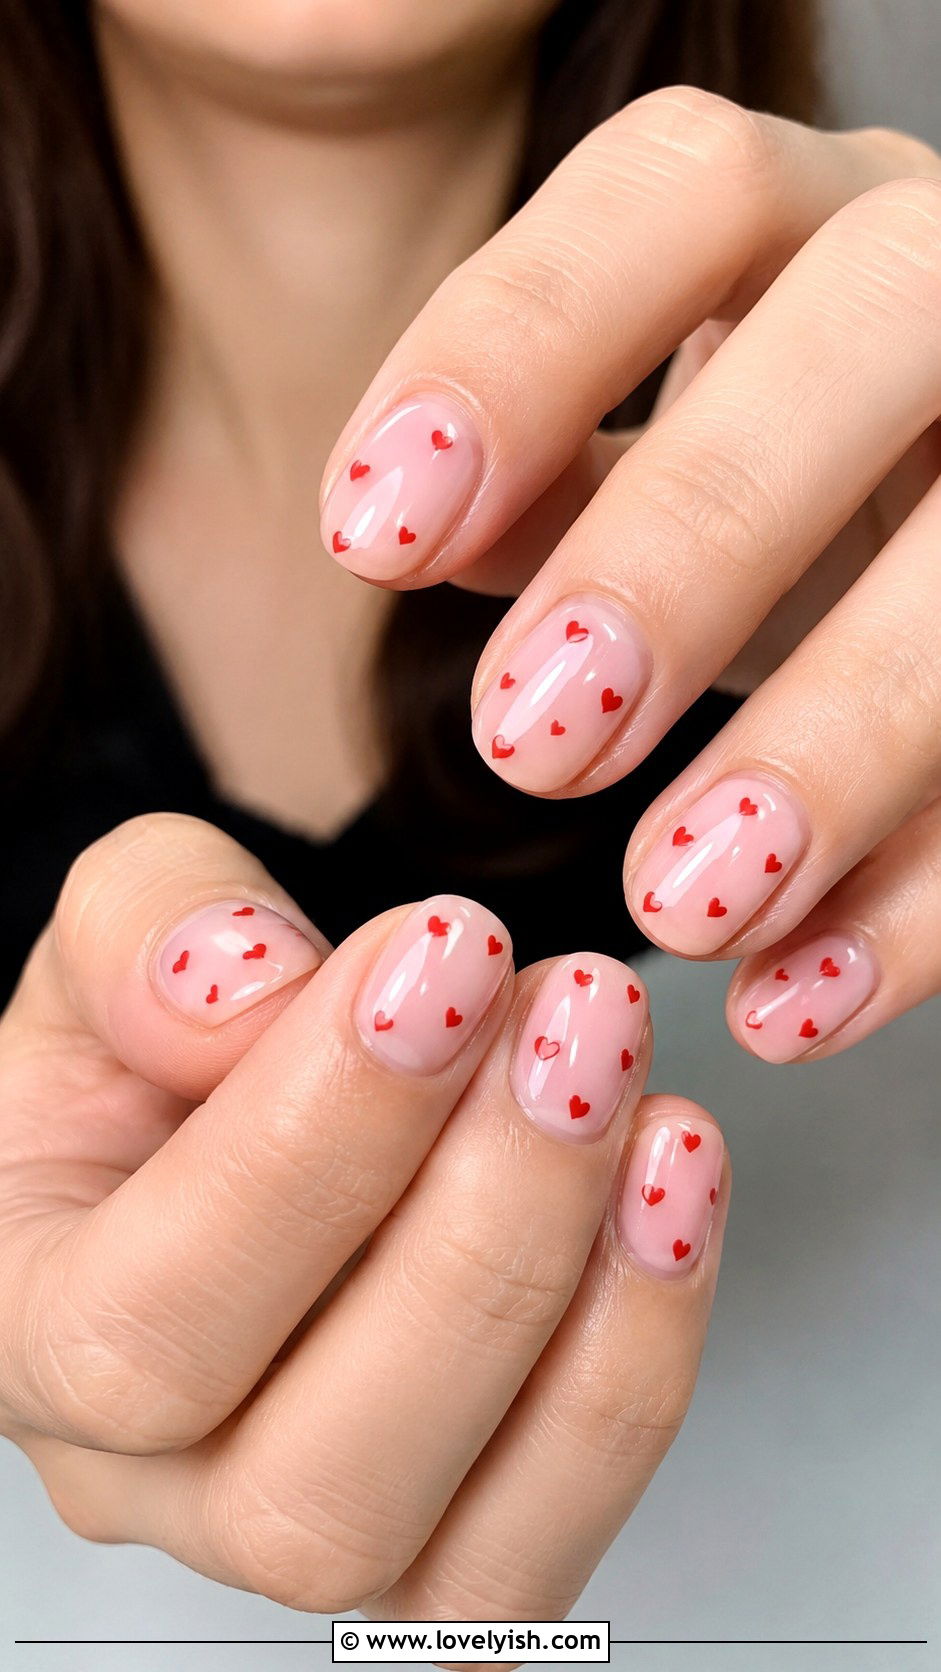
24. Mini Heart Toothpick Nails
Tiny scattered hearts are sweet, soft, and beginner-friendly. Paint all five nails a sheer pink or milky white base. Dip a toothpick into red, deep pink, or even pastel lilac polish, and place two small dots side by side. Use a clean toothpick tip to drag the bottom of the dots down into a point, creating a little heart. Scatter two or three hearts across each nail in a random pattern, or feature one heart on each finger for a cleaner look. Top coat to seal. This romantic design feels girly and feminine, and it’s gorgeous on short oval or squoval nails.
25. V-Tip Brush Nails
V-tip nails are a fresh twist on the classic French manicure, and your polish brush handles it beautifully. Paint all five nails a sheer nude or pale pink base and let dry. Then, using a polish brush wiped mostly clean, paint two short diagonal lines from the corners of each free edge that meet in the center, forming a V shape. Choose a sharp contrasting color like black, white, or chrome silver. Take your time with the angles. Clean up any wobbles with a cotton swab dipped in remover, then top coat. The geometric finish feels modern and minimal on medium almond or coffin nails.
Conclusion:
Beginner nail art doesn’t need fancy gear, just a few household basics, a steady hand, and a willingness to embrace happy accidents. The 25 easy nail art designs for beginners without tools above prove that toothpicks, bobby pins, sponges, and straws can deliver salon-worthy results from your own couch. Start with the simplest looks, like polka dots or freehand French tips, then work your way up to swirls, marbles, and skittle sets as your confidence grows. Remember, slightly imperfect lines and uneven dots add charm rather than ruining the design. Pick a look that matches your mood, queue up a show, and have fun creating your next favorite manicure.
You'll Like These Styles:


Leave a Reply