Nothing ruins a great hike faster than hair that won’t stay put. Wind, sweat, and miles of trail can turn even the most carefully done hairstyle into a tangled mess by mile two. That is exactly why braided ponytails have become the go-to choice for women who love the outdoors. They combine the secure hold of a braid with the easy practicality of a ponytail, keeping every strand locked in place while you focus on the trail ahead. Whether your hair is short, medium, or past your shoulders, there is a braided ponytail out there that works for your texture and length. Here are 20 hiking ponytail with braid looks worth trying on your next adventure.

1. French Braid Ponytail
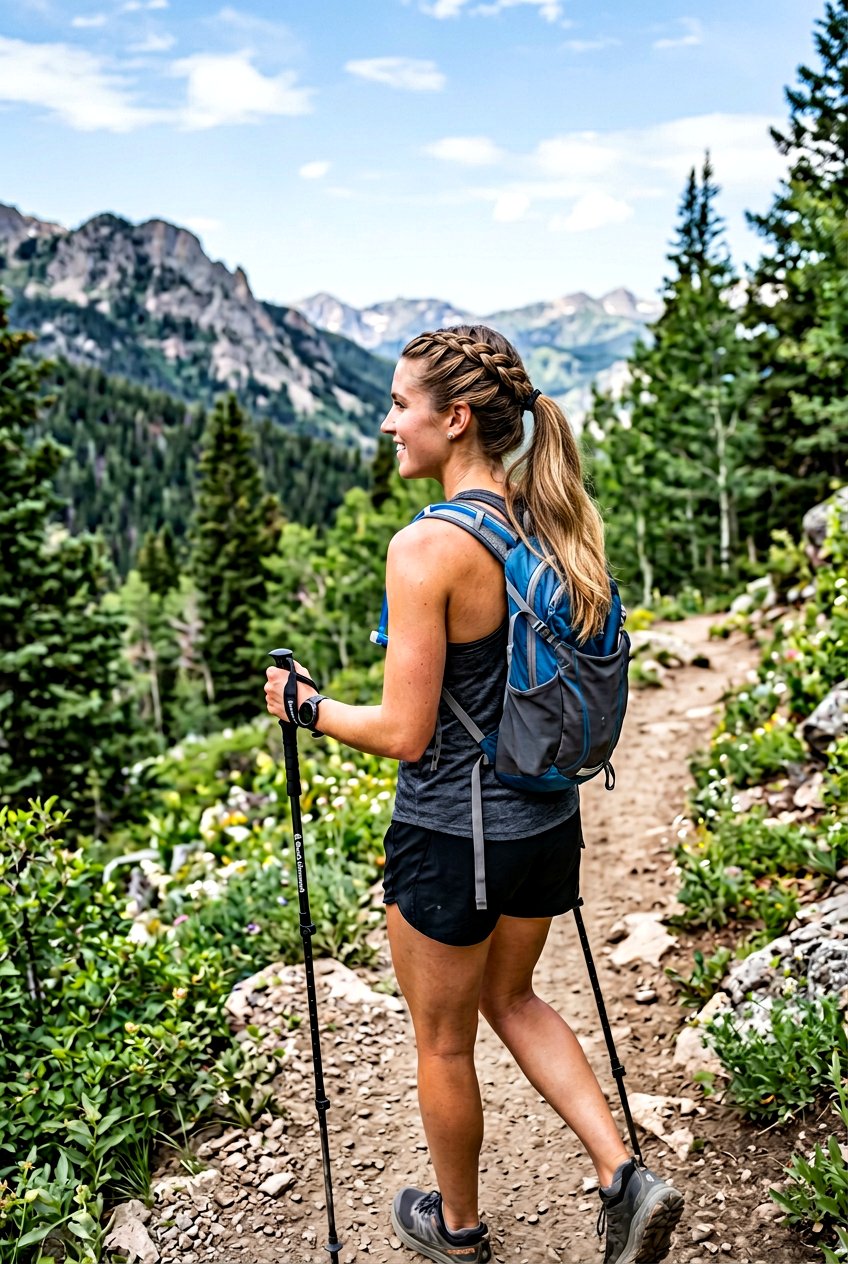
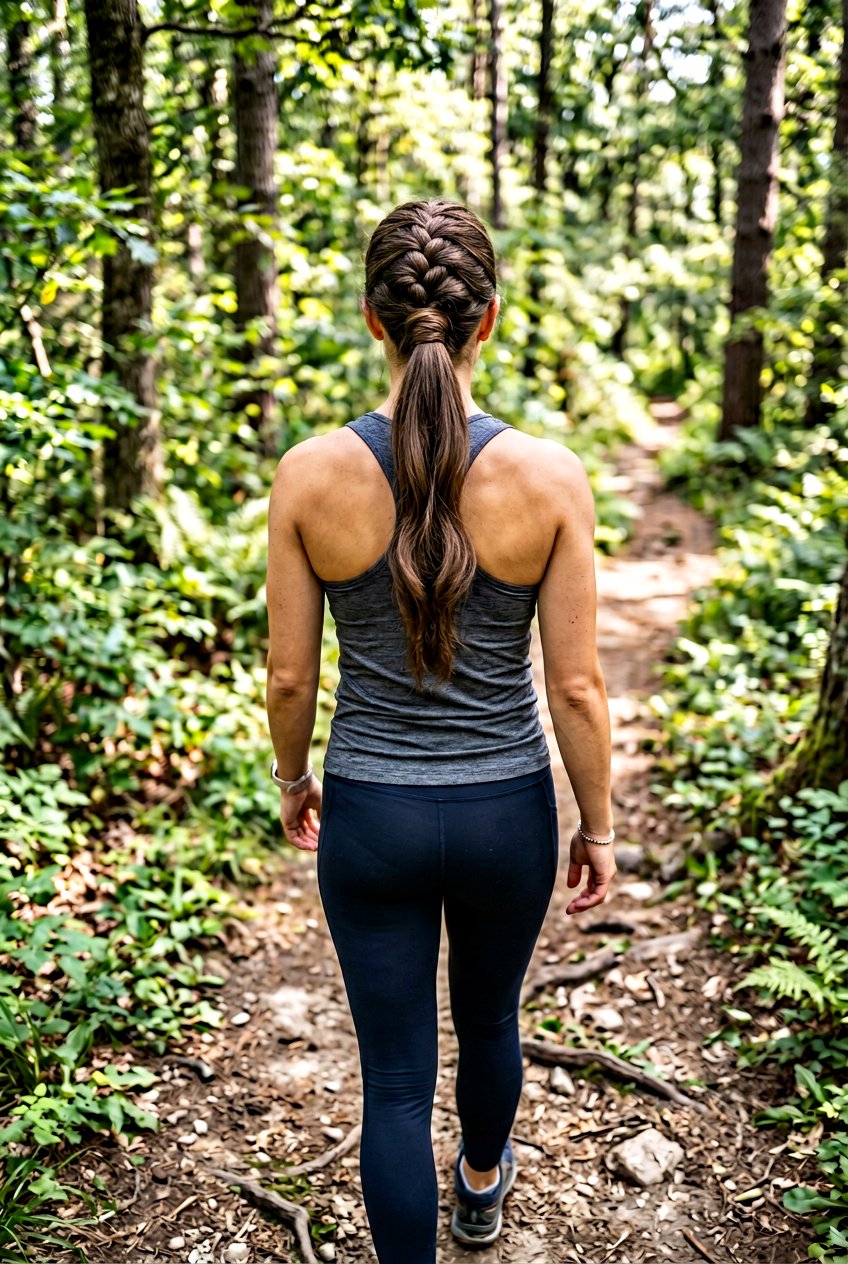
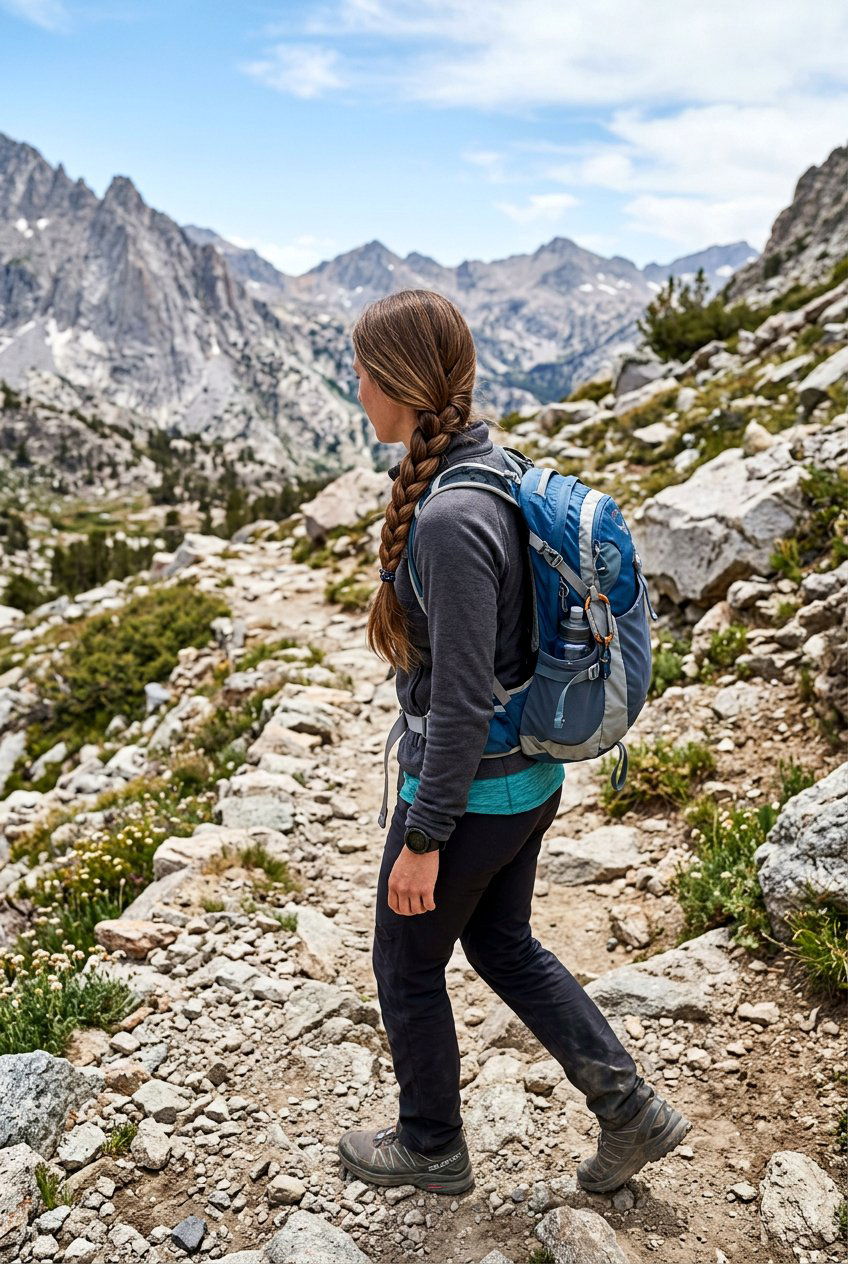
A French braid ponytail is one of the most reliable choices you can make for a long day on the trail. You start by French braiding from the top of your head, gathering sections as you work your way down toward the nape. Once you reach the base of your neck, you secure the braid with an elastic and let the rest of your hair fall into a loose ponytail. This look keeps the top layers of your hair completely locked down, so you never have to stop and re-tying mid-hike. It works beautifully on medium to long hair and holds up well under a hat or buff. Add a little dry shampoo before you start for extra grip that lasts all day.
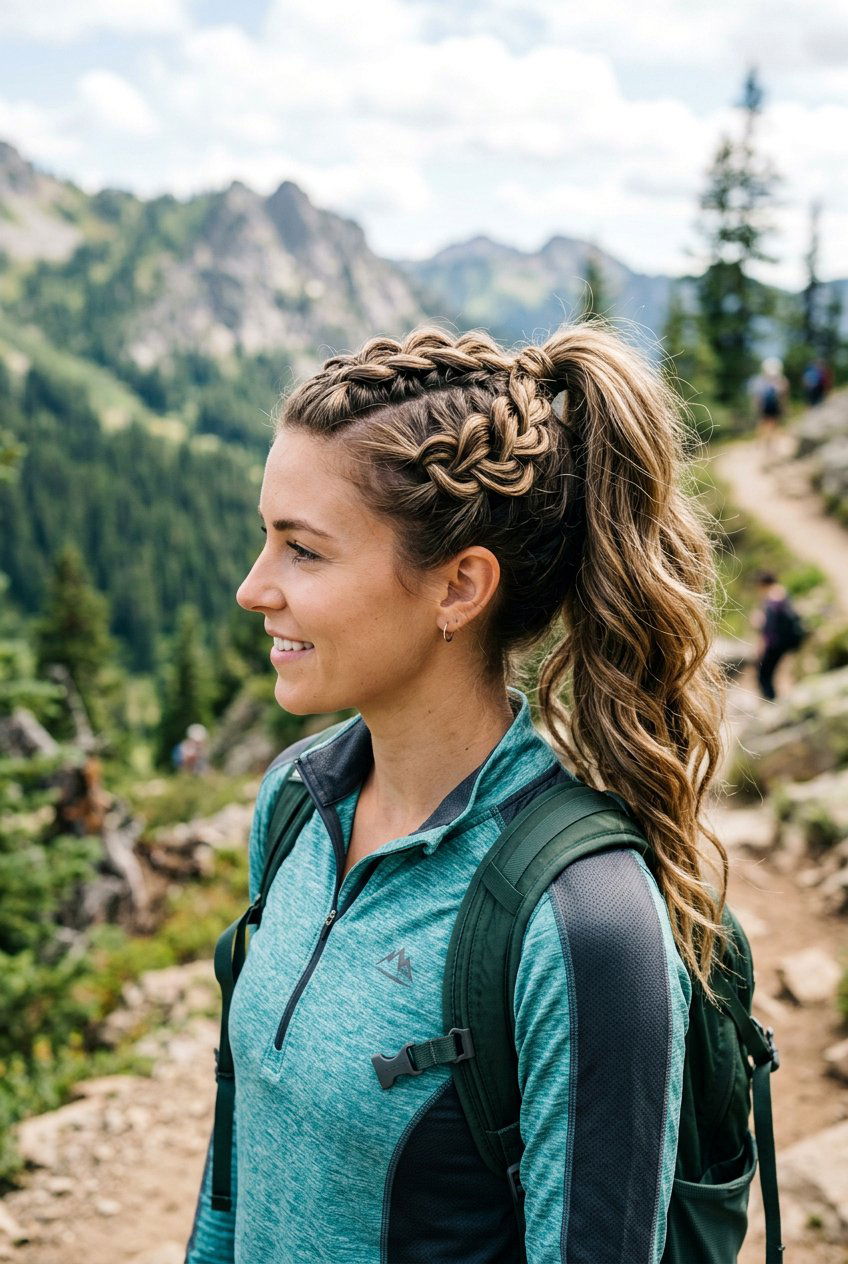
2. Dutch Braid Ponytail
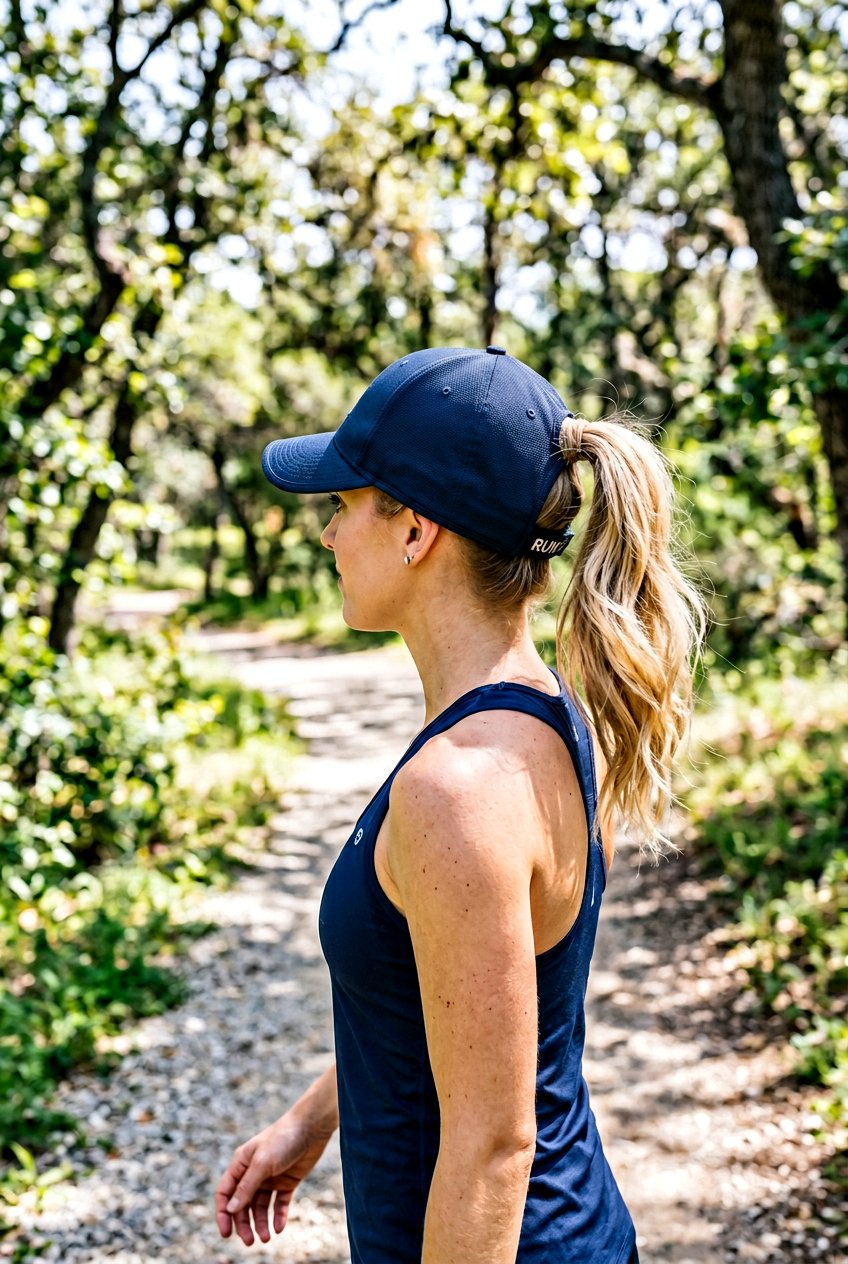
Dutch braids add a bold, raised texture that stands out on the trail. Unlike French braids, the Dutch technique crosses strands under instead of over, which creates a three-dimensional ridge effect. You can braid from the crown all the way down and then gather everything into a high or mid-height ponytail. The raised pattern keeps the braid from loosening, even during steep climbs or windy ridge walks. This style is especially flattering on thick hair because the braid looks more defined and prominent. It pairs well with a baseball cap and stays secure under a backpack strap. Finish with a light hold hairspray to keep flyaways in check without making your hair stiff or crunchy on the trail.
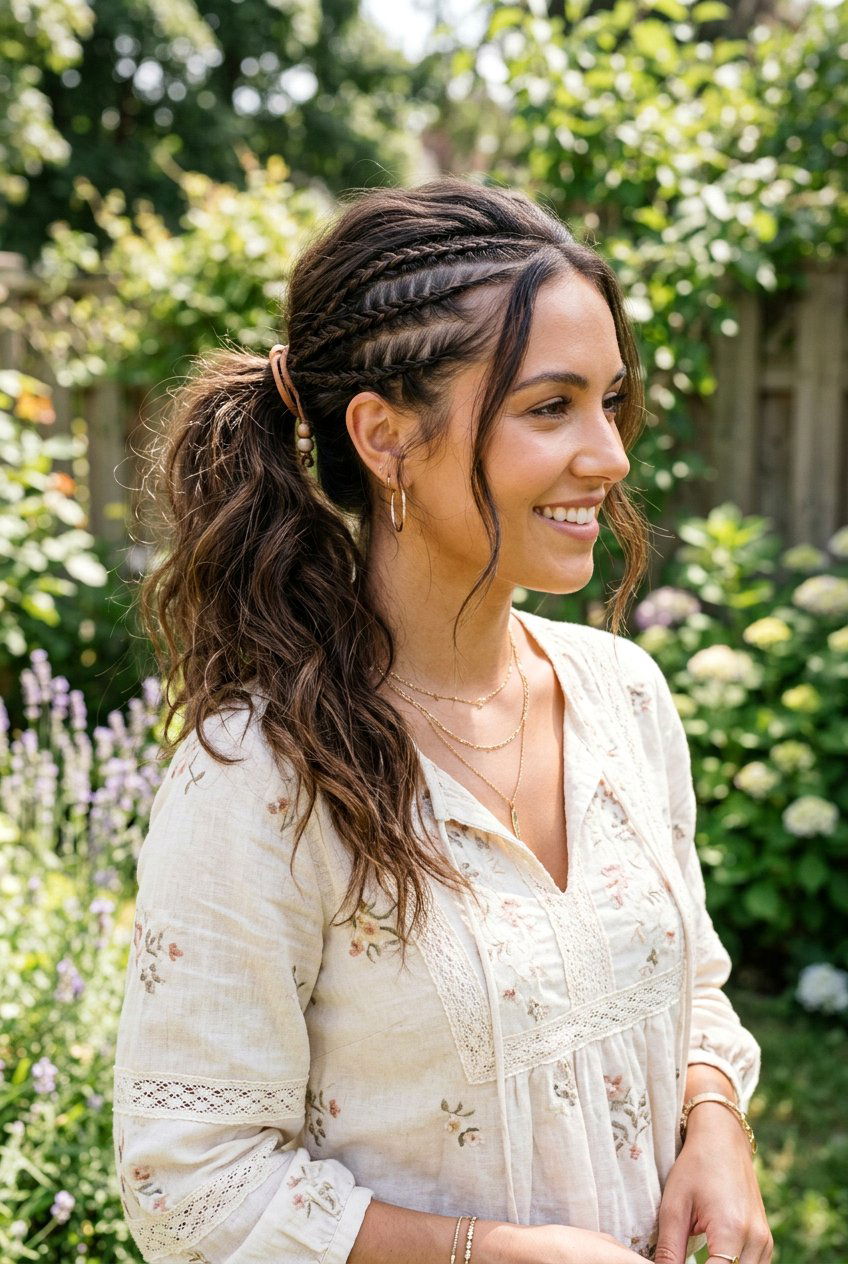
3. Fishtail Braid Ponytail
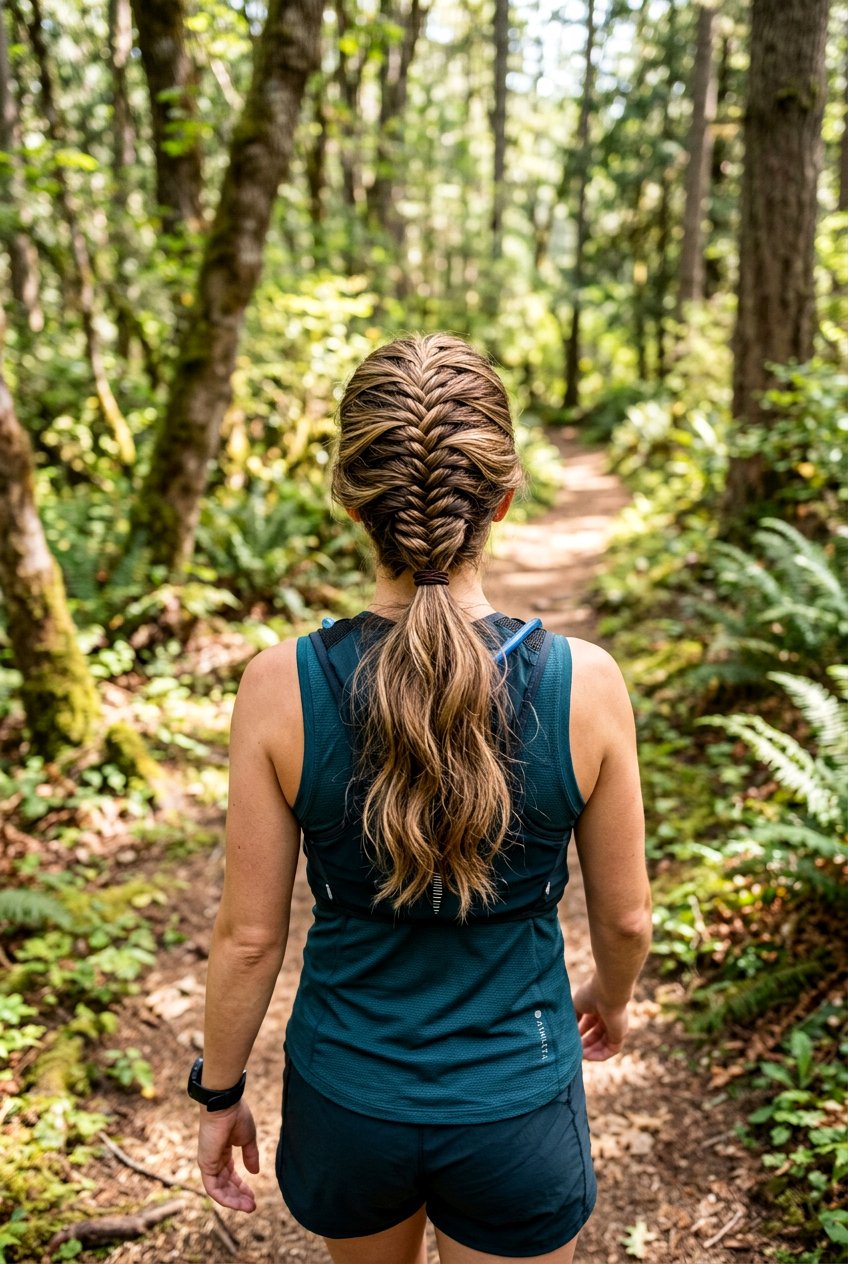
Fishtail braids have a delicate, intricate look that hides how practical they really are on a hike. You only work with two sections instead of three, pulling small pieces from the outside of each section and crossing them toward the center. The result is a flat, wide braid that sits snugly against your head and distributes tension evenly. After fishtail braiding down to the nape, gather the remaining hair into a ponytail for a clean finish. This style works especially well on fine hair because the braid adds visual thickness without needing extra volume. It holds surprisingly well through sweat and movement. If your hair tends to slip, spray some texturizing spray before braiding to give the sections something to grip.
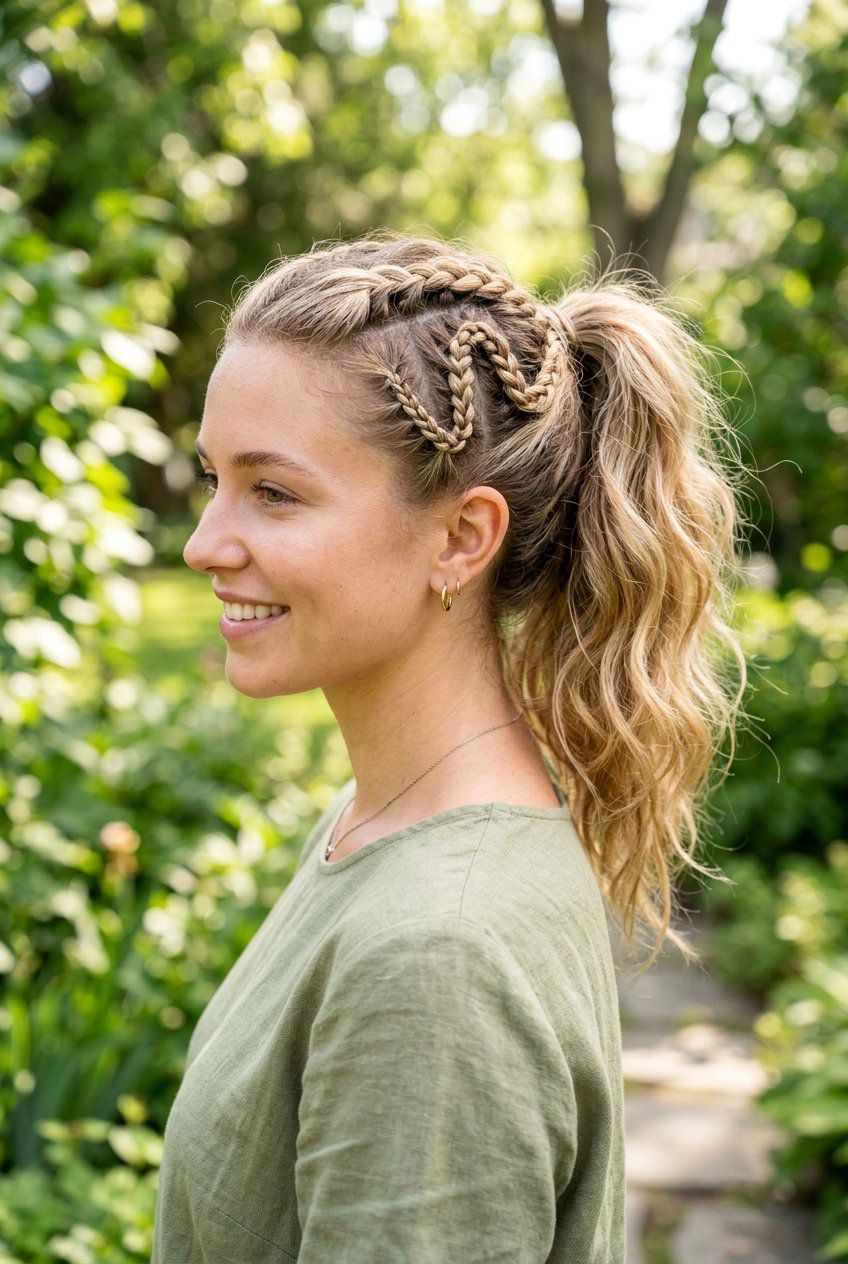
4. Two French Braids Into High Ponytail
Why choose one braid when you can double down? Two French braids running along both sides of your head and feeding into a high ponytail is a sporty look that keeps every single strand contained. Start by parting your hair down the middle, then French braid each side from the temple down to the nape. Pull both braids along with the rest of your hair into a high ponytail at the crown. This look is a favorite among runners and hikers because nothing escapes. It also sits comfortably under a hydration pack without pulling. The dual braids create a fun, youthful vibe that photographs beautifully against a mountain backdrop. Secure with a strong elastic and you are set for miles.
5. Side Braid Low Ponytail
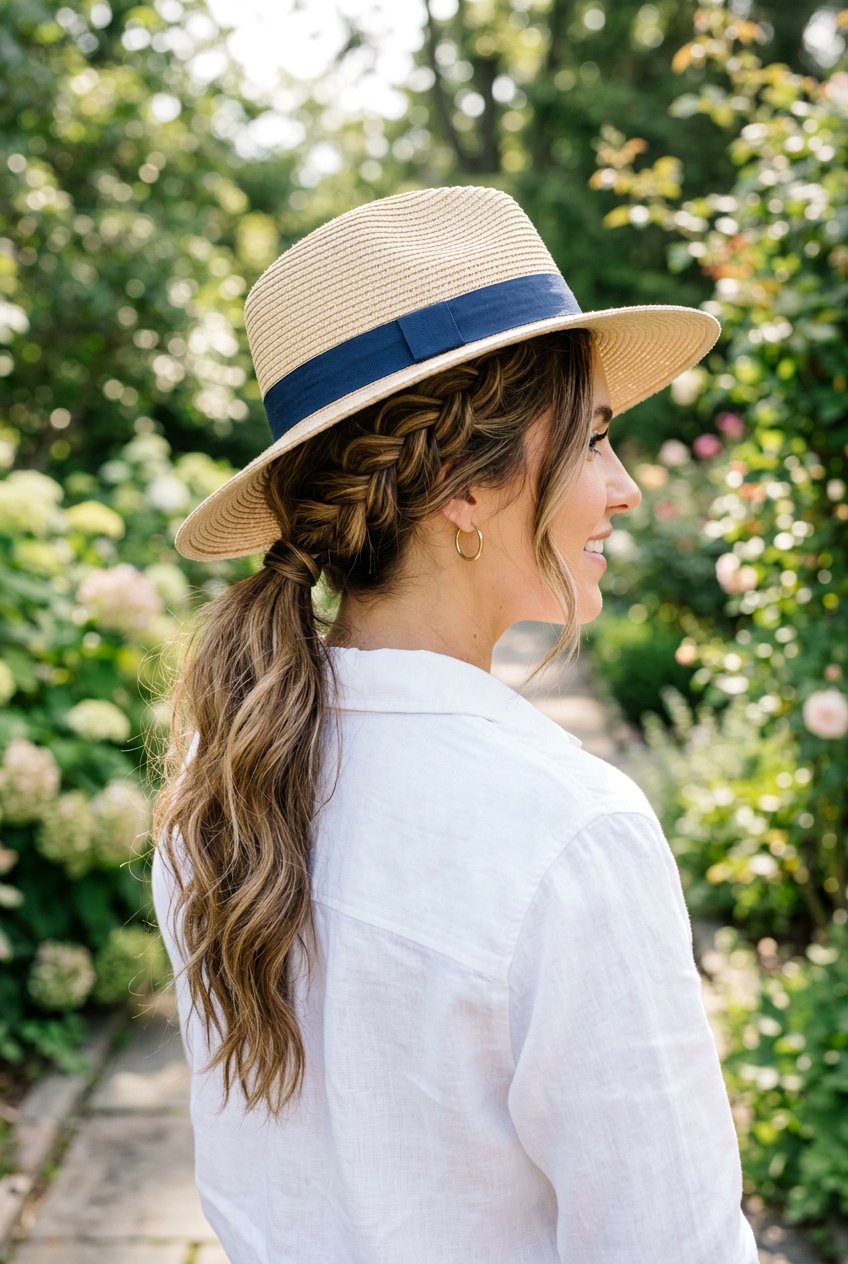
A side braid low ponytail is the laid-back option that still keeps things practical on the trail. You braid along one side of your head, starting near the temple and angling down toward the nape on the opposite side. Once the braid reaches the base, pull it together with the rest of your hair into a low ponytail that sits at the nape of your neck. This style is incredibly easy to do, even without a mirror, making it perfect for trailheads where you are rushing to get started. It works well on wavy or straight hair and feels comfortable under a wide-brimmed sun hat. The asymmetry gives it a casual, effortless charm that looks great in every photo.
6. Rope Twist Braid Ponytail
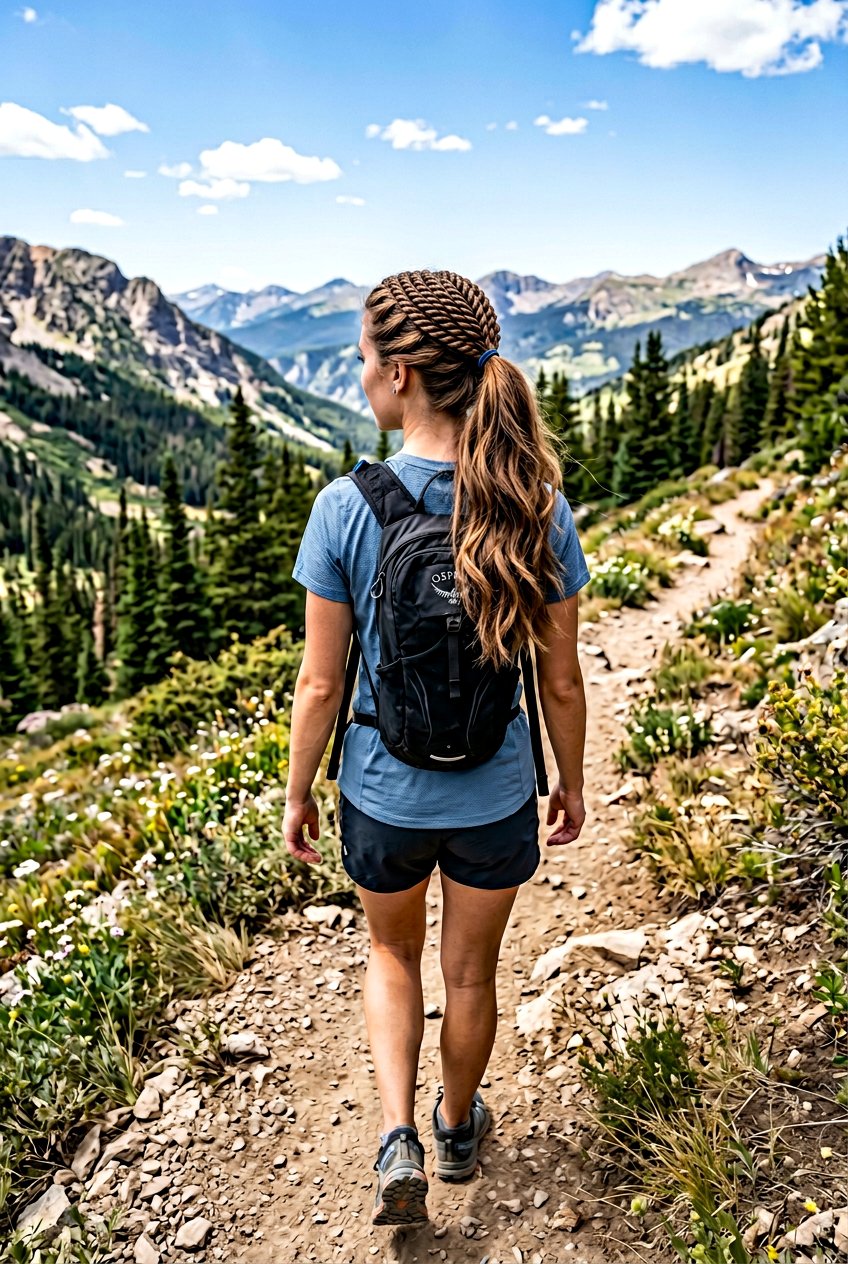
Rope twists are one of the fastest braided styles you can pull together before a hike. You simply divide your hair into two sections and twist each one in the same direction, then wrap them around each other in the opposite direction. The counter-twisting action locks the rope braid in place naturally. Work the twist from the top of your head down to the nape, then secure it into a ponytail. This style is ideal for short to medium hair because it does not require a lot of length to look good. It holds up beautifully through hours of movement and barely loosens, even on the most rugged trails. A single elastic is all you need, making it a minimalist hiker’s dream hairstyle.
7. Cornrow Braided Ponytail
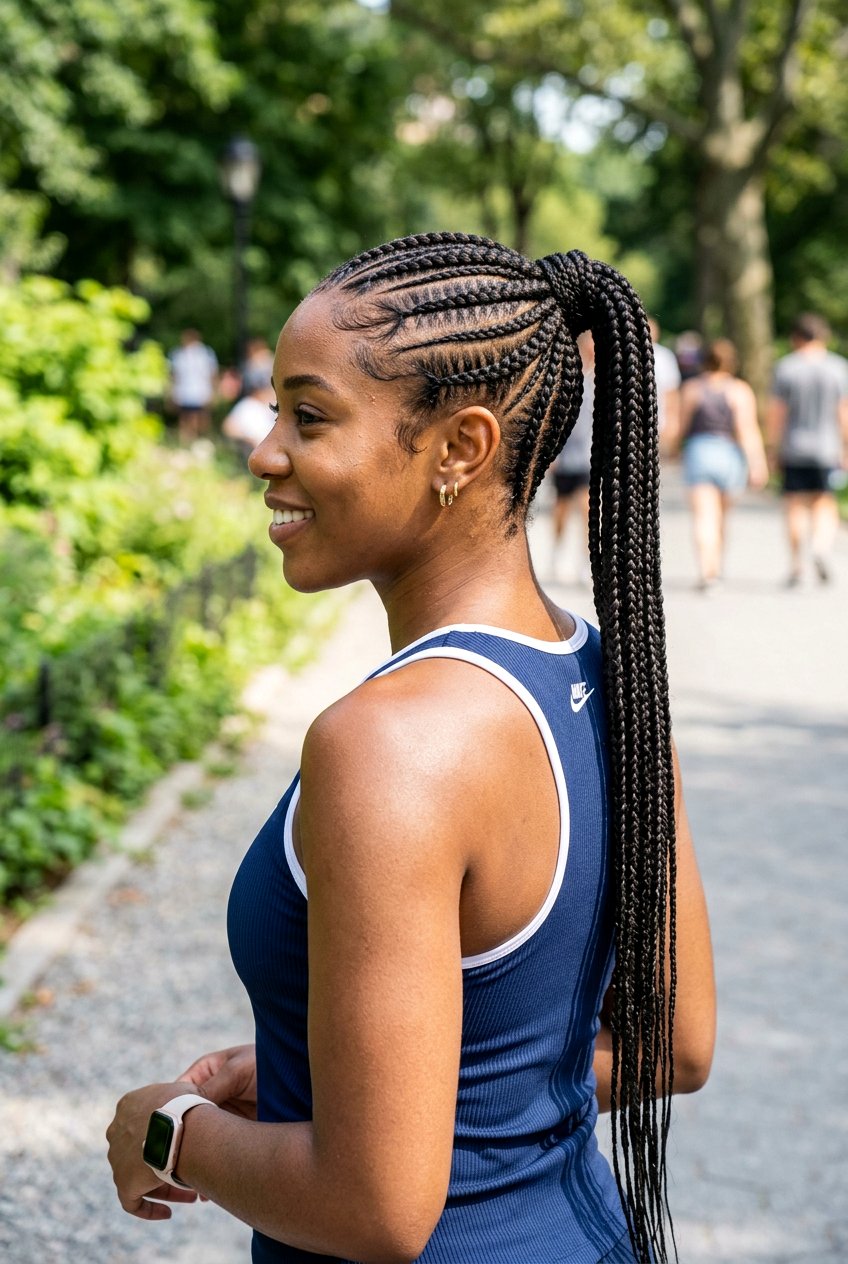
Cornrows bring serious staying power to any hiking hairstyle. These tight, flat braids lie close to the scalp and can be styled in straight lines or curved patterns before feeding into a ponytail at the back. Because each braid is anchored firmly to the roots, cornrows are nearly impossible to shake loose on the trail. They also distribute the weight of a ponytail evenly across your scalp, which reduces tension and discomfort during long hikes. This look works on all hair types but is especially popular for thicker and coarser textures. You can wear just a few cornrows or cover your entire head before pulling everything back. Add a lightweight gel or edge control for a neat, polished finish that lasts for days.
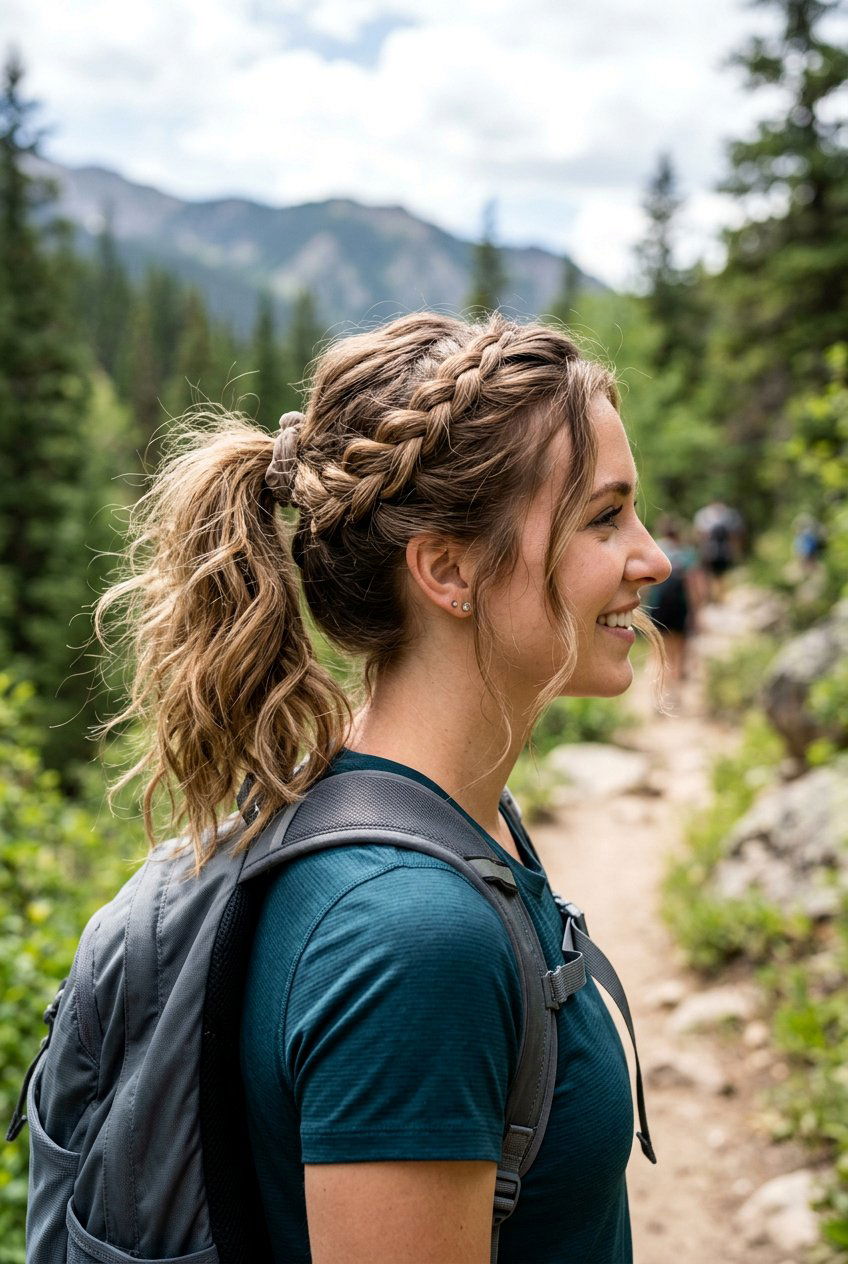
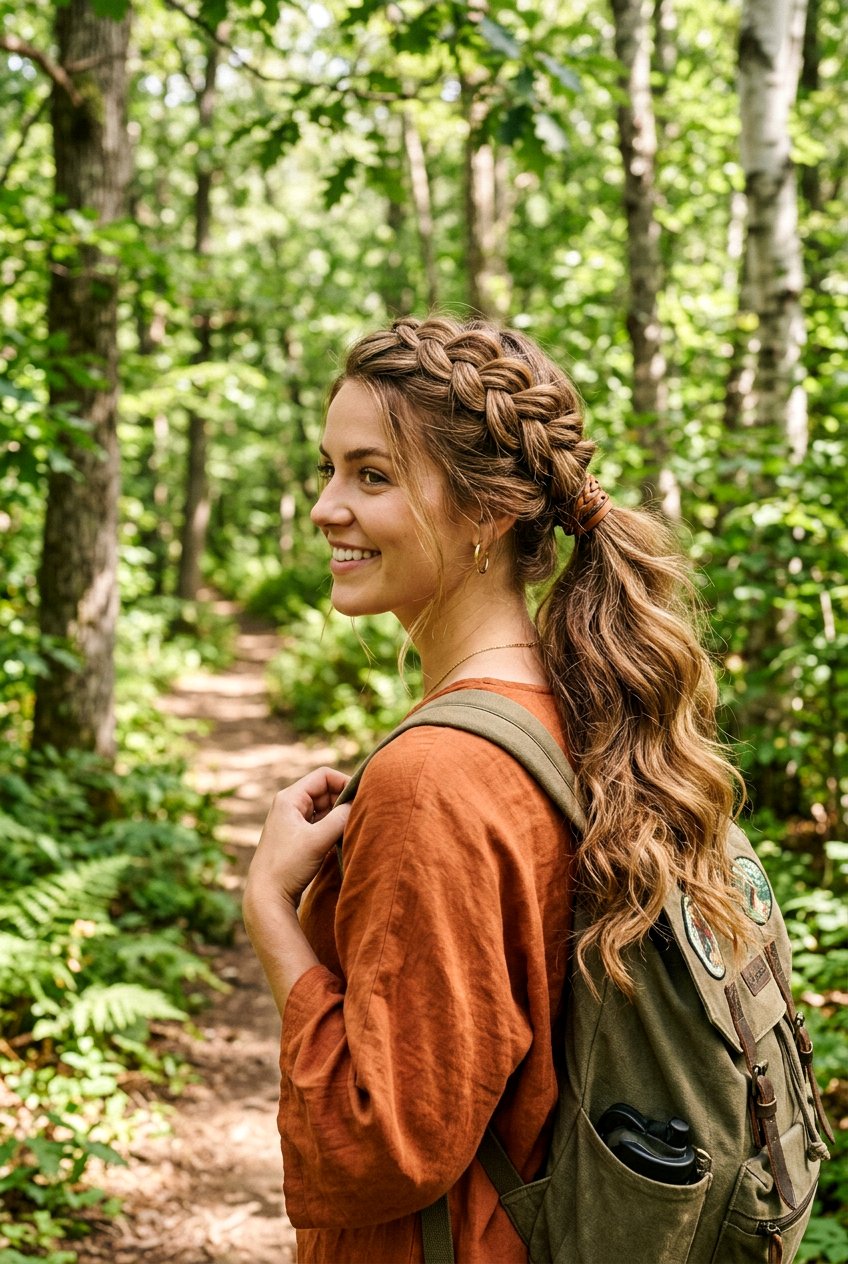
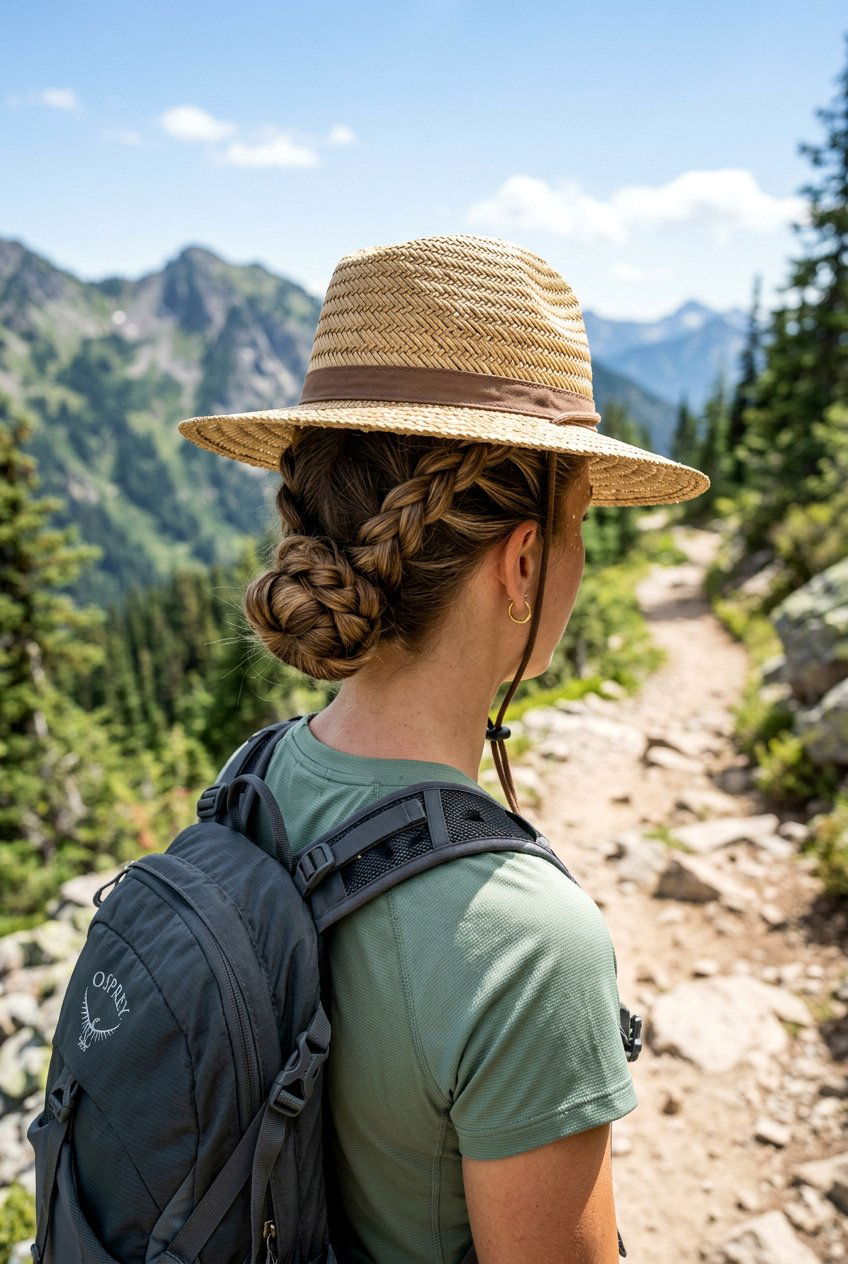
8. Crown Braid Ponytail
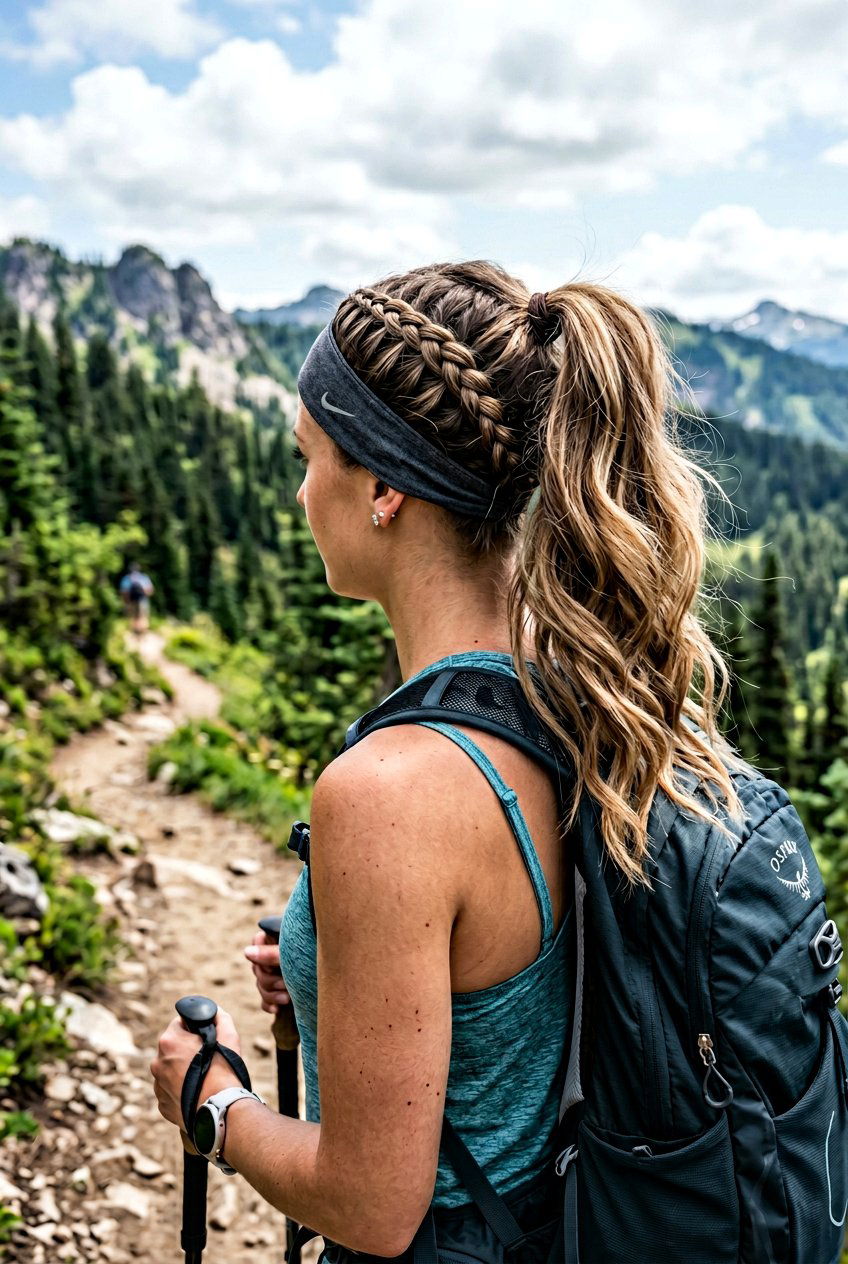
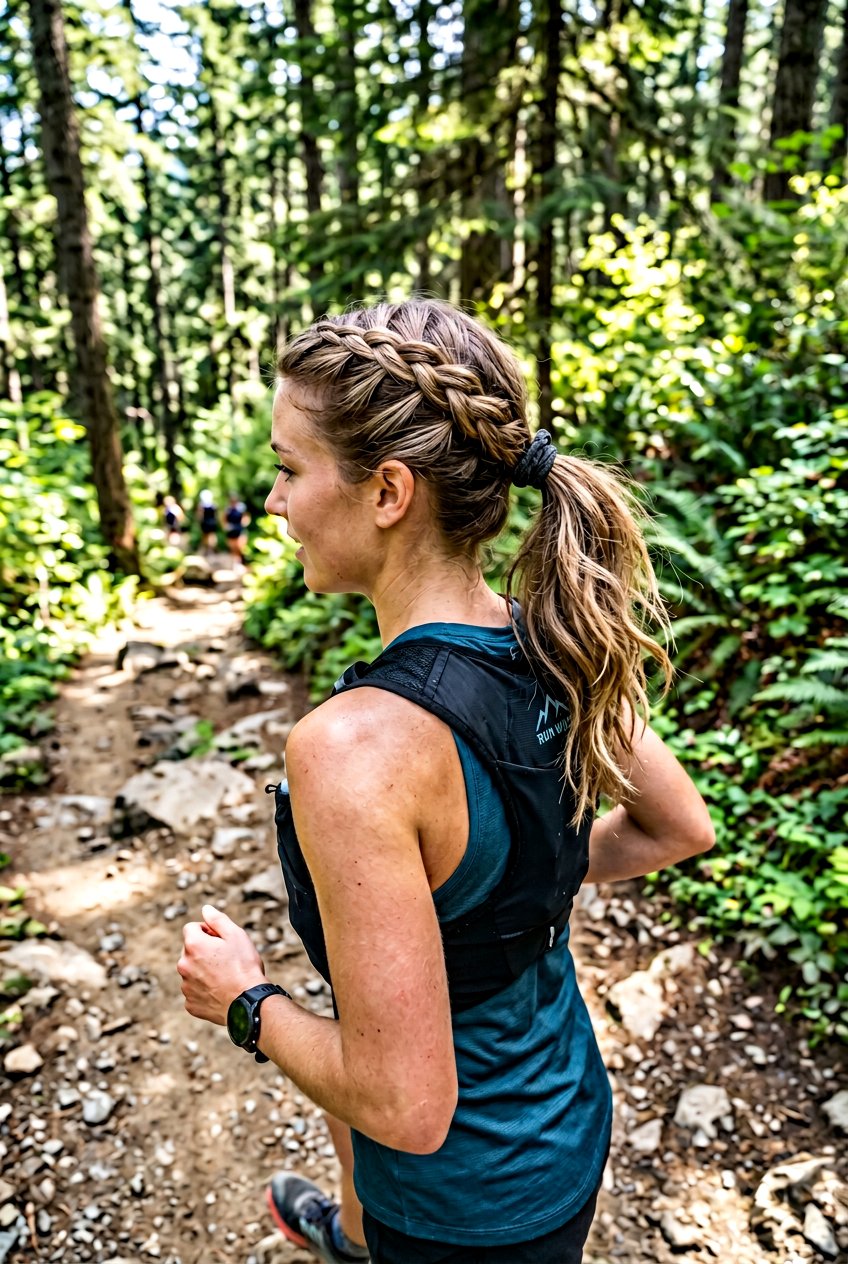
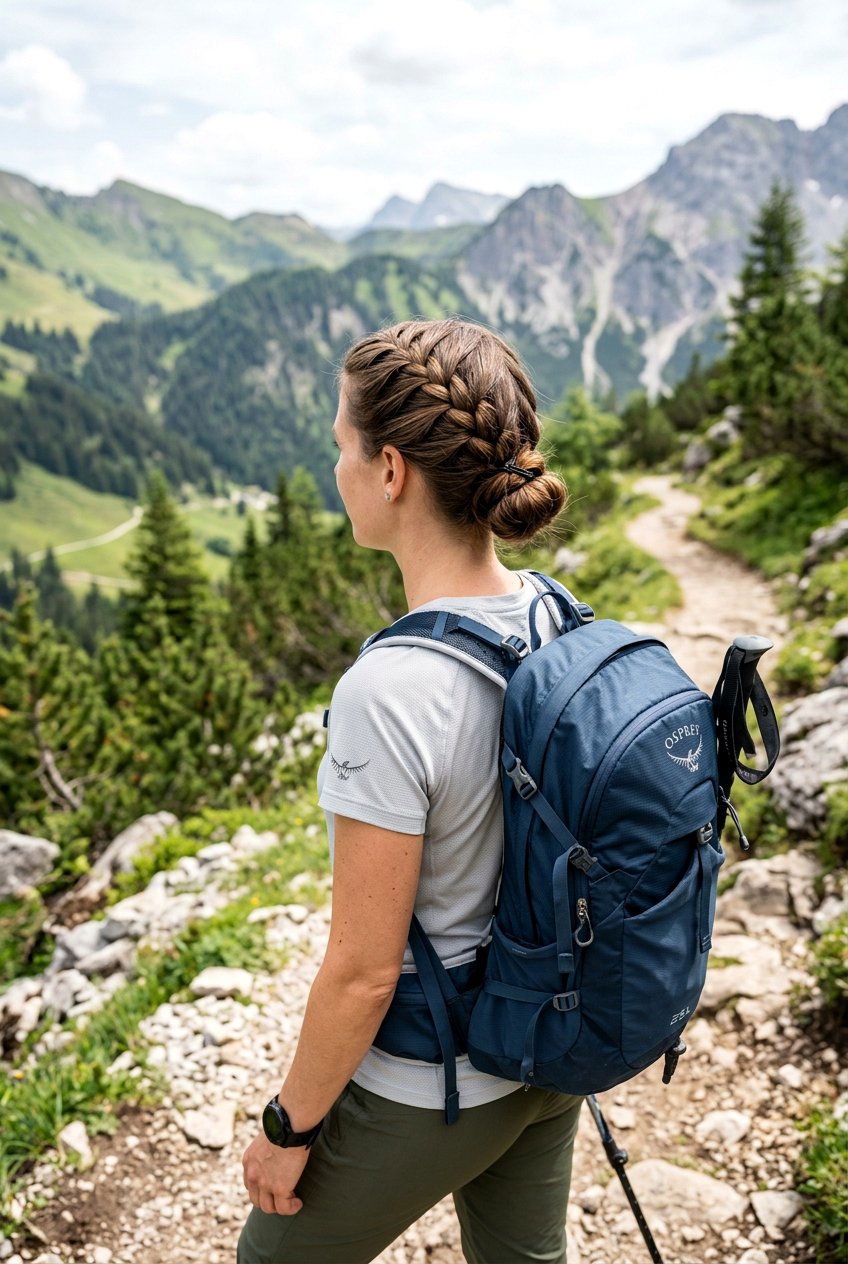
A crown braid ponytail wraps a single braid around the top of your head like a headband, then flows into a ponytail at the back. This look is as functional as it is beautiful, keeping the front and sides of your hair completely contained while leaving the back free in a ponytail. It works especially well if you want to keep bangs or face-framing pieces off your forehead during a sweaty climb. The braid sits above the ears, so it does not interfere with sunglasses or a hat. Start by French or Dutch braiding from one side, curve across the front, and finish at the other side where you gather the hair into a ponytail. It is a stunning look that handles windy trails with ease.
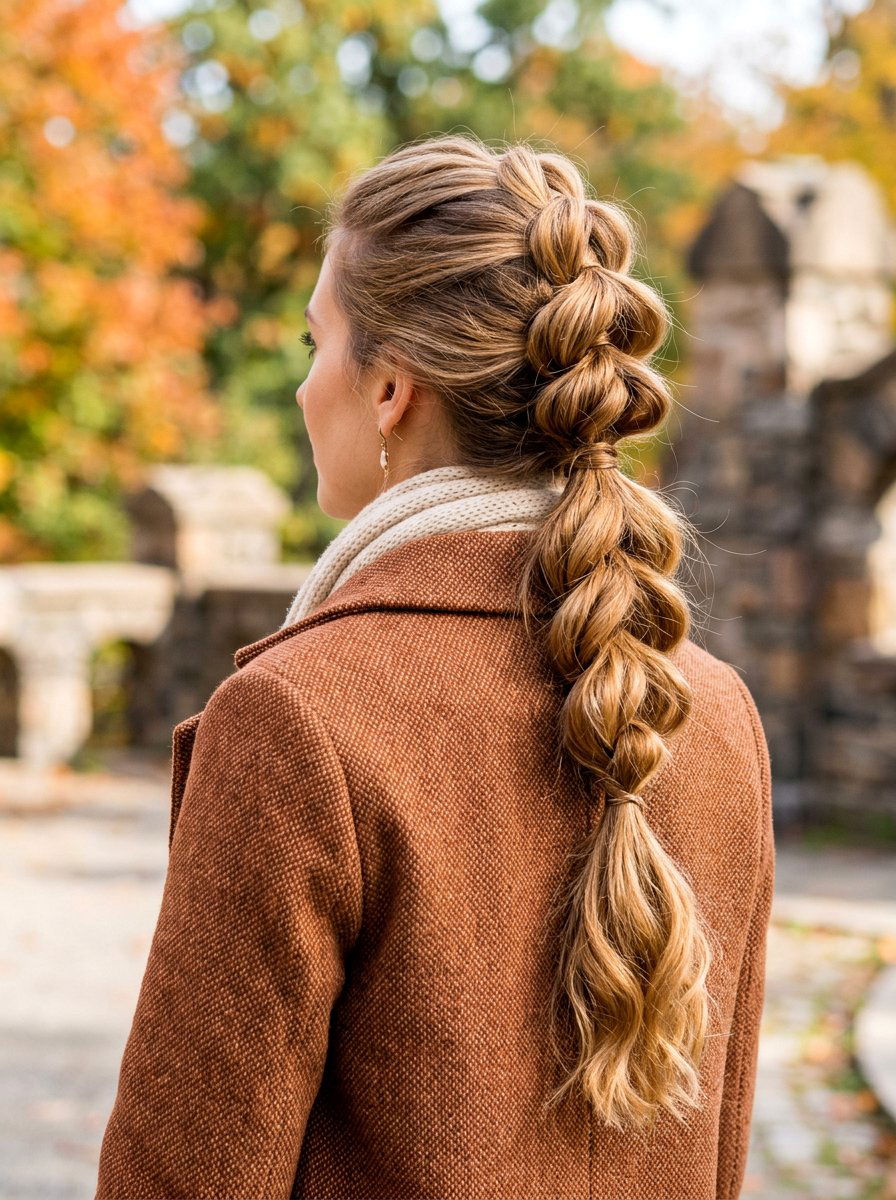
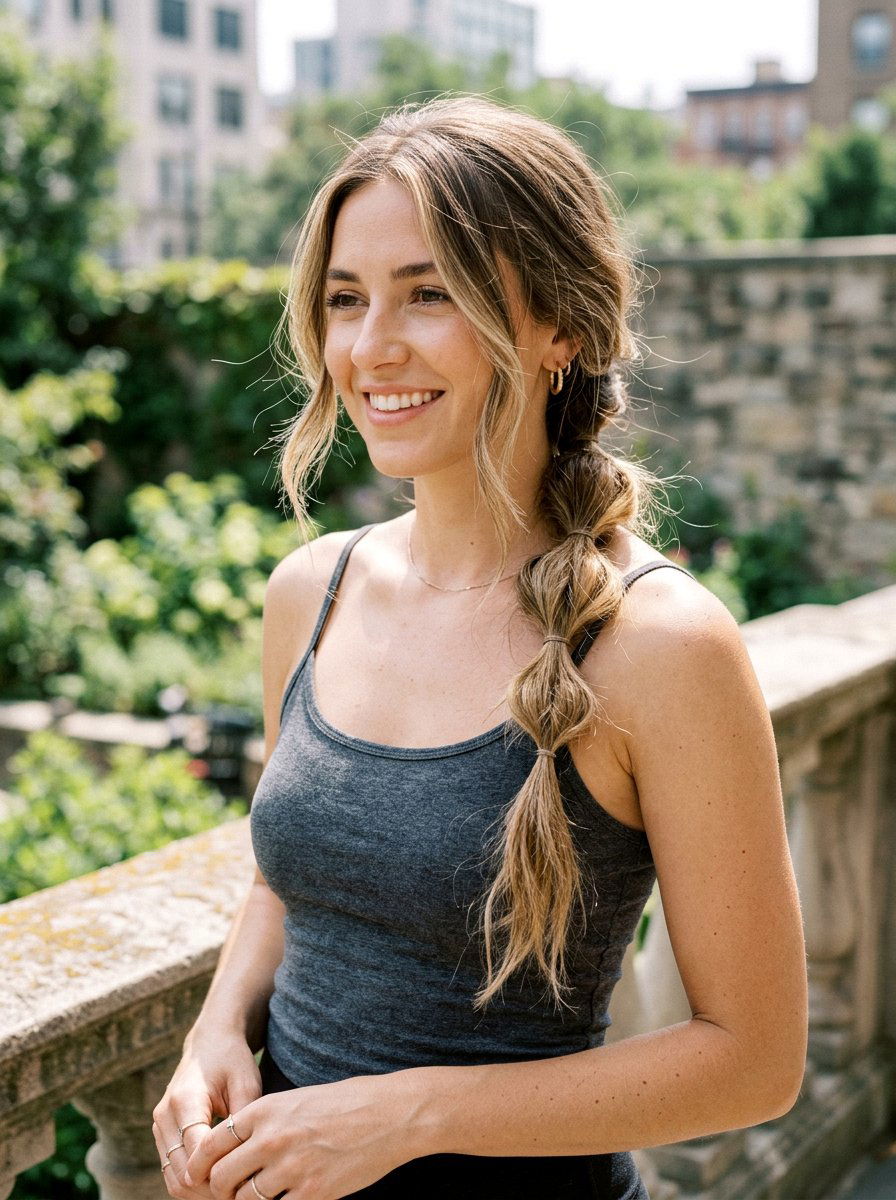
9. Bubble Braid Ponytail

Bubble braids have taken over social media, and they are just as useful on the trail as they are on Instagram. This look starts as a regular ponytail, then you add several small elastics at even intervals down the length and gently pull each section outward to create bubbly, voluminous puffs. You can combine a braid at the top with the bubble technique at the ponytail for extra hold and visual interest. The bubbles add texture and fullness without needing any teasing or product. This style is forgiving on second-day hair and works on most lengths. Each elastic acts as an anchor point, so even if one section loosens, the rest stay intact. It is playful, practical, and a breeze to put together in minutes.
10. French Braid Into Messy Ponytail
Not every hike calls for a perfectly polished look, and a French braid flowing into a messy ponytail hits that sweet spot between put-together and relaxed. Braid from the crown down to the nape, then pull the remaining hair into a loose, textured ponytail. Leave a few pieces out around your face and gently tug at the braid to soften it. The messy ponytail portion keeps things comfortable and breathable, while the braid at the top prevents the front sections from falling into your eyes. This style is perfect for warm-weather hikes when you want something off your neck but not overly tight. It looks effortless and holds up surprisingly well through wind and light rain without needing constant touch-ups.
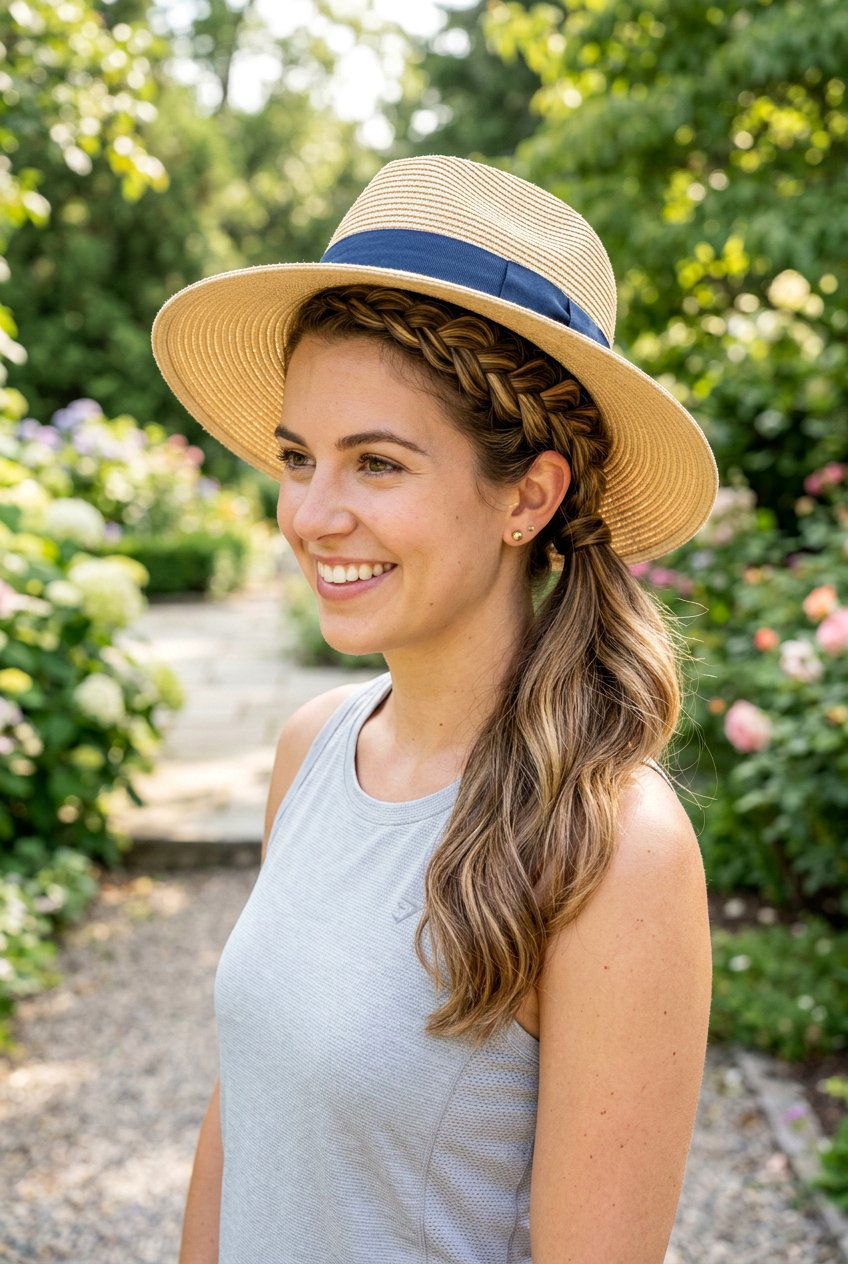
11. Single Side Braid With Ponytail
Sometimes the simplest approach is the most effective one. A single braid on one side of your head, pulled back into a standard ponytail, is quick to create and highly functional on the trail. You can use a basic three-strand braid, a French braid, or a Dutch braid along one side, then bring all your hair together at the back into a ponytail. This style is perfect for women who do not want a full-head braid but still need something to keep the front sections from flopping around. It sits naturally under a trail hat and looks great with hiking accessories like headbands or buff wraps. The asymmetry adds character, and the whole thing takes less than five minutes from start to finish.


12. Braided Ponytail With Hair Wrap
A hair-wrapped ponytail is a small detail that makes a big difference on the trail. After creating your braid and pulling it into a ponytail, take a small section of hair from the ponytail and wrap it around the elastic to hide the tie completely. Secure the wrapped piece with a bobby pin underneath. This technique works with any type of braid, whether it is a French, Dutch, or fishtail variation. The wrap not only looks polished but also prevents the elastic from snagging or pulling uncomfortably under a hat or pack strap. It is one of those upgrades that takes just seconds but makes your hiking hairstyle look intentional and finished rather than thrown together at the last minute.
13. Pull-Through Braid Ponytail
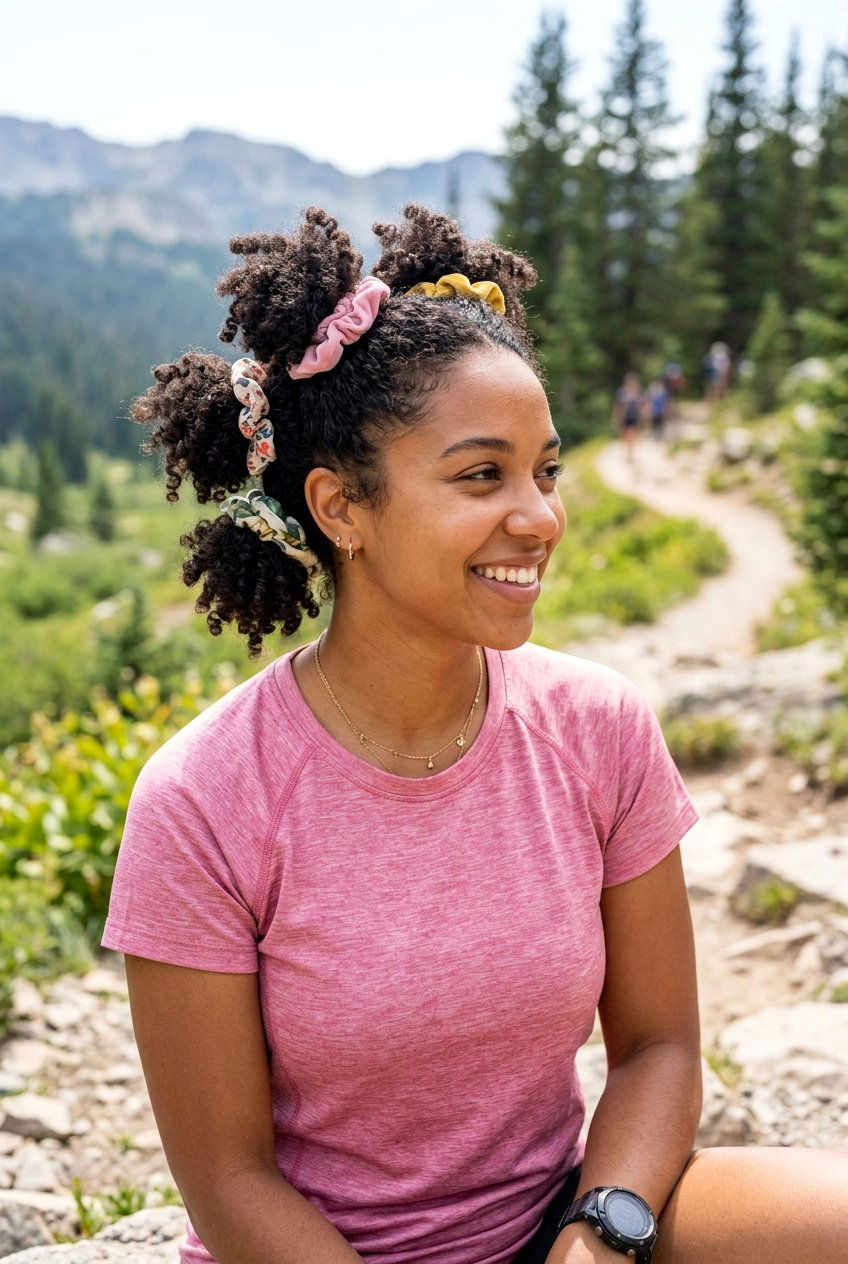
The pull-through braid is a faux braid technique that creates the appearance of a complex braid without any actual braiding skills. You create a series of loops and pull sections through them, building a chain-like pattern that feeds into a ponytail. This style looks incredibly intricate but is actually one of the easiest to master, making it ideal for hikers who want a standout look without spending a lot of time on their hair. The looped structure holds tightly, so it survives rugged terrain and high winds without budging. It works best on long hair with some volume but can be adapted for medium lengths too. Add a silk scrunchie at the base for extra comfort and a touch of trail style.
14. Micro Braid Accents Into Ponytail
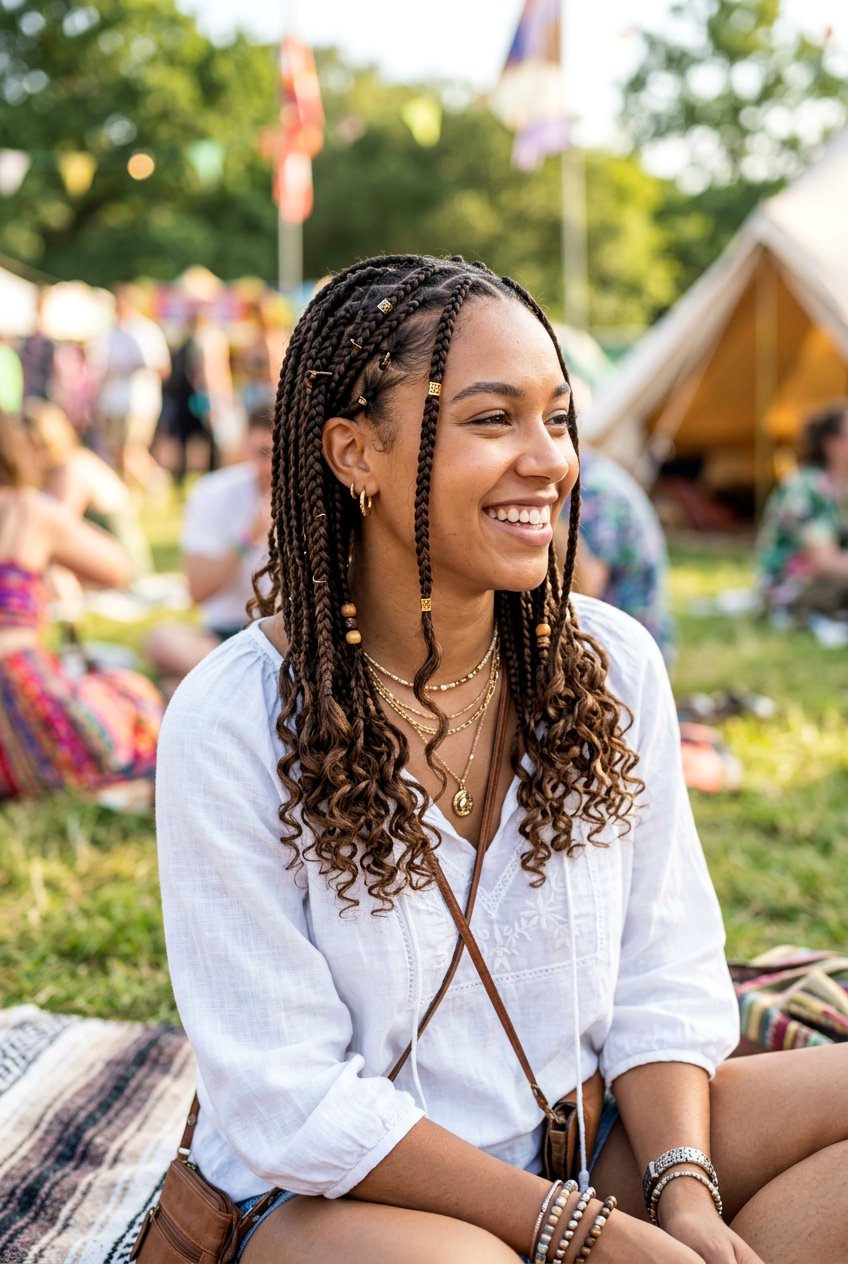
Micro braids are tiny, thin braids scattered through your hair that add subtle texture before everything gets pulled into a ponytail. You do not need to braid your entire head. Just a few small braids along the hairline, temples, or mixed into the ponytail itself are enough to create visual interest. The rest of your hair stays loose and free within the ponytail, so it remains comfortable and breathable during a long hike. Micro braids work on all hair lengths, though they are easiest to create on hair that is at least shoulder-length. They hold for hours without product and add a boho, natural feel to your outdoor look. This is a great choice when you want something slightly different from the usual.
15. Twist Braid Ponytail

A twist braid is created by dividing your hair into two sections and simply twisting them around each other from the scalp down to the nape, then securing everything into a ponytail. Unlike a rope twist, you do not pre-twist the individual sections. You just cross them over one another in the same direction all the way down. The result is a loose, organic-looking braid that is comfortable and easy to achieve on the go. It is not as tight as a French or Dutch braid, so it is better suited for easier trails or casual walks where extreme hold is not necessary. The twist adds just enough structure to keep hair out of your face while maintaining a soft, natural appearance that feels right at home on the trail.


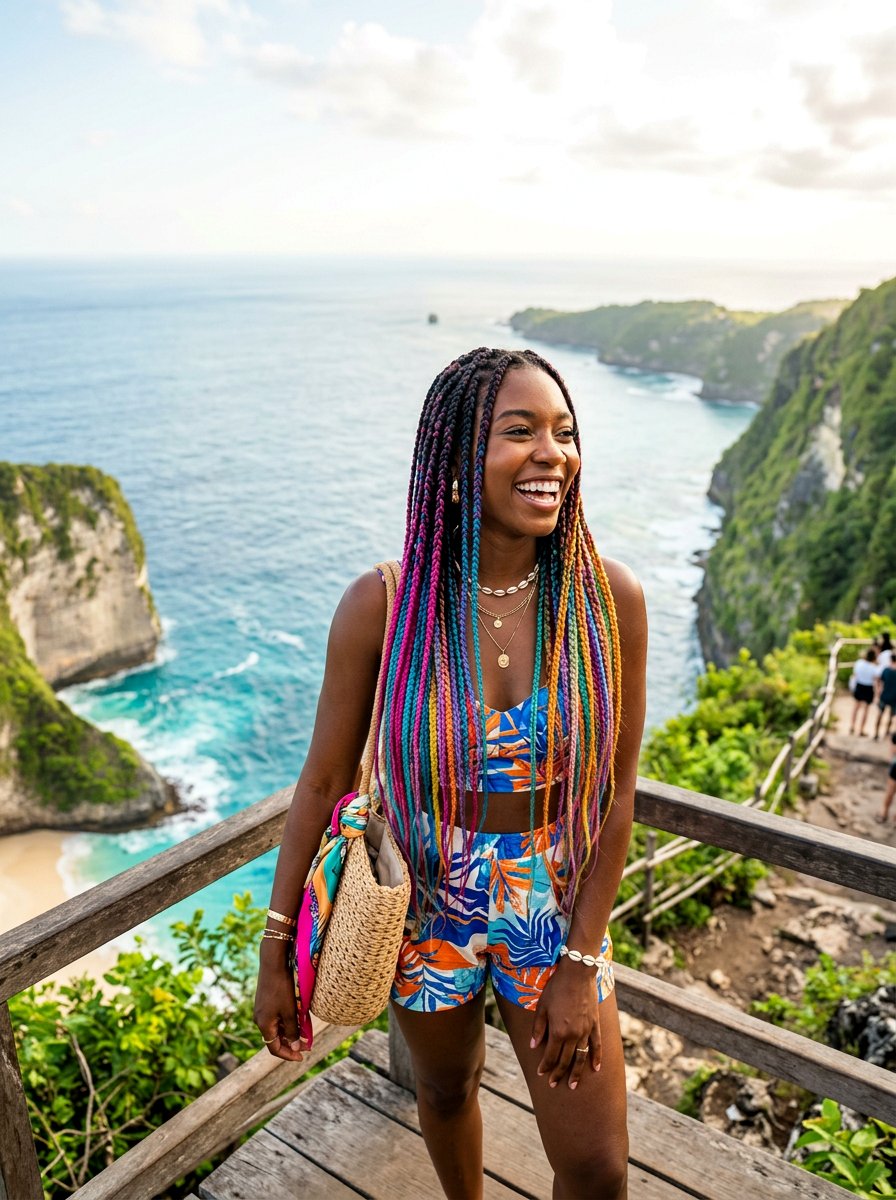
16. Box Braids Ponytail
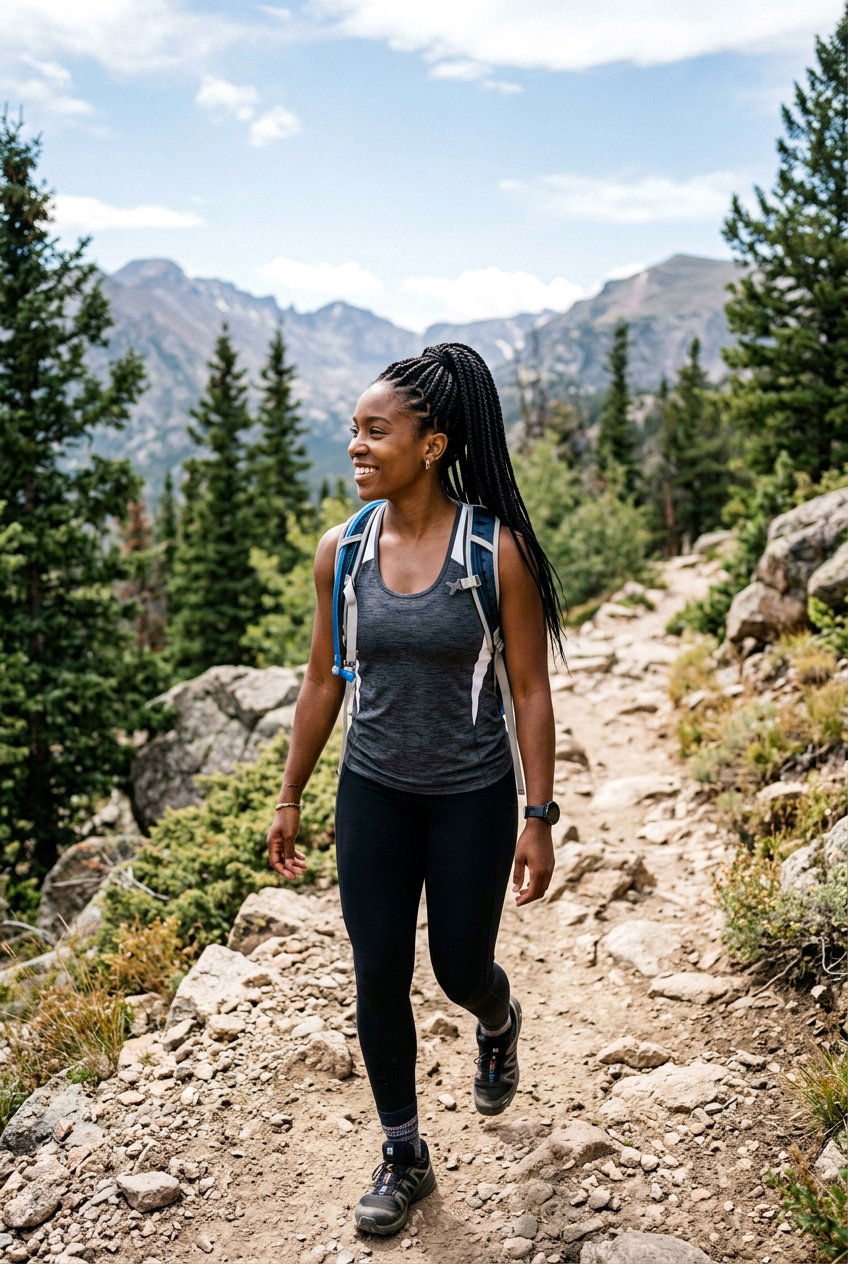
Box braids offer long-lasting protection and an incredibly secure hold for hiking. These individual, sectioned braids can be gathered up into a single ponytail or left to flow naturally. Either way, they keep your hair completely managed on multi-day hiking trips without requiring daily restyling. Box braids are especially popular among women with natural hair because they protect the strands from wind damage, sun exposure, and tangling on the trail. Once installed, they can last for weeks, making them ideal for thru-hikes or extended backpacking trips. Pull them into a high ponytail during the day for maximum ventilation and comfort. At camp, you can let them loose or re-tying them into a different configuration for a fresh look.
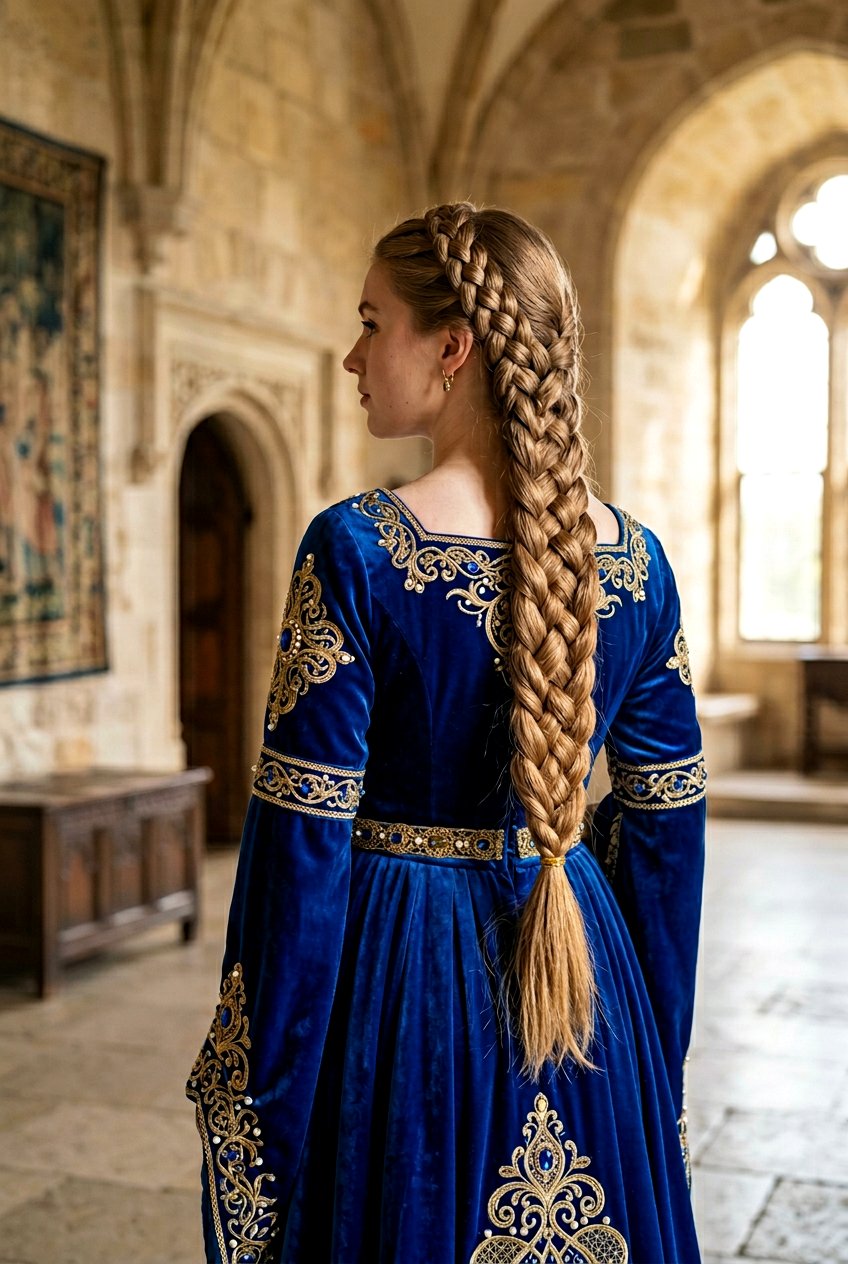
17. Thick Boho Braid Ponytail
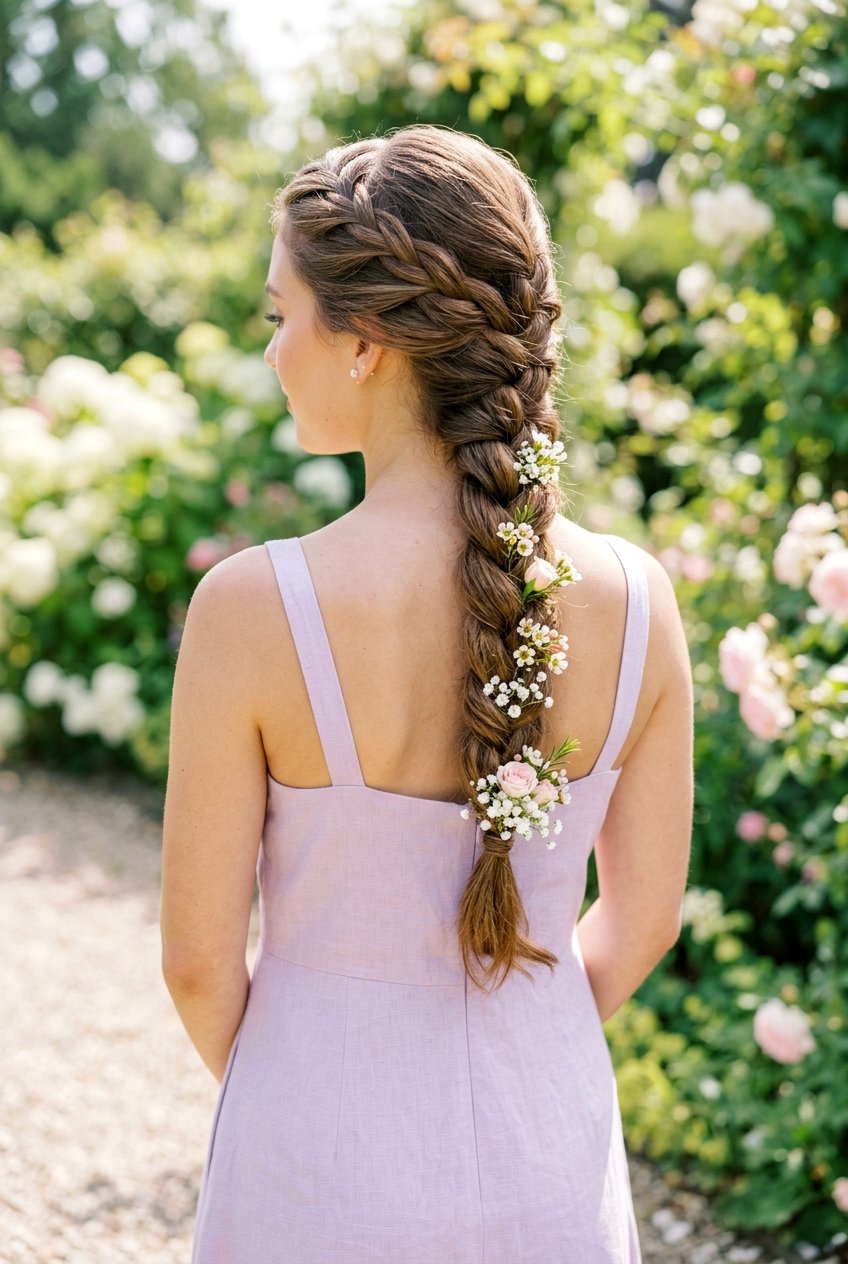
A thick boho braid ponytail combines a chunky, relaxed braid at the top with a full, voluminous ponytail at the back. The braid is not tight or uniform. Instead, you gently pull and widen the sections after braiding to create a soft, lived-in texture. This style feels right at home on nature trails and forest hikes, where the relaxed, organic aesthetic perfectly matches the surroundings. It works best on medium to long hair with natural wave or slight texture. If your hair is straight, add some sea salt spray before braiding to give it grip and body. The boho braid stays in place through moderate activity and transitions seamlessly from trail to campfire without needing a complete restyle.
18. Snake Braid Ponytail
The snake braid, sometimes called a zigzag braid, is a unique twist on traditional braiding that creates a winding, serpentine pattern along your scalp before flowing into a ponytail. After creating a regular three-strand braid, you gently push the loops upward to form a stretched, squiggly shape. This technique adds visual drama without requiring any extra skill or time. The snake braid is more decorative than some of the tighter options on this list, but it still does a solid job of keeping hair contained during a hike. It works well for shorter adventures or easy nature walks where you want to look stylish without sacrificing comfort. The playful pattern stands out in photos and gives your hiking hair a fun, creative personality.
19. Lace Braid Ponytail

A lace braid is similar to a French braid, but you only add hair to one side as you work your way down. This creates a delicate, asymmetrical braid that traces along one side of your head before joining a ponytail at the back. Lace braids are thinner and more subtle than full French or Dutch braids, making them a great choice for hikers who want some hold and texture without a heavy, tight feeling across their scalp. They are quick to create and look especially nice when paired with a low or mid-height ponytail. The one-sided design keeps hair off your face on the side most exposed to sun and wind, which is a clever functional bonus for long trail days.
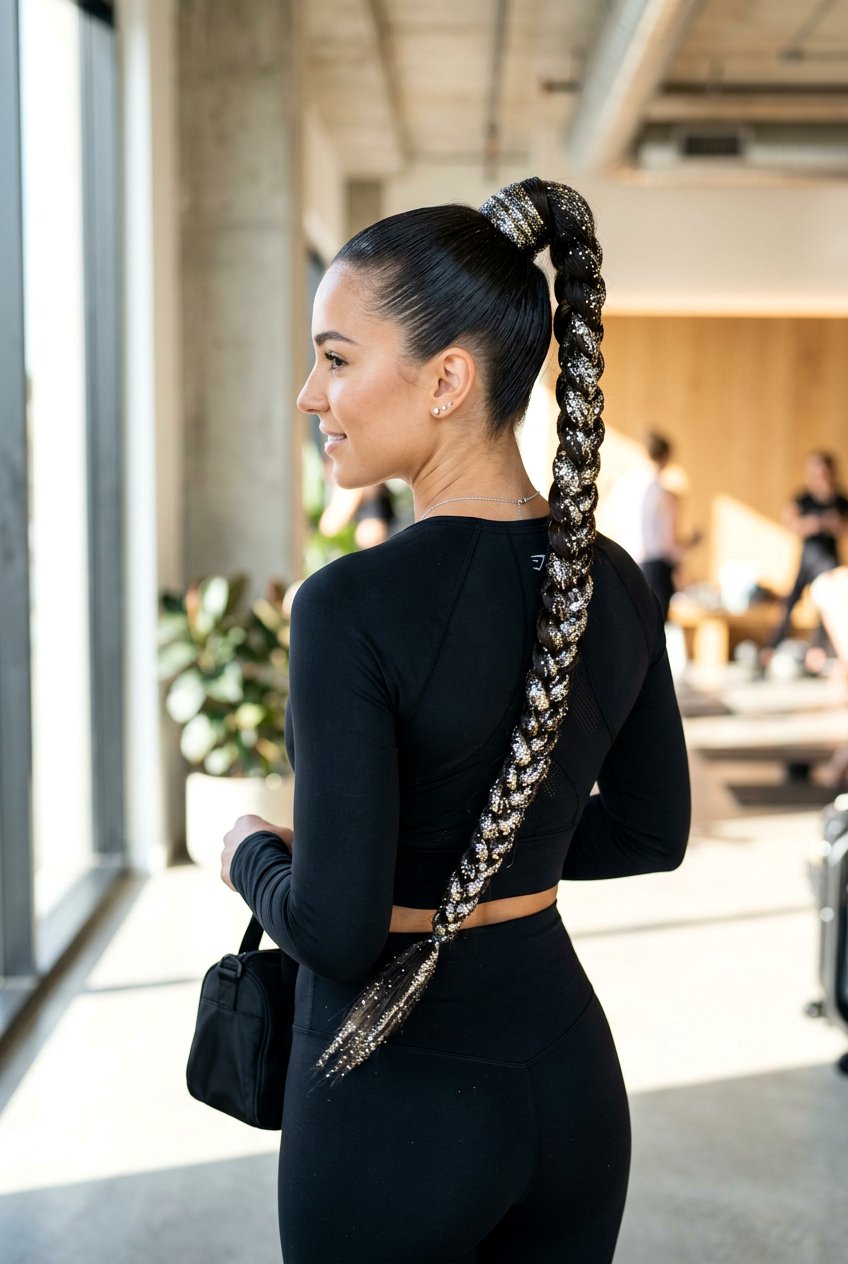
20. Scalp Braid Into High Ponytail

A scalp braid is a tight, close-to-the-head braid that runs along your hairline or down the center of your scalp before feeding into a high ponytail. This style is all about maximum security. The braid anchors directly to the roots, so there is zero chance of it slipping or loosening, no matter how rough the trail gets. It is a favorite among endurance hikers and trail runners who need a hairstyle that can handle serious mileage. The high ponytail keeps your hair off your neck for full ventilation, and the scalp braid ensures nothing escapes. It works on all hair types and lengths, though it is easiest to execute on hair that is at least chin-length. One strong elastic and you are trail-ready.
Conclusion:
Choosing the right braided ponytail for your next hike comes down to your hair type, the difficulty of the trail, and how much time you want to spend getting ready. Some of these styles take just a couple of minutes, while others offer all-day hold that survives the toughest terrain. The key is finding the look that keeps you comfortable and confident so you can focus entirely on the adventure ahead. Try a few different options on shorter walks before committing to one for a big hike. With 20 braided ponytail styles to choose from, you will never run out of fresh looks for the trail. Pack your elastics, hit the trailhead, and enjoy a hairstyle that works as hard as you do.
You'll Like These Styles:


Leave a Reply