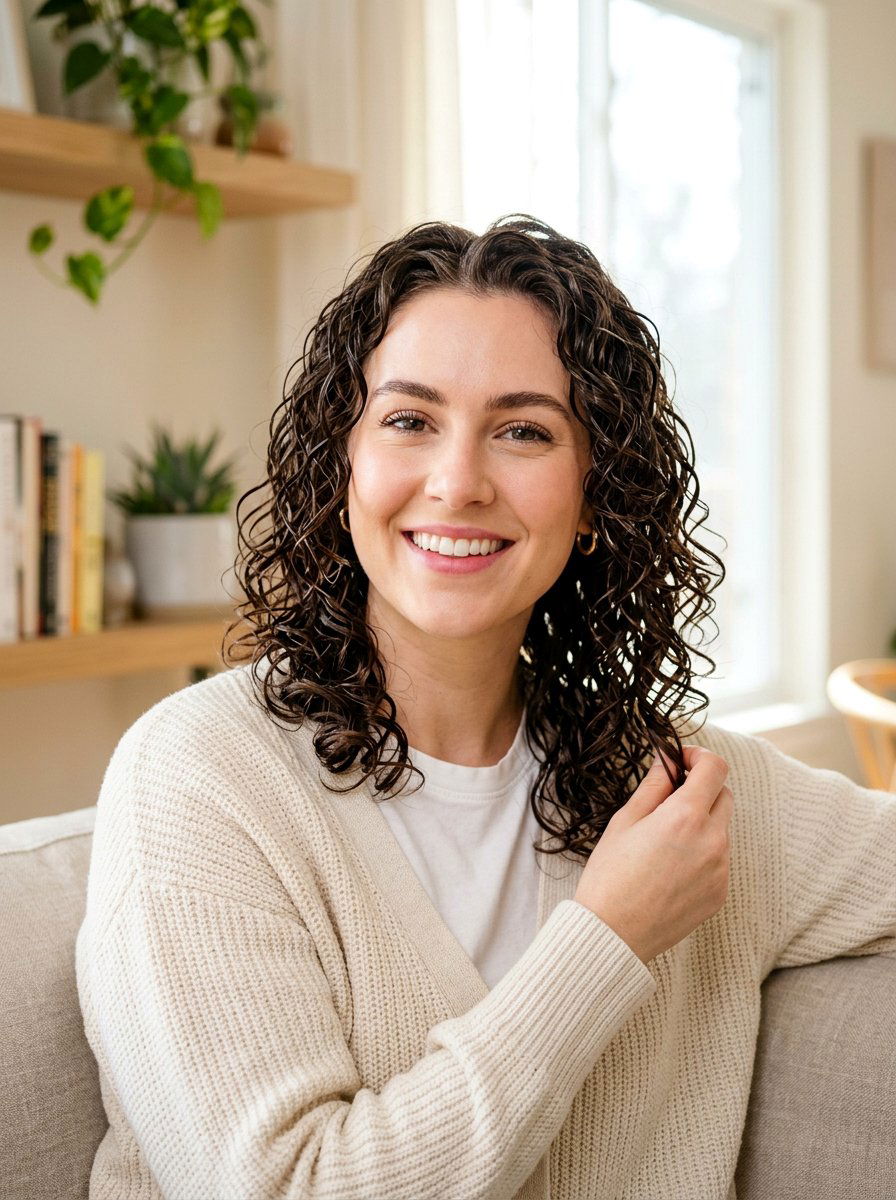
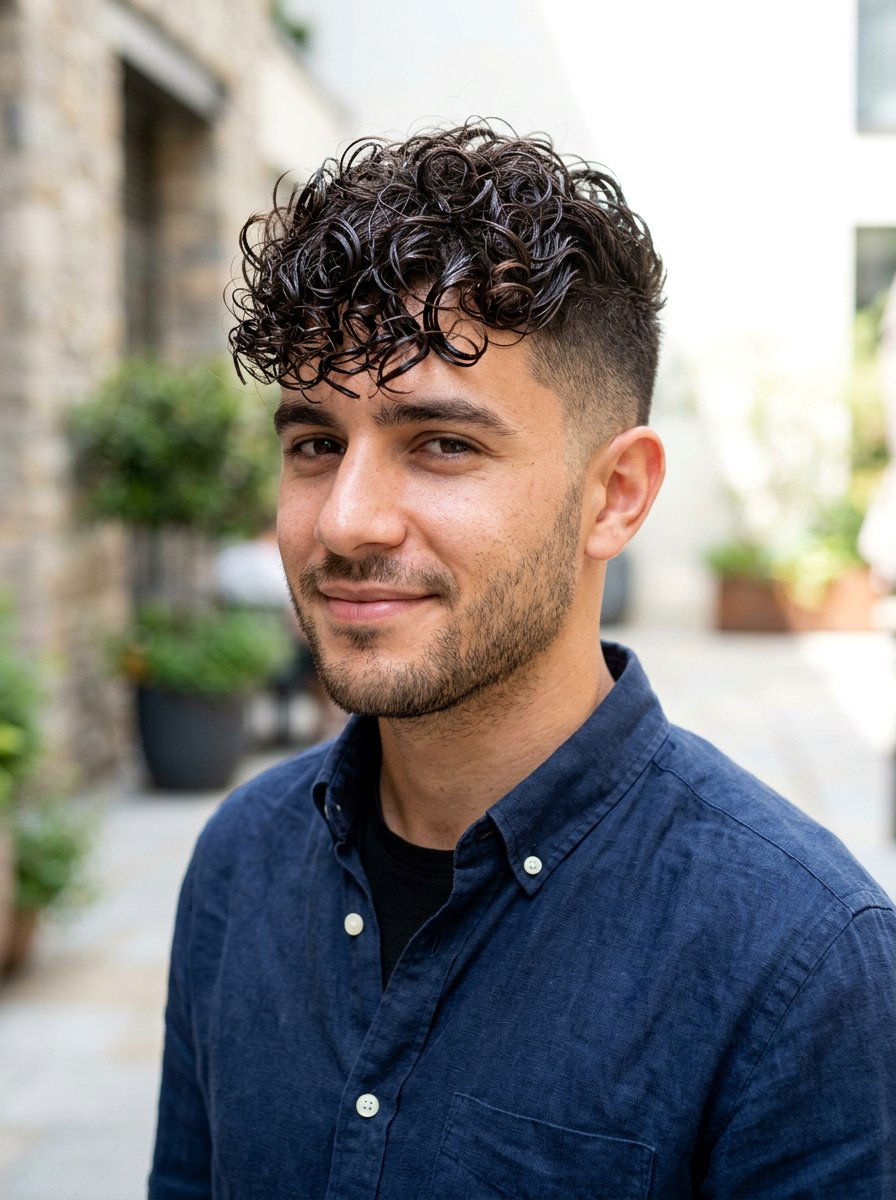
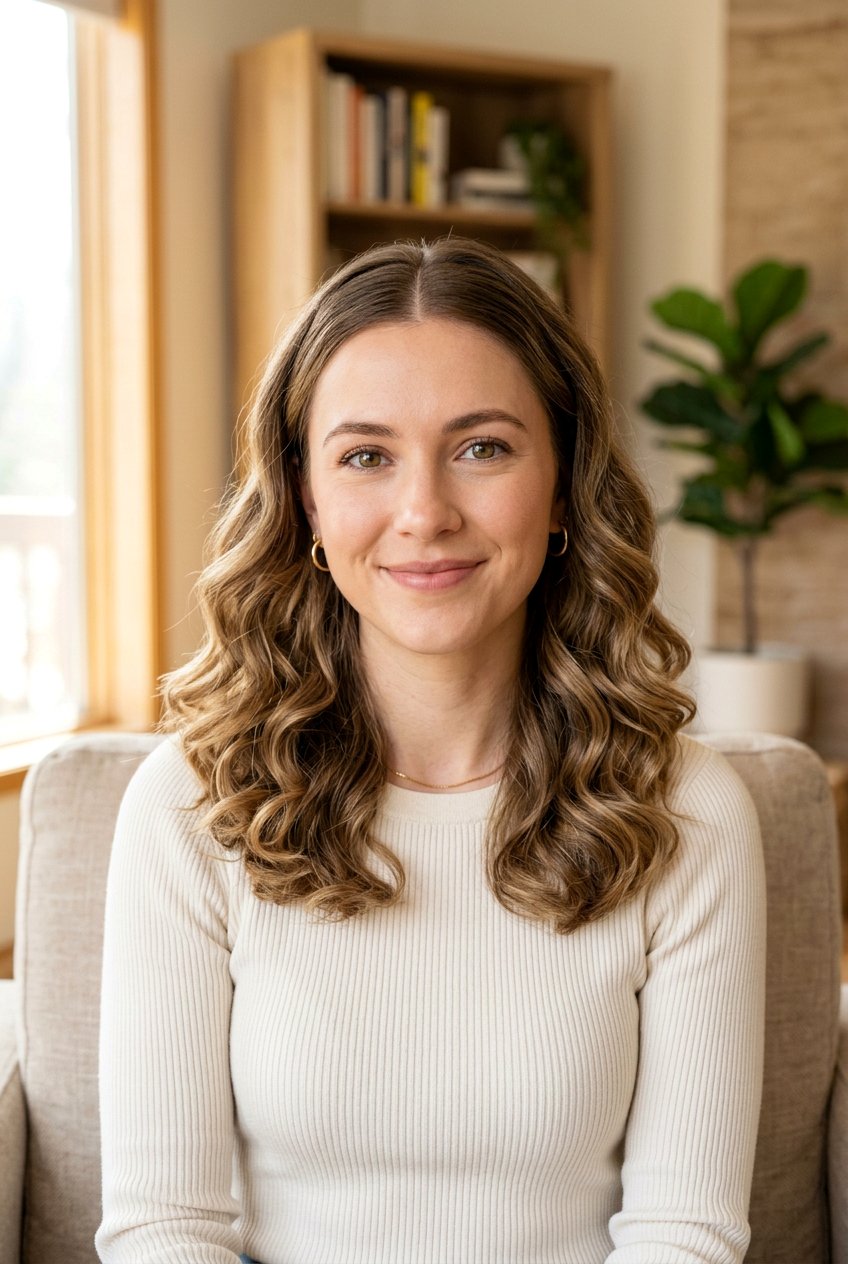
Wet look curls give that just-out-of-the-shower shine while keeping your texture controlled and defined, not crunchy or frizzy. This trend has moved from red carpets and runways into everyday curly routines, pairing glossy definition with a sleek, intentional finish. In 2026, hair trends are leaning hard into healthy-looking shine and more defined curl patterns, which makes wet look curls feel current and elevated instead of messy or undone. With the right prep, gels, and layering techniques, you can lock in moisture, boost definition, and make that “wet” effect last all day without your hair feeling heavy. The key is working on damp hair, choosing shine-boosting yet flexible products, and using finger-raking or brush-styling to create glossy curl clumps that stay sleek but still have movement.
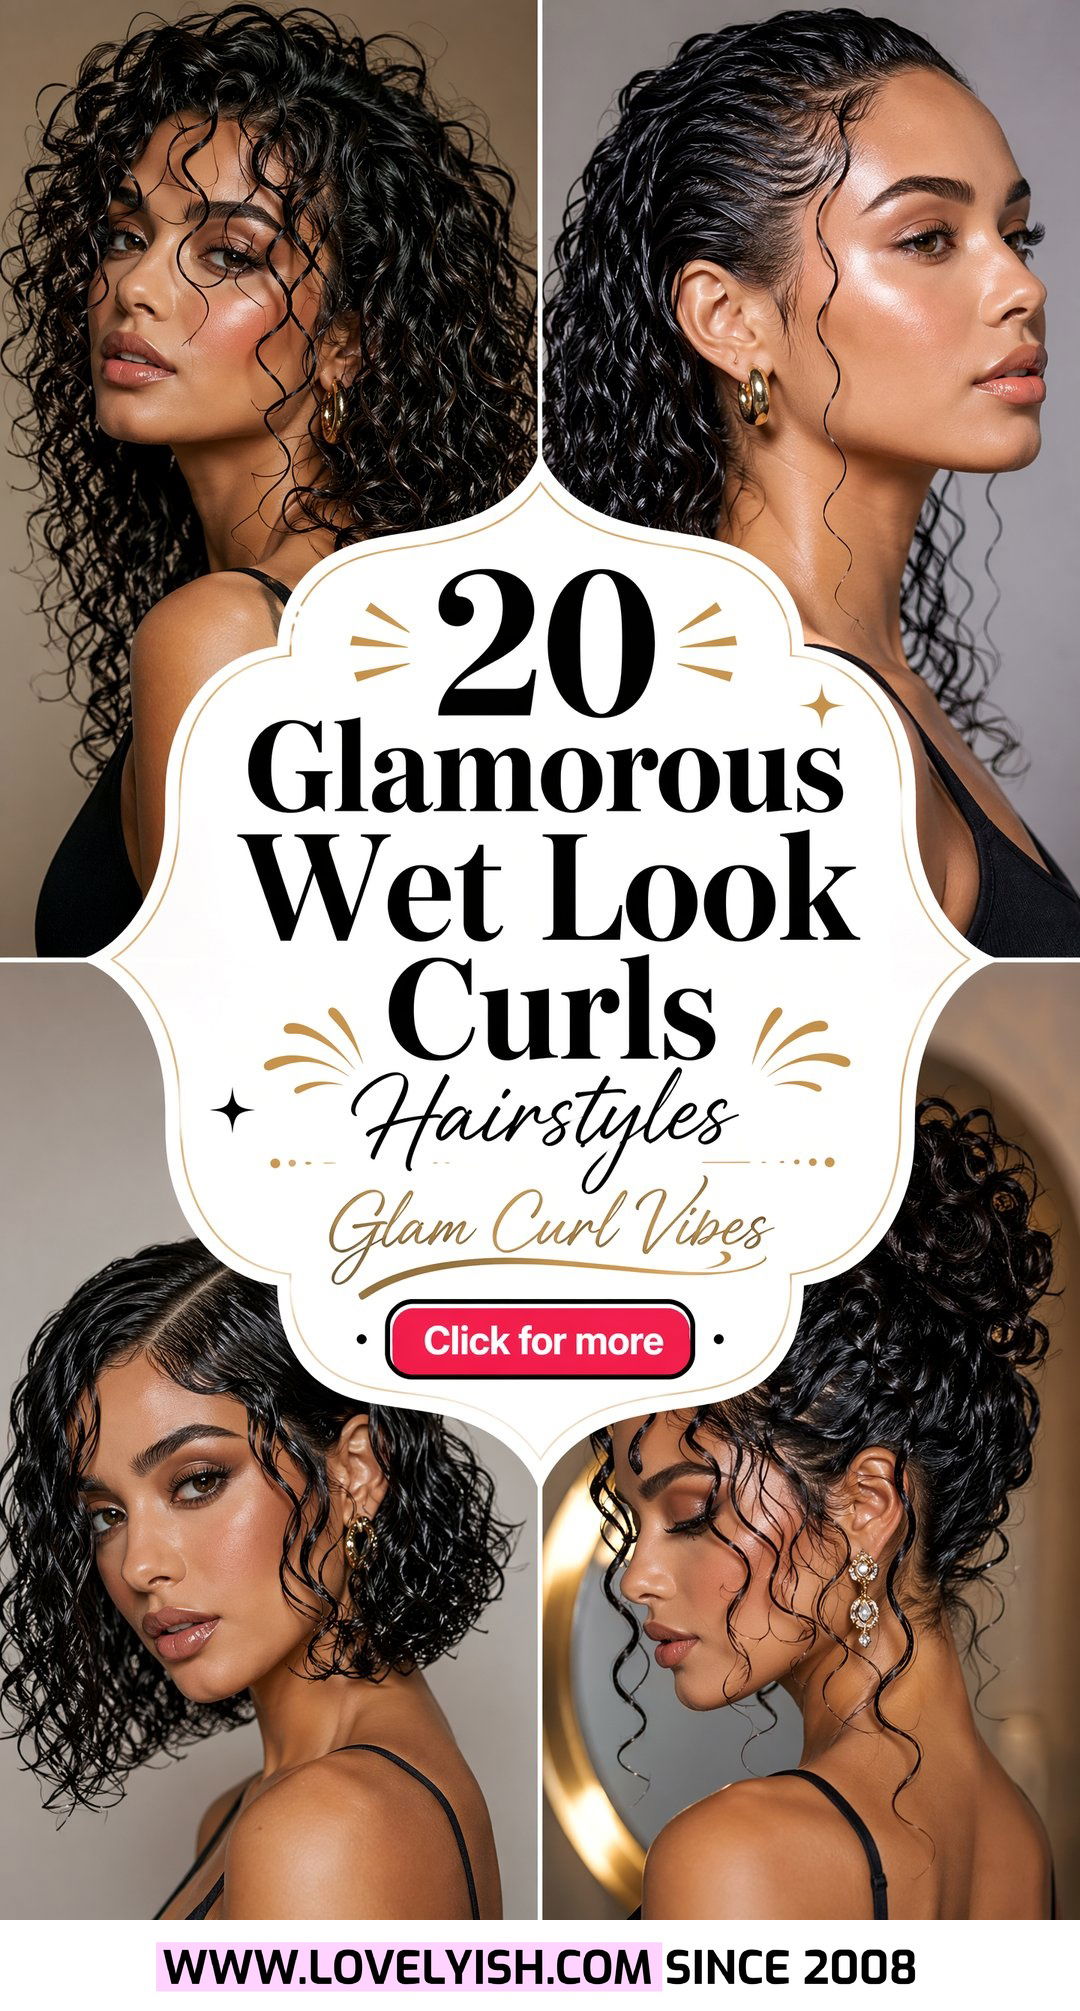
1. Slicked Back Wet Look Curls
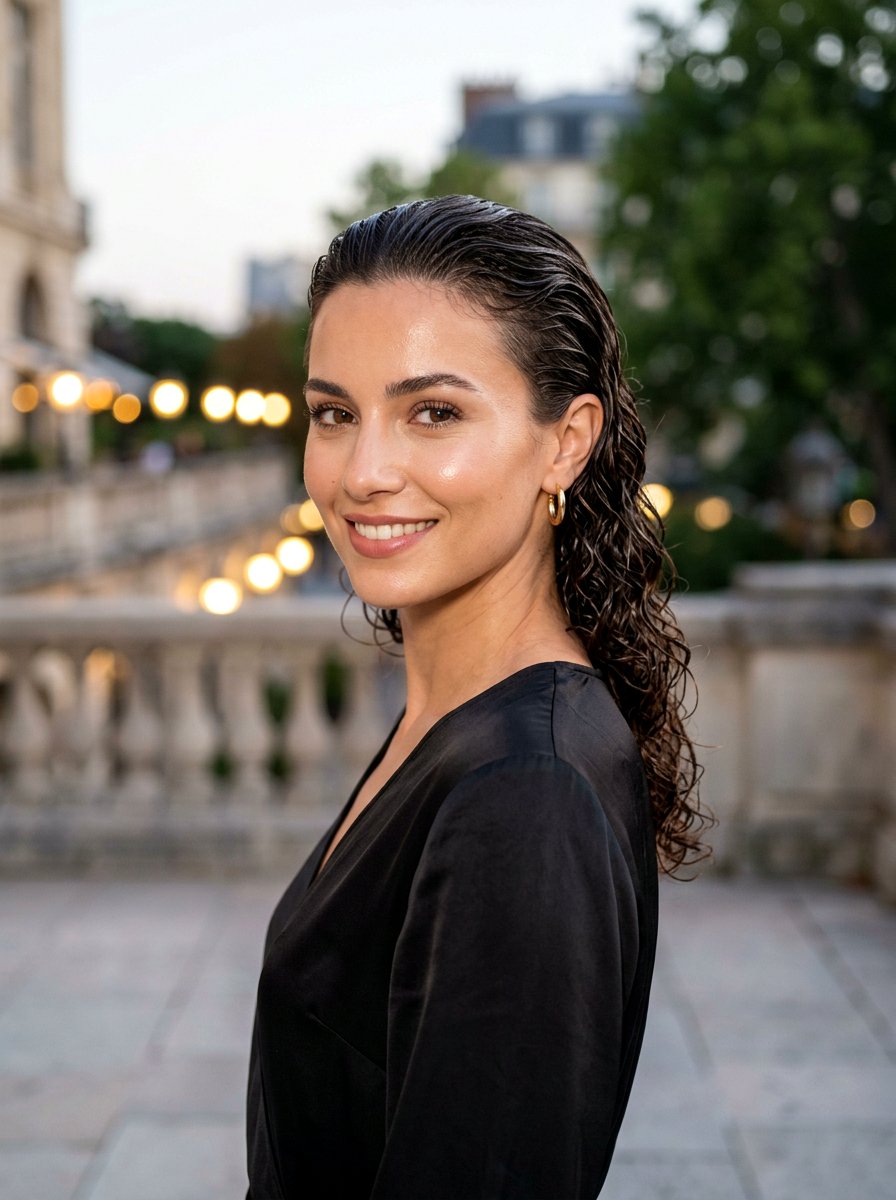
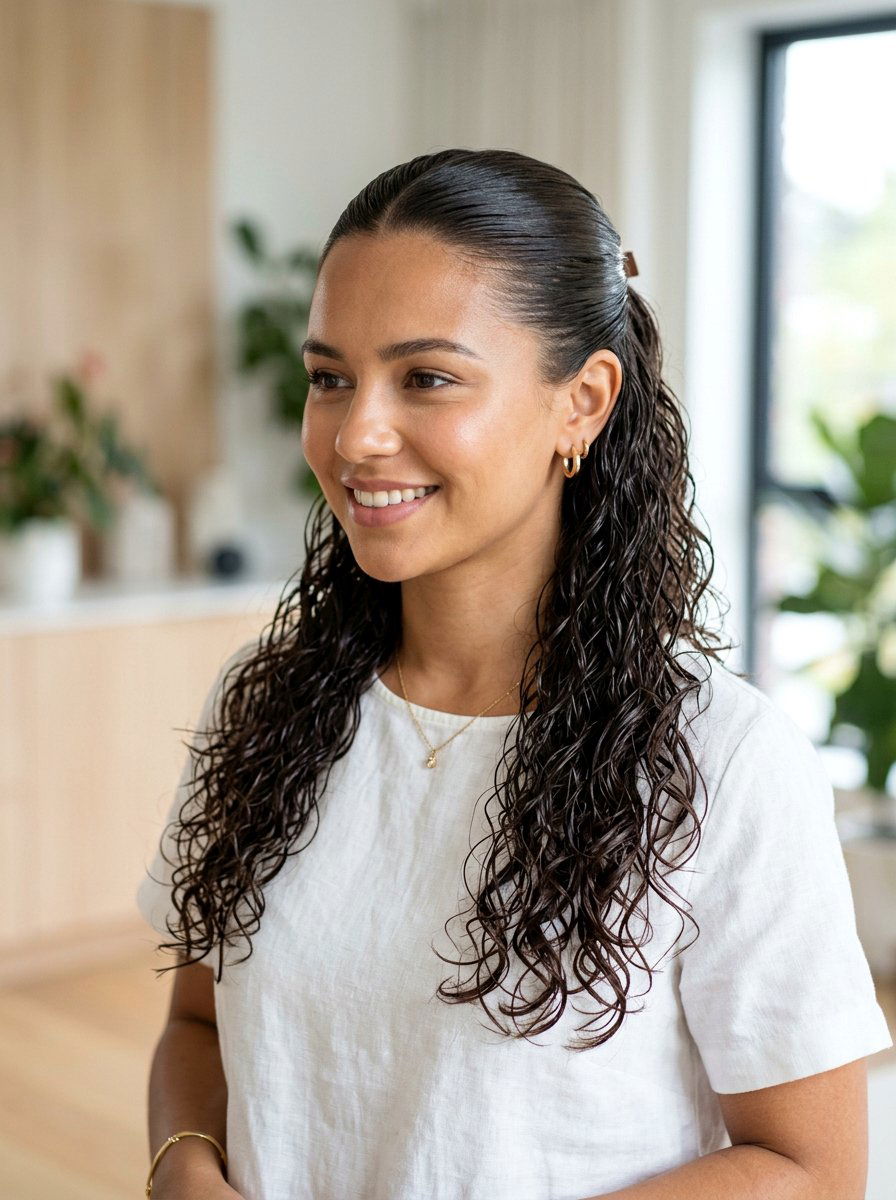
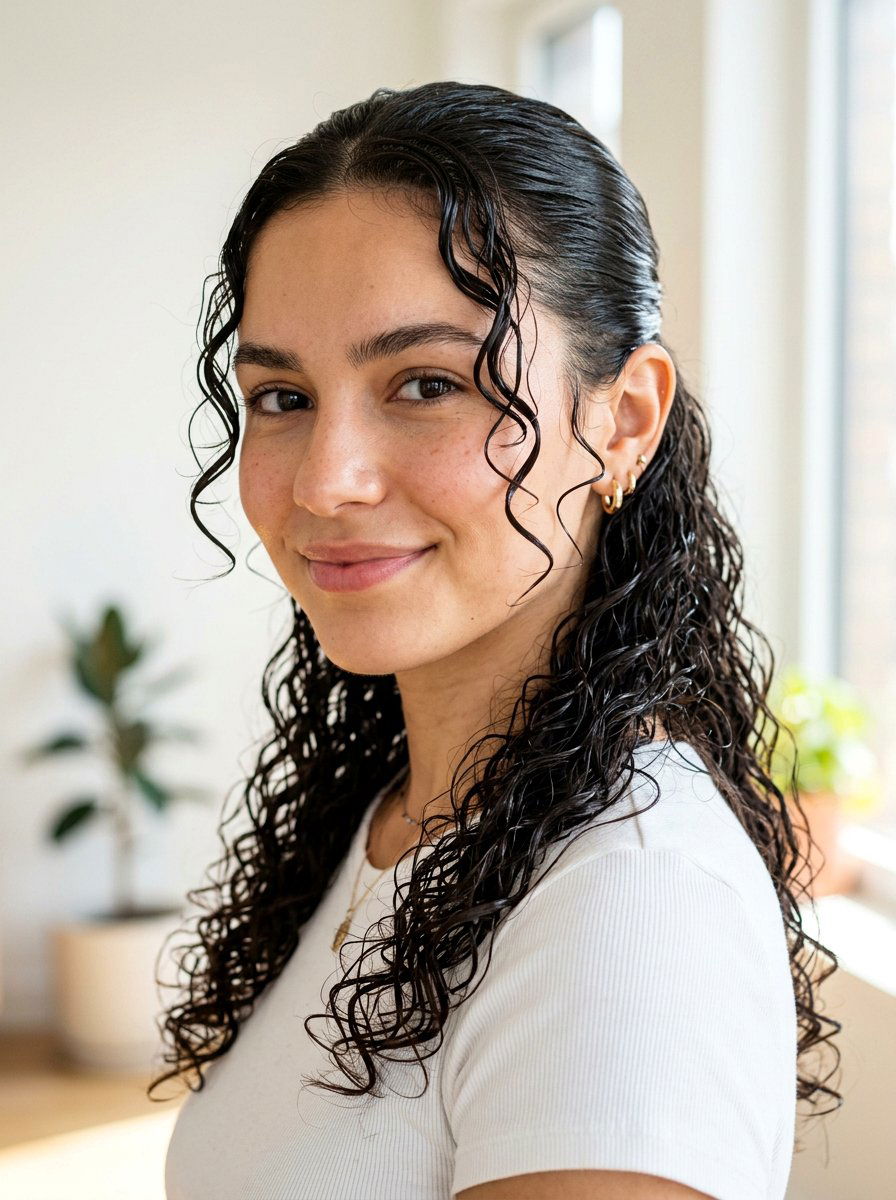
Picture your curls combed away from your face, glossy from root to ends, with every coil defined and set in place. This slicked back wet look works beautifully for medium to long curls because it keeps the hairline neat while allowing your natural texture to shine through behind it. Start with damp, conditioned curls and apply a leave-in or curl cream for slip, then layer a strong yet flexible gel from roots through mid-lengths, concentrating extra product at the crown to smooth everything back. Use your fingers or a brush to rake the hair straight away from your face, then press it close to the scalp so it looks intentionally sleek, not like you simply ran out the door with wet hair. Finish by smoothing a lightweight anti-frizz or shine product over the surface to add gloss and tame flyaways, and let it air dry without touching so the wet effect sets and stays polished.
2. Side Part Wet Look Curls
A deep side part instantly shifts wet look curls from basic to dramatic because it creates that sculpted, asymmetric shape across your forehead. To build this look, start with damp curls coated in a hydrating conditioner or curl cream, then create a clean side part using the tail of a comb so the line is sharp and intentional. Apply a high-shine gel along the parting and hairline, smoothing the hair flat to the scalp on the smaller side while letting the heavier side show more volume and curl definition toward the ends. You want the roots glossy and slick, but the lengths should hold that defined, clumped curl pattern that makes the wet look feel expensive instead of stiff. Avoid touching your hair while it sets, and if you need extra hold, mist a light hairspray only at the roots so your side-swept structure stays in place without making the curls crunchy.
3. Comb Back Wet Look Curls
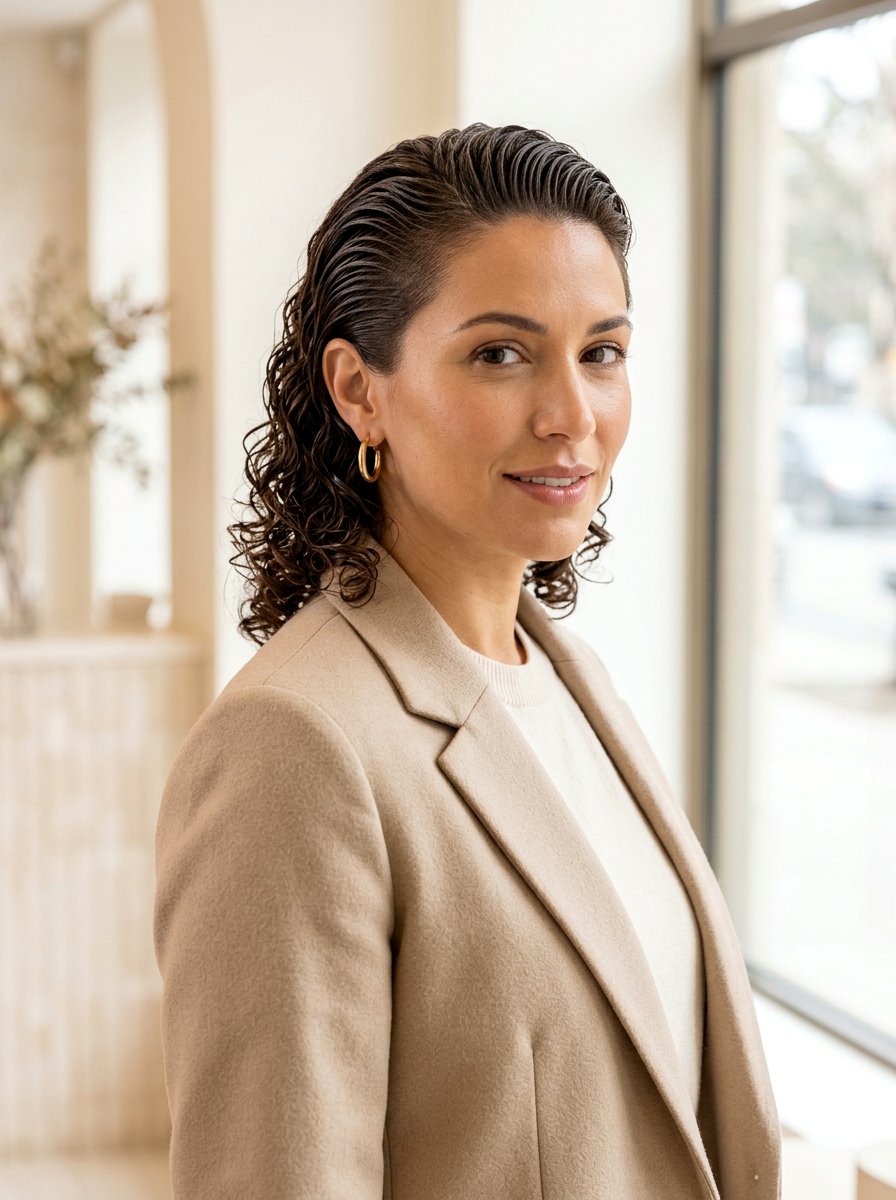
Think of comb back wet look curls as the glossy sibling of a classic slick-back, where you can see deliberate comb marks flowing through your texture. This version leans into that “freshly groomed” aesthetic seen on recent runways, with curls coated in gel and raked straight back to showcase shine and structure. Start on very damp hair and layer a slip-giving leave-in with a strong hold gel, then use a wide-tooth comb to pull curls back from the forehead to the crown, leaving visible rake lines for that editorial finish. Keep the sides closer to the scalp for control while allowing the back and ends to sit a bit fuller, so the look stays wearable and not overly severe. Once everything is positioned, resist the urge to re-comb as it dries; unnecessary touching can break up your defined clumps and introduce frizz that ruins the sleek wet illusion.
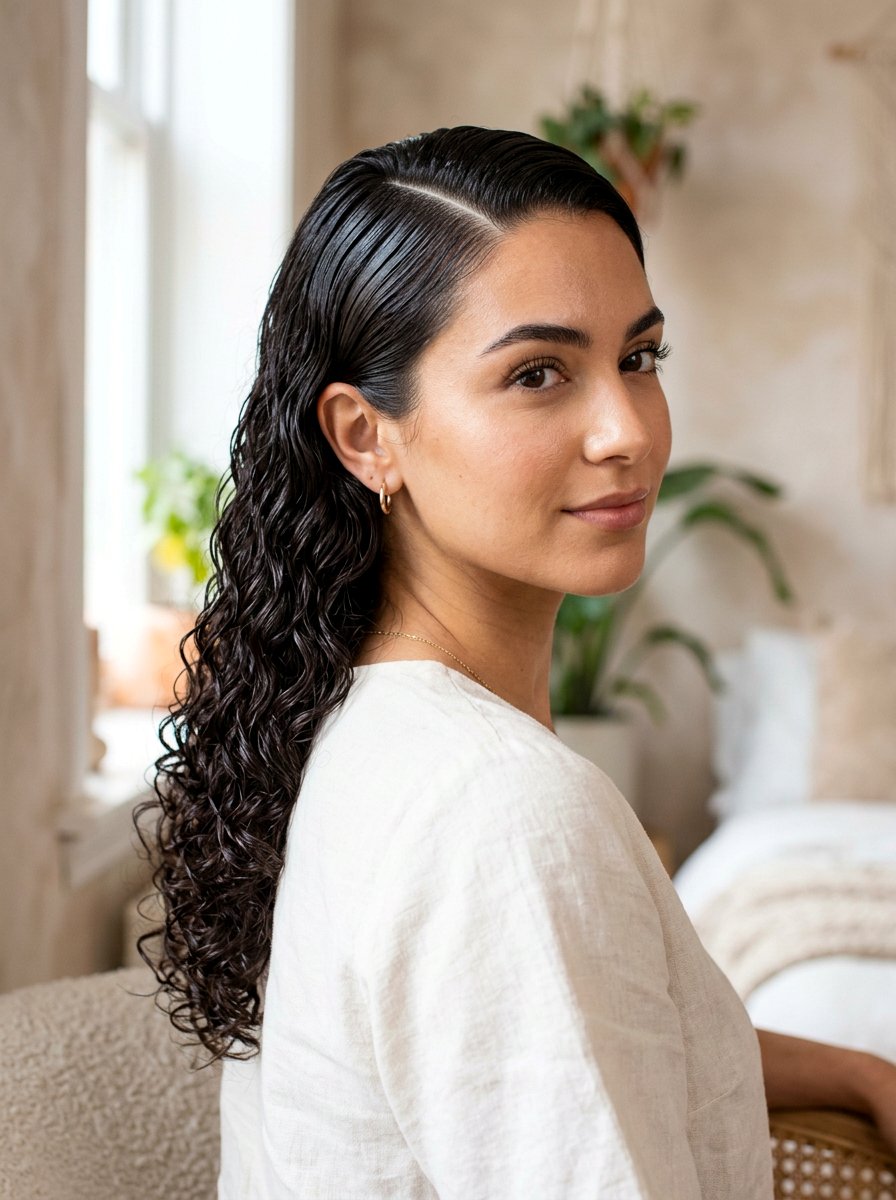
4. Middle Part Wet Look Curls

A middle part gives wet look curls a clean, symmetrical frame that feels modern and minimal. Begin with saturated, detangled curls and draw a straight center part on damp hair, then apply a generous amount of curl cream followed by a shiny gel, focusing on getting even coverage on both sides of the part. Use your fingers or a styling brush to smooth the roots down close to the scalp, keeping the part visible, and then gently rake through the lengths to encourage clumped, defined curls that still move. The goal is roots that look sleek and glassy with mid-lengths and ends that appear moist and defined instead of dry or fluffy. Let your hair air dry or diffuse on low without disturbing the part, and if your scalp area tends to frizz, press a tiny bit of anti-frizz cream along the part line once the hair has finished setting.
5. Half Up Wet Look Curls
On days when you want your curls off your face but still love that glassy texture, a half up wet look is a great option. Start with damp curls and layer a leave-in and gel throughout, focusing extra product on the top section you plan to pull back so it looks the sleekest. Use your fingers or a brush to smooth the crown area backward, then secure that half up portion with an elastic at the back of your head while leaving the lower curls hanging loose and defined. The top should look almost sculpted and very shiny, while the bottom shows bouncy curl clumps that still have the wet effect without being stuck to your scalp. Avoid heavy oils on the loose section, which can make curls look stringy; stick to gel and a light glossing product so the entire look stays cohesive and lightweight.
6. Wet Look Curls With Face Framing Pieces
Gentle, wet look tendrils around your face can soften the overall style and highlight your features. To get that effect, apply your usual curl cream and gel all over damp hair, but pay extra attention to the front sections, smoothing them and twisting each piece slightly to encourage definition. You can wear the rest of your curls slicked back, half up, or down, but those face-framing curls should look especially glossy and deliberate, not frizzy or random. If your hairline frizzes easily, add a bit more gel or mousse to those pieces and gently scrunch upward, then leave them alone while your hair sets. Once dry, avoid brushing these curls out; if you need to separate them, lightly coat your fingers with a serum and split the clumps in half so you keep shine and shape.
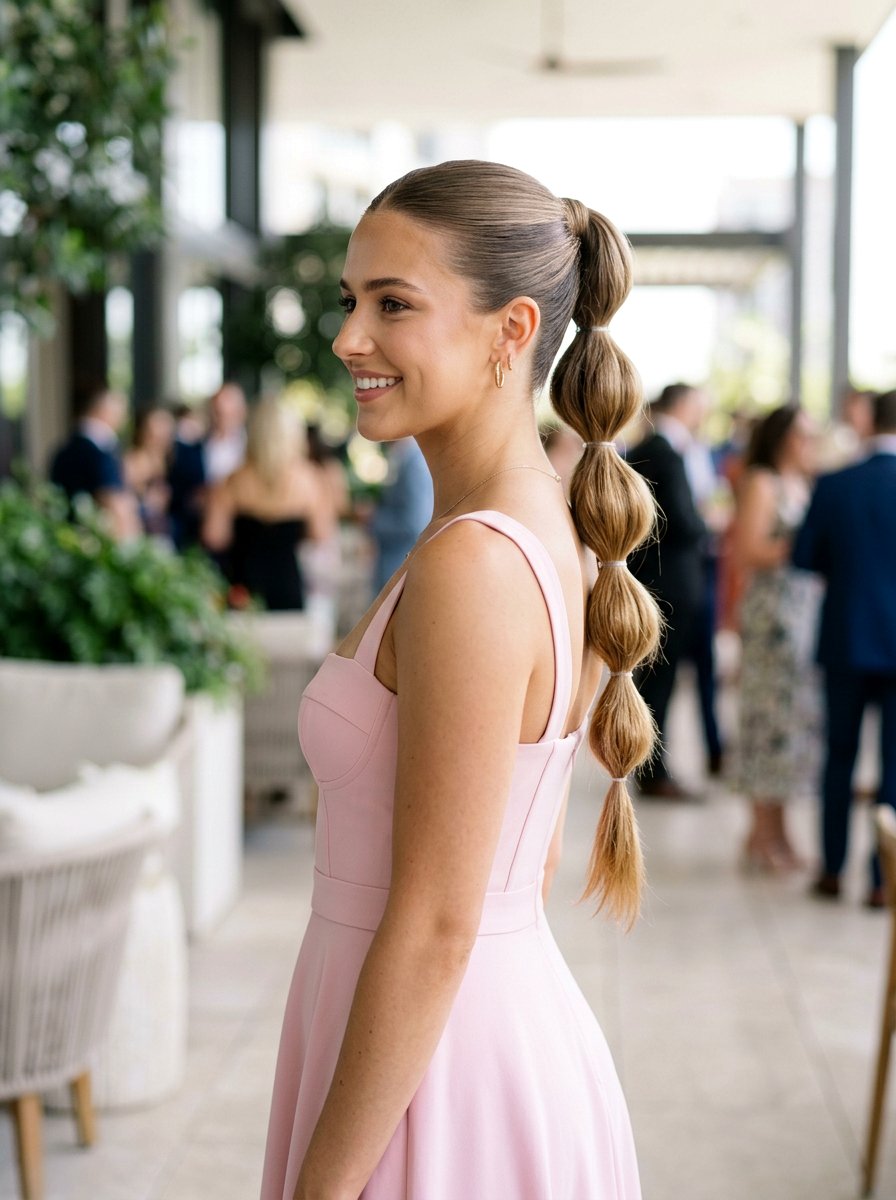
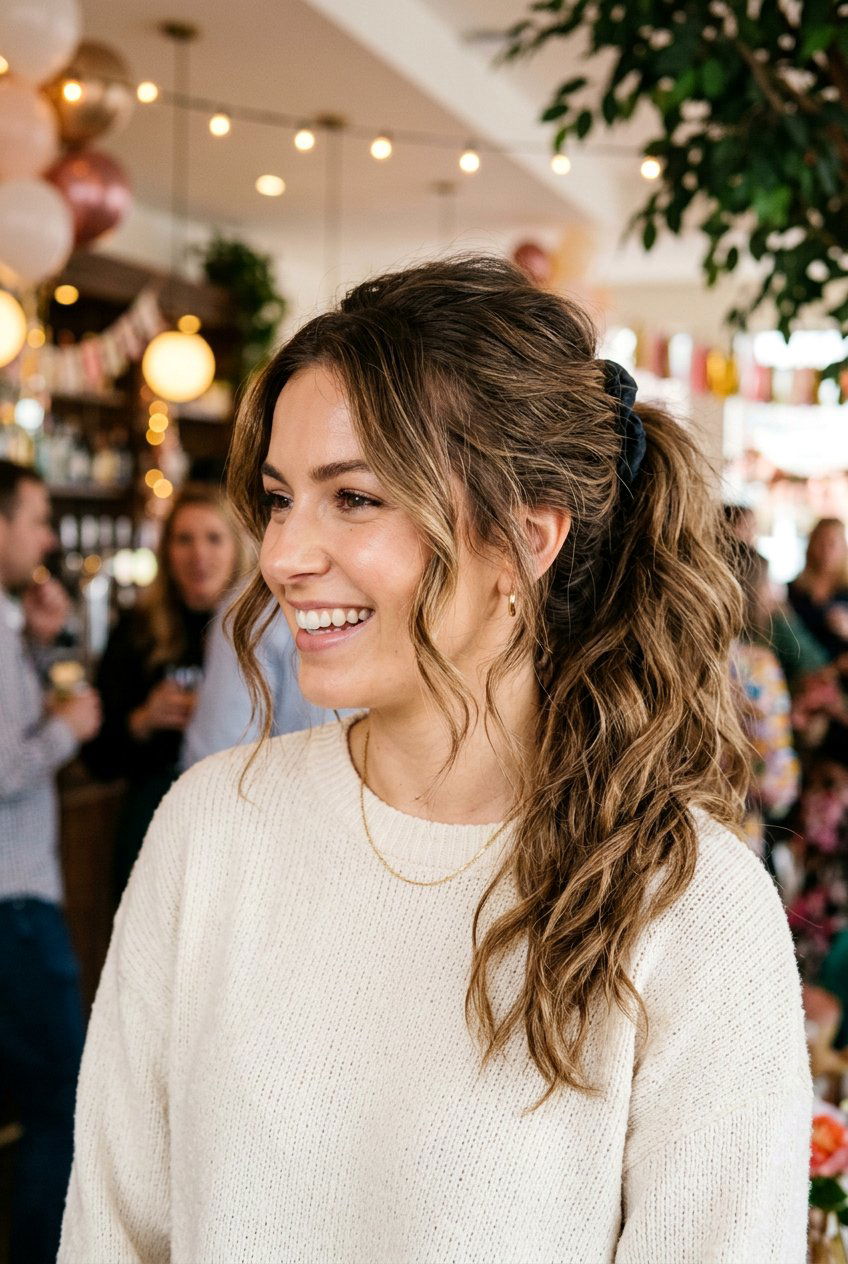
7. Wet Look Curls Ponytail
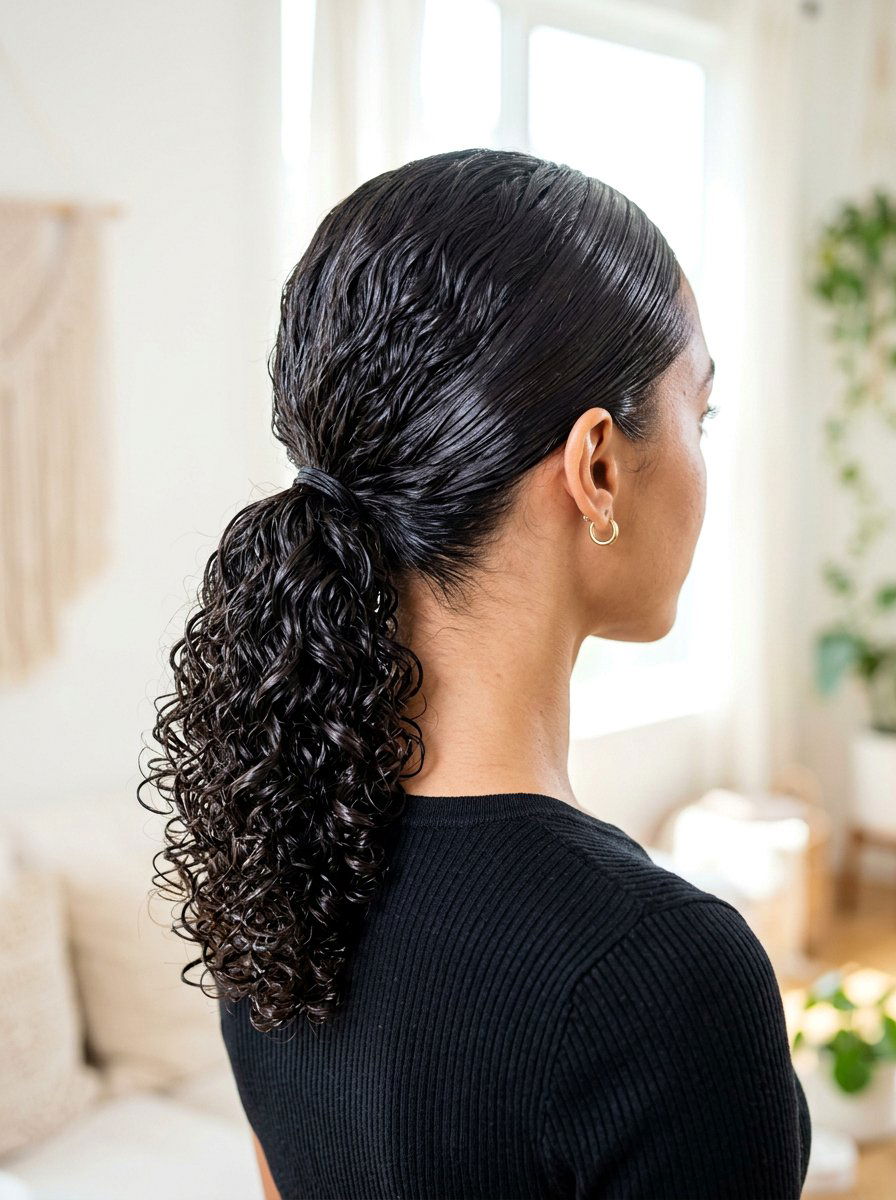
A wet look curls ponytail is perfect when you want something sleek at the front and playful at the back. Begin by applying leave-in conditioner and gel to damp curls, then use a brush to smooth everything back into a mid or low ponytail, making the roots and sides extra glossy. Secure your ponytail snugly so the base feels firm, then scrunch a little more gel into the curly lengths to enhance clumps and shine without weighing the hair down too much. You want the ponytail itself to look moist, defined, and frizz-free, not crunchy or stiff, which is why flexible hold gels work best here. If you like a more polished finish, wrap a small section of hair around the elastic and gel it down, then let the rest of the curls dry untouched for a glossy, pulled-together result.
8. Low Bun Wet Look Curls
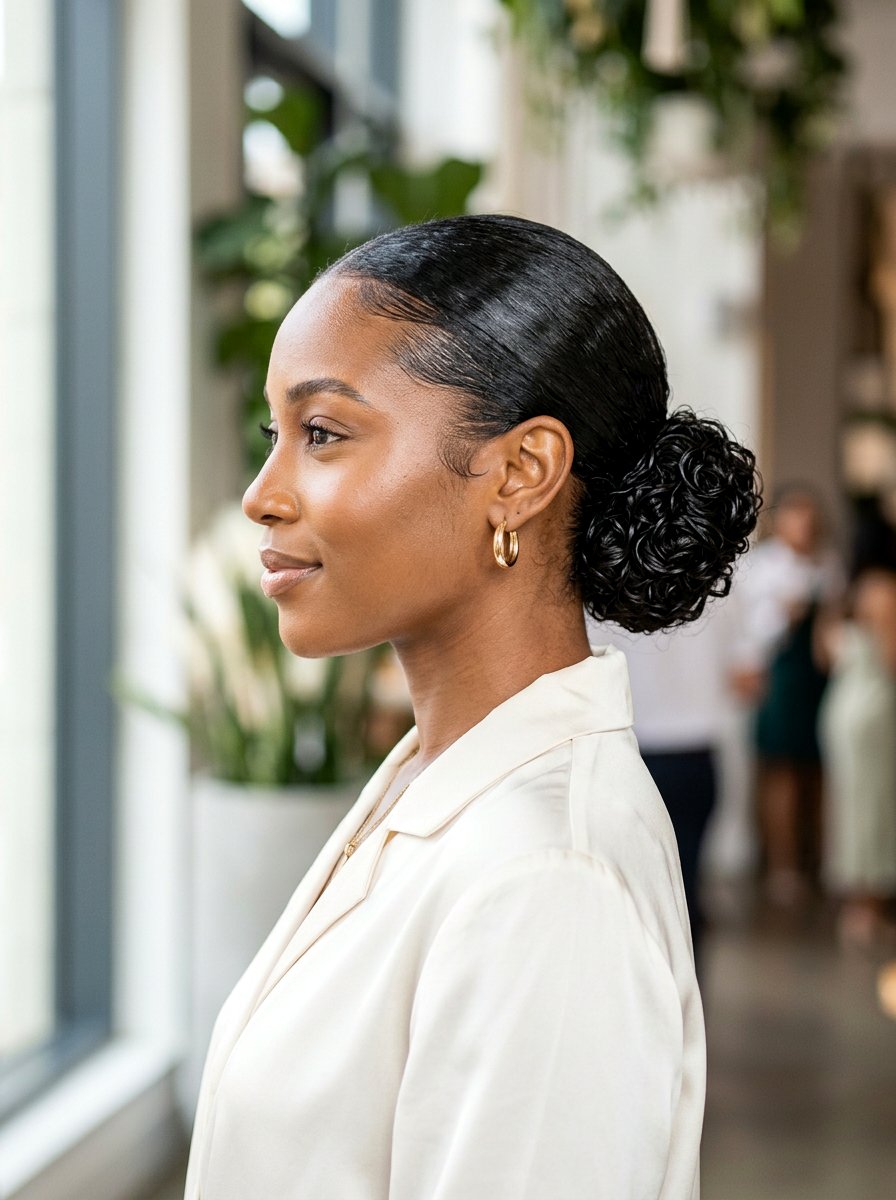
A low wet look curls bun combines elegance with that trendy, freshly-styled shine. On damp hair, apply a smoothing cream followed by a strong-hold gel from roots to ends, combing downward toward the nape of your neck so all the hair lies flat and controlled. Gather your curls into a low ponytail first, then twist or coil the lengths into a bun, allowing some textured pieces to show for a soft, curly finish instead of a super tight knot. The surface of the bun and the hair leading into it should look sleek and wet, while any visible curls appear shiny and defined. To keep everything in place, smooth a little more gel or anti-frizz cream over flyaways and let it air dry completely before touching, which helps the wet illusion last for hours.
9. High Puff Wet Look Curls
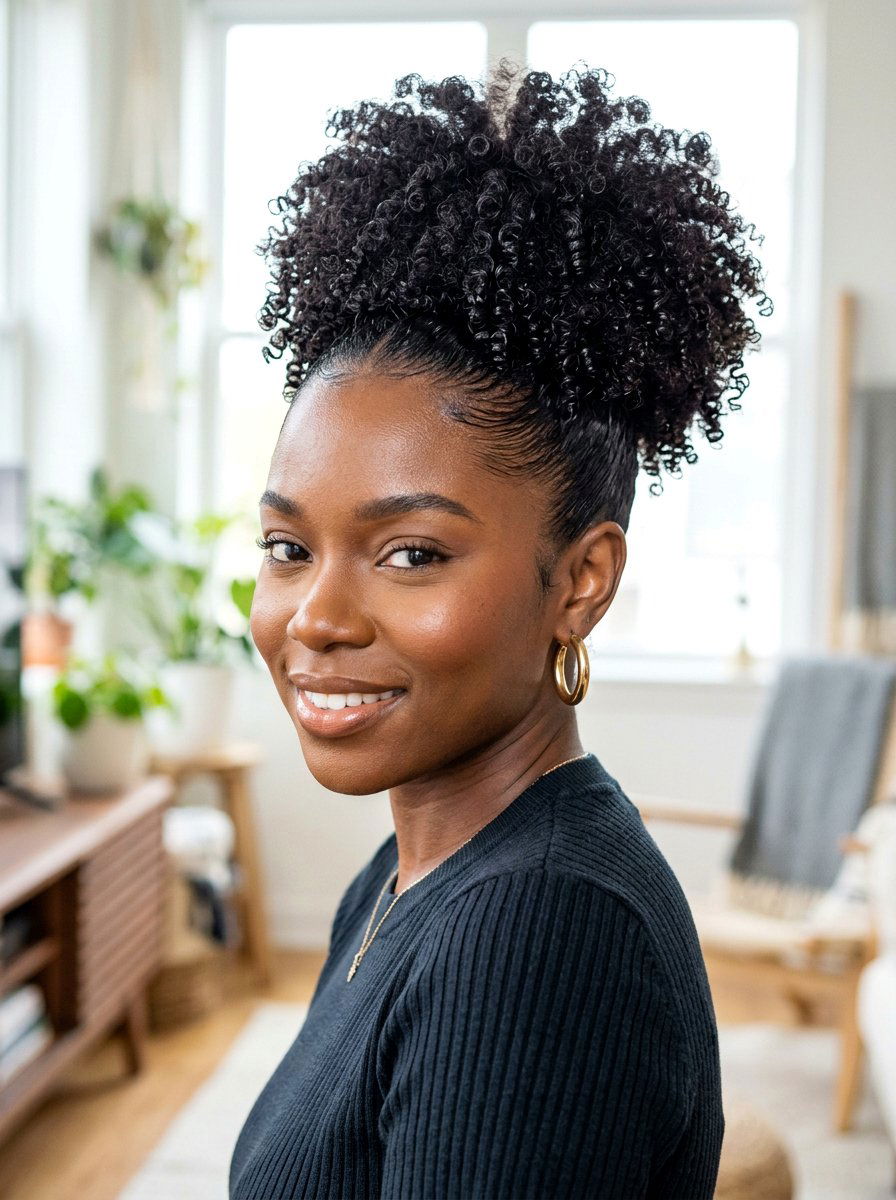
A high puff with wet look curls brings all the attention to your texture while keeping your hairline sleek. Start with damp curls and apply a moisturizing leave-in or curl activator through your hair, then layer gel along the perimeter, brushing upward to gather everything at the crown. Secure with a puff cuff, elastic, or scarf, making sure the sides and back are smooth, glossy, and pulled tight enough to stay put without discomfort. For the puff itself, scrunch in a bit more gel to define curls and add a high-shine finish, but be careful not to overload product so the hair doesn’t look flat. Let the puff dry while you avoid touching it; once set, you’ll have a sleek hairline and a cloud of shiny, well-defined curls that still look wet and intentional.
10. Curly Wet Look Shag
A curly shag with a wet finish feels edgy and modern because it mixes layered movement with high-gloss definition. This look works best if your haircut already has layers and maybe shorter pieces around the crown, since those shapes help the wet texture fall in a cool, undone way. Apply a lightweight curl cream throughout damp hair, then use a medium-hold gel to scrunch each layer, focusing on getting clumped curls rather than brushed-out volume. You want the roots to sit flatter than a typical big shag, which keeps the silhouette closer to the head while still showing off all those layered pieces. Air dry or diffuse on low, then, if needed, add a shine serum to the ends so the overall effect looks glossy, lived-in, and effortlessly styled instead of stiff or crispy.
11. Wet Look Finger Coils
Finger coils are a great way to create very defined wet look curls that last for several days. Start with soaking-wet hair and apply a rich leave-in conditioner for slip, followed by a high-shine gel that offers strong hold without too much crunch. Working in small sections, rake the product through, then wind each curl around your finger from root to tip, allowing it to spring back into place as a perfect coil. This technique gives you uniform, glossy spirals that look like they just came out of the shower but feel secure and controlled. Let your coils dry completely before separating any of them, and if you do split them later, coat your fingers in a bit of serum to keep frizz from breaking that wet, glassy finish.
12. Defined Wash And Go Wet Look
A defined wash and go can easily be dialed into a wet look finish with the right product layering. Begin on cleansed, very wet curls and apply a leave-in conditioner or curl activator, then follow with a medium to strong hold gel that’s known for shine. Use the rake and shake method: rake gel from roots to ends several times, then gently shake each section so curls clump together and form juicy, defined ribbons. Avoid scrunching out the cast once it dries; keeping that gel cast mostly intact actually helps maintain the wet appearance and frizz-free finish. If needed, you can lightly glaze a shine serum over the top layer of hair, but skip heavy creams at the end so your curls stay light and glistening instead of greasy.
13. Wet Look Curls With Clips
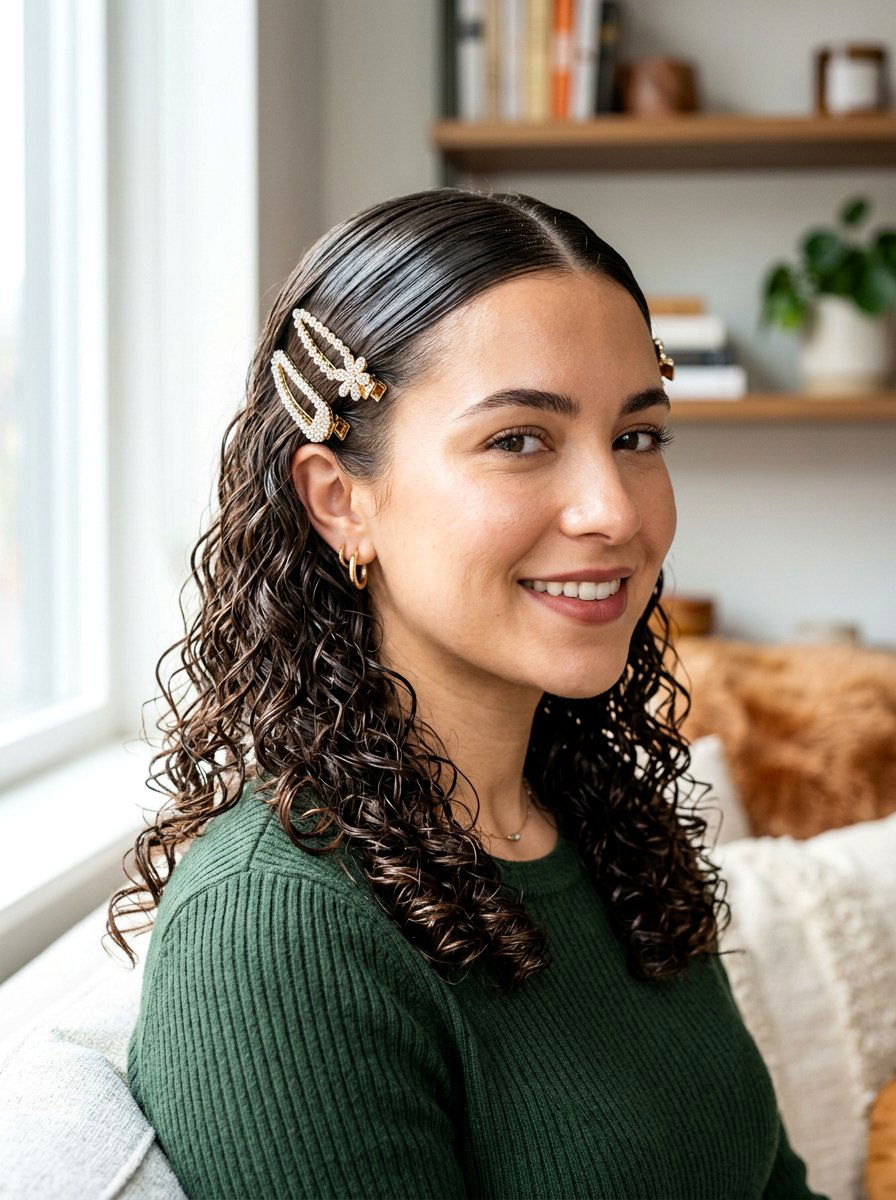
Decorative clips can emphasize the sleek lines of wet look curls while also keeping your hair off your face. After applying leave-in and gel to damp curls, decide where you want your part, then smooth the hair on each side flat against the scalp using a brush or your fingers. While everything is still wet, place clips along the front or sides to hold sections in place, which can create a sculpted, almost runway-inspired shape once dry. The clips highlight how glossy and controlled your curls are at the roots, while the lengths stay defined and softly hanging. Allow your hair to dry fully before removing any clips you don’t want to keep in; this helps the molded, wet look structure stay sharp without relying on a ton of extra product.
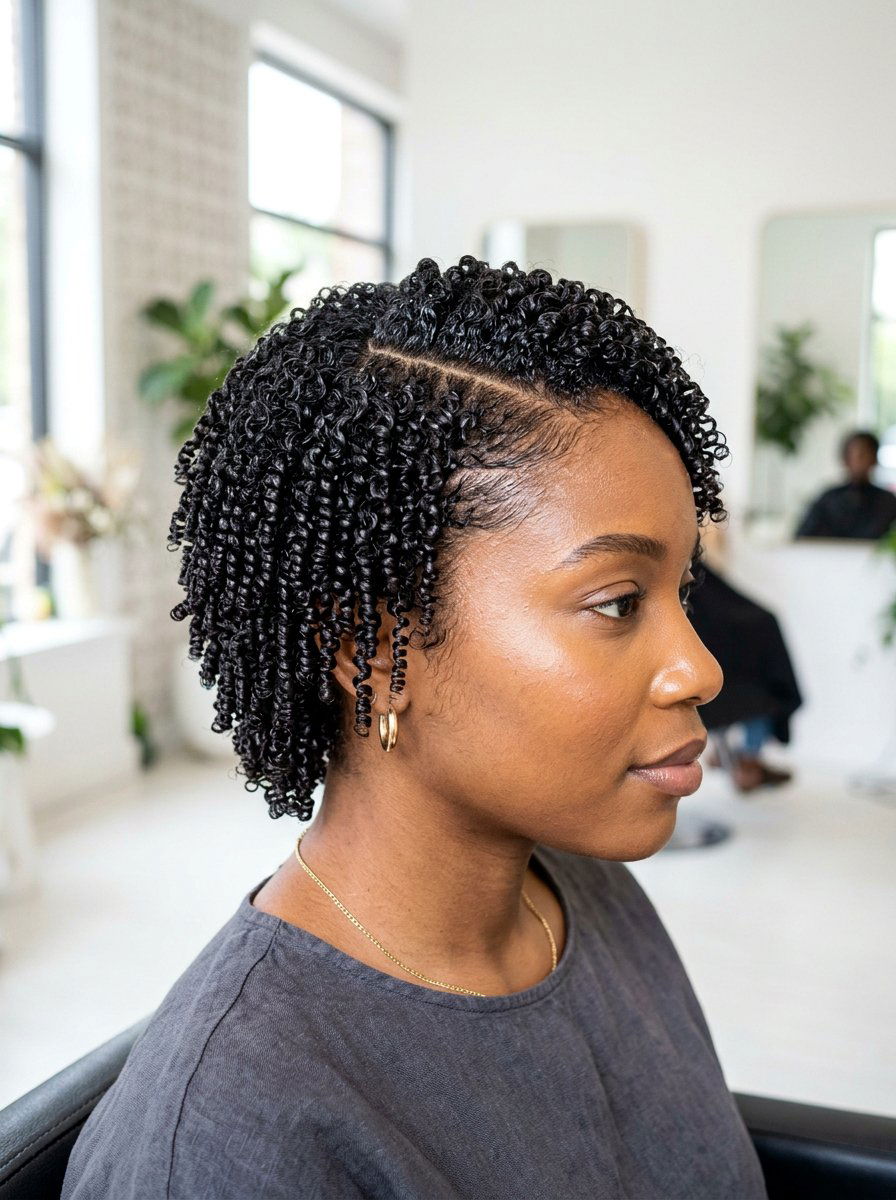
14. Short Wet Look Curls
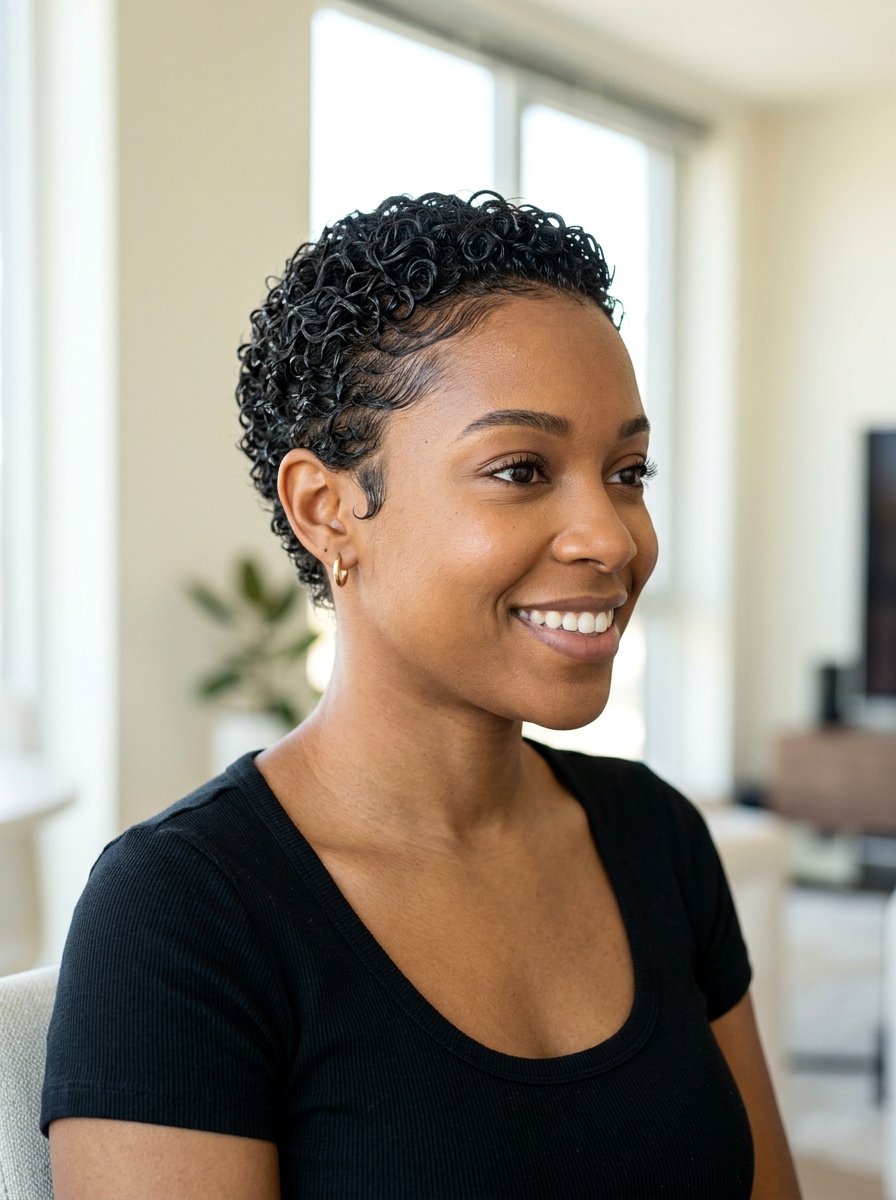
Short curls look incredibly chic with a wet finish because the gloss and definition become the main focus. Start by saturating your short hair with water, then apply a curl cream or leave-in to hydrate, followed by a generous amount of gel that offers shine and firm hold. Use your fingers or a small brush to direct curls into the shape you like—whether that’s slightly forward toward the forehead, fully slicked back, or parted to one side. Because short cuts show everything, smooth over the surface with a frizz-fighting cream or serum to ensure every curl looks deliberate and glossy. Let the hair dry completely before touching, and if any areas lose shine, lightly mist with a shine spray or re-glaze a tiny bit of gel just on the outer layer for a fresh, wet effect.
15. Long Wet Look Curls
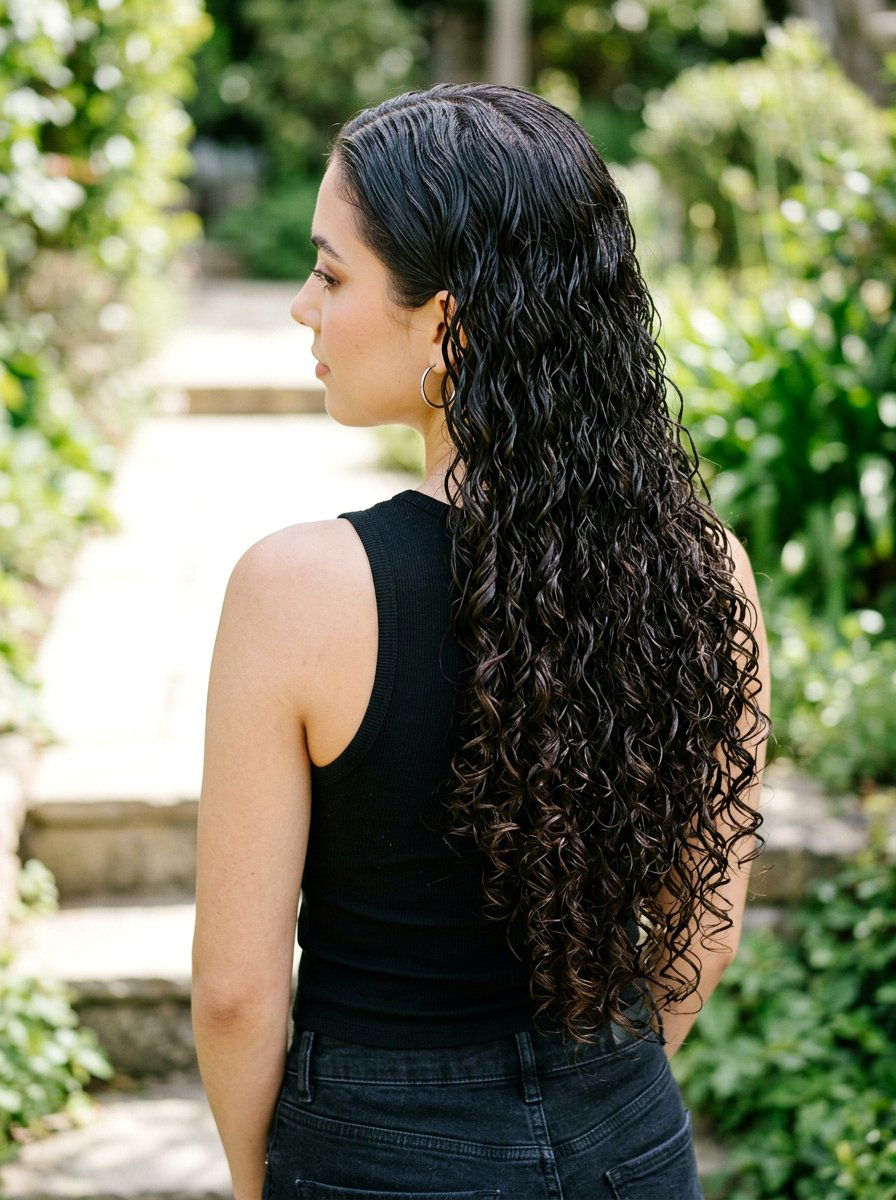
Long wet look curls feel glamorous because you get that “waterfall of shine” effect from roots to ends. The trick is balancing product so your curls look drenched but not stringy or weighed down. On soaking-wet hair, apply a hydrating mask or rich leave-in as your base, then layer a gel with strong hold and high shine, raking it through section by section to ensure even coverage. Scrunch gently to encourage curl formation while still keeping the strands elongated for that glossy length. Allow your hair to air dry as much as possible and avoid touching it; once it sets, you can lightly separate a few curls with serum-coated fingers so it looks lush and defined without losing the wet illusion.

16. Wet Look Bangs With Curls
Wet look bangs paired with curls can feel bold but surprisingly wearable when done right. On damp hair, style the rest of your curls with your usual cream and gel routine, then focus on your bangs by applying a bit more gel and smoothing them into your preferred direction—straight down, slightly side-swept, or parted in the middle. Use a fine-tooth comb or your fingers to create clean lines and ensure every bang hair is coated so the fringe looks intentionally glossy. The curls behind the bangs should stay defined but can have slightly less product so they don’t compete with the high-shine fringe. Let your bangs dry in place without pushing them aside, and once everything sets, you’ll have a statement wet look in front that frames and contrasts beautifully with your textured lengths.
17. Wet Look Curls With Gel Cast
Leaning into a visible gel cast can give your wet look curls incredible longevity. After applying leave-in conditioner to very wet hair, work a strong-hold gel through in sections, raking and smoothing until every curl is fully coated and clumped together. Instead of scrunching out the crunch once your hair is dry, leave that cast mostly intact so your curls stay super defined, shiny, and resistant to frizz throughout the day. This technique is especially helpful in humidity because it creates a protective shell around each curl. If you want a bit more movement without losing the wet effect, gently scrunch only the ends with serum-coated hands, keeping the roots and mid-lengths firm and glossy.
18. Wet Look Curls With Mousse
Using mousse for a wet look gives your curls more bounce while still delivering shine and definition. Start with damp hair and apply a curl cream or leave-in to hydrate, then layer a generous amount of non-drying mousse from roots to ends, scrunching upward to encourage curl formation. For extra gloss and hold, glaze a light layer of gel over the top, focusing mostly on the outer layer and hairline instead of saturating every strand. This combination lets the curls feel airy while the surface still looks sleek and wet. Let your hair air dry or diffuse on low, and avoid over-touching so the mousse and gel can set into that shiny, frizz-resistant finish that lasts past the first few hours.
19. Wet Look Curls Updo
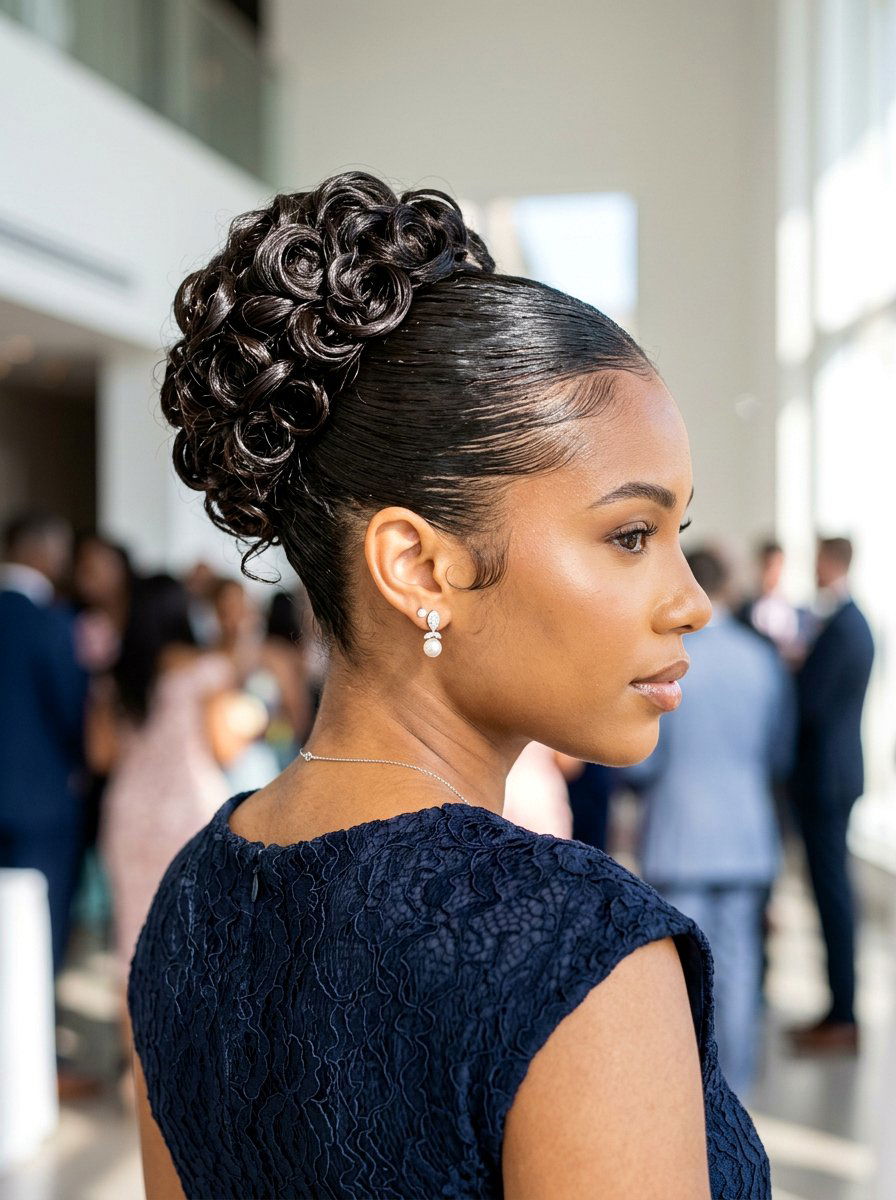
A curly updo with a wet finish is perfect for special occasions when you want something polished but still true to your texture. Apply leave-in and gel to damp curls, then smooth the sides and back upward or backward depending on the shape you prefer, securing sections with pins as you build the updo. Let some curls remain visible and slightly loose within the updo so the texture shows through instead of looking like one solid mass. The key is keeping the hairline and surface shiny and controlled while the pinned curls appear moist, defined, and softly sculpted. Once everything is in place, smooth a little anti-frizz cream over any flyaways and avoid touching so the style stays glossy and intact throughout the event.
20. Wet Look Curls For Short Sides Long Top
If you wear a short sides, long top cut, wet look curls can really highlight the contrast in length. Keep the sides closely cropped and mostly product-free or lightly slicked with gel, while the longer top section gets the full wet look treatment with leave-in and high-shine gel. Use your fingers or a brush to direct the curls on top either forward, back, or to the side, depending on whether you want a more classic or edgy shape. Because the top carries most of the texture, be generous with product there to achieve glossy, defined curl clumps that look almost lacquered. Allow the hair to dry without disruption, and if any areas dull down, touch up the surface with a tiny amount of gel or shine serum to restore that wet, high-contrast finish between the sides and the curls.
Conclusion:
Wet look curls are more than a quick trend—they fit perfectly into today’s push for shiny, defined, healthy-looking hair that still feels expressive and personal. Whether you prefer slicked back roots, high puffs, structured updos, or everyday wash and go routines, the wet finish simply tweaks your usual curly styling instead of reinventing everything. The secret lies in strategic layering: hydrating bases for slip, high-shine gels or mousses for hold, and minimal touching while your curls set so the definition stays intact. With those fundamentals in place, you can easily adapt any of your favorite cuts and lengths into a wet look version that feels intentional, runway-inspired, and surprisingly long lasting. As curly hair trends move toward more structured product routines and refined shapes, knowing how to create glossy wet look curls gives you a versatile styling option you can dress up or down whenever you want that extra shine.
You'll Like These Styles:
Leave a Reply