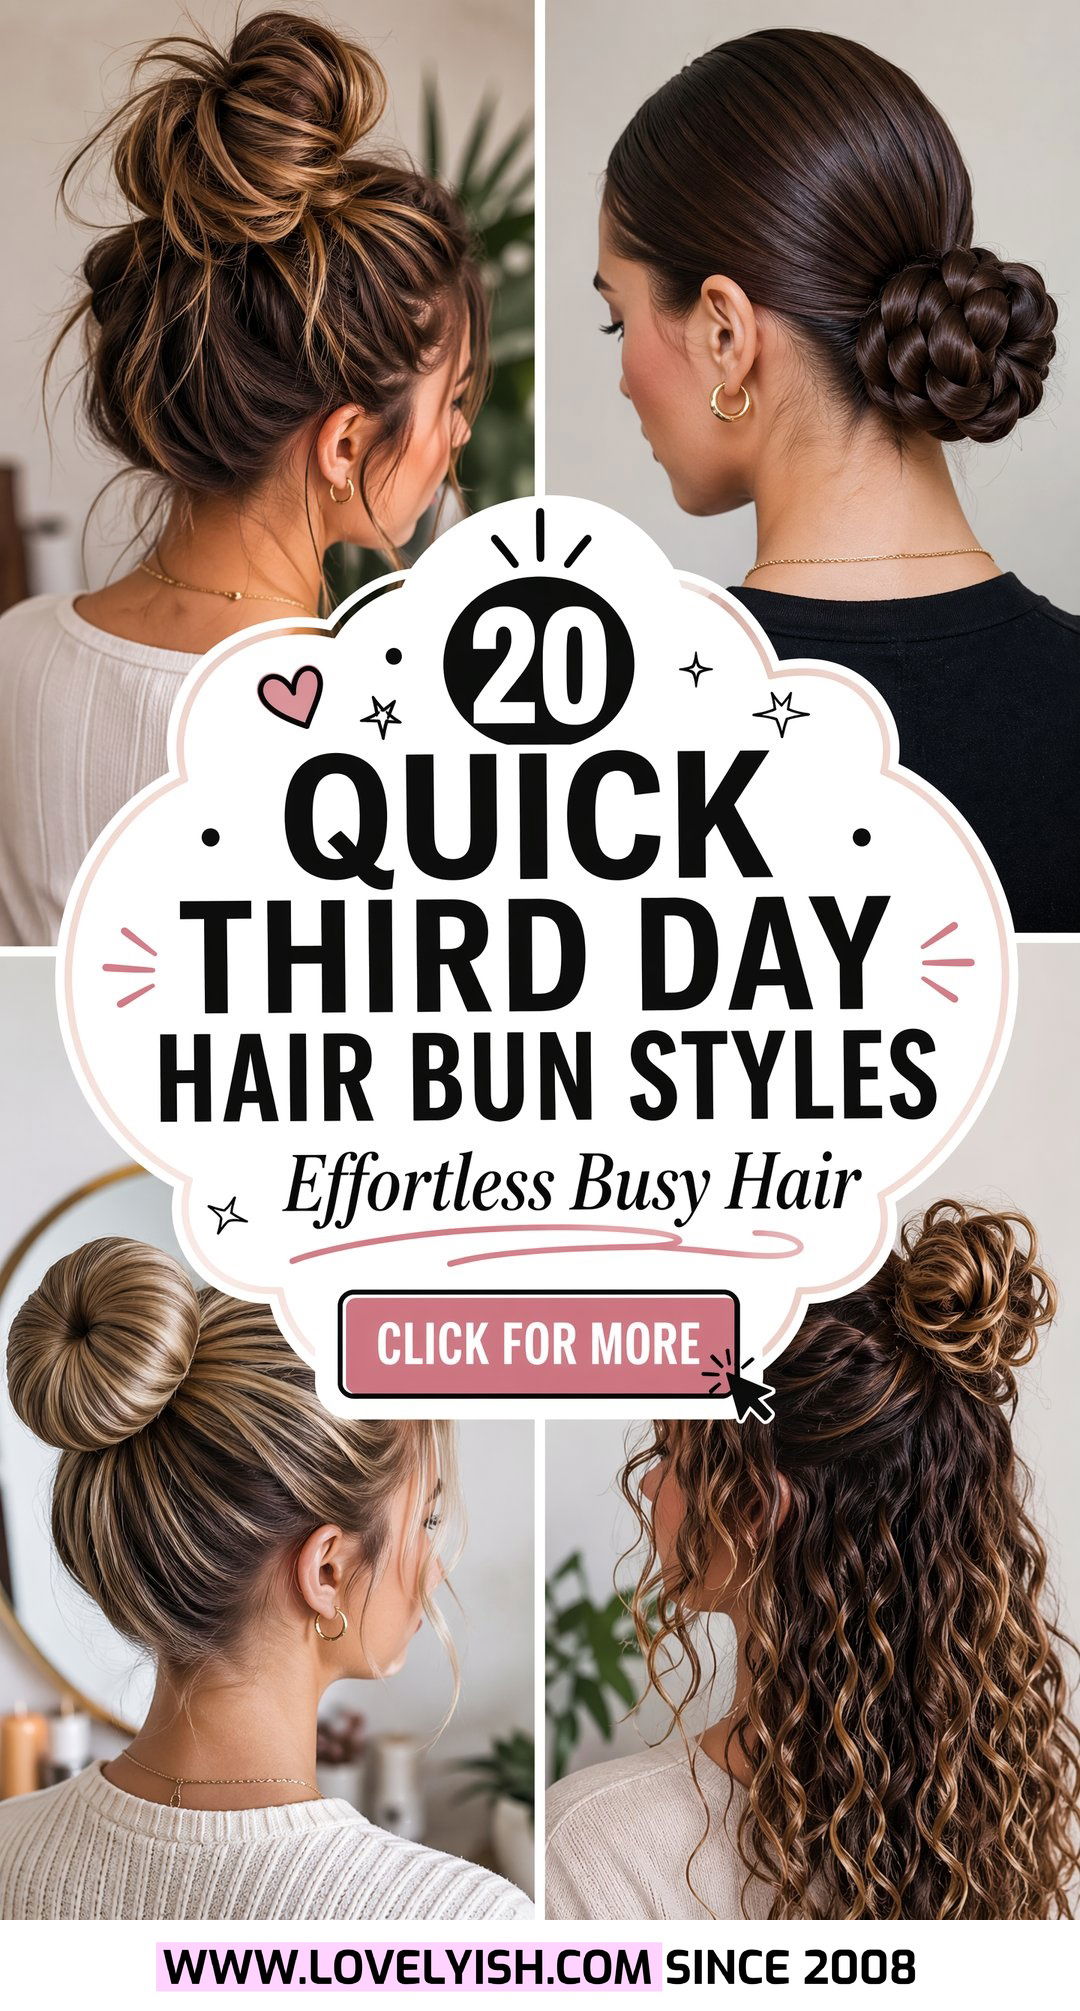
Third day hair can feel tricky, but it is actually the perfect canvas for an easy bun that looks relaxed, lived‑in, and intentional instead of greasy or messy in a bad way. Natural oils give your strands grip, so buns hold better with fewer pins and less effort, which is why so many stylists recommend updos on second or third day hair. Dry shampoo, texturizing spray, or a light styling paste help refresh the roots while adding volume and texture through the mid‑lengths, turning “I should have washed” into “I woke up like this.” In this guide, you will find 20 different third day hair bun looks, ranging from low and sleek to high and undone, plus braided and accessorized options that work for workdays, errands, and evenings out. Each bun focuses on the full hairstyle, including parting, volume, face‑framing pieces, and finishing touches, so you can stretch your wash days without sacrificing polish, confidence, or personal style.
1. Low Messy Third Day Bun
Picture that slightly tousled, just‑rolled‑out‑of‑bed texture being turned into a chic low bun that looks deliberate instead of lazy. A low messy third day bun starts with reviving flat roots using dry shampoo at the crown, massaging it in with your fingertips to add lift without making the scalp look dusty. Brush or finger‑comb hair back loosely, letting your natural bends and waves show, then gather everything at the nape of your neck, securing a low ponytail with a soft elastic to avoid breakage on already dry ends. Twist the ponytail, wrap it around the base, and pin it, then gently tug small sections of the bun to make it look fuller and more relaxed. Pull out a few face‑framing strands, smooth flyaways with a tiny amount of styling paste on your fingertips, and finish with a light mist of flexible‑hold hairspray so the bun stays put but still looks effortless.
2. High Textured Third Day Bun
On mornings when your roots feel oily but your ends still look good, a high textured third day bun becomes a fast way to lift everything up and away while keeping the look casual yet put together. Start by flipping your head over and spraying dry shampoo through the roots from underneath; this helps add extra lift through the crown once you stand upright again. Use your fingers instead of a fine‑tooth comb so you do not flatten the natural texture that has built up over the last couple of days, then gather hair into a high ponytail at the top of your head, securing it tightly for support. Twist the ponytail loosely and wrap it around its base, allowing some pieces to stick out slightly for that “perfectly imperfect” textured finish. Pin with several bobby pins crossing in an X shape for grip, scrunch the bun with your hands to build more volume, and smooth baby hairs at the hairline with a dab of styling paste or gel so the finished look feels intentional, not sloppy.
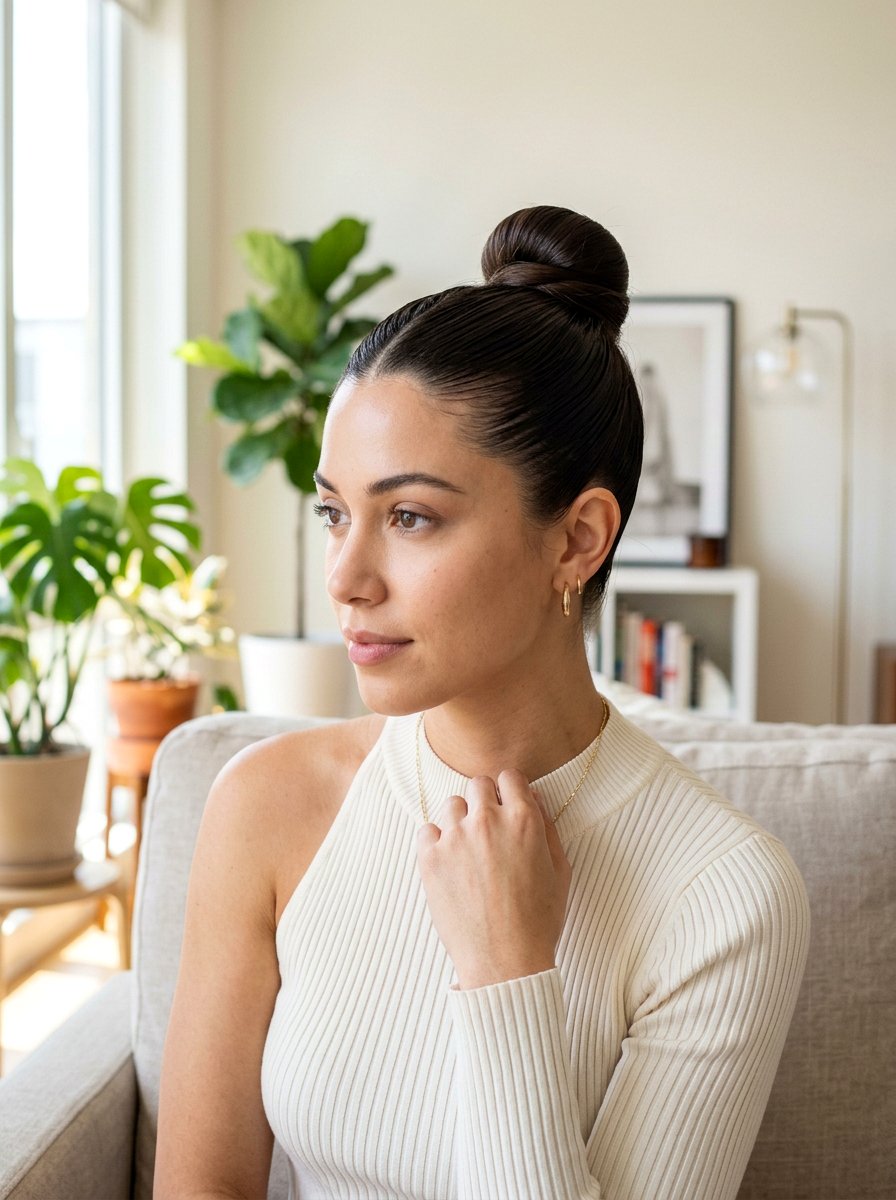
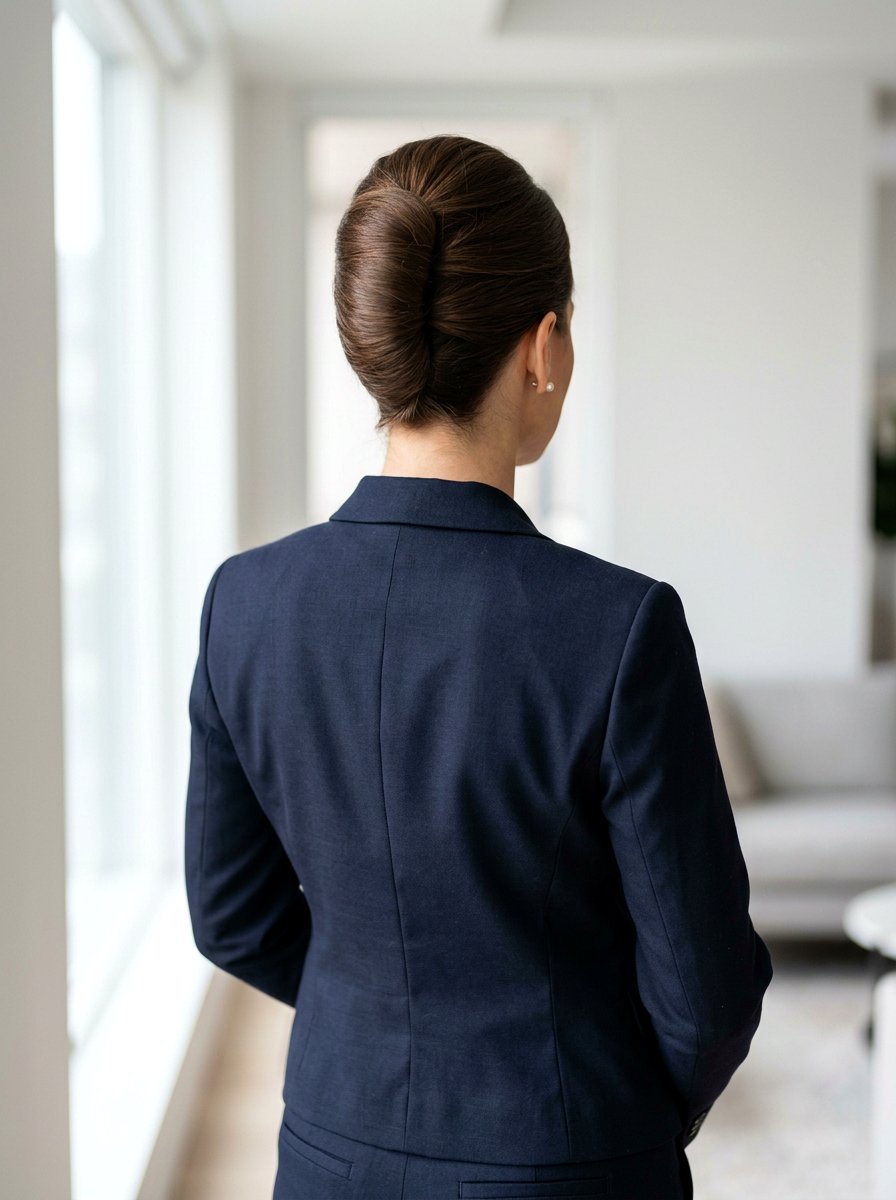
3. Sleek Third Day Low Bun
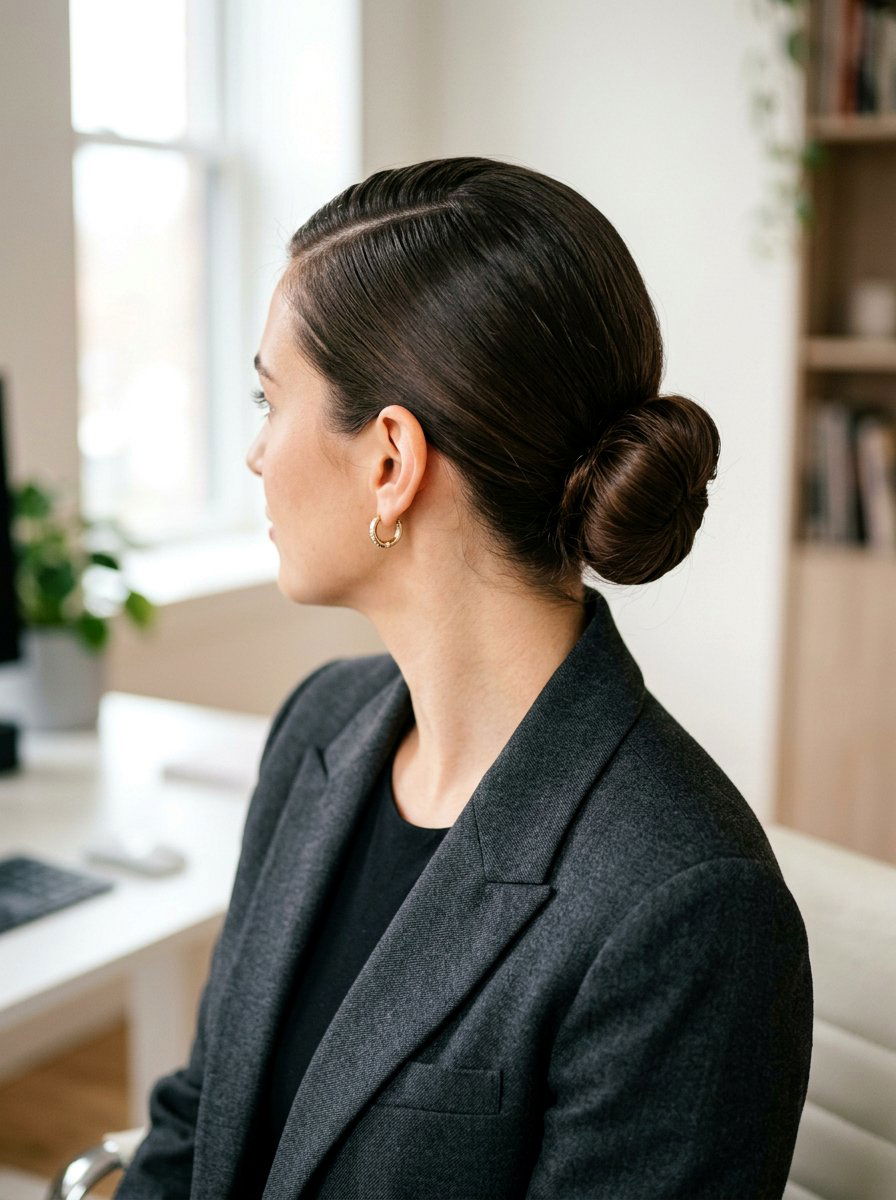
Sometimes you want third day hair to look polished and professional, and that is when a sleek third day low bun really shines because your natural oils actually help create a smooth, glassy finish. Begin by applying a small amount of smoothing cream or light gel through the top and sides, concentrating product where frizz and flyaways show the most, usually around the part and hairline. Use a boar‑bristle or smoothing brush to direct hair straight back or along a sharp center or side part, then gather it neatly at the nape and secure with a hair tie that matches your hair color. Twist the ponytail into a tight coil, wrap it flat against your head, and secure with bobby pins, keeping the bun low and compact for a refined look that works with blazers, button‑downs, or simple tees. Finish by brushing the surface again with a little more product if needed, then lock everything in with a shine spray or light‑hold hairspray so the bun stays sleek without getting crunchy or stiff throughout the day.
4. Third Day High Top Knot Bun
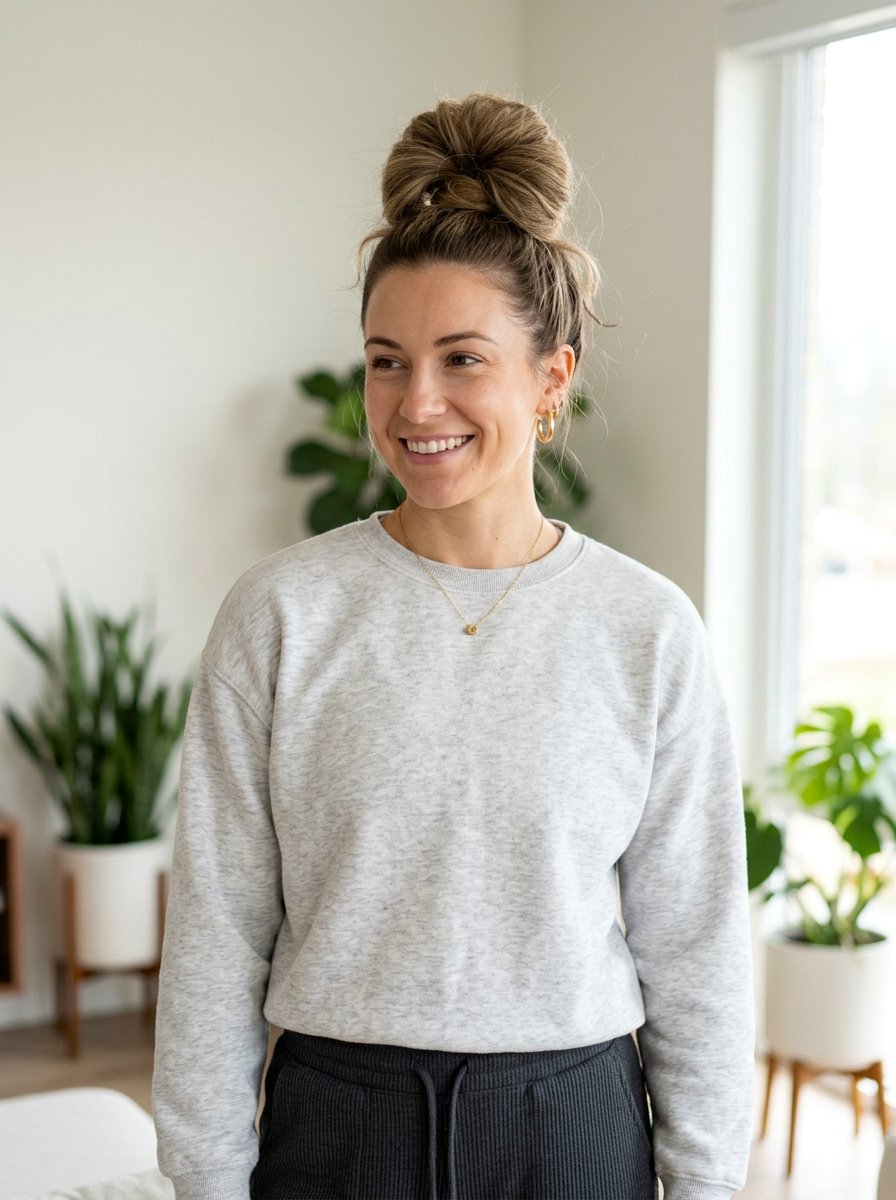
When you want all your hair off your neck and out of your way, a third day high top knot bun offers both style and practicality in one quick move. Use dry shampoo or texturizing spray at the roots to counter oil and give lift, concentrating at the crown where top knots can sometimes look flat on unwashed hair. Flip your head over, rake hair upward with your fingers, and secure a very high ponytail at the crown, making sure it sits where the bun will be visible from the front. Instead of tightly twisting all the way down, loosely wrap the ponytail around its base like a rope, letting some ends stick upward or outward, then secure with an extra elastic and a few pins. Gently pull small sections of the top knot to fan it out and create a bigger, more voluminous shape, then tame edges at the hairline with a soft brush and a tiny bit of gel for a clean yet relaxed finish that pairs well with casual or sporty outfits.
5. Third Day Half Up Bun
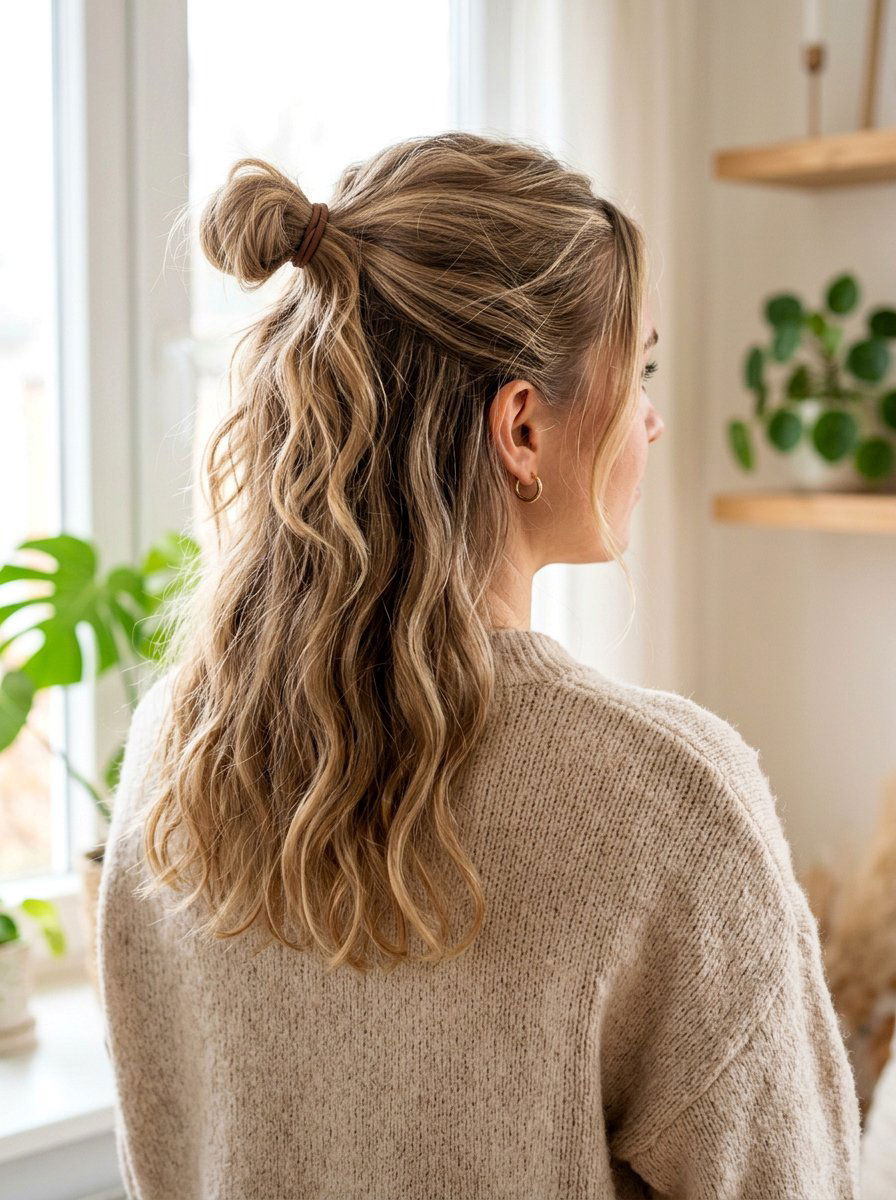
If your roots feel greasy but your lengths and ends look too good to hide, a third day half up bun gives you the best of both worlds by lifting just the top section into a bun and letting the rest flow. Start by parting your hair naturally, then use your thumbs to separate the top half from just above your ears, leaving the bottom half down to show off your waves or curls. Apply dry shampoo through the top section, working it in with your fingertips until the roots look refreshed, and lightly mist a texturizing spray on the mid‑lengths below for body. Gather the upper section into a ponytail at the crown or slightly higher, secure with an elastic, then twist and wrap it into a small bun that sits on top of your head like a soft knot. Pin the bun in place, gently loosening a few sections to add volume, and fluff the hair that is left down with your fingers so the whole look feels balanced, playful, and perfect for everyday errands or casual outings.
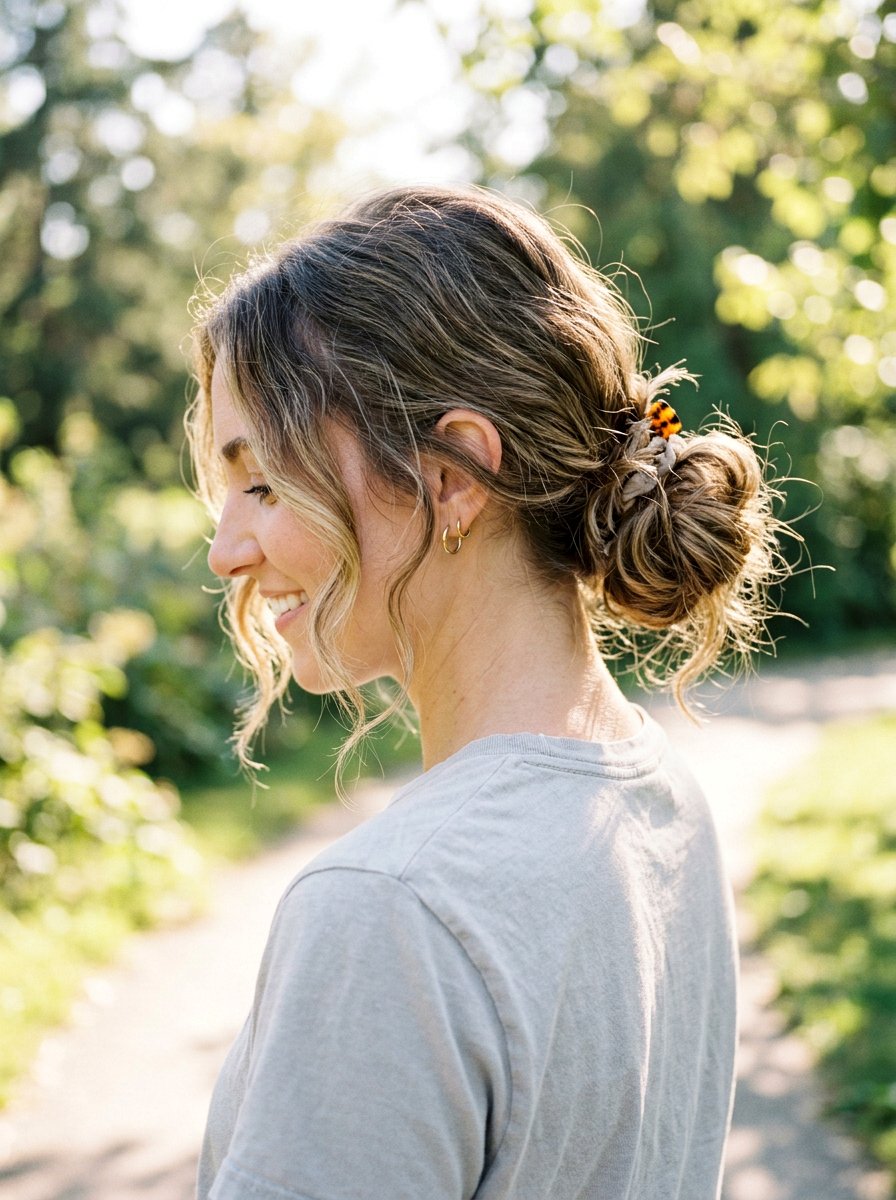
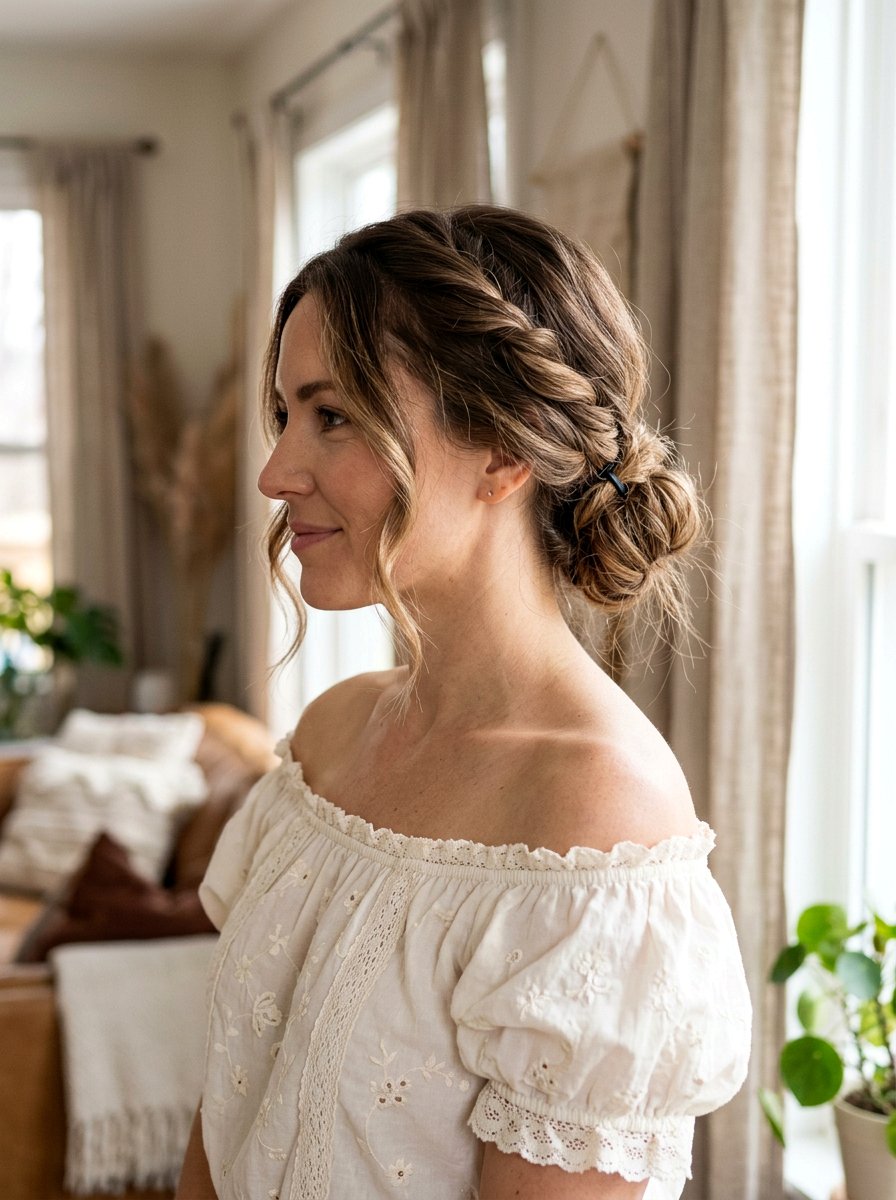
6. Third Day Side Bun With Face Framing Pieces
On third day hair, a side bun with face framing pieces softens your look and makes even simple outfits feel more romantic and intentional. Begin with a loose part, either in the middle or slightly off to one side, and refresh roots using dry shampoo wherever they appear oily, focusing around the part and temples. Gently brush hair toward one side, stopping just behind your ear, and gather it into a low ponytail that sits on the side of your neck, securing it with a snag‑free elastic. Twist the ponytail into a coil and wrap it around the base to form a side bun, then secure with several pins, allowing the bun to sit a little loose and textured instead of perfectly tight. Carefully pull out a few thin strands around the hairline to frame your face, smoothing their ends with a tiny amount of cream so they curve softly, and finish with flexible hairspray so the bun lasts without losing movement as you go through your day.
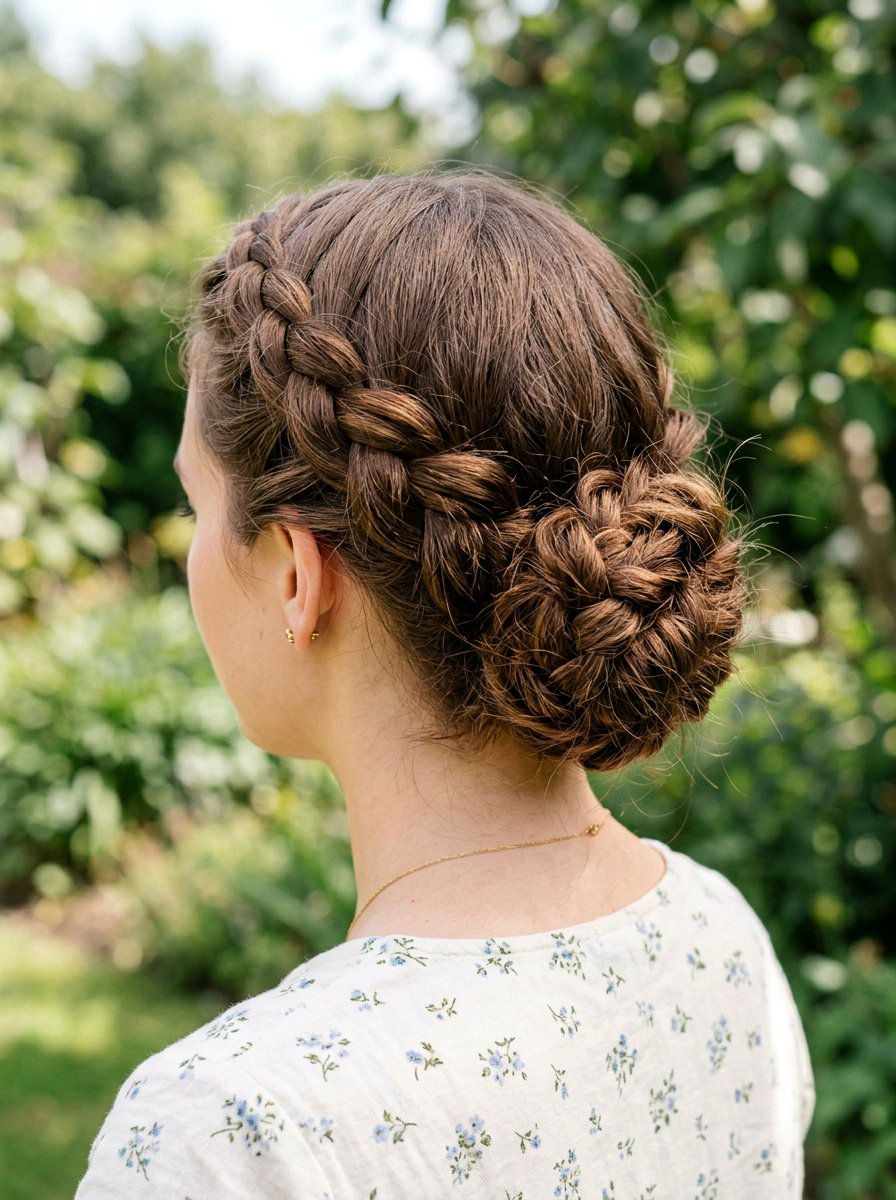
7. Third Day Braided Low Bun
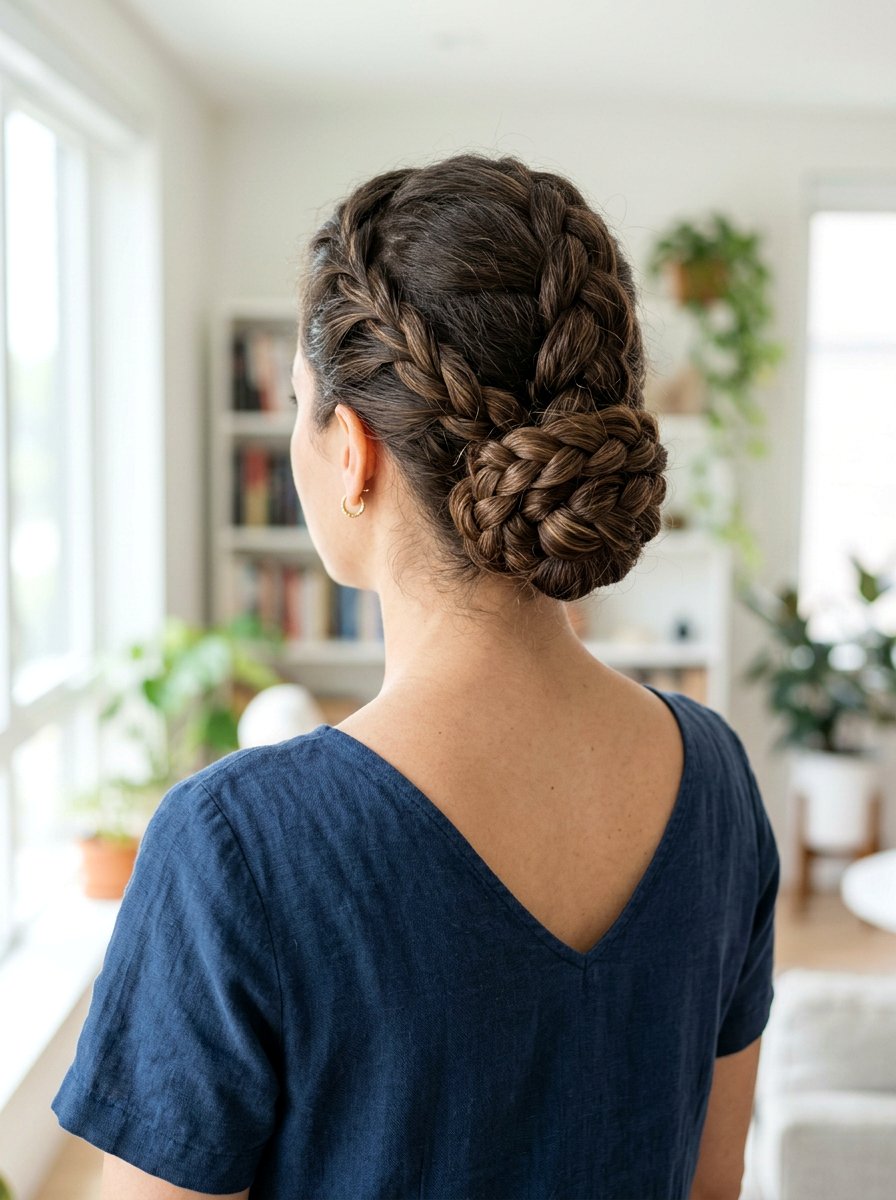
A third day braided low bun looks intricate, but it is surprisingly easy once you use your built‑in texture to keep everything in place. Refresh your roots with dry shampoo, then brush hair back into a low ponytail at the nape, securing with an elastic, and lightly mist the ponytail with texturizing spray so the braid holds better. Divide the ponytail into three sections and create a classic three‑strand braid all the way to the ends, securing with a small clear elastic that will hide inside the bun. Gently pull apart the sides of the braid to pancake it, making it wider and softer, which gives the final bun more volume even if your hair is fine. Wrap the braided length around the base of the ponytail to form a bun, tuck the end underneath, and pin securely, then smooth the top and sides with a brush and a little styling paste so the final look feels polished enough for the office or a dressy dinner.
8. Third Day Braided Crown Bun
When you want a third day bun that looks special for brunch, photos, or events, a braided crown bun wraps texture around your head in a way that feels intricate without needing freshly washed hair. Start by parting your hair down the middle or slightly off center, then take a section near one temple and begin a Dutch or French braid along the hairline, adding in hair as you work toward the opposite ear. Continue braiding around the head until you reach the nape, gathering remaining hair into the braid so it forms a crown effect, then secure the end with a small elastic. Twist any leftover length at the back into a small bun at the nape, tucking the braid’s end around its base and pinning so the braid appears to flow seamlessly into the bun. Gently pull on the outer edges of the braid to soften it and add fullness, then finish with flexible‑hold hairspray so the crown and bun stay secure while still feeling soft and romantic all day.
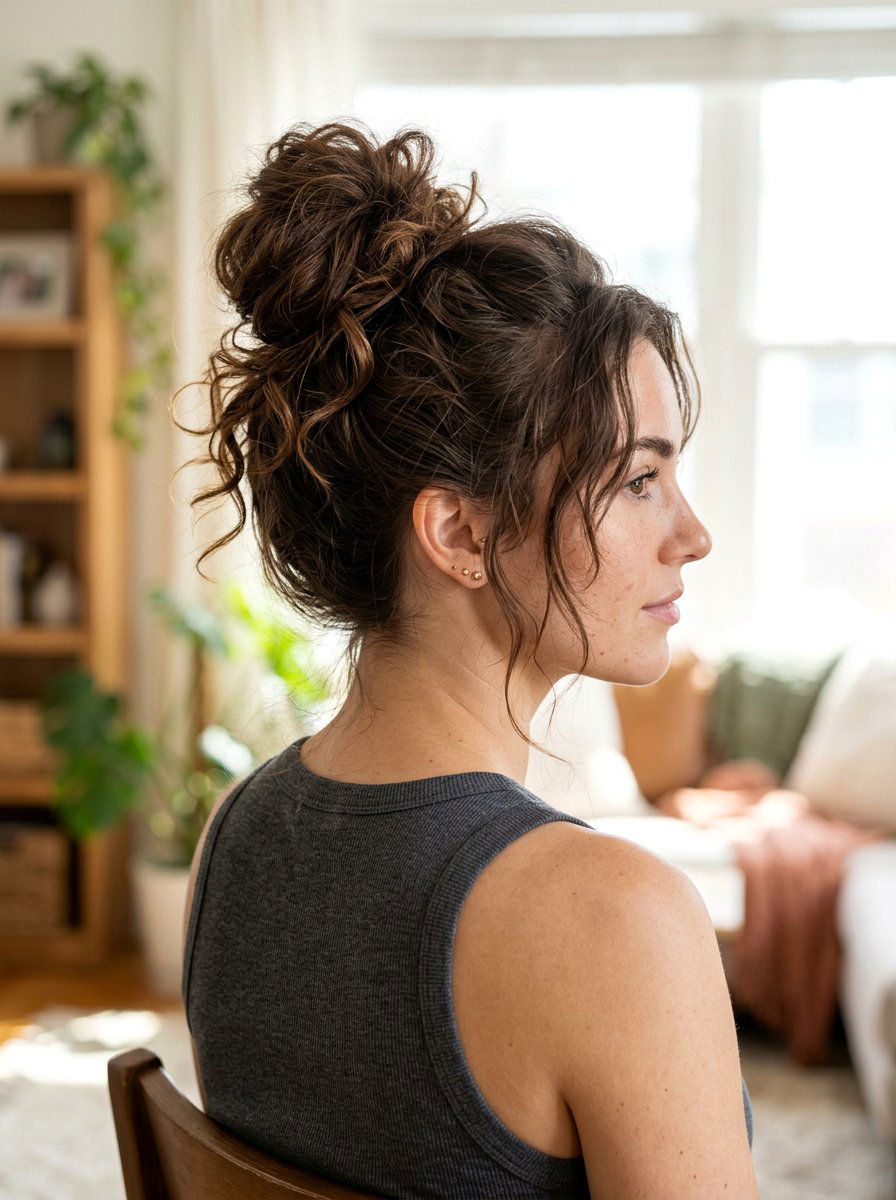
9. Third Day Curly Pineapple Bun
Curly hair often looks its best on day two or three, and a third day curly pineapple bun uses that defined, slightly stretched texture to create a fun, high updo that keeps curls visible. Refresh your curls by misting a curl‑refresher spray or water mixed with leave‑in conditioner through the mid‑lengths and ends, scrunching to revive shape without disturbing your natural pattern. Flip your head over and gather your curls right at the top front of your head, almost at your hairline, securing loosely with a soft scrunchie so the curls spill forward like a pineapple crown. Instead of pulling the hair all the way through on the last loop, leave a big looped “bun” with curls popping out in different directions, giving the look height and volume. Smooth the sides and edges with a soft brush and edge control if you like a more defined hairline, then let a few curls fall around your face for softness and balance that works for both casual days and laid‑back evenings.
10. Third Day Low Curly Bun
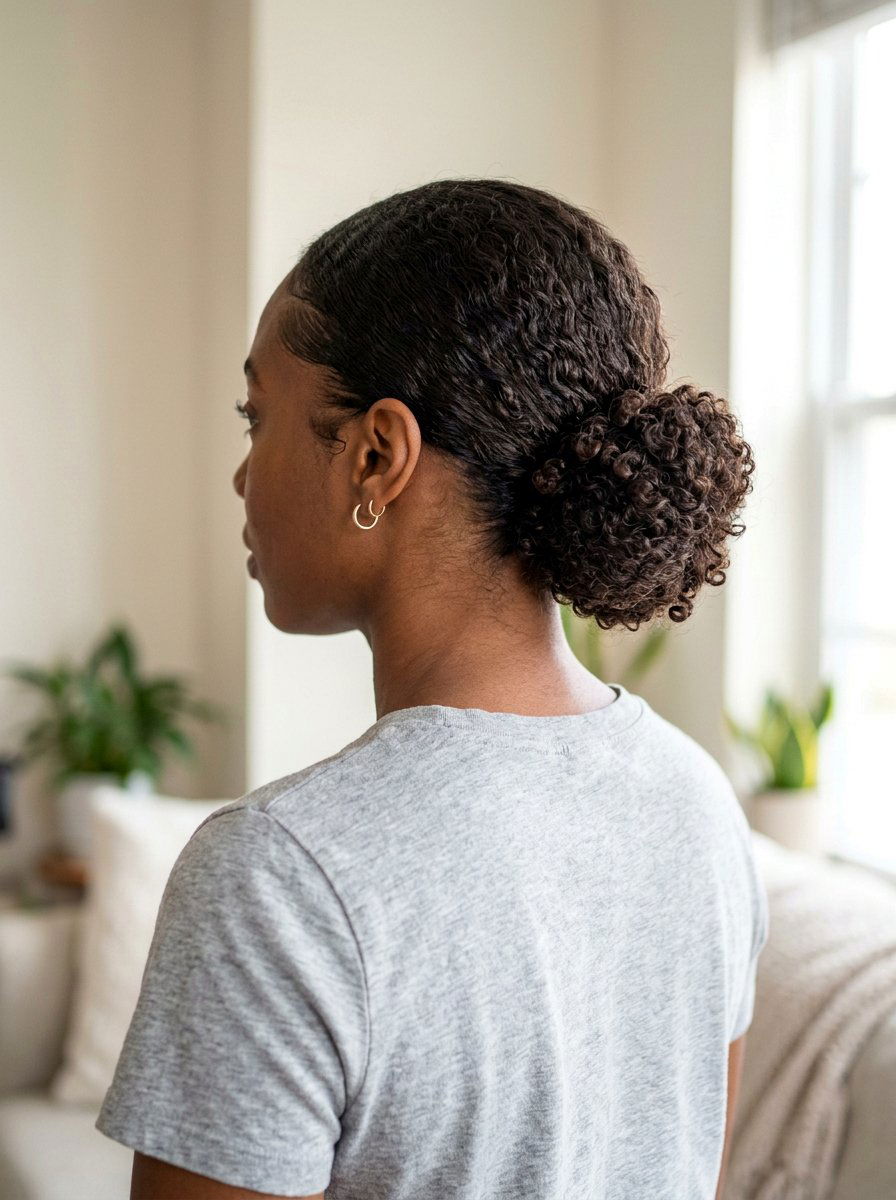
A third day low curly bun is perfect when your curls still have definition but the root area feels a bit too fuzzy or flat to wear down. Start by reviving curls with a curl‑refresh spray or a mix of water and leave‑in, focusing on the mid‑lengths and ends, and gently scrunch out any crunch from previous products so the texture feels soft. Apply a lightweight curl cream or gel only to the surface and edges to smooth frizz without weighing everything down, then gather hair into a low ponytail at the nape using your hands rather than a brush to preserve curl pattern. Secure with a soft elastic, then twist the ponytail very loosely and wrap it around its base, pinning pieces so curls still show and the bun looks full and textured rather than tight and compact. Smooth baby hairs with edge control or styling gel if you like a more refined finish, and mist with a humidity‑resistant hairspray to help keep frizz at bay while your curls stay defined inside the bun.
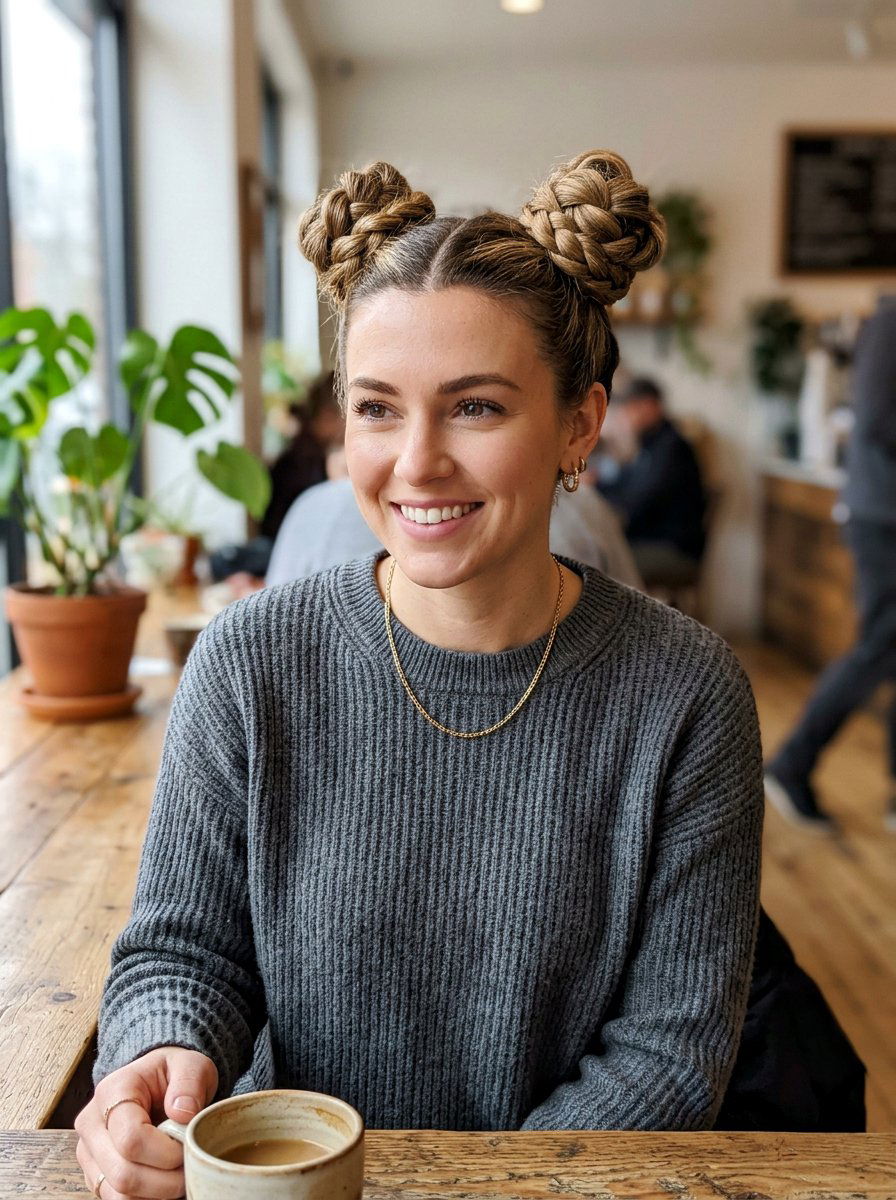
11. Third Day Textured Space Buns
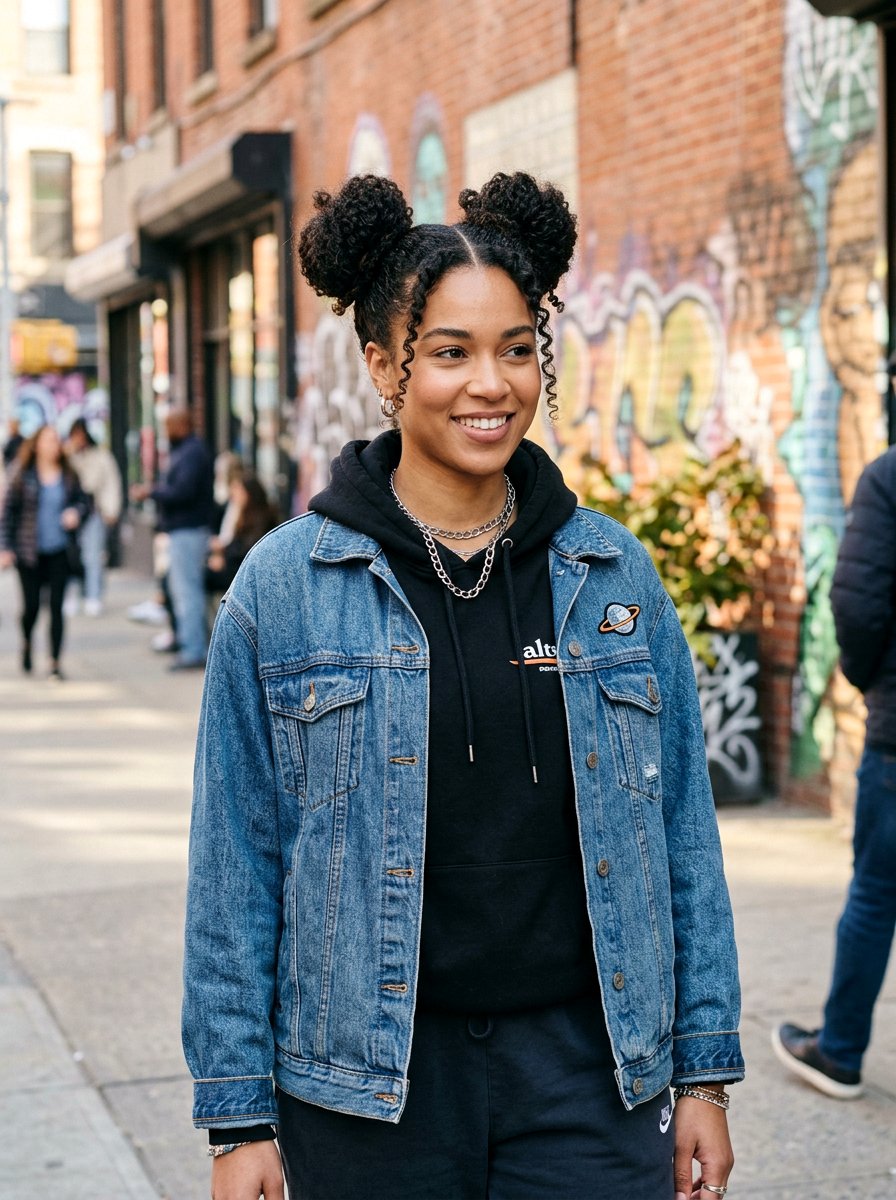
On days when you want something playful and bold, third day textured space buns use natural grip to keep double buns secure while you move around. Create a clean center part from your forehead all the way to the nape, then clip one side out of the way while you work on the other to keep sections even. Spray dry shampoo at the roots on both sides to add volume and fight oil, then gather one side into a high or mid‑height ponytail above your ear line, repeating on the other side so they match. Twist each ponytail loosely and wrap it into a bun, securing with elastics and pins, and lightly pull on sections of the buns to make them bigger and softer. Leave a few face‑framing strands out if you like, then finish with flexible hairspray so the buns stay put without feeling stiff, creating a look that works for festivals, weekend outings, or anytime you want extra personality.


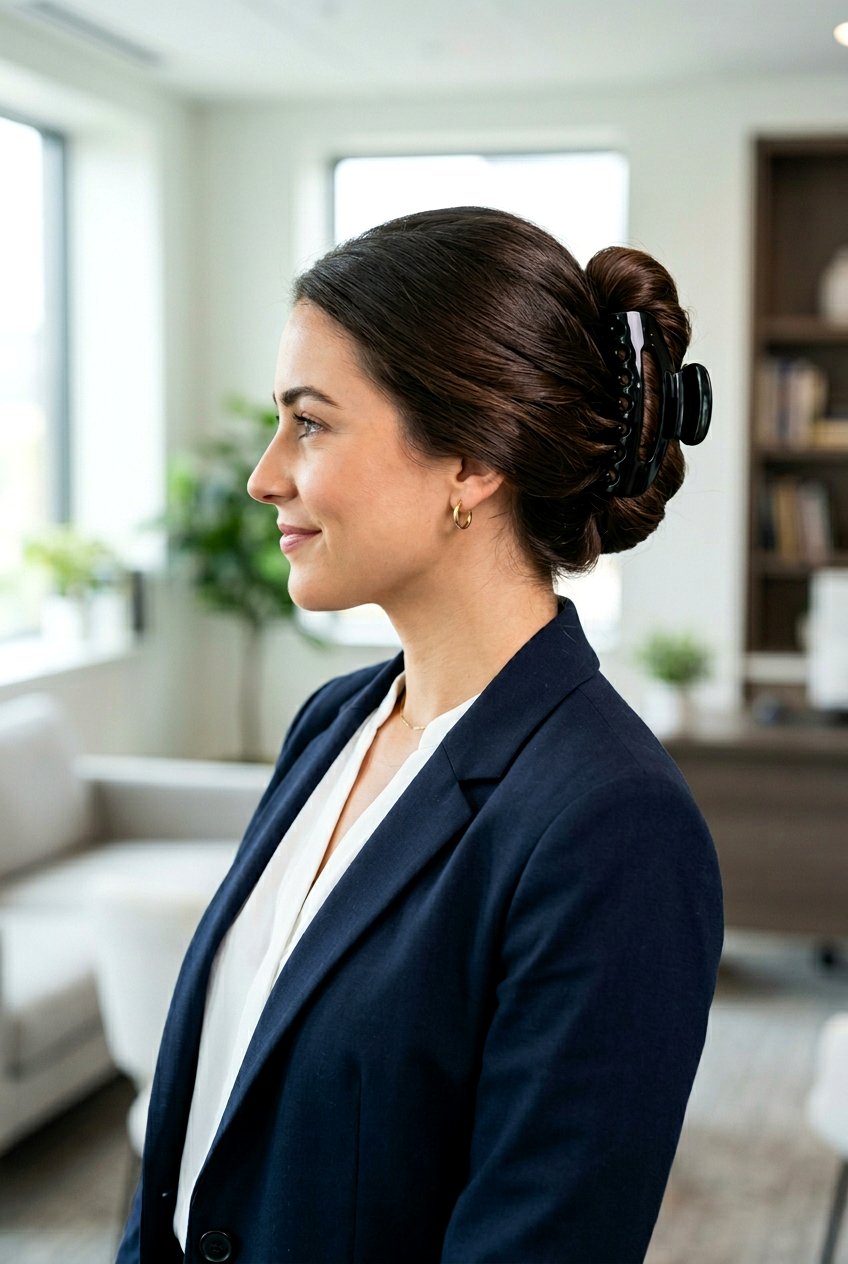
12. Third Day Claw Clip Bun
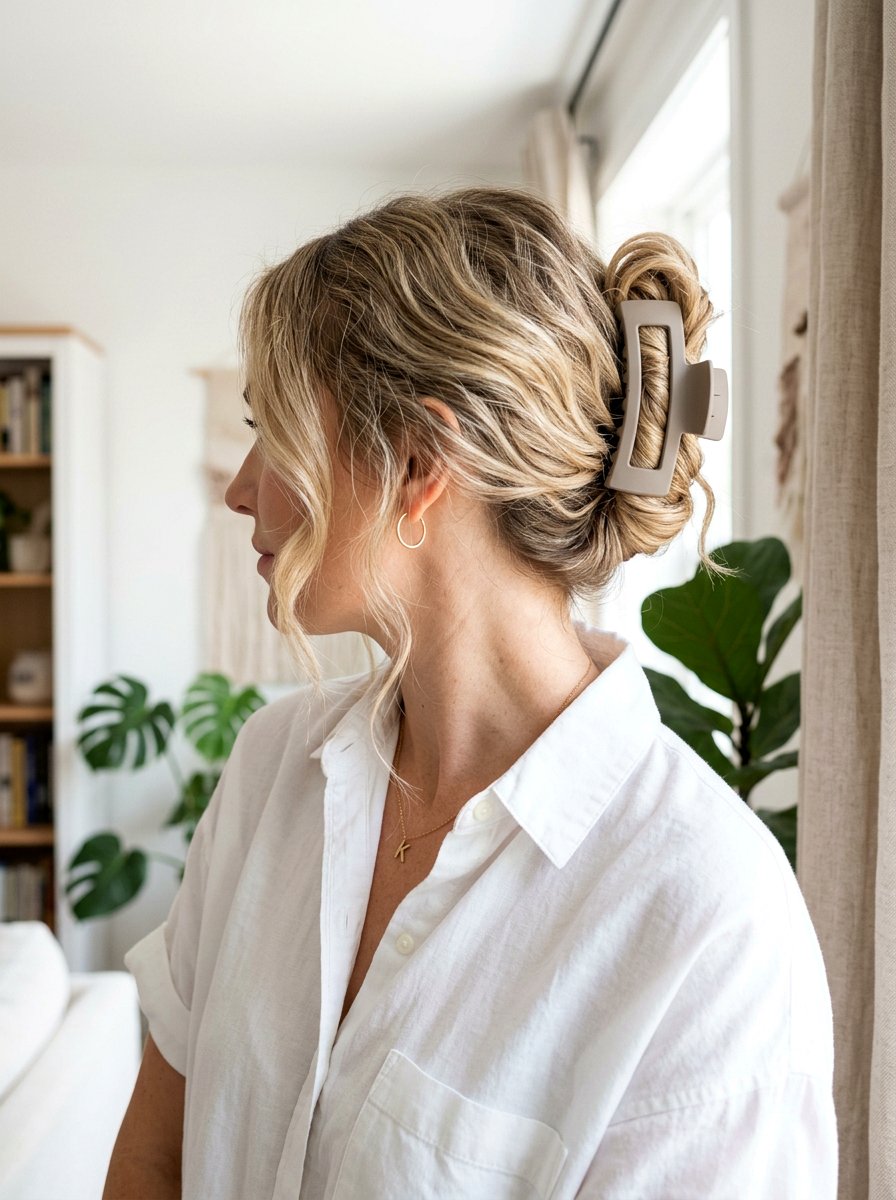
When you do not feel like dealing with a bunch of pins and elastics, a third day claw clip bun is a quick, trendy solution that takes advantage of your hair’s natural texture. Begin by gathering your hair at the back of your head as if you are making a low ponytail, but instead of tying it, twist the length upward so it lies flat against your head. Fold the ends down or leave them sticking out at the top, depending on the look you prefer, then place a medium or large claw clip over the twisted section to hold it in place securely. To turn this simple twist into more of a bun, tuck portions of the ends back toward the clip and twist them around each other so they create a rounded shape, adjusting until it looks balanced. Pull a few strands loose near your temples for softness, and mist with a light hairspray or texturizing spray to keep everything from slipping while still maintaining that effortless, undone vibe that claw clip buns are known for.
13. Third Day Sock Bun For Volume
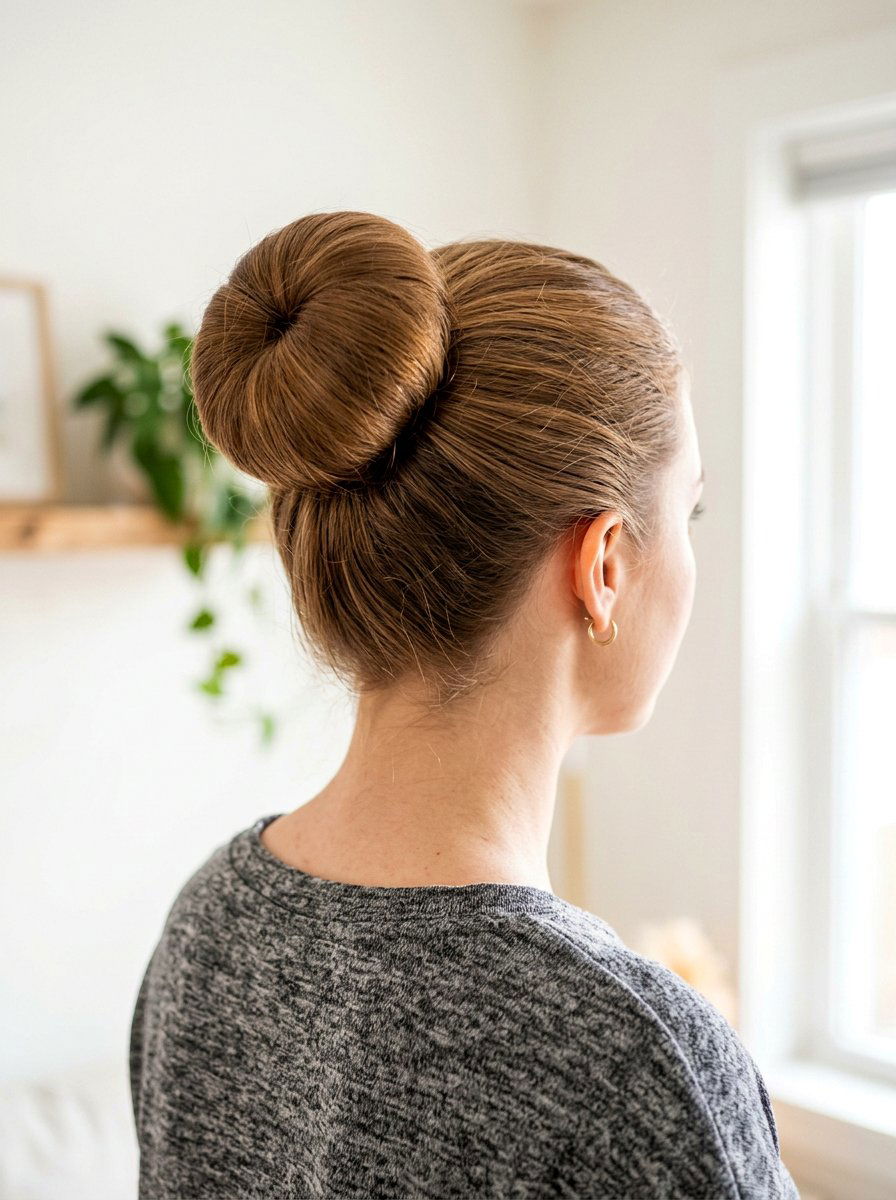
If your third day hair feels limp and you want a bun with more shape, a third day sock bun adds instant volume and structure without needing freshly washed strands. Cut the toe off a clean sock and roll it into a doughnut shape, or use a premade hair donut, then pull your hair into a high or low ponytail depending on where you like your bun to sit. Thread the ponytail through the center of the sock or donut, spread your hair evenly over it, and then begin rolling the donut down toward your head, tucking hair underneath as you go. Your natural oils and texture actually help the hair grip the donut, making it easier to secure and less likely to unravel throughout the day. Once the bun sits flush against your head, pin any loose pieces, smooth the surface with a brush and a bit of smoothing cream if needed, and spray with light‑hold hairspray for a full, round bun that looks polished yet still works perfectly on unwashed hair.
14. Third Day Twisted Crown Bun
For a softer alternative to braids, a third day twisted crown bun uses simple two‑strand twists around your head, feeding into a bun at the back for a romantic finish. Begin with a center or deep side part, then take a small section near your hairline on one side and split it into two, twisting the strands over each other as you move toward your ear, adding in more hair as you go. Secure the twist temporarily with a clip and repeat the process on the other side, so you end up with two twisted sections running along your hairline like a loose crown. Gather the remaining hair plus the ends of both twists into a low ponytail at the nape, secure with an elastic, then twist the ponytail and wrap it into a bun, pinning it flat or leaving it slightly textured. Gently loosen the twists by pulling on small sections to add volume and softness, then finish with a light‑hold hairspray so the twisted crown and bun stay put without looking stiff or overly formal.
15. Third Day Loose Top Bun With Bangs

If you have bangs or shorter face‑framing layers, a third day loose top bun with bangs keeps your hair off your neck while letting your fringe stay front and center. Start by refreshing only the crown and back with dry shampoo, leaving bangs to be styled separately with a blow‑dryer or round brush and a light smoothing cream so they look fresh. Gather the rest of your hair into a high ponytail at the top or back of your head, keeping the tension loose so the bun looks casual and not overly tight or pulled. Twist the ponytail softly and wrap it once or twice around the base, securing with a loose elastic, then pin sections of the bun until it feels stable but still airy and slightly undone. Tousle the bun with your fingers to add texture, smooth your bangs into place, and use a very light‑hold spray so the overall look reads relaxed and modern while still working well for busy days or casual evenings out.


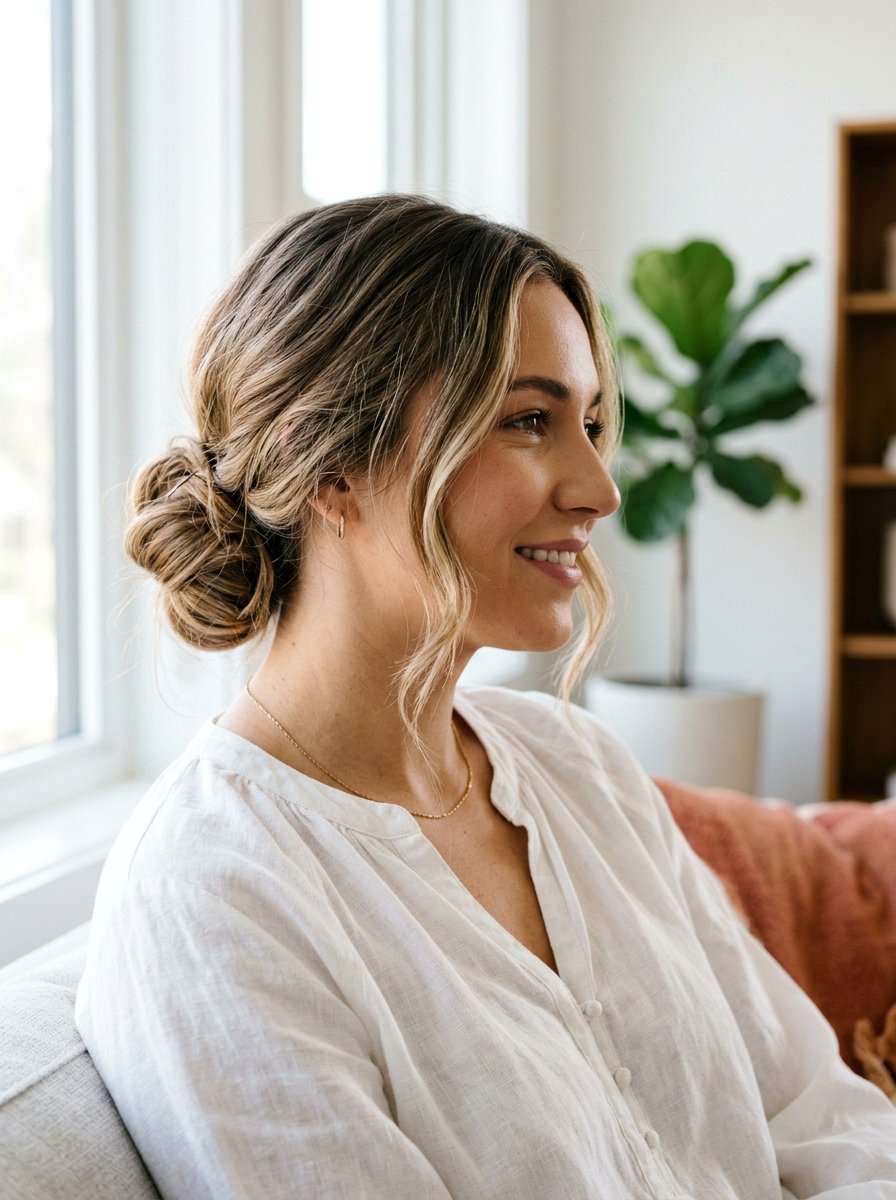
16. Third Day Low Knot Bun
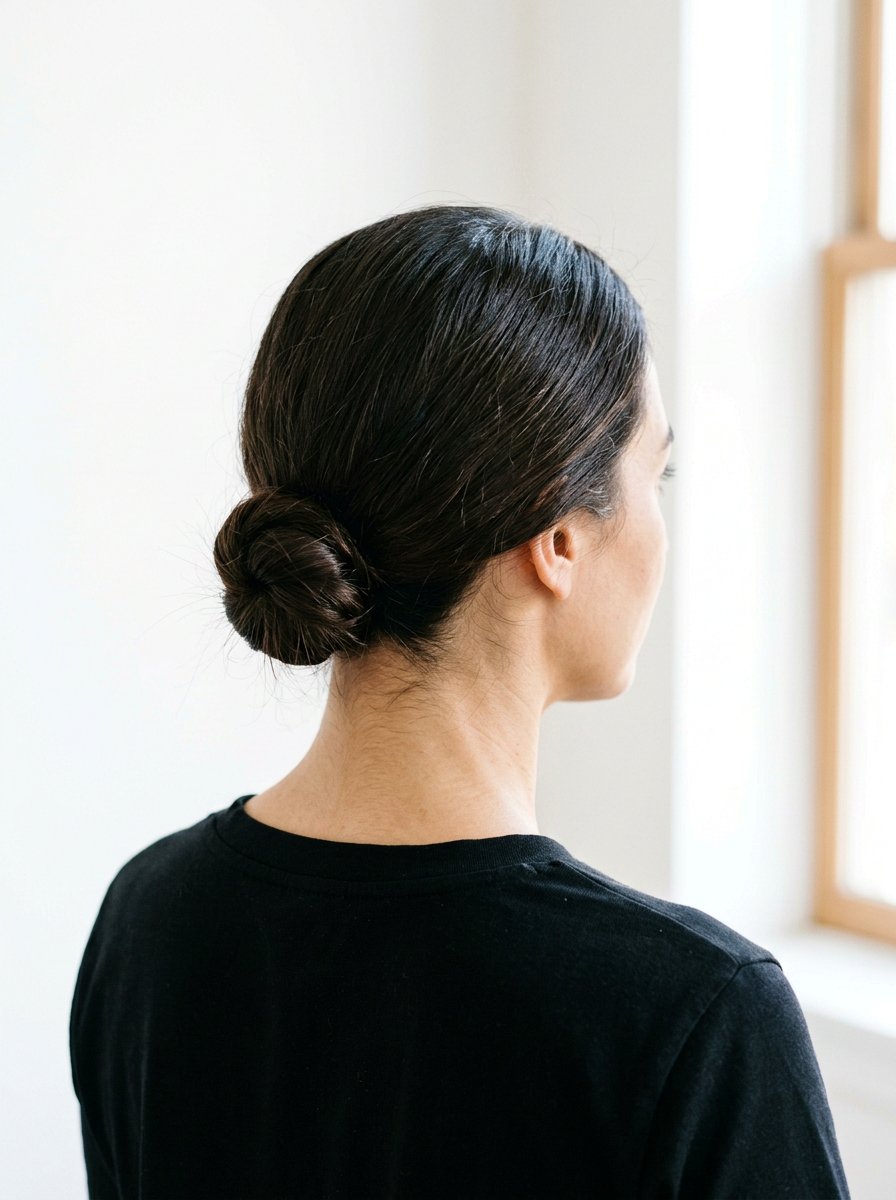
A third day low knot bun has a minimal, almost architectural feel, making it a great choice when you want something simple yet deliberately styled. Brush your hair back or along your preferred part, then gather it into a low ponytail at the nape without securing it with an elastic just yet. Tie your ponytail into a loose knot as if you were tying a rope, pulling ends through carefully so the knot sits centered and snug against your head. Once the knot is formed, wrap the remaining lengths around its base to create a bun shape, tucking ends underneath and securing with several bobby pins until it feels solid. Smooth the surface with a touch of serum or light cream, leaving a few wisps at the neck if you prefer a softer look, and set the style with flexible hairspray so the low knot bun stays secure through work hours or evenings without needing a wash.
17. Third Day Braided Space Bun Updo
When you want extra detail, a third day braided space bun updo combines the fun of double buns with the texture of braids, helped by the grip of unwashed hair. Create a clean center part from front to back, then gather one side into a high or mid‑height ponytail above your ear, repeating on the other side so both ponies sit evenly. Braid each ponytail into a classic three‑strand braid, securing the ends with small elastics, and gently pancake the braids by pulling on their sides to give them more width and softness. Wrap each braid around the base of its ponytail to form a bun, tucking the end underneath and pinning it in place so the braided pattern remains visible on the outside. Leave a few soft strands around your face if you like, then mist with flexible hairspray so the braided space buns stay secure while still looking playful and textured for all‑day wear.
18. Third Day Sleek Top Bun With Middle Part
For a more fashion‑forward look, a third day sleek top bun with middle part combines a sharp part line with a high, polished bun that feels modern and clean. Use a comb to create a straight middle part from the forehead back to the crown, then apply a smoothing cream or gel along the roots on both sides, focusing where flyaways tend to appear. Brush hair back toward a high ponytail while maintaining the part at the front, smoothing the sides and back so they lie flat against your head and securing the ponytail firmly with an elastic. Twist the ponytail tightly and wrap it around its base into a compact bun, pinning as you go so it sits high and balanced on your head, almost like a ballerina bun. Finish by brushing the surface again, applying a bit more product for shine if needed, and setting with a strong yet flexible hairspray so the sleek top bun and part hold their shape throughout the day or night without looking stiff.
19. Third Day Messy Bun With Headband

On third day hair, accessories can make all the difference, and a messy bun with headband turns a simple updo into a styled look with almost no extra effort. Start by slipping on a fabric or padded headband so it sits just behind your hairline, then tease or massage the roots at the crown lightly to add a bit of lift behind the accessory. Pull your hair into a mid‑height ponytail at the back of your head, secure with an elastic, and twist it loosely into a messy bun, leaving some ends out and tugging at sections for volume. The headband helps disguise oily roots at the front while drawing attention upward, so even if your hair is not freshly washed, the overall effect reads intentional and cute. Finish with a bit of texturizing spray on the bun for extra grip and movement, and smooth any frizz around the headband with a tiny amount of cream so the whole look feels cohesive and ready for your day.
20. Third Day Low Bun With Scarf Wrap
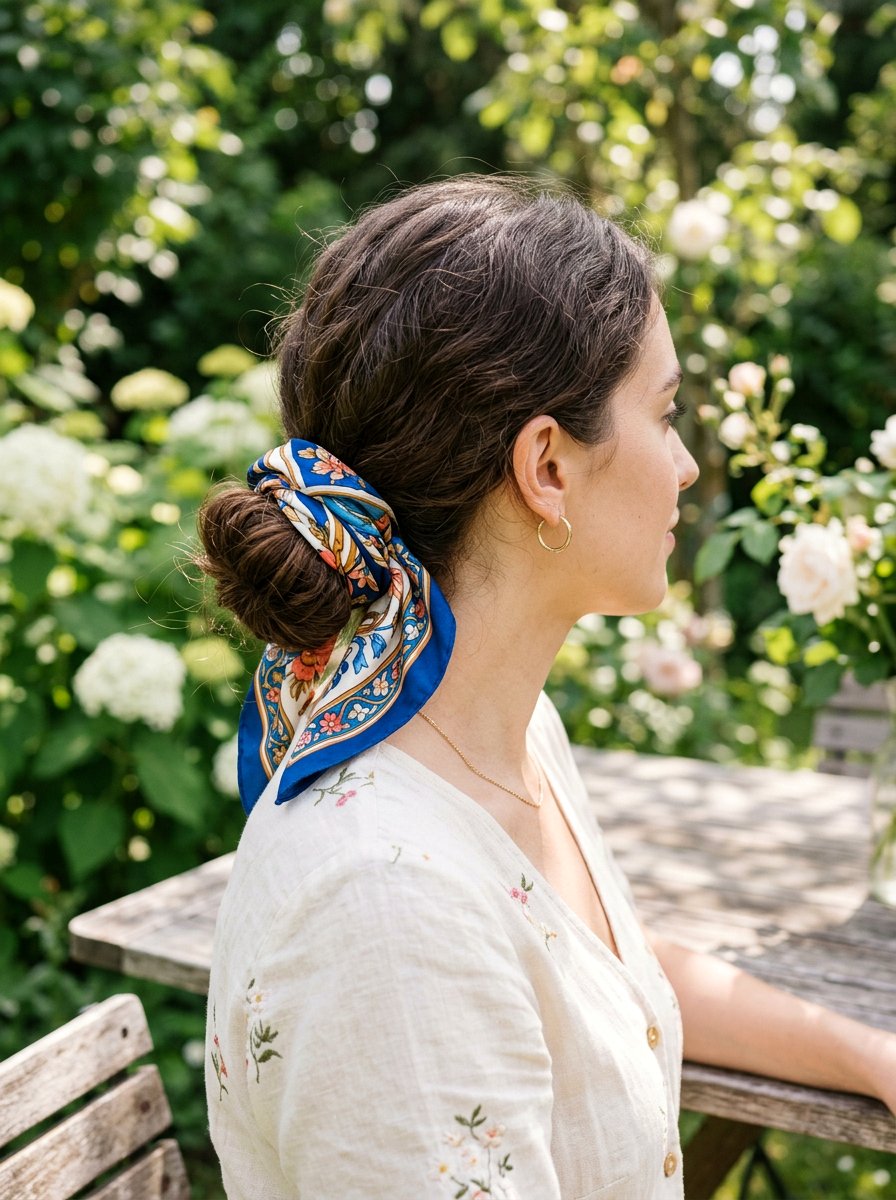
A third day low bun with scarf wrap is an easy way to add color and personality while also cleverly covering roots that may feel oily or flat. Begin by tying your hair into a simple low bun at the nape, either messy or sleek depending on your preference, using an elastic and a few pins to keep it secure. Fold a lightweight scarf lengthwise into a long band, then place the middle of the scarf at the nape under the bun and bring the ends up around your head, crossing them over the top or slightly off center. Tie the scarf into a knot or bow and tuck any loose ends neatly, adjusting so it frames your face in a flattering way and covers as much of the root area as you like. Gently loosen a few pieces around your temples or at the nape for softness, then spritz your bun with a light hairspray to keep it in place while the scarf does double duty as a statement accessory and a clever third day hair helper.
Conclusion:
Stretching your wash days becomes much easier when you have a lineup of reliable third day hair bun options that work with your natural texture instead of against it. From low messy buns and sleek nape knots to braided crowns, space buns, and scarf‑wrapped looks, each of these twenty bun hairstyles uses the extra grip from unwashed hair to stay put with less effort and fewer products. Dry shampoo, texturizing sprays, and light styling creams are your core tools, helping you refresh roots, add body, and smooth frizz without weighing everything down or making hair feel coated. By rotating between high, low, sleek, and textured buns, you can keep your routine feeling fresh while giving your scalp a break from daily washing and heat styling, which supports healthier, less stressed strands over time. The more you practice these simple techniques, the faster they become, turning third day hair from something you hide under a hat into a chance to try a new, confident bun look that fits your mood and schedule.
You'll Like These Styles:


Leave a Reply